|

HyperScale is proudly supported
by Squadron.com
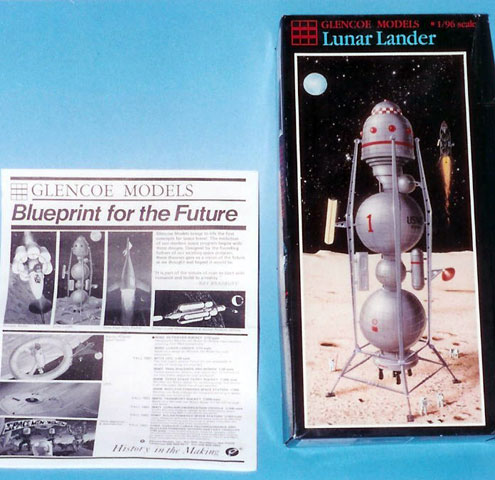
As a builder of primarily 1/72nd aircraft, I never expected to have
purchased, let alone begin construction, let alone finish a Space theme
subject. (Not that there’s anything wrong with that.) But wandering
through our local D&J Hobby Shop near San Jose, CA, I saw the box art of
this model and instantly remembered building it when I as about 10 years
old. Same box too (I think). The ‘Gotta have it’ syndrome, again, set in
so I bought it!
A few years have passed since I bought the kit (the 2nd time). I began
an interest in N scale trains and diverted from plastic models after
nearly 25 years. Did trains, still like them, but wanted to get back and
do something with the plastics again. This model just happened to be on
the top of the bench, so it became a matter of LIFO (Last In, First Out)
and it looked pretty simple so I decided to build it.
Glenco's 1/96
"Lunar Lander"
|
The model is one of a series that was popular many years ago that
featured the design concepts of the space scientists of the time. Other
companies like Lindberg, I think, featured Willy Ley. I just ate this
stuff up. This was right around the start of the Mercury Space Program
and ‘Space’ was the rage. Everywhere were signs like “Sputnik café” or
“Rocket Laundry” with goofy looking rockets sporting blinking lights.
And there was Sputnik bubble gum (light blue gum balls with crystallized
sugar all over them . . . 1¢).
There was also the ‘missile gap’ stuff in the news plus lots of really
cool 50’s propaganda movies (I ate that stuff up too!). I remember Air
Force vans – the size of moving vans – with really neat pictures of
F-84s, F-86s and B-47s, like the picture of the F-84 with all the
different kinds of armaments laid out in front of the airplane. At 8
years old the naive thought of ‘how do they get all that on that little
airplane?!’ came to mind until . . . duh! Oh yeah, and the “special
weapon” hidden under a piece of canvas . . . .I wonder what that could
be?
A Flashback...
One of the coolest things I remember was the rocket and launcher sets
in cereal boxes. (Don’t remember if it was Frosted Flakes or Cheerios or
whatever.) You’d load the rocket into the launcher and a tab on the base
held it down until you pushed a button that released the tab and a
spring shot this sucker pinging off the ceiling fixture or across the
room! Try getting a toy like that now-a-days! My neighbor and I used to
set up our toy soldiers and then fire these rockets at them. We never
lost an eye or anything.
Speaking of cool toys, my Dad bought me a plastic toy cannon as a gift
around the same time. This thing was about a foot long and had a breech
that you’d pull back, load a 1 or 2 inch long plastic shell, push the
button on the cannon and wham! The shell would come outta there so fast
it nearly put a hole in my Mom’s lamp shade (we put a soldier up there).
Well, after a Gazillion firings, the button that fired the breech broke
so I had to pull back the breech with one hand, hold it, put the bullet
in and let the breech go to fire it. This got old after a while. So one
day I got the bright idea to just slide the shell in from the top then
pull back the breech and fire it. This worked great. But once I dropped
it in but it didn’t go all the way down to the breech. So I decided to
blow on the tube to force it down. You guessed it . .. I inhaled first
to get a goooooood puff of air and sucked that sucker right out of the
cannon and right down the ‘ol gullet. My eyes bugged out – not from pain
or anything but from the surprise. ‘Uh – Oh’. I went running down the
stairs yelling to my Mom, “ I swallowed a bullet, I swallowed a bullet.”
I couldn’t figure out why her eyes were the size of silver dollars. She
packed me in the car thinking I just swallowed a .38 caliber bullet and
we went to the Doc’s office. After he found out what happened, and after
they both stopped laughing for 15 minutes, my Mom asked him what should
she do. He told my Mom, “Sell raffles! . . . . Don’t worry, it’ll come
out.” So, my Mom, bless her heart had to, how shall I say – find it –
after a day or so . . . if you get my drift here.
She came out of the bathroom a day or so later and said, “ I found it!”
“Great!” I exclaimed looking down at her empty hands, “Where’s my
bullet?” I figured, ‘hey . . .a little rubbing alcohol, it’s good as
new!’ Well, Mom said that she threw it away.
Fast forward 30 years. She brought the scrapbooks out to show some of
our relatives. They were turning pages, laughing about this and that and
then I see taped on the page a bronze plastic bullet!! She lied!!! She
had it all along!! She just wanted to save it for THIS occasion and,
sure enough, she said, “Hey, ya wanna see what our aerospace engineer
did when he was an 8 year old dumb kid!” Ahhhh, the lessons of life.
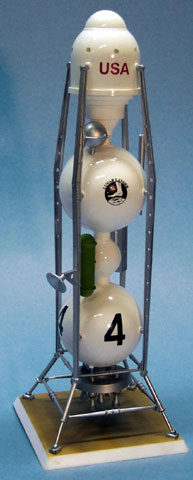
Sorry, back to the model. When I got the model home, the 2nd time a few
years ago, I was a little disappointed to see that the decals had
changed from what was advertised and what I remembered to a big ‘4’ or a
big ‘1’ or even a 41 or a 14! . . . your choice. Oh yea, and a bunch of
jet ejection warning triangles. These kill me. Who is on the OUTside
that requires warning? I really think the triangles should be on the
INSIDE of the spaceship to remind the occupants that if they eject on
the surface of the moon or in space the ejection charge will put them
into orbit around the sun, moon or earth (or worse) − their choice!
There’s also a new “Lunar Lander” logo of a big bare foot stepping on
the moon.
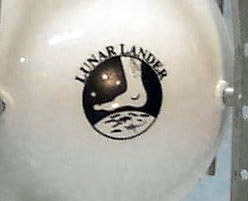 Hmmmm
: “Huston, Big Foot has landed”. . . . Nah’ doesn’t have the pizzazz as
“Tranquility Base here . . . . . . .”. Hmmmm
: “Huston, Big Foot has landed”. . . . Nah’ doesn’t have the pizzazz as
“Tranquility Base here . . . . . . .”.
I wanted the red and white checkerboards and the red translucent glass
windows (that are now clear) that were in the old kit and on the current
kit box art. Oh well, some things are just not the same.
The model, it says, is 1/96 scale. OOOK. That would make the foot a,
what? 64D. It’s molded in white, center tanks, and gray, everything
else. The decals are the kind that when you put them into water the
water becomes milky with lots of little milky white flakes itching to
get between the decal and the model. But they are useable if you change
the water frequently – hint: if you paint the tanks white . . . . . . .
. . . . .
The injection molds are either old or my sample suffered from mold
misalignment (or both) causing many ‘decisions’ to be made as to which
side of the two halves of most of the parts (like, all of the parts) is
the true shape. In other words, lots of sanding. The flexi-file worked
great on the myriad of round tanks and rockets. The long struts were
especially difficult to determine where the ‘real’ strut was supposed to
be verses the other half offset about 3/32nds of and inch. These were
the most difficult to get to look right. Sand, sand, sand, sigh . . .
sand, sand, sand, sand, sand, sand, sigh. ‘Geeez, I thought this was
going to be an easy one!’ Course how many, really, are: add glue, paint
– shake box – finished model.
I completed the center tank and cabin sections first. Sanding off all of
the big rivets makes, I think, for a better-looking model. I painted all
of the parts separately since the construction was pretty simple and
there was not much to worry about with respect to assembly order. In
hindsight, I’ve had a bottle of Micro Mask or something very similar and
never really used the stuff. I should have used it here. All of the
parts connected with pins into holes and putting a blob of Liquid Mask
over each of these pins would have save about 1/3rd the construction
time. I didn’t do that and spent an eternity sanding off the paint from
the pins to get a good glue bond.
The center tanks I painted Humbrol white. The struts and just about
everything else I used Model Master buffable Aluminum and buffed up the
oleo struts. A Zinc chromate green tank and Model Master steel rocket
assembly package with a tad of blue/steel mix over spray to give it a
‘burnt steel’ look.
Getting everything to line up was a challenge but it looks pretty good.
The fit of the rocket engine assembly to the bottom of the tank took a
long time to get it so the package would fit all the way up to meet the
underside of the tank properly. Sand, sand, sand, another sigh.
I chose not to use the clear plugs provided for windows. Maybe I would
have had they been red . . . and I was not in the mood to do that. The
clear plugs made the model look more like a big bug with about 10 eyes.
I used, instead, Krystal Klear. I think it looks better – even though I
deviated from the basic kit – oh heavens!
 The base I painted a Polly Scale Rust (train paint - within reach on the
tool bench) with some dark gray added. I then dry brushed on some gray,
light gray and brown chalk for the “blast” effect on landing. (It kills
me when people look at a model on which you spent many hours say, “Nice
base” - but that’s another story!) ‘Course with the rust, the base looks
more like it’s a Mars Lander . . .but I still like it. The base I painted a Polly Scale Rust (train paint - within reach on the
tool bench) with some dark gray added. I then dry brushed on some gray,
light gray and brown chalk for the “blast” effect on landing. (It kills
me when people look at a model on which you spent many hours say, “Nice
base” - but that’s another story!) ‘Course with the rust, the base looks
more like it’s a Mars Lander . . .but I still like it.
I decided to, indeed, put the ‘Big Foot’ decal on . . . if anything it’s
a conversation piece.
It’s not a contest winner, but I really enjoy having it built for memory
sake if nothing else.
As much as I’ve poked fun at the model and even though it must be made
from molds over 40 years old, I am truly grateful that Glenco released
it. If you really want something different, this one is pretty
inexpensive, easy – well not really – but it does looks pretty
good when you’re done.
It was fun.
Model, Images and Text Copyright © 2003 by
Bill Dye
Page Created 12 April, 2003
Last Updated 17 March, 2004
Back to HyperScale
Main Page
|
 Home |
What's New |
Features |
Gallery |
Reviews |
Reference |
Forum |
Search
Home |
What's New |
Features |
Gallery |
Reviews |
Reference |
Forum |
Search