|
M3A3 Stuart Mk.V
by
Steve Palffy
|
 |
|
M3A3 Stuart Mk.V |
images by Brett Green

AFV Club's
1/35 scale M3A3 is available online from
Squadron.com
Here is Steve Palffy's 1/35
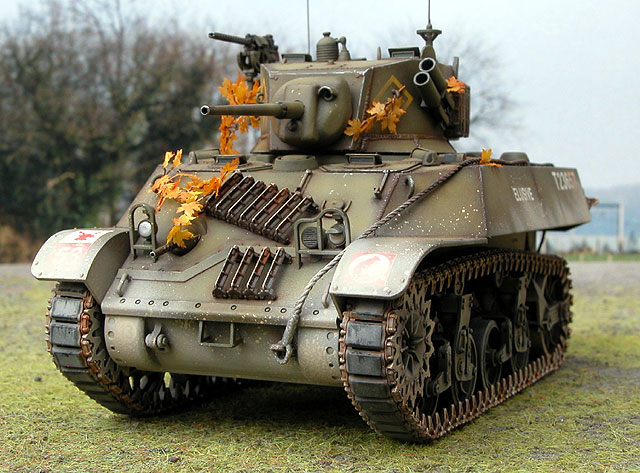
scale AFV Club Staurt Mk.V.
An
in-box and construction review by Steve appears elsewhere on
HyperScale.
Steve comments that the kit
is more temperamental to build than the latest Tamiya offerings, but that
it is a very nice model indeed.
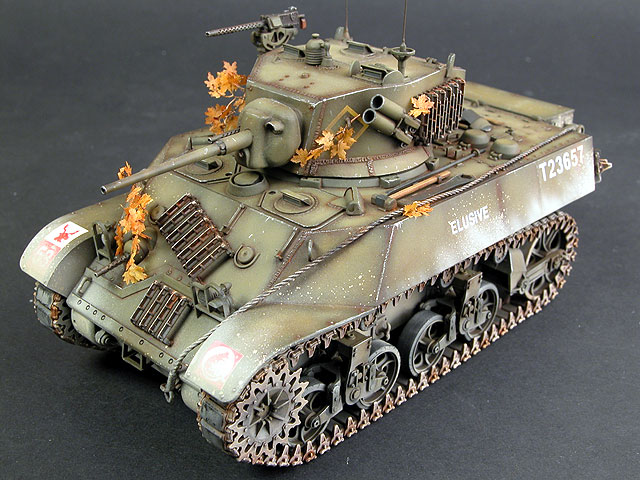
The highlights include
correct suspension and running gear, excellent flexible tracks and plenty
of delicate details. However, if you are a modeller who does not like
small parts you will probably want to forget about the grousers and other
tiny details, as they are quite tricky to handle and secure to the kit.
Steve said that assembling
the grousers for the turret and glacis plate took almost as long as the
entire rest of the kit! There were two tiny parts per grouser, but the end
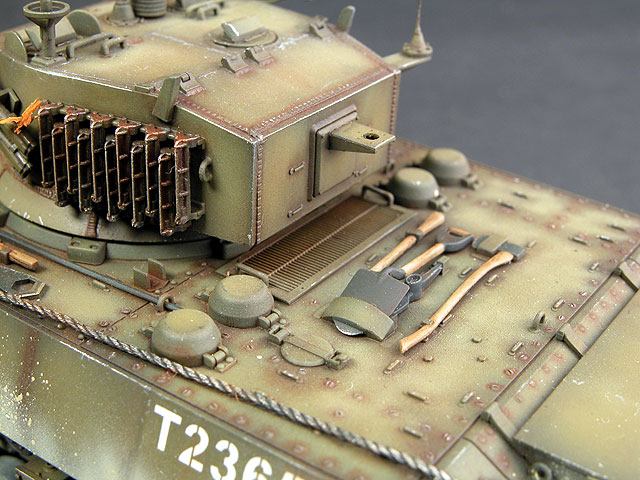
result is worthwhile as can be seen in these images. Other fine details
included handles, smoke grenade launchers, British pattern antennas, fire
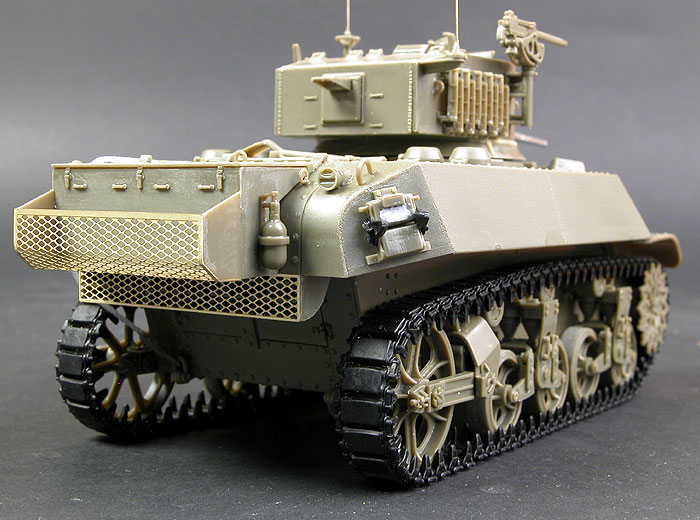
extinguisher and tool box. The photo etched fret supplies the rear stowage
and tool box.
The .30 cal barrels are very
well done, with deeply recessed holes in the cooling sleeves.
The string provided for the
towing cable and the turned metal barrel are great finishing touches for
this model.
The detail on the interior
of the vehicle did not meet the high standard of detail on the outside.
Steve closed the hatches as a result. However, the radio is worthy of note
as a very authentic looking piece of plastic.
Characteristic prominent weld beads are missing from the turret and the
glacis plate. Steve added these from Tamiya two-part epoxy putty.
The model was painted with
Tamiya acrylics using the Tamiya Spray Work HG Super Fine airbrush.
The overall colour was a mix
of Tamiya Olive Drab mixed with XF-4 Yellow Green. The interior of
selected panels were faded with progressively lighter coats containing a
higher proportion of the Yellow Green.
After the vehicle was
painted, an overall wash of thinned Burnt Umber oil paint was applied.
Paint chipping was simulated
using a lead pencil and a silver artist's pencil. Although the silver is
not actually a realistic representation of the colour of the metal
underneath, it is a more satisfactory method of displaying wear and tear,
as a lead pencil is almost invisible on the model.
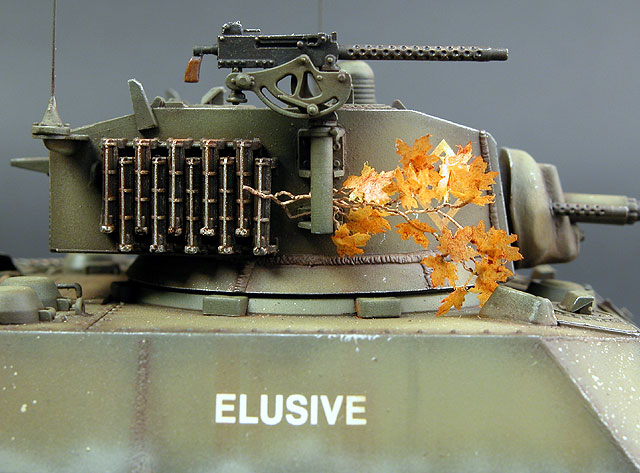
Machine gun barrels were
painted with a mix of Field Blue and Flat Black followed by light
dry-brushing with Flat Aluminium. The gun barrels then receive a wash of
thinned black oil paint. Black pastel chalk was used for the muzzle blast
residue on the end of the main gun barrel.
Wooden tool handles were
prepared for paint by raking lengthwise with a fine razor saw. They were
then painted with a mix of German Yellow and Yellow Green. When dry, the
handles then receive a wash of Sienna and Umber oil paints to highlight
the grain created by the razor saw.
Wheels were brush-painted
with a mix of Flat Earth and Flat Black then oversprayed with Buff. The
edges of the wheels were highlighted with a Cool Grey artist's coloured
pencil
The kit-supplied tracks were
painted with a mix of Flat Earth and Flat Black. The rubber blocks were
painted grey. The edges of the rubber blocks were coloured in with a
darker shade of grey using a coloured artist's pencil to represent a worn
appearance. The guide teeth were dry brushed with Tamiya acrylic Flat
Aluminium.
Burnt Sienna oil paint was
used to depict rust highlights on the track links.
The kit decals were applied
over Microscale Gloss. Once the decals were on the model, they received a
sealing coat of Microscale Gloss and, finally, sealed with Testor's
Dullcote.
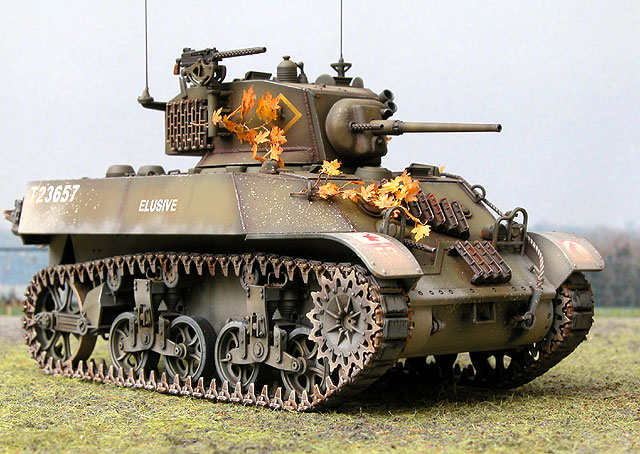
The attractive foliage was
sourced from a Hudson and Allen set entitled "Norway Maple Leaves - Fall
Color". Tiny lavender roots were used to represent the branches. They were
glued to the leaves using Testor's Canopy Cement. A light wash of Sienna
oil paint added depth to the colour of the leaves and blended them with
the "branches".
Click the thumbnails below to view larger
images:
Model Copyright ©
2003 by Steve Palffy
Images and Text Copyright © 2003 by
Brett Green
Page Created 04 May, 2003
Last Updated
17 March, 2004
Back to
HyperScale Main Page |
Home |
What's New |
Features |
Gallery |
Reviews |
Reference |
Forum |
Search