|
M551 Sheridan
by
Rolando Raffaut
|
 |
|
M551 Sheridan |

HyperScale is proudly supported by
Squadron.com
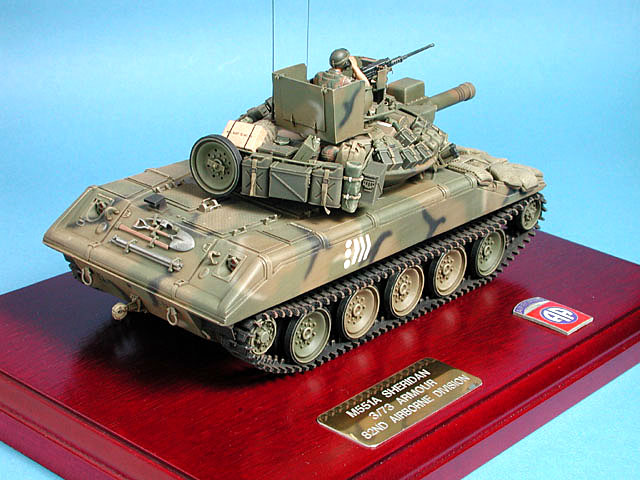
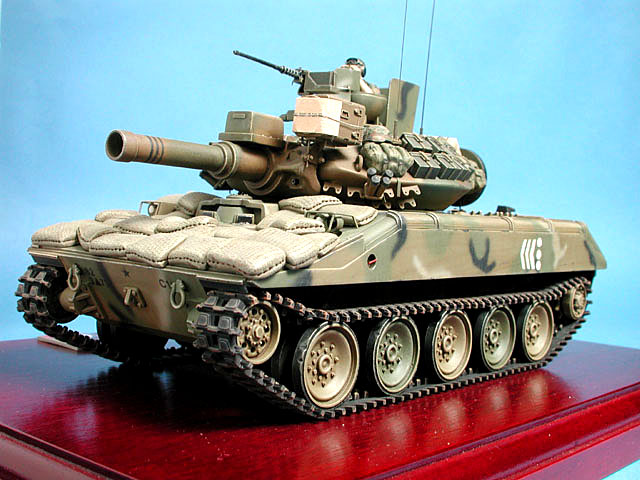
Here is my attempt at building Tamiya’s antiquated
1/35 scale kit of the M551 Sheridan.
This kit was built during my modelling production
heydays of the early 1990’s. At the time the only reference I had to
work with was the Squadron book.
The kit itself is really a motorized toy dating
back to the early 1970’s, as such it leaves much to be desired as far as
an accurate depiction of the real vehicle. I built it as far as the
reference and my modelling skills would allow at that time so upon
closer inspection it still has quite a few inaccuracies and missing
details that I wasn’t aware of . I’ve often thought of re-detailing the
kit but with rumours of Academy releasing their version some time in the
immediate future I figure I’ll wait for a better one to come along, so
onto the kit.
My interest in this vehicle was sparked by a picture I saw in a
Time/Life book showing the vehicle trundling down a road in Panama
during Operation Just Cause, I was really intrigued by the sand-bagged
hull of the vehicle in the picture when the modelling voices in my head
started telling me “Gotta have one, Gotta have one!…..” , so now I began
an amazing quest to find the kit. I recall at this time that Academy had
basically released a near-perfect copy of Tamiya’s kit and I was able to
scrounge one from somewhere, after opening the box I realised it just
wouldn’t do as a lot of the details were too soft for my liking. So now
how do I find a Tamiya kit that was OOP for many years?, I combed all
the Sydney hobby shops with no luck and in those pre-internet years and
me not being a member of any modelling clubs my search was pretty
limited.
Luckily, I was reading a copy of Finescale Modeler and a hobby shop in
Philadelphia was advertising the kit so I called and bought the last one
they had, the only problem was that they didn’t ship internationally!
Now what?,I remembered I had a cousin living in Hawaii so I had it
shipped to him. Okay, so now it was ½ way to Oz I had to figure out how
to bring it the rest of the way. I had another cousin here in Sydney who
was about to go on holidays to Hawaii so he became my personal “courier”
and delivered it to me a few weeks later, whew!! The lengths we obsessed
modellers will go to in order to appease the voices in our heads!
So know the building began in earnest.
Hull
I started with the lower hull and blanked off the
motorization slots. I robbed a lot of the usual small tank fittings such
as towing shakles/hooks, lights, tools etc from Tamiya’s Bradley kit as
their mouldings were crisper and much more accurate in shape. The rubber
in the road wheels were distressed with a motor tool. An exterior fire
extinguisher handle was added to the front left hull as well as
flotation screen edge around the sides. I scratchbuilt the rear towing
hook assembly as the mount was quite unique and not to be found in any
other of my armour kits. Some of the engine deck louvers were blanked
off with styrene sheet and others had stainless steel woven mesh added
as per my references. A modified exhaust outlet was made from sheet
styrene and the light guards and a couple of handles were made from
brass rod. The front idler wheels had the lightening holes drilled out.

The picture of the real vehicle showed the crew had
added armour in the way of sandbags so I added this feature with epoxy
putty textured with gauze bandage, a little overscale but I really liked
the way it turned out.
This pretty much concluded the major
additions/alterations to the hull. The real vehicle has hundreds of
small rivets all along the hull sides and I wasn’t sure how to add these
as my skills weren’t up to the job so I left them off, a decade later
armed with better tools/skills and reference articles I have thought
many times about adding them.
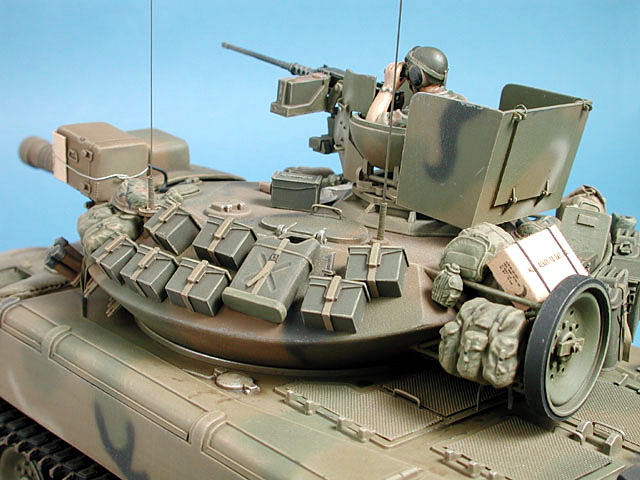
Turret
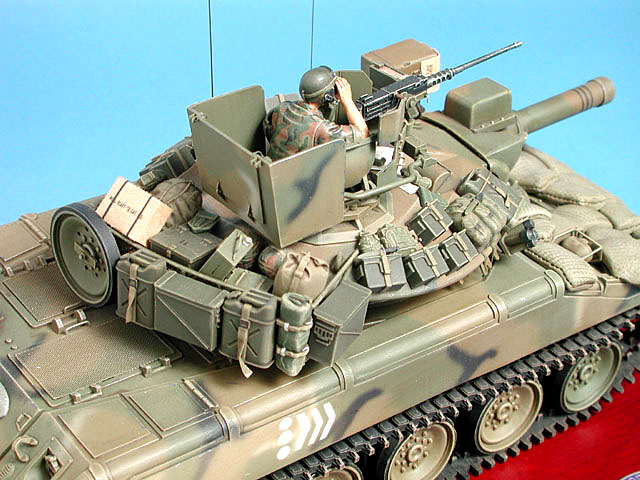
Next up was the turret , this needed lots of mods
according to my references so I began by scratchbuilding the larger
turret basket from brass rod. Had I been able to solder back then it
would have made my job so much easier, in the end it was all held
together with super glue and often during construction it would pop
apart, AAARRGGHH!, anyway I finally got it together and was able to line
it with Velinden mesh, which is nothing more than horrendously
overpriced wedding veile tule!, unfortunately with all the crew gear the
basket is almost invisible which is a shame as it was the most intricate
of all the detail I added to the kit.
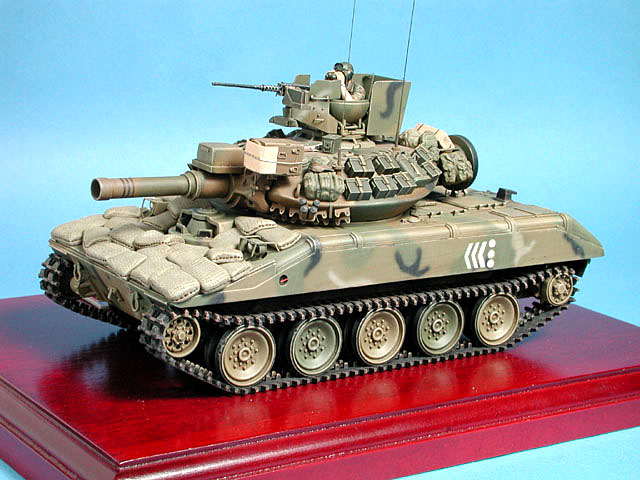
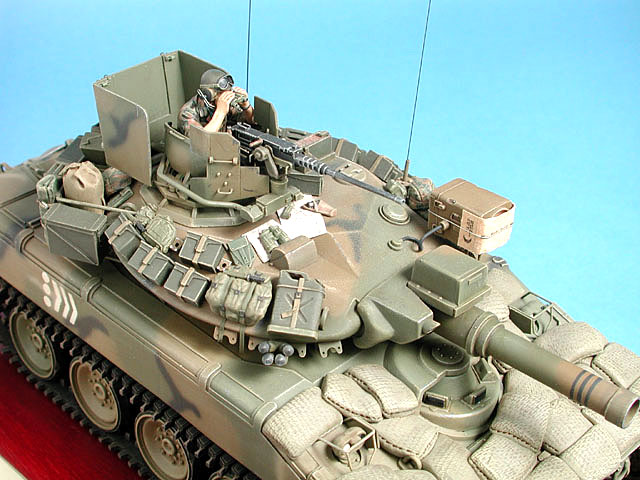
I replaced the gun barrel with 2 different diameters of aluminium tubing
to depict the later style of bore evacuator. I scratchbuilt a new
searchlight mount and borrowed the actual light from a ESCI M60 kit, and
covered the lense in an add hoc fashion with part of an MRE box as per a
pic in the Squadron book.
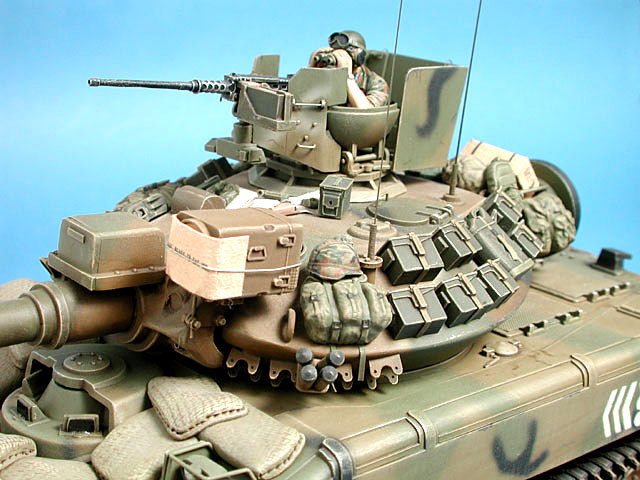
The other major alteration was to add the commanders armoured gun
shields around the .50 cal gun, this was simply done with sheet styrene
with hinge/locking mechanism detail added from brass wire. The laser
range finder was added under the gun mount itself and the armoured
conduit leading back into the cupola was added also, all this was done
with brass rod and square cross section stock.
The old style smoke grenade dischargers were ditched in favour of newer
style ones from the Tamiya Bradley, but the old mountings were added
from styrene sheet and shaped accordingly. I also replaced the kit’s .50
cal gun as the early Tamiya ones were pretty awful. A few other minor
additions in the way of a shutter added to the gunners sight, a modified
turret ventilator, a shroud for the co-axial machine gun and other minor
bits and bobs saw the turret complete.
 I
now turned to painting the little beastie and really wanted to do it in
the current NATO tri-colour camouflage, but I couldn’t find a good 3
view illustration of the actual layout of the colours so in the end I
settled on the older MERDC scheme of armour sand, forest green, field
drab and matt black. I used Testor's Model Master range for the colours. I
now turned to painting the little beastie and really wanted to do it in
the current NATO tri-colour camouflage, but I couldn’t find a good 3
view illustration of the actual layout of the colours so in the end I
settled on the older MERDC scheme of armour sand, forest green, field
drab and matt black. I used Testor's Model Master range for the colours.
When cured the model was given a wash of Raw Umber
oil paint and was dry brushed with Tamiya Desert Yellow. High wear areas
were simulated with chips and scratches of Tamiya Metallic Grey. Since
the vehicles were parachuted into Panama and basically used in built up
areas I kept the weathering to a minimum. The tracks were painted matt
black and dry brushed an appropriate rust colour.
I added numerous items of stowage such as ALICE
packs, helmets, tarps, duffle bags, jerry cans etc, from the various
accessory sets and the straps were added from lead foil.
The markings were a mixture of rub on decals from
Woodland Scenics as well as a template I made up that I sprayed through
for the white markings on the hull side, the barrel markings were simply
masked and airbrushed.
I was lucky in that I was in a Disposal shop
(Surplus store) and came across a neat little enamelled badge of the
82nd Airborne that went perfectly with the base. I intend to ultimately
have this kit on a small diorama with some of the Dragon figures of the
same era depicting some of the CQB’s that were fought against Manuel
Noriega’s Dignity Battalions or “Dingbats” as they were dubbed by US
Forces.
I really enjoyed this model as I feel it really
captures the compact sporty looks of the Sheridan that I find unusually
appealing as far as AFV’s go.
This coupled with the fact that it was the only air
transportable modern “tank” in the US inventory was enough to motivate
me into wanting one for my collection. Of course in the decade since I
built this kit there have been numerous articles written in modelling
circles, especially FineScale Modeler, Osprey Modelling series, etc and
the kit has even been issued in full resin from Kirin with a P/E set
released from Eduard.
The model went on to capture a few “firsts” in
various model comps around the Sydney area, despite all it’s short
comings and the wealth of detail I neglected to “fix up” it still holds
a special place in my collection.
Click on the thumbnails
below to view larger images:
US Light Tanks 1944–84
Vanguard 40 |
|
|
|
|
Limited Re-Issue
US Price: $14.95
UK Price: £8.99
Publisher:
Osprey Publishing
Publish Date: June 15, 1984
Details: 64 pages; ISBN: 0850455413
|
|
|
Model, Images and Text Copyright ©
2004 by Rolando Raffaut
Page Created 25 February, 2004
Last Updated 17 March, 2004
Back to HyperScale
Main Page
|
 Home |
What's New |
Features |
Gallery |
Reviews |
Reference |
Forum |
Search
Home |
What's New |
Features |
Gallery |
Reviews |
Reference |
Forum |
Search