|
Marder III Ausf M
by
Ian Robertson
|

|
|
Marder III Ausf M |

Tamiya's
1/35 scale Marder III Ausf M is available online from Squadron.com
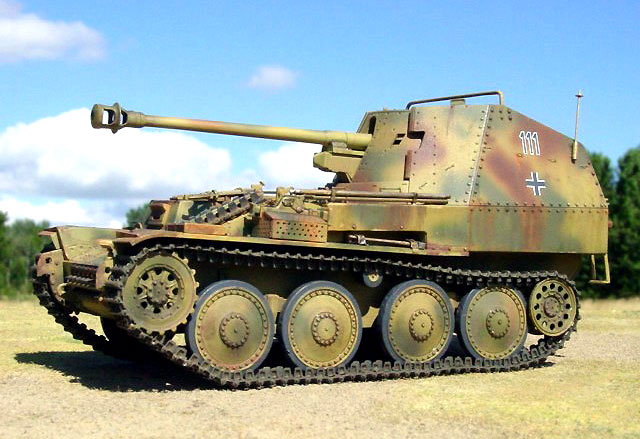
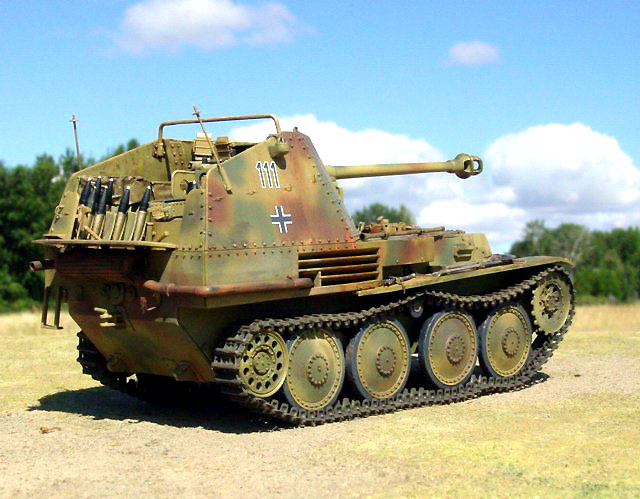
The Marder III Ausf M tank destroyer, which made
its first appearance in mid 1943, was based on the out-dated Czech-built
38(t) chassis. The cabin on the IIIM was located toward the rear of the
hull, unlike its predecessor which had the cabin located centrally. By
most accounts the Marder IIIM was an effective tank hunter, with its
7.5cm Pak40/3 gun firing armor piercing and high explosive rounds.
Tamiya's Marder IIIM (kit #35225) has received high
accolades from AFV modelers, and for good reason. The kit is well
detailed and builds into a fine model out of the box.

Nevertheless, the kit leaves plenty of room for the
aftermarket companies to take it to the next level. The following
modifications/additions were made to my kit:
-
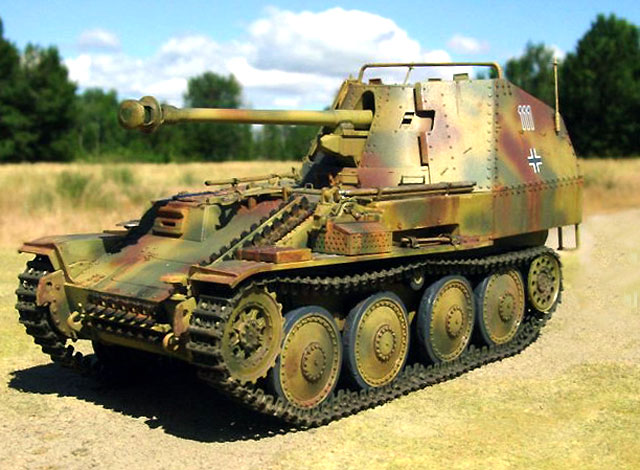
Individual link resin
tracks from WWII Productions
-
Individual brass shells
from Tamiya (produced as an accessory for this kit)
-
Grab handles on the sides
of the cabin fashioned from copper wire
-
Scratch built details
added to the radio equipment (mainly wiring)
-
Scratch built shutters
added to the gun sight aperture on the gun shield
-
Scratch built release
handle added to the front left area of cabin
There is no trick to building this kit. The design
is superb, and the parts fit together without difficulty. Some ejector
pin marks on the inside of the cabin require attention because these
areas are visible on the completed model.
Individual Link Workable Resin Tracks
WWII Productions out of New South Wales, Australia
makes a limited variety of individual link resin tracks that can be
clicked together (i.e., no pins or glue are necessary).
The design is ingenious and they look superb when
complete.
To top it off, the tracks are slightly less
expensive than the Modelkasten and Friulmodel replacement tracks for the
38(t).
Replacement tracks for the Marder are worth the
expense in my opinion because the tracks are highly visible in the
finished model, and the realistic sag is difficult (but not impossible)
to achieve with vinyl tracks.
My model was painted in a three tone scheme with
Tamiya acrylics: XF-60 (dark yellow), XF-64 (red-brown) and XF-65 (field
grey). Washes of Model Master burnt sienna and umber were then applied.
Postshading with highly thinned black and red-brown paint was used to
create streaks and stains on the hull and cabin.

Additional streaking was created using "Real Rust"
by Aims Products. The exhaust was painted with Model Master burnt iron,
followed by "Real Rust" and then black chalk pastel.
Images of the completed model were taken outdoors
with a SONY digital camera set at its highest picture resolution (2048 x
1536 pixels). Other camera settings were as follows: 200 ISO film speed
(it's an option on my digital camera), 800-1000th/sec shutter speed,
F-stop 8.0, and fixed focus distance of either 20 or 30 cm. Images were
cleaned up using Adobe Photoshop 6.0 for the Macintosh. Specifically,
the interface between the base and background were merged using the
software's "blur" tool, and edges in some photographs were sharpened
using the "sharpen edges" tool. Sharpening images in such a way helps to
restore some of the clarity lost during image compression.
-
AFV Modeller, Issue 8
(Jan/Feb 2003)
-
Tamiya Model Magazine,
Issue 96 (Feb/Mar 2003)
Click on the thumbnails
below to view larger images:
Model, Images and Text Copyright ©
2003 by Ian Robertson
Page Created 23 August, 2003
Last Updated 17 March, 2004
Back to HyperScale
Main Page
|
Home |
What's New |
Features |
Gallery |
Reviews |
Reference |
Forum |
Search