|
Marder III (Sd.Kfz.139)
by
Ian Robertson
|
 |
|
Marder III (Sd.Kfz.139) |

Tamiya's
1/35 Scale Marder III is available online from Squadron.com
As Germany's invasion of Russia unfolded in 1941 it
became apparent that Russian T-34 and KV-1 tanks were formidable
opponents for German panzers. To cope with Russian armor the Wehrmacht
required large numbers of anti-tank weapons. One interim solution was to
mount captured Russian 7.62 cm guns on the obsolete Czech-built 38(t)
chassis, resulting in the Sd.Kfz.139 (Marder III).
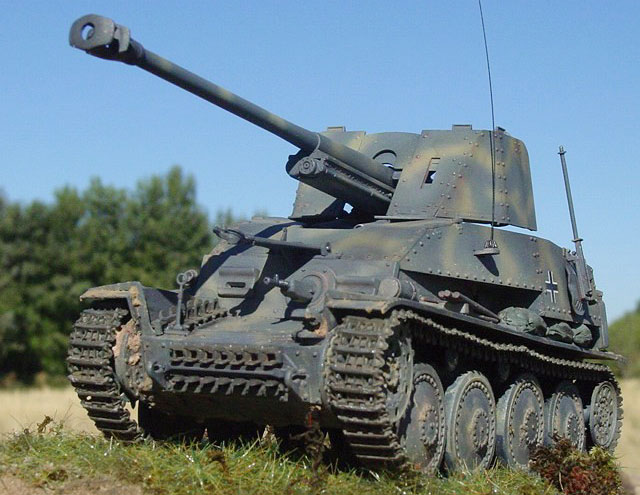
Although the Marder III offered little protection
to its crew of four, it provided the Wehrmacht with a mobile anti-tank
weapon that was urgently needed on the eastern front in 1942 and beyond.
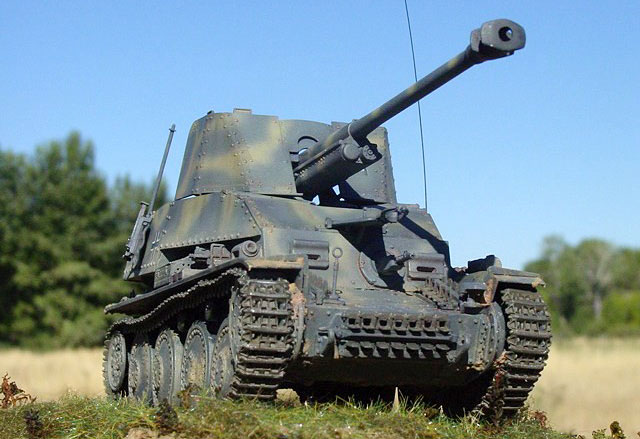
Tamiya's Marder III (kit #35248) is a beautifully
detailed and well engineered kit. Although it builds into a fine model
out of the box, I made the following modifications/additions:
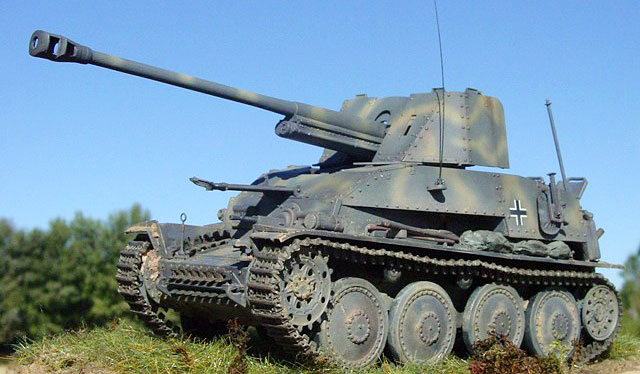
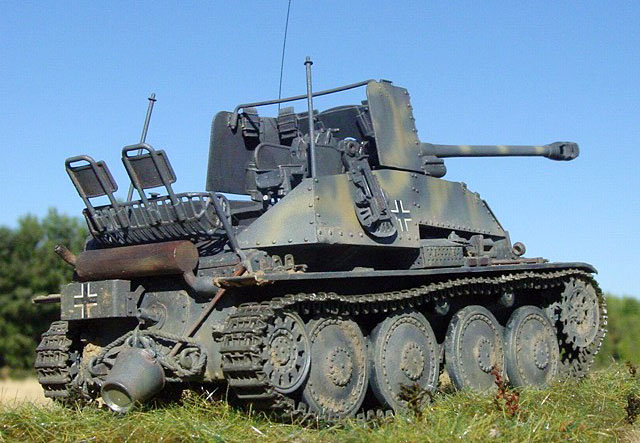
-
Individual link tracks
from Model Kasten
-
Stowage bag made from
Milliput wrapped in wet tissue paper
-
Radio antenna from
stretched sprue
-
Gasoline canister and
bucket from Tamiya accessory kit
-
Tow cable from nylon
string
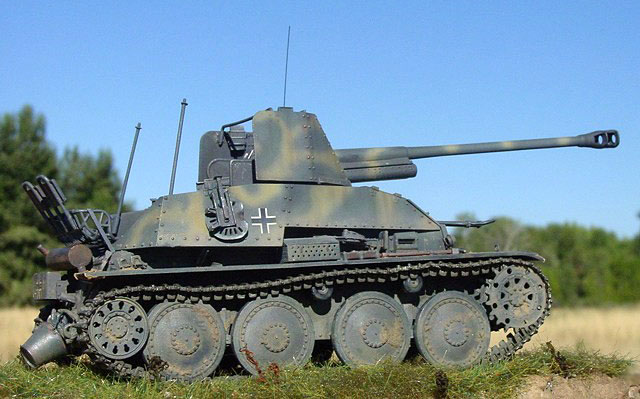
For me the only weak point of the kit was the
oversize thickness of the wire basket behind the crew compartment.
Considerable time was spent thinning the individual bars, although it is
difficult to achieve the proper scale thickness due to the risk of
breakage.
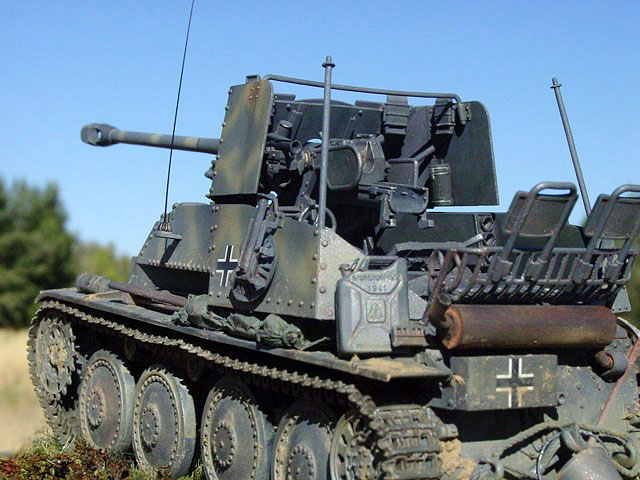
Some ejector pin marks on the inside of the crew compartment require
attention because these areas are visible on the completed model.
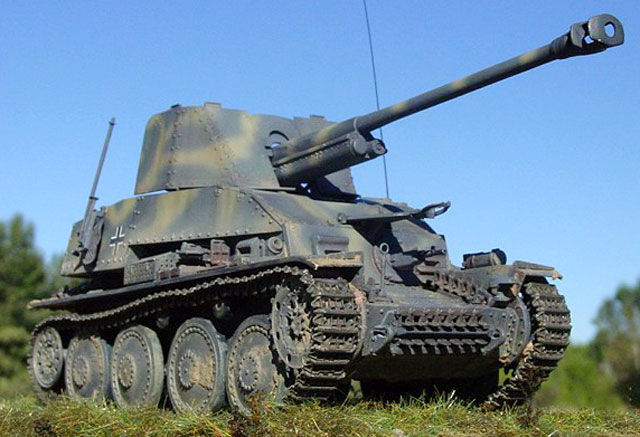
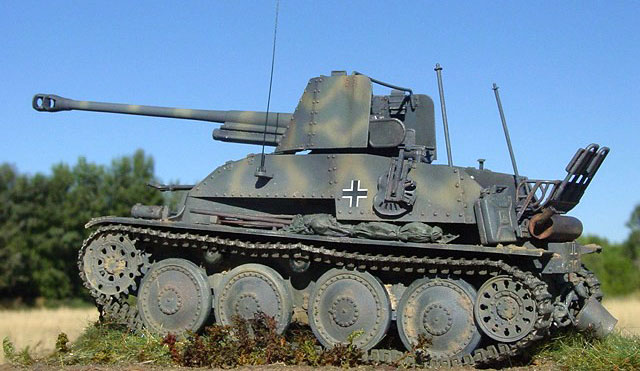
My model depicts a Marder III on the eastern front
near Kursk during the summer of 1943. It was painted in a base coat of
Tamiya XF-63 (dark gray) followed by wavy patches of XF-60 (dark yellow)
sprayed over top. Washes of Model Master burnt sienna and umber were
then applied to tone down the contrast between colors. Post-shading with
highly thinned black and red-brown paint was used to create subtle
streaks and stains. The exhaust was painted with Model Master burnt
iron, followed by "Real Rust" and then black chalk pastel.
The tracks were painted a mixture of Polly Scale dark brown and black,
followed by several washes of light brown and black until the desired
look was achieved. As a final touch, a very light dusting of SnJ
metallizer polishing powder was rubbed with a cloth on the tracks to
give a metallic sheen to exposed areas.
Small amounts of "mud" were added to the road wheels and hull. The mud
consisted of celluclay mixed with white glue, water, and fine sand. The
mixture was tinted brown with acrylic paint and applied to the model by
hand and with an old brush.
The groundwork consists of a base layer of
celluclay covered in fine sand and moss. For the grass I used Heki "Wild
Grass Matt", product #1574.
The Heki line of diorama supplies can be purchased
through European and Australian mailorder companies.
Images of the completed model were taken outdoors
with a SONY digital camera set at its highest picture resolution (2048 x
1536 pixels). Other camera settings were as follows: 200 ISO film speed,
800-1000th/sec shutter speed, F-stop 8.0, and fixed focus distance of
either 20 or 30 cm. Images were cleaned up using Adobe Photoshop 6.0 for
the Macintosh. Specifically, the interface between the base and
background were merged using the software's "blur" tool, and edges in
some photographs were sharpened using the "sharpen edges" tool.
Sharpening images in such a way helps to restore some of the clarity
lost during image compression.
Click on the thumbnails
below to view larger images:
Model, Images and Text Copyright ©
2003 by Ian Robertson
Page Created 31 December, 2003
Last Updated 17 March, 2004
Back to HyperScale
Main Page
|
 Home |
What's New |
Features |
Gallery |
Reviews |
Reference |
Forum |
Search
Home |
What's New |
Features |
Gallery |
Reviews |
Reference |
Forum |
Search