|
Gloster Meteor F.4
by John
Valo
|
|
|
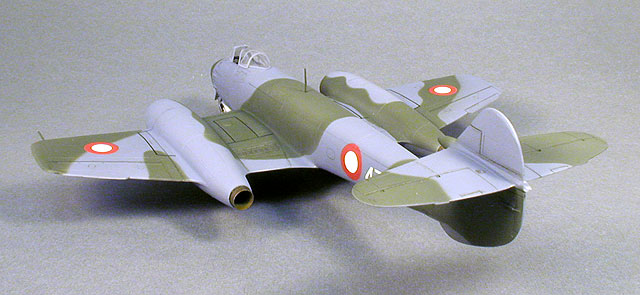
Gloster Meteor F.4 |

Classic
Airframes' 1/48 scale Meteor F.4 is available online from
Squadron
Preceded earlier this year by the release of the
later F.8 version of the Meteor, the F.4 is now available.
Like the F.8, the kit consists of a resin cockpit and details; major
components are injected plastic with nicely recessed panel lines. A
three-piece injected canopy is provided, allowing the canopy to be posed
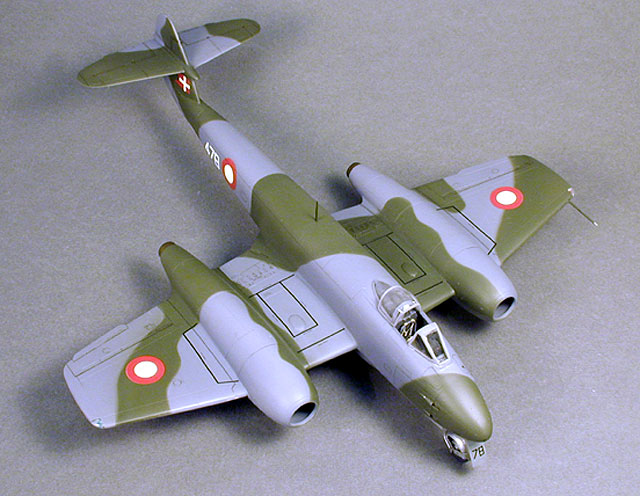
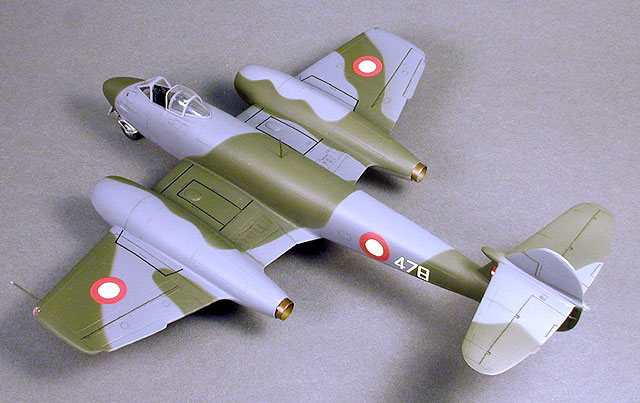
open. Decals are provided for one Danish and one British machine.
I cut out and cleaned up the parts first, then bagged
these according to assembly sequence. I also removed all ejector pin marks
on the plastic parts, which is an absolute must on this particular kit.
As I mentioned in the F.8 review, you must dry-fit every assembly before
committing to glue. The CA Meteor series is engineered to use as many
common parts as possible to keep production costs reasonable, which
inevitably leads to some minor fit variations between parts. These issues
are quite minimal on the Meteor, and simple to fix - just take the time to
test fit the parts. One small but welcome change from the F.8 was the
inclusion of one-piece stabilizers in the F.4 release.
I began assembly with the cockpit, the floor of which is glued to the
nosewheel strut support. The front cockpit bulkhead and nosewheel strut
support is a very delicate, and I reinforced the assembly with superglue
and accelerator once installed.
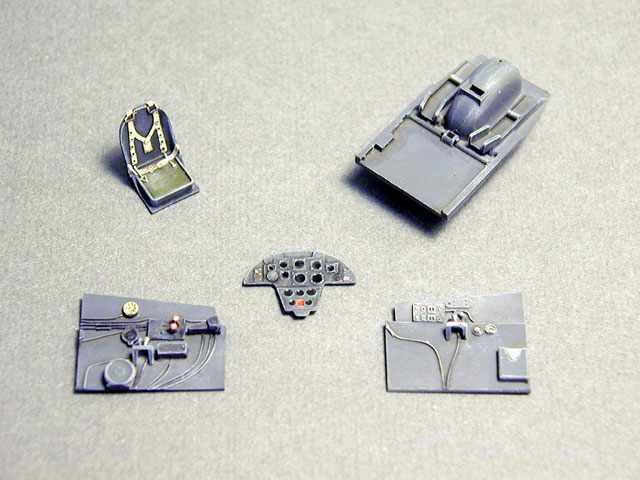
The fit of the nosewheel bay/cockpit was a minor challenge on the F.8, but
the F.4 cockpit parts fit well. I used small pieces of adhesive tape to
hold the cockpit sidewalls to the floor, then fitted the floor/nosewheel
bay to the right fuselage half. Once the fuselage halves were joined, I
offered up the rear bulkhead and adjusted the yet-unglued cockpit walls to
fit. I then sealed the bulkhead and deck parts with a thin bead of epoxy,
and poured birdshot mixed with epoxy into the fuselage through the hole
where the lower wing fits.
As on the F.8, I deviated from the kit instructions with regard to the
wing assembly. The instructions show the typical sequence of mating the
lower wing/nacelle/lower fuselage part with the upper wing/nacelles. I
elected to glue the lower wing/lower fuselage part in place, then dry-fit
and tweak the upper wing parts to fit at the roots. This worked very well,
and I would highly recommend this approach to anyone building this kit.
The resin engine faces need some sanding to fit within the nacelle
assemblies. I glued mine in place to the lower nacelle, then proceeded to
sand the upper portion to fit at the same time I was tweaking the wing
root fit of the upper wing panels.
The only real fit challenge on this kit were the engine intakes. For the
F.4, one set of intakes is provided, the small inlet style. Each intake
consists of two main pieces (upper and lower) with a small two-piece wing
leading edge insert. I needed to sand the wing root areas on both the
intakes and the wings to get a good fit. Upon initial fitting, there was a
small step at the nacelle joint, so I carefully squeezed the nacelle upper
and lower halves to match the intake, then used superglue and accelerator
to attach the intakes.
The next step was assembling the outer wing panels, which were a better
fit than on the F.8. I carefully trimmed and sanded the mating edges to
get as tight a fit as possible.
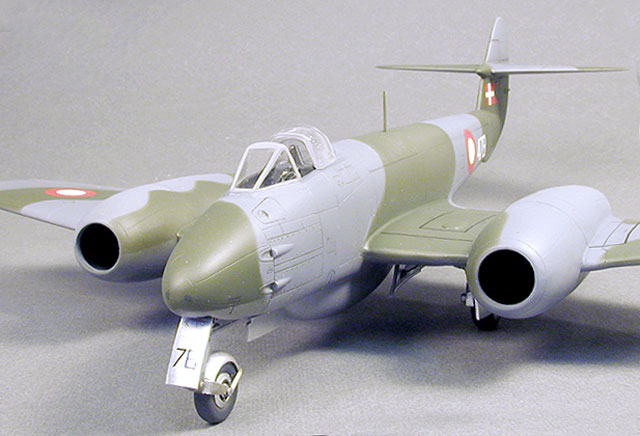
Like the F.8, the landing gear is nice but demands a bit of cleanup. I
once again deepened the locating holes for the main gear struts for a more
solid fit on the F.4. The nosegear doors have little 'hinge' tabs which I
dispensed with, and glued the doors directly to the fuselage.
As I finished my F.8 in 'High-Speed Silver', I
couldn't resist the attractive camouflaged Danish version. I used
PollyScale paints as well as SnJ for the 'metal' areas.
The decals went on without incident, and a light
eggshell-satin clear coat was applied, once again using PollyScale.
Well, as I stated with the F.8, what you get out of
this kit is directly related to what you put into it! It does build up
fairly quickly, and I must admit I like the lines of the F.4 better than
the later marks.
Classic Airframes' 1/48 scale Meteor F. Mk.4 can be
recommended to experienced builders who don't mind doing test-fitting and
trimming.
Model, Images and Text Copyright © 2003
by
John C. Valo
Page Created 31 December, 2003
Last Updated
17 March, 2004
Back to
HyperScale Main Page |
 Home |
What's New |
Features |
Gallery |
Reviews |
Reference |
Forum |
Search
Home |
What's New |
Features |
Gallery |
Reviews |
Reference |
Forum |
Search