|
"MiG-31" Firefox
by Paul Holmes
|
|
|
MiG-31 Firefox |

HyperScale is proudly supported by Squadron
 You
know that "one airplane" you see as a kid... whether it be at an airport,
flying at an airshow, or in a movie? Remember how "cool" and "awesome" you
thought it was? You
know that "one airplane" you see as a kid... whether it be at an airport,
flying at an airshow, or in a movie? Remember how "cool" and "awesome" you
thought it was?
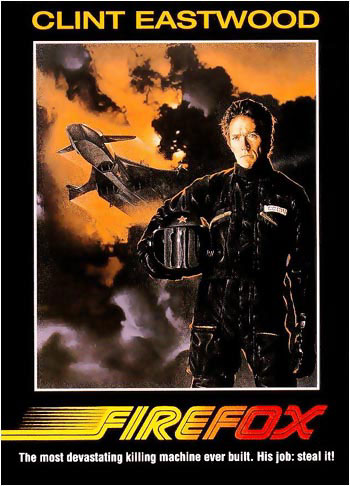
Well, back in the early Eighties (I was about 9 or 10), I saw a rather
boring movie with Clint Eastwood in it (I knew of him because he was in
"Paint Your Wagon"... my Mom's favourite movie). I remember bad guys and
guns......I was so bored!!!! (My how things change!)
But then, this one scene panned around a hangar door, and there was
this big, black, fast-lookin airplane. I was hooked instantly. It remained
for many years my favourite airplane.
Imagine my reaction, upon reading the "New Releases" section in an issue
of Tamiya Model Mag........."1/48 Firefox". I nearly lost it. It was
available through a company called Comet Miniatures out of the UK. I
wanted to order it right then and there, but as I was about to move over
there.... I patiently waited.
I've always wanted to do a kit that no one else in the club has done, and
this is the one.
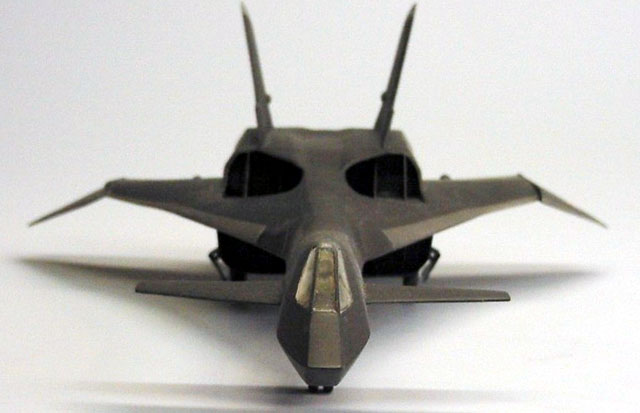
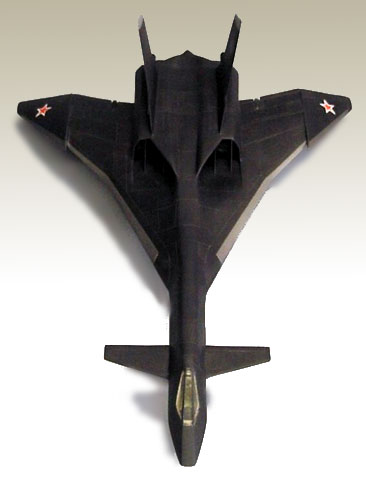
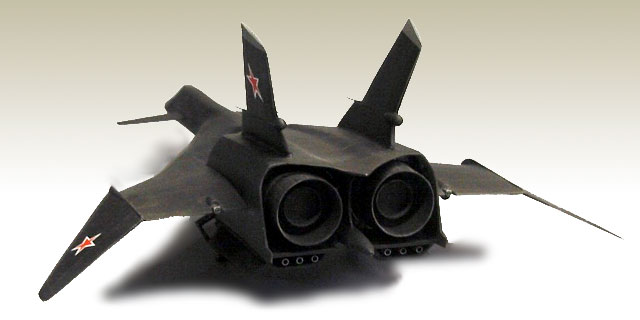
Anyways... on to the kit. This kit is by a company called Studio 2 Models.
Mainly a resin kit (comprised of 33 parts), it comes with 2 Vacform
canopies and white metal landing gear. This thing has a pricetag on it
that makes even the most die-hard aircraft modelers wince. It is SOLID
CAST RESIN, which makes this sucker rather weighty. Everybody who has
picked it up can hardly believe how heavy it is. Which loosely brings me
to my next point.
 When
I was test fitting the supplied landing gear, the kit's weight made the
gear fold up like a kite. Understandably, a major problem. Now I found out
through other sources that the movie mock-up used the landing gear from an
F-4 Phantom. I put out a request on Aircraft Resource Center, and got a
response with a donation of the appropriate gear. (I wish I could remember
the guys' name, just to say thanks again). To allow for proper support, I
drilled out the length of the landing gear and inserted a sewing needle in
each When
I was test fitting the supplied landing gear, the kit's weight made the
gear fold up like a kite. Understandably, a major problem. Now I found out
through other sources that the movie mock-up used the landing gear from an
F-4 Phantom. I put out a request on Aircraft Resource Center, and got a
response with a donation of the appropriate gear. (I wish I could remember
the guys' name, just to say thanks again). To allow for proper support, I
drilled out the length of the landing gear and inserted a sewing needle in
each
Assembly is kind of tricky, as the some of the pieces came bent out of
shape. Either from shipping damage or mis-molding, clean up didnt take too
long. The panel lines are roughly scribed on this one, and the underside
details on mine were obviously uneven. Modelers' Putty and a steady scribe
took care of this problem. The aft engine shroud came with a huge amount
of resin that needed to be removed, and upon attaching it to the main
fuselage, there were some unbelievably large gaps.
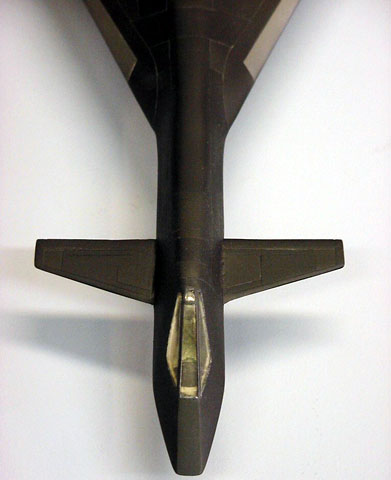
Also, in the trail edge of the wings (on the main body piece), were
infested with bubbles. I cleaned up as much of the rough stuff, and used
ultra-thick CA and accelerator to fill in the spaces, which was then
sanded down to the appropriate shape. As a matter of fact, CA was used to
fill pretty much all the gaps on this thing. The tailfins, wing
extensions, and front end canards need some extra support from the inside.
Not so much for "Structural" support, but more for preventint the pieces
from eventually snapping off. I used lengths of coat hanger wire for the
larger pieces, and sewing needles for the canards. I added some brass
tubing for the forward guns, the "rearward missile nozzles", and the small
thrust nozzles underneath each burner can.
The cockpit comes with no tub detail, a small, moderately detailed control
panel, and a fairly nice looking Ejection Seat. I compared the seat to a
1/48 scale Verlinden Mig-29 seat, and there is a noticeable size
discrepancy. (Which leads me to believe that the cockpit is more like
1/50th scale). The kit supplied canopies are shaped properly, but aren't
all that detailed. Some strip styrene laid across the appropriate areas
made a handsome looking canopy frame.
Rebuilding
Now before I go any further, I should mention that this model has had
two lives. I built it in England, but on the return journey, the kit got
smashed into quite a few pieces. Now with the money I spent on this kit,
and my obsession with the subject. I set out to restore it.
I used much of the same techniques as before. I filled in the existing
panel lines with putty, applied several coats of gloss clear to minimize
"breakaway" pieces of hardened putty. I had to replace the landing gear,
and eventually coat the canopy with some Future (thanks Scott). I also
added some screen mesh to the air intakes, and replaced the resin
inlet-vanes with styrene copies.
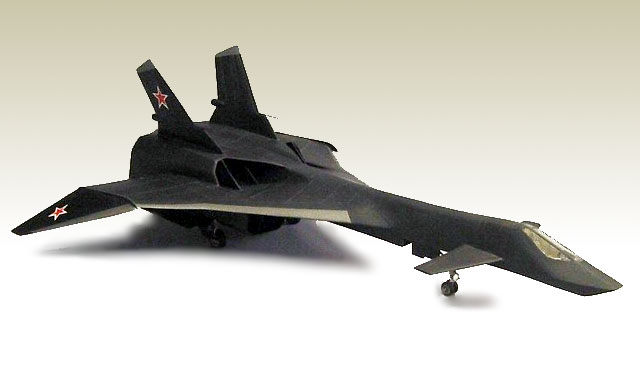
For the painting, my original goal was to get a very subtle (ie: nearly
invisible) multi-tonal panel effect.
This was accomplished by first painting the kit dark grey, masking the
desired panels off, then painting the rest black. After about a week of
drying time, a 50/50 coat of Gloss Black and Gloss Clear (thinned
out....applied several times over) was misted on until the grey panels
"darkened" themselves down to near-black. The first time I did this, the
grey panels showed through too much. The second time, same techniques,
different result. Basically, I nailed it!
One of our club members didn't notice the colour variation until long
after first looking at it.
I chose to finish the aircraft in a slightly flattened-satin finish.
I am really satisfied with the final product. My biggest pet peeve is
when someone says "Well, the movie one looked like this....." or "The
Movie one was that colour....". If you want to improve it, why don't you
drop 90 Pounds Sterling on it, and build it yourself
You know, I really don't care about the negative things that people say.
To me the real reward is seeing peoples faces light up when they see this
and realize what this thing is. This is the proverbial "Crown Jewel" of my
aircraft collection.
If you would like to see this in person, it will be at the RMMC show (in
Calgary) on May 10, 2003!
Click the thumbnails below
to view larger images:
Model, Images and Text Copyright ©
2003 by Paul Holmes
Page Created 08 May, 2003
Last Updated
17 March, 2004
Back to
HyperScale Main Page |
 Home |
What's New |
Features |
Gallery |
Reviews |
Reference |
Forum |
Search
Home |
What's New |
Features |
Gallery |
Reviews |
Reference |
Forum |
Search