|
Mk. IV Male Tank
in 1/72 Scale
by Glen Porter
|
 |
|
Mk. IV Male Tank |
images by Brett Green

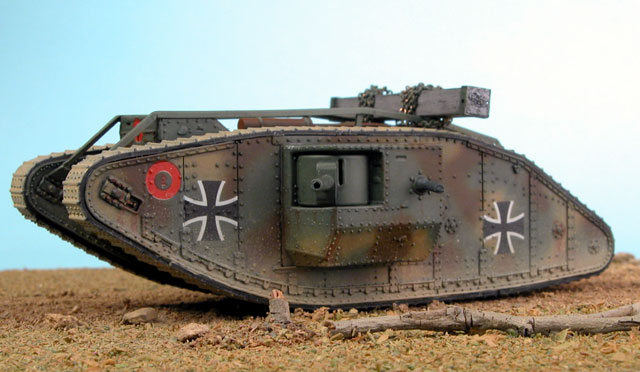
Emhar's 1/72 scale Mk. IV Male Tank is available
online from Squadron
A few months ago, the
Editor, Brett Green, showed me a model of the German WWI A7V tank by Emhar
in 1/72 scale that he had built. I was very impressed.
A couple of days later I
came across one of these kits in a hobby shop and decided to buy it. The
model did not impress me much in the box, as I considered that they could
have put more effort into the tracks and suspension, and less into the
armour shields.
However, the end result was
quite good with no modifications required for a nice representation of
this very rare tank.
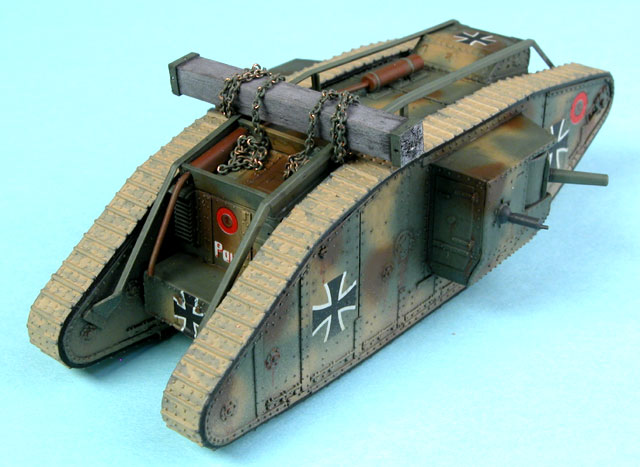
Emhar's 1/72
Scale Mk. IV Male Tank
|
Unfortunately, the same
cannot be said for Emhar's Mk. IV Male and Female tanks in the same scale.
Construction
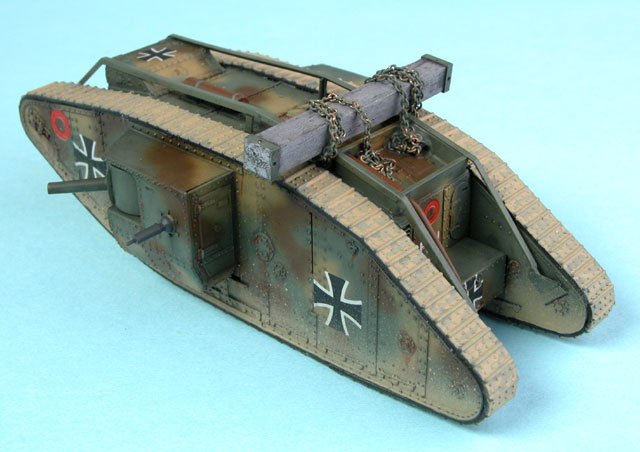
The Mk. IV Male goes
together reasonably well and the surface detail is excellent. Even the
rubber-band tracks can be made to look okay. There are, however, a couple
of problem areas.
The open box that goes on
the rear deck appears to have been moulded upside down. Rather than try to
fix the kit part I decided to scratch build one out of appropriately-sized
plastic strip. This was not a terribly difficult job and the result was
far superior to that supplied by Emhar.
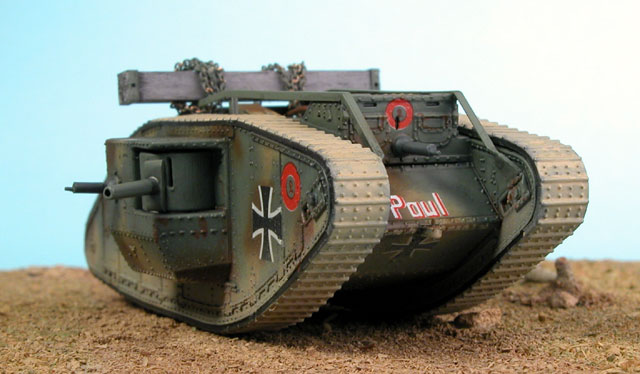
The next problem area
concerns the unditching rails mounted on top of the vehicle. These appear
to be made from angle iron and all the photos that I have seen suggest
that the angle is facing inwards. The whole assembly seems to be sitting
on top of the Commander's cabin and the aforementioned box on the rear of
the tank. The Emhar rails are angled outward and sit beside the
cabin and box. I did not try to fix the kit rails. I believe that they are
too short anyway. As I had already bought some plastic angle in the right
size to build equipment boxes for an Australian Leopard AS1, I decided to
scratchbuild these also.
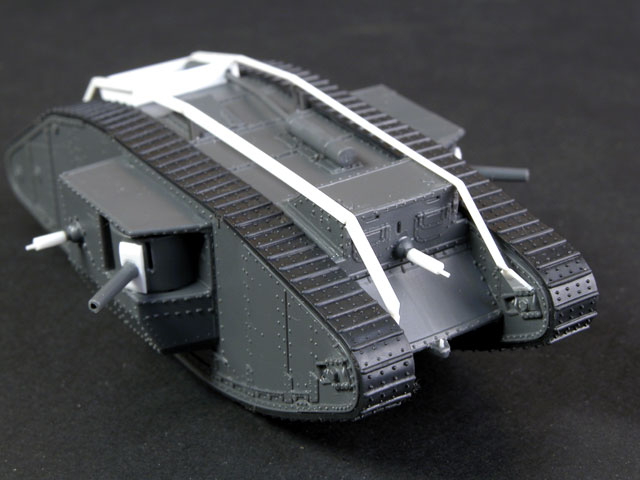
There are several bends
along each rail so I cut a vee segmment out of the lower side of the angle
at the appropriate place. After the railw as fitted, I applied Tamiya
Liquid Glue to the now-closed gap.
A small post was added from
angle midway along the rail, and small bits of plastic card were cut to
shape to attach the front and rear of the rail to the inside of the track
sponsons.
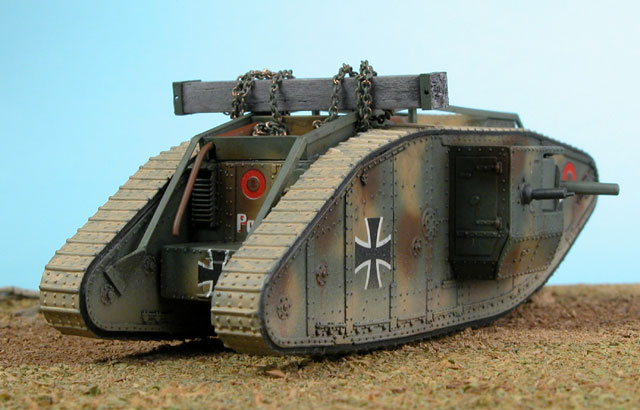
As I had decided to model
"Paul", one of the Mk. IVs captured by the German Army and used against
its former masters, these tanks had their armament replaced with German
items. After scratch building three Maxim machine guns, I learnt that most
captured vehicles simply had their Lewis guns rechambered! Oh well...
that's modelling for you. As we do not know exactly which guns were fitted
to "Paul", I decided to leave it as is.
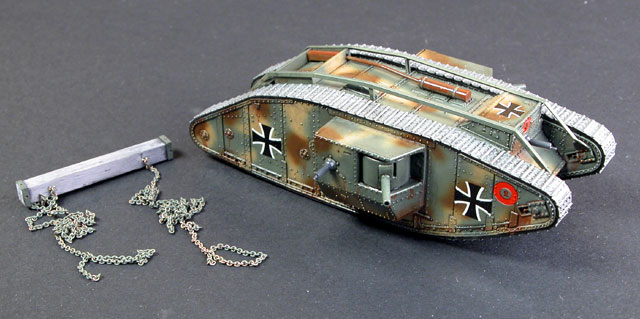
Emhar do not supply an
unditching beam in either kit so I bought a short length of 5mm square
balsa wood and some fine model railway chain to use for these items. The
balsa was sprayed with grey primer from an aerosol can, then rubbed back
with wet and dry to get rid of the furriness but leave the woodgrain. The
metal straps at either end of the beam (to prevent the real thing from
splitting) was attached to the beam with "U" shaped pieces of wire then
simply pushed into the balsa at the appropriate place. The beam was
destined to be attached to the model upon completion of painting and
weathering.
The rubber band tracks were
attached using super glue, starting from the underside centre, to the
front, over the top then back to the centre again. There was one problem
here. Although the track material is fairly hard, the tracks still seemed
to bend around the tight curves at the drive sprocket and idler wheel, so
I only placed glue either side of the bends. If there is the slightest
crack at one of these tight curves, the entire track can split and come
apart in a matter of days. I advise gluing the track for the entire length
to avoid this problem.
With construction finished
it was time to start painting.
Painting
Emhar supply F.S. numbers
for the three colours and I found these to be a fairly close match for
Tamiya XF-22 RLM Grey as the base colour, XF-59 Desert Yellow and TXF-64
Red Brown , all in enamel. I use enamels only because I have a big range
and I am used to them, not because I necessarily think that they are
better. I thin them with Turpentine because it is inexpensive and easy to
get.
RLM Grey was sprayed over
the model first using the fine tip on my trusty Aztek airbrush. I then
sprayed the light and dark browns freehand (without masks), working from
the box art on the back to determine the pattern.
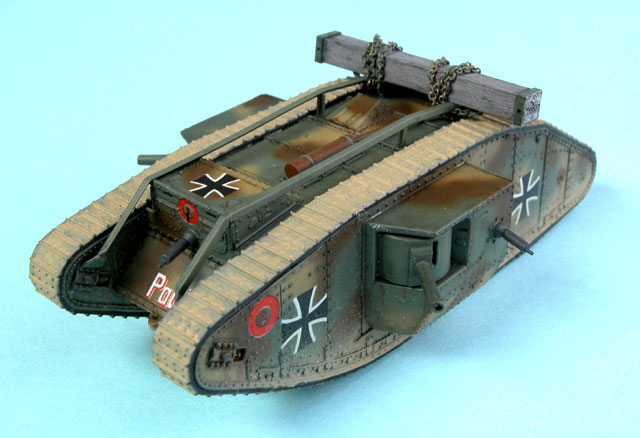
Wash and Detail Painting
Next, I applied a thin wash
of black acrylic paint thinned with Methylated Spirits (don't use this mix
over acrylic paints though!) with a soft brush. This needs some caution -
if the wash is too thick it can leave unwanted stains, so keep the wash
thin! When the wash is dry after a half an hour, I scrub most of it off
using a soft brush and clean Metho. This leaves the wash in the crevices,
highlighting features such as rivets panels, vision slots etc.
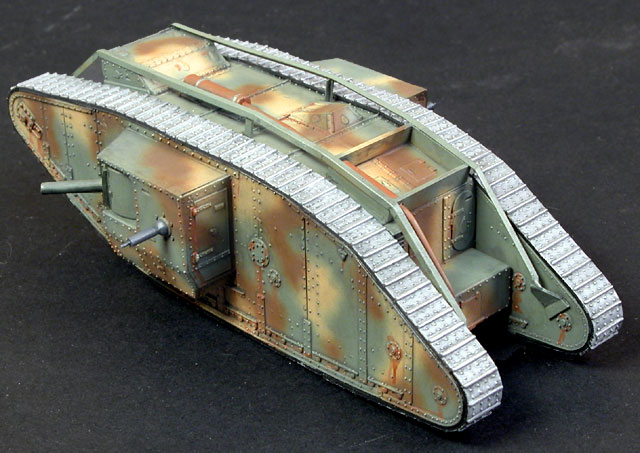
The tracks were hand painted
in light grey, with the sides painted black to simulate the gap that would
be there. Small items such as the Maxims were coated with a very dark
grey, and exhaust mufflers in rust. Rust and oil streaks were added with a
very fine brush using the box art as a guide. The model was now ready for
gloss coat and decals.
Decals
 The
decals were not the best I have ever used. In fact, they were terrible. The
decals were not the best I have ever used. In fact, they were terrible.
They had some register
problems with the red, and did not want to come loose from their backing
sheet. After soaking the decals in room-temperature water for 3-5 minutes
I had to place each decal between thumb and forefinger, flexing sideways.
Once the decals were free
they performed normally, and I did not have this same problem with the A7V
decals.
Weathering
And now it is time to get
dirty - no Harriet, not that way!
I took a 50/50 mix of Tamiya
Desert Yellow and Buff, blobbed it here and there on the tracks to
simulate where damp earth has clung to them, and added streaks to the
belly and lower corners of the gun sponsons. The tracks were also sprayed
with a thin coat of dust after the rest of the model was masked off. Not
too heavy though - the grey of the tracks should still show through.
This dusty coat was also
sprayed on the underside and a short distance up the sides. I then touched
up the black strip between the track plates and the sponsons.
The painting and decal
method I have described here is used on my WWII model aircraft, which is
my usual area.
I don't usually build tanks
but I must admit that I am becoming more and more interested in them,
along with ships. In fact, I am about to start a WWI biplane.
Damn - I think I feel
another article coming on!
Click the thumbnails below to view larger
images:
Model and Text Copyright ©
2003 by Glen Porter
Images Copyright © 2003 by
Brett Green
Page Created 06 March, 2003
Last Updated
17 March, 2004
Back to
HyperScale Main Page |
 Home |
What's New |
Features |
Gallery |
Reviews |
Reference |
Forum |
Search
Home |
What's New |
Features |
Gallery |
Reviews |
Reference |
Forum |
Search