|
De Havilland D.H. 98
Mosquito Prototype
by Scott A. Bregi
|
|
|
De Havilland D.H. 98
Mosquito Prototype |

Tamiya's
1/72 scale Mosquito B. Mk.IV is available online from Squadron.com
Mosquito!
The name that brought fear to many a German
pilots’ heart was by most accounts probably one of the most successful
aircraft designs to come out of WWII.
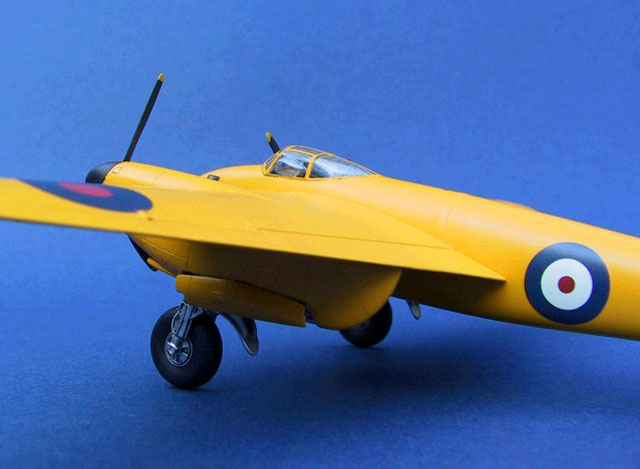
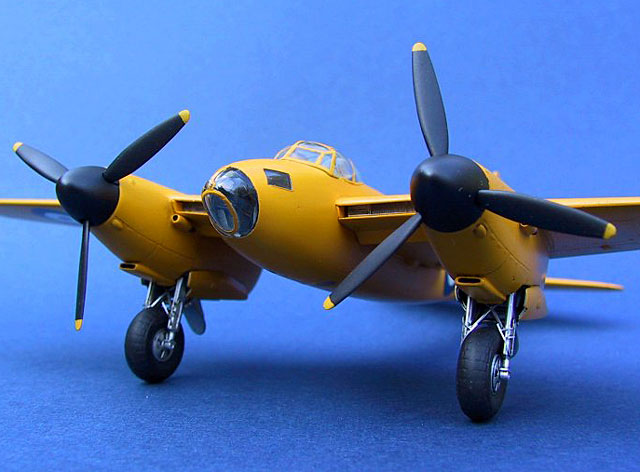
The “Yellow Bird” was born in a small hanger
disguised as a barn, across a moat from a manor house called Salisbury
Hall, England. Production was later moved to Hatfield for want of a larger
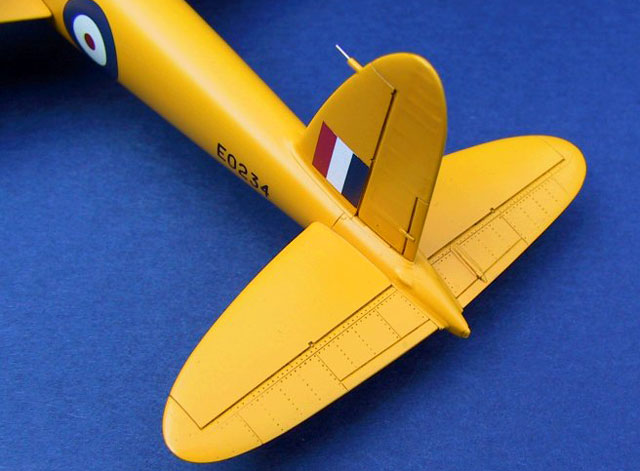
facility. The De Havilland D.H. 98 Prototype was rolled out in all its
bright yellow glory, for the first time on Nov 19, 1940. She was painted
in an overall yellow so AAA gunners would not mistake it for an enemy
aircraft and shoot it down! She would be given a green/brown camouflage
scheme on its upper surfaces at a later date.
Design and construction was radical for it’s
time and was the reason for its phenomenal performance. Constructed of
materials that were not strategically important, it was built in some
respects the same way we modelers build our aircraft kits. It was
primarily constructed from a 3-ply; balsa filled, birch plywood formed
over a mahogany mould. The fuselage halves were fitted out with all
electrical and mechanical equipment before they were cemented together.
The one piece wings were also constructed out of the same plywood sandwich
as the fuselage with two-one piece, spruce spars of box construction,
running from wing tip to wing tip. The only metal was used in the
construction of control surfaces, engine and engine mounting and landing
gear.
Its prodigious performance gave the D.H. 98
its name, “Mosquito”. At the time of its roll out it was one of the
fastest twin engine aircraft produced with a top speed of 382 mph. It was
able to outrun almost all known Axis fighters excepting the Me 262. The
Mossie as she was affectionately known by its aircrews was used in every
conceivable mission known from unarmed high speed reconnaissance to
passenger ferry to target tug! Design work commenced in late 1938 and
construction began on the first Mosquito in Oct 1940. First flight took
place on 25 Nov 1940. In all, 7781 Mosquitoes were built with the last
airframe completed in 1950.
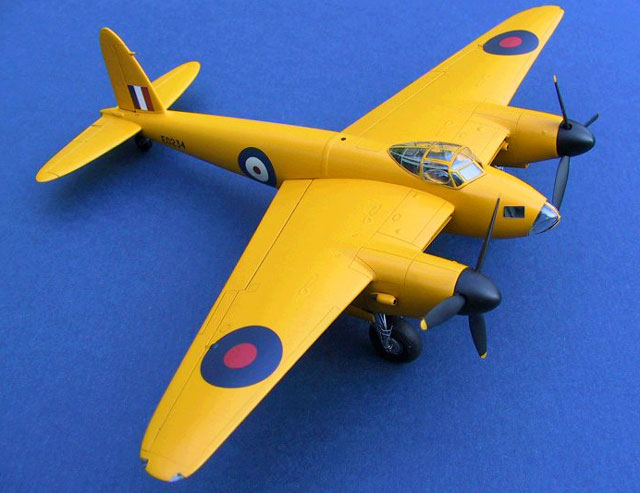
I have always had a soft spot in my heart for
the Mosquito, probably since we have the same birthday albeit 20 years
apart! I just wish I had the time to build more of them. But I just had to
have an example of the prototype, the progenitor of the line, E0234/W4050.
I loved that overall yellow scheme! I’ve nicknamed it the Great Canary!
My odyssey to build (and finally finish) a
model of the prototype began many years ago using the old Airfix kit. Then
along came Hasegawa with their fine rendition so I trashed the Airfix kit
in favor of the Hasegawa kit but I ran into problems using the Paragon
designs resin conversion kit on the Hasegawa kit. Now cut to Tamiya and
their beautiful kit that was pantographed down from their 1/48 scale kit.
I then started anew using the latter. I tend to go for the finesse of the
detail and crispness and quality of the kit over minor shape issues! Some
people will start to argue about this curve not being right or this panel
line not being in the right place. But I think the Tamiya kit has the best
overall detailing especially exterior detailing over the Airfix or the
Hasegawa kit.
On with construction!
Conversion and Backdating
I began construction with the conversion of the wings
and nacelles. This was the most time consuming part of the build. The
first few versions of the Mosquito had short engine nacelles with a single
piece flap. The rear part of the nacelle would hinge down and into the
rear part of the nacelle. The nacelle was modified into the more familiar
longer design after severe buffeting of the tail planes was experienced at
around 240 mph.
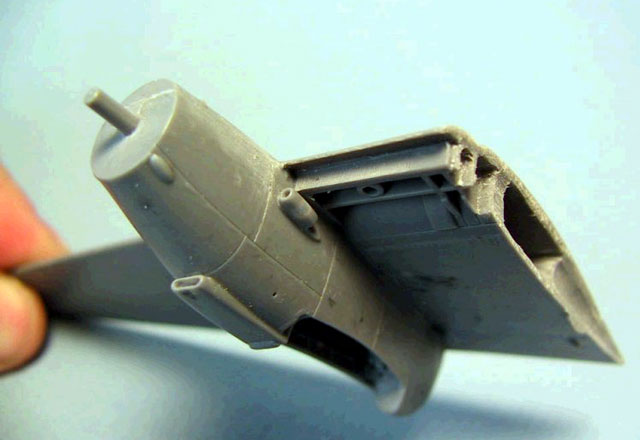
I assembled the nacelle and added the rear bulkhead
from the Aires super detail set (#7077). The cutouts over the landing gear
retraction knuckles was filled in with Milliput and smoothed out with a
wet cotton swab. I then filled the back of each nacelle and the cutouts
for the exhausts on the sides of the nacelle with polyester resin and set
them aside to cure.
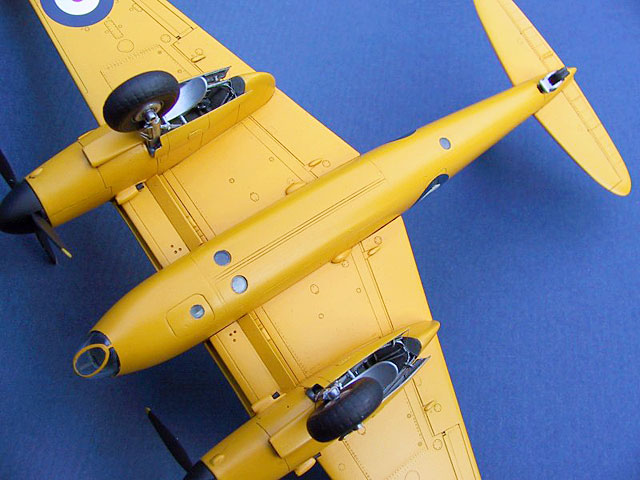
The Wings
The prototypes wingspan was shorter by 20 inches at
52 feet, 6 inches. The wings on production versions were lengthened to 54
feet, 2 inches. So each wingtip had to be shortened 10 inches each. I did
this by cutting of approximately 5/32 of an inch from each wingtip.
Then I cut each wingtip (part #B5/B6) in half
spanwise down the center between the lights and glued the forward edge of
the front piece up against the leading edge and the aft portion lining it
up with the trailing edge of the wing. I then filled in the resulting gap
with plastic strip and filed and sanded to match the rest of the wing.
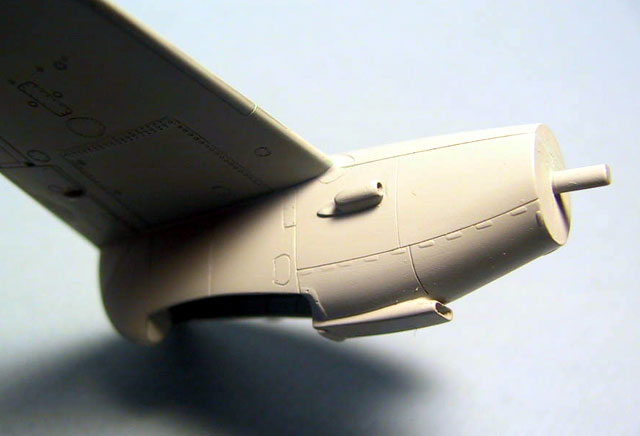
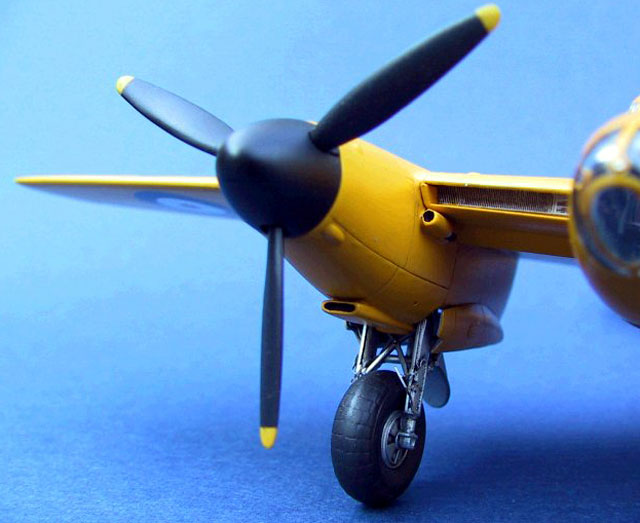
The Nacelles
After allowing the resin to cure I commenced to
reshape the rear of each nacelle using the drawings in the Aerodetail no.
23 on pg. 104. Rescribing the one-piece flap was accomplished by first
filling all flap actuator access surface detail over the nacelle with
Tamiya putty and then connected the inboard line with the outboard line.
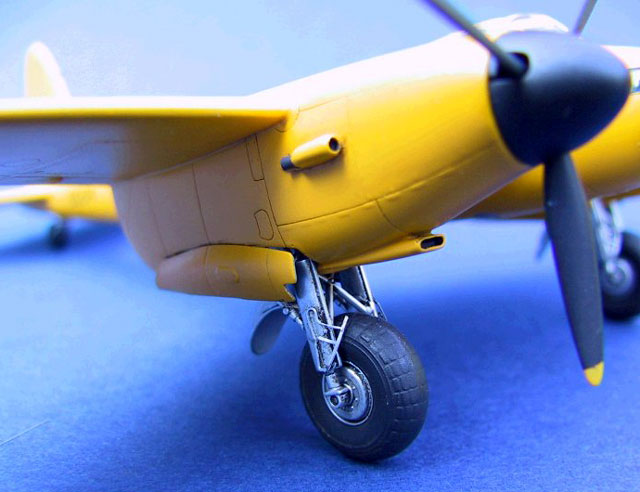
E0234 and all first generation Mosquitoes came equipped with automobile
style exhaust manifold resulting in a small scoop shaped exhaust stub.
Blistering of the engine cowling necessitated the later redesign to the
stub style we are more familiar with. The cutouts for the exhausts were
smoothed over and the exhaust fairings added from the Paragon Designs
conversion set. All surface details were rescribed by first primering with
Gunze Mr. Surfacer 1000 and scribing into the paint not the plastic. This
yields a cleaner line that does not have to be rescribed over and over
again. Radiator face detail came from the Eduard detail set.
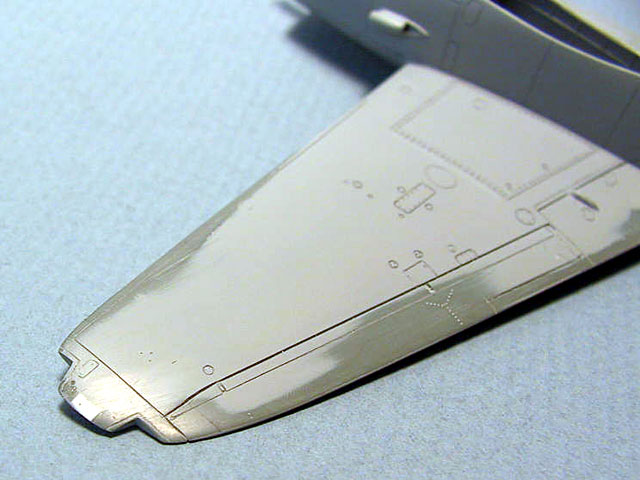
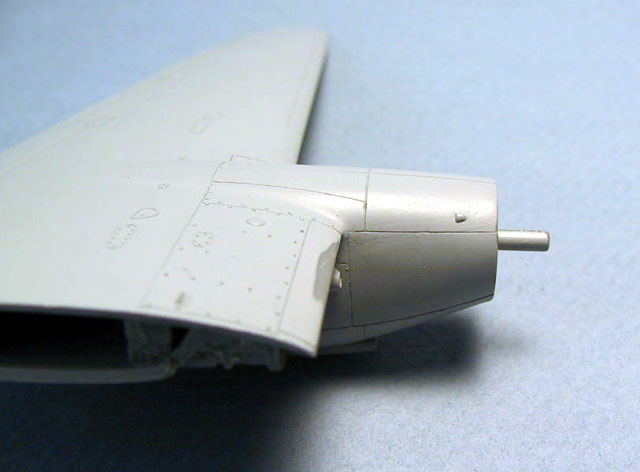
These wings were designed to be masters for a set of
one piece resin wings that may be marketed in the future. Above are the
masters and below are the resin copies. My model was built using a set of
resin copies. These only need the modeler to add the kit parts for landing
gear and doors, lower radiator flap and wing tip lights and attach to the
fuselage like normal using the spars as installed in step 10 of the kit
instructions.
Click the
thumbnails below to view larger images:
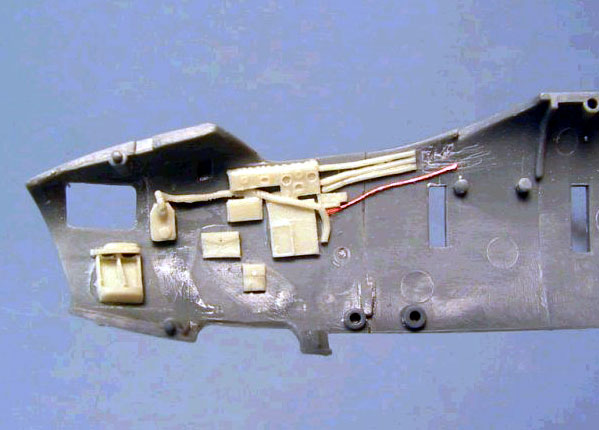
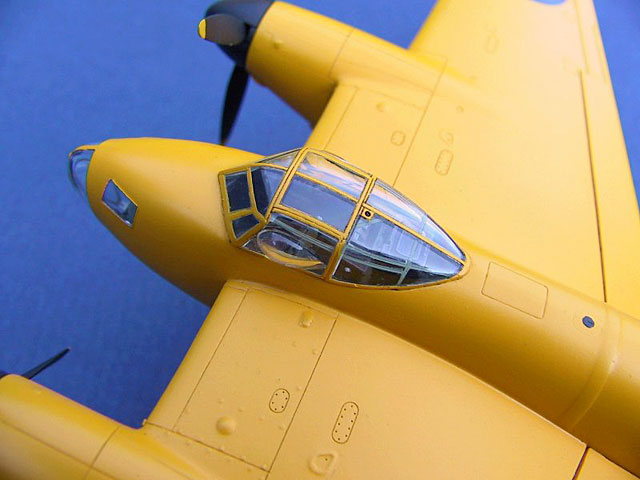
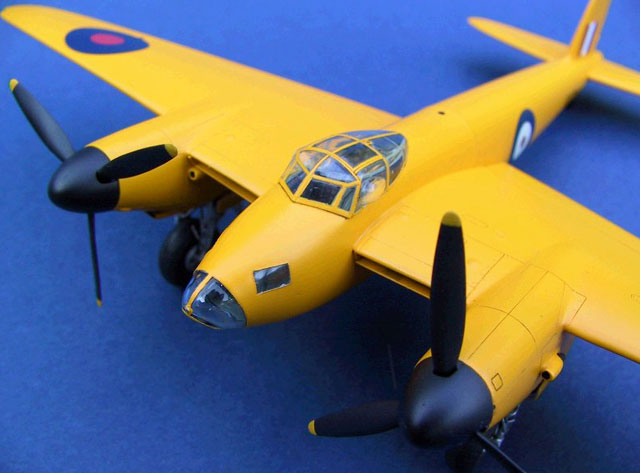
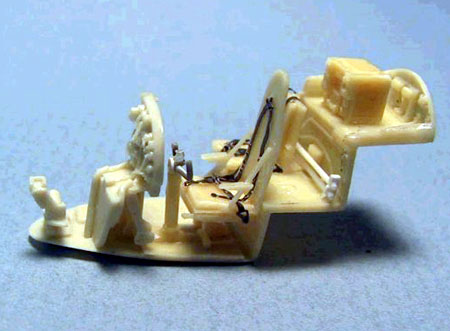
The Cockpit
The cockpit was built with a combination of CMK
(#7037), Aires (#7067) and Eduard (#72-314) detail sets. The Aires set
making up the lion’s share of the added detail. The CMK set providing the
floor, instrument panel, rudder pedals and control column.
All the side panel detail from the Aires set was
sanded free of the sidewall and attached to the inside of the fuselage
halves with CA.
Other details were added using plastic rod and fine
multi-stranded wire that is marketed as model railroad switch wire!
Click the
thumbnails below to view larger images:
The Rest of the Story
The rest of the model was built as per the kit
instructions with the following exceptions and changes. The horizontal
tail planes on E0234 were 9 feet 9 ¾ inches and production versions were
10 feet, 4 1/3 inches in length measured from fuselage center line to tip.
Each tail plane was shortened 5/32nd of an inch each
and reshaped and surface detail rescribed. The gear door guides on the
landing gear were replaced with ones from the Eduard brass set. Remove the
longitudinal strengthening rib on the right side of the fuselage and
delete the antenna mast.
I added another camera window to the center of the
rear access
Painting,
Decals and Weathering
|
The model was prepared for painting by masking off
the clear parts with an Easy-mask set and was then primered with Mr.
Surfacer 1000. She was then airbrushed with Testors Model Master Insignia
yellow overall.
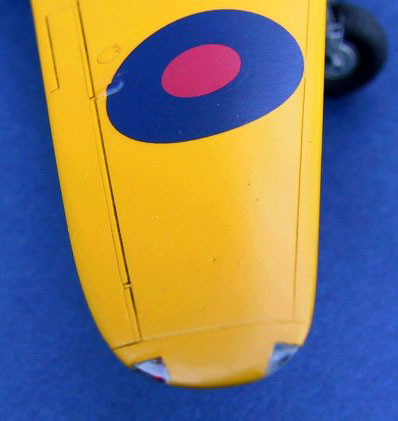
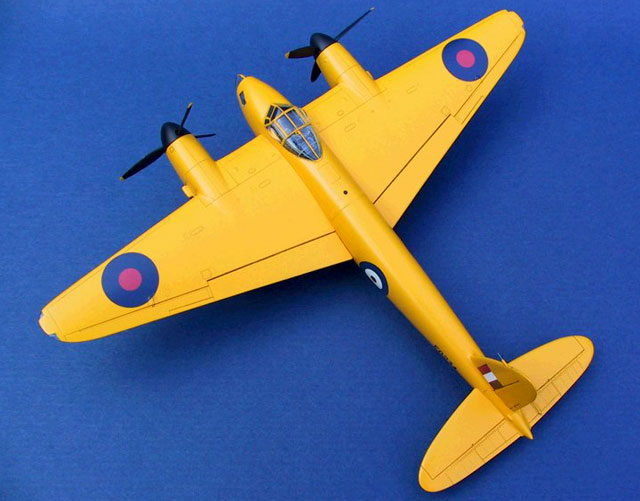
The model was then prepared for decaling by spraying
on two coats of Future floor wax and set aside to dry for 1 week. Decals
came from several sources : Fuselage: 45" Type A1 (blue-white-red) from
the Modeldecal sheet # 39; Upper wing: 54" Type B (blue-red) from Micro
Scale sheet # 72-292; Lower wing: 50" Type A1 (blue-white-red) from Micro
Scale sheet # 72-292; Finflash: 24x27" (blue-white-red) from Aeromaster
sheet 72-003 cut from the Hurricane flash to fit.
The tail codes were graciously provided by my friend
and fellow mosquito modeler Rob de Bie over in the Netherlands. Thanks
Rob. The decals were custom designed and printed by him and went on
perfectly.
After decaling was completed I then gave it a quick
overspray of Future and set it aside to harden. A very light was given to
the panel lines with Windsor-Newton Burnt Umber oil paint thinned with
Turpenoid. This was kept to a minimum as the acft was new and did not get
a chance to collect a lot of grime.
I feel very pleased that this project is finally
finished and is a “bright” addition to my growing 1/72nd scale aircraft
collection. For my next conversion project I plan on doing the Mk XVIII
with the 6 pound Molins gun in the belly using the Tamiya FB MK VI! At
Tsetse Mosquito I can’t wait! And a special thanks to Rob de Bie for all
the help in researching this project and for providing me with the serial
number decals!
Click on the thumbnails
below to view larger images:
Model, Images and Text Copyright © 2003
by Scott Bregi
Page Created 06 October, 2003
Last Updated
17 March, 2004
Back to
HyperScale Main Page |
 Home |
What's New |
Features |
Gallery |
Reviews |
Reference |
Forum |
Search
Home |
What's New |
Features |
Gallery |
Reviews |
Reference |
Forum |
Search