|
1/72 Scale Conversion
DeHavilland
Mosquito T.3
by Lee Coll
|
 |
|
DeHavilland Mosquito T.3 |

Tamiya's
1/72 Scale Mosquito FB.VI is available online from Squadron
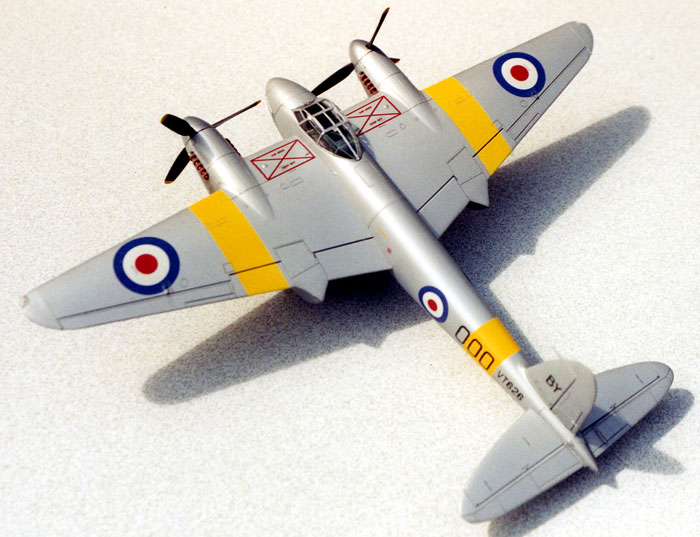
The specific Mosquito subject was found in the Squadron In-Action book,
Mosquito Pt.II that offered an all aluminum doped aircraft with yellow
bands on the fuselage and wings. I couldn’t resist the “000” fuselage
markings of the early FAA Experimental Trials and Development Aircraft, so
with the choice of markings confirmed, I was committed to this paint
scheme.
This project started out with Tamiya's 1/72 scale Mosquito.
Construction of the DeHavilland T.III Mosquito trainer was fairly
straightforward, with some minor modifications to the cockpit, starboard
wing, and nose of the aircraft. Tamiya has done such a wonderful job with
their 1/72 Mosquito kits, it took me less than 8 hours to assemble
everything prior to painting.
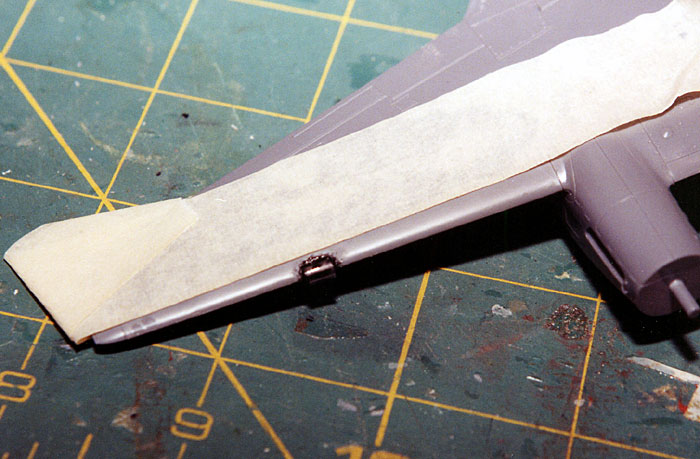
One item requiring some correction was the height of the tail, which is
about 2-3 mm too tall. I overlayed a scan of a Mosquito tail in profile
scaled to match a scan of the kit part, and used this as the basis for my
freehand carving and shaping with various sanding sticks.
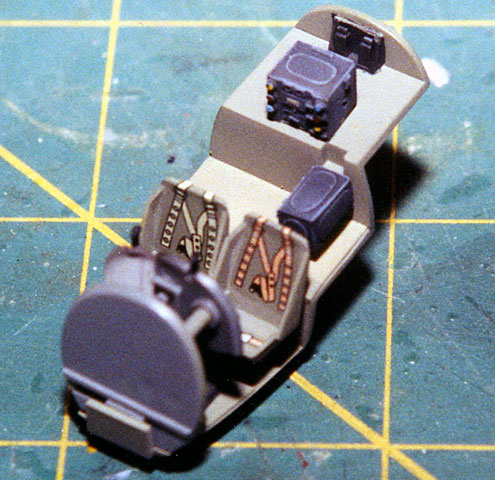
Besides instrument panel information, I couldn’t find a lot on the seat
arrangement for the trainer version, which I understood had both seats at
the same station, unlike the fighter, bomber, or recon aircraft. While not
all were fitted with both gunsights (most without cannons), I chose to
include both sights in this representation.
Aside from plugging the cannon ports (on the nose, and ejector chutes on
the bottom of the fuselage) I included the large leading edge landing
lamps on the starboard fuselage. I punched out two discs from some
Bare-Metal foil and affixed them to the flat side of a piece of clear
sprue. The sprue fit into a receiving notch cut out of the leading edge,
and once glued in place with a little CA, it was all sanded smooth to
match the leading edge profile.
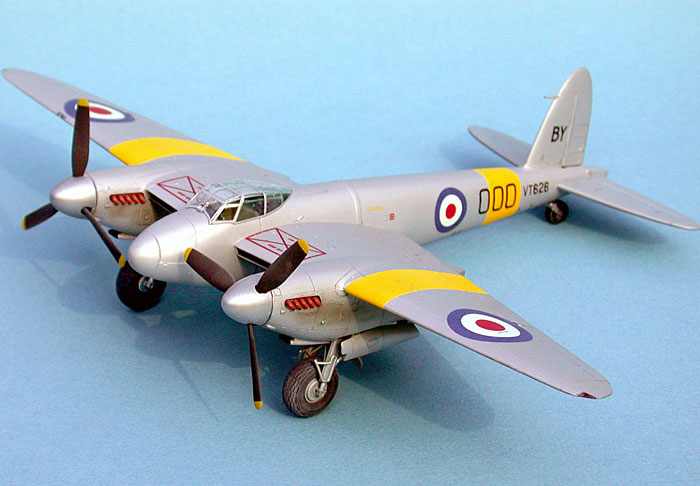
The fit of the major components required no filler, and soon the model
was ready for paint. I had initially used SNJ to cover the entire
airframe; unpolished SNJ has a nice even finish similar to scale aluminum
dope. As it turned out, the bottle of SNJ I used had much of the metallic
pigment separate from the liquid carrier and resulted in minute, but
visible, splotches all over the surface of the model. I was forced to
polish the entire surface with sanding cloths to remove the SNJ. My second
attempt used Floquil Old Silver, which went on without a problem.
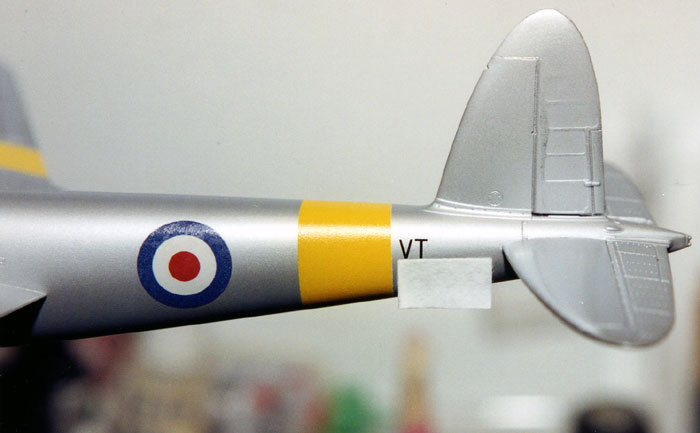
The yellow trainer bands were a mixture of Tamiya Yellow (XF-3), with a
drop of Red (X-7) to reduce the “lemony” effect of the yellow by itself.
The 36” wide bands were masked with Tamiya tape.
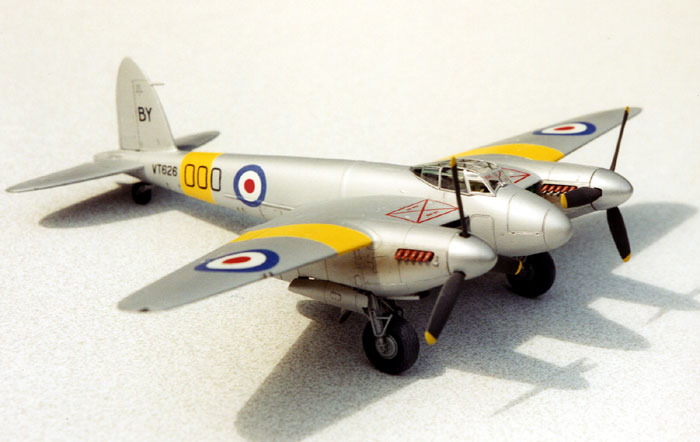
After the paint dried, I coated the model with Future in preparation for
decal application. I used various sources for the roundels and codes, but
did use the Tamiya stencils. The Modeldecal Type D Roundels were easy to
apply, but some residual wax from the protective oversheet they were
packaged with stayed on the surface of the decal. I was forced to cobble
together the “VT626” from Modeldecal and Xtradecal sheets, and used a wet
piece of paper to align their bottoms on the rear fuselage. The “000”
fuselage codes were a unique font, and I’d done these using Illustrator
and printed them on a laser printer onto a sheet of decal film. The “BY”
from RNAS Brawdy was all that was applied to the fin; the aircraft at this
time carried no fin flash.
The decals were sealed with a top coat of Future, and once dry, some
dark grey enamel washes were applied to panel lines and various recesses
on the surface of the model. A final coat of Golden MSA flat/satin coat
was applied, and the model was put aside to dry as subassemblies were
completed. The canopy framing was decal film that had been sprayed Old
Silver at the same time as the airframe. This was not my first time to use
decal film for canopy frames; it offers a really crisp appearance – I
spread this task out over several hours to allow sections to dry before
overlaying adjacent strips.
This was a very satisfying project, made more so by the fact that the
Tamiya kit is so nice and offers no surprises or headaches during
assembly. A very attractive, simple conversion has resulted, with a
minimum of fuss. My advice to anyone trying a similar project is to
consult as many photographs as possible and be wary of published sources,
such as the SAMI book that offered several erroneous call-outs on roundel
diameter and trainer ID band dimensions. Interestingly, this same aircraft
later had the “000” removed and code “422” – again in an odd style –
painted in it’s place.
Click the
thumbnails below to view larger images:
Model, Images and Text Copyright ©
2004 by Lee Coll
except Title Image Copyright ©
2004 by Roy Sutherland
Page Created 28 January, 2004
Last Updated
17 March, 2004
Back to
HyperScale Main Page |
 Home |
What's New |
Features |
Gallery |
Reviews |
Reference |
Forum |
Search
Home |
What's New |
Features |
Gallery |
Reviews |
Reference |
Forum |
Search