|
Hawker P.1127
by Angus McDonald
|
 |
|
Hawker P.1127 |

HyperScale is proudly supported by
Squadron.com
Ahh, the nostalgia, the memories, the kit!
It’s an Airfix series one kit, uh-oh.
It was moulded in the early sixties, uh-oh.
It has: rivets the size of tennis balls; less detail than a blank
sheet of paper; mouldings so soft and indistinct a blob of Blu-tack
has more shape.
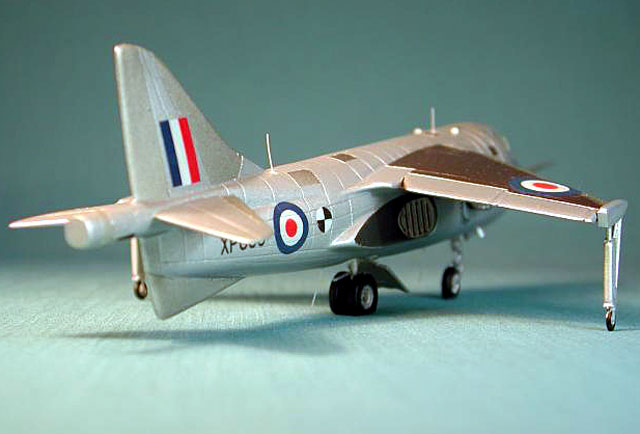
.It is the 1/72 scale Airfix Hawker P.1127
Marvellous!
One of the beauties of Airfix kits is their general cheapness. This
means you can hone your modelling skills by attempting new
techniques and/or practicing old techniques. So it was with the
Hawker P1127.
For a fuller account of the build, see the July 2003 edition of
Scale Aviation Modeller International.
 Those
rivets had to go. Those
rivets had to go.
Out with the scribing tool, credit card
(straight edge, you see) and Dymo tape (curved edges). Then, scribe,
scribe, scribe, wobbly line, swear, scribe, scribe, scribe, more
swearing, etc. Actually, it didn’t take long due to the diminutive
nature of the kit: a couple of hours at most. My biggest mistake was
not sanding down the rivets before scribing, hence the wobbly lines.
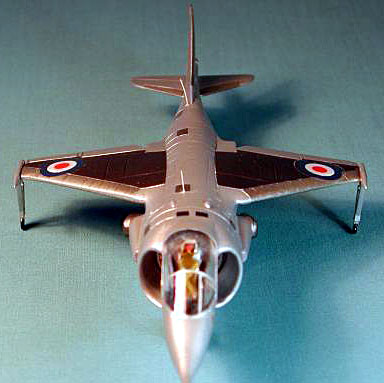
The cockpit is basic (the kit must be over 40 years old), an
armchair seat, a pilot, a control column, a suggestion of a control
panel: No floor, no side detail, nothing. Given the vintage nature
of the kit, the cockpit transparency is large, and amazingly clear
and free of distortion. Even though it is one piece (and so cannot
be posed open without surgery) it does give a clear view of the bare
cockpit interior.
The straight cockpit sides double up as the centre-line baffles,
while the lips of the intakes are razor sharp. In real life, these
baffles are gracefully curved, tapering to a cusp, while the lips
are quite bulbous.
Something had to be done about the cockpit and the intakes. Bits of
card and stretched sprue were press ganged into scratch building a
cockpit interior. The control panel was a decal taken from a Revell
Harrier GR5 kit. I didn’t read the instructions properly and forgot
to apply it to the GR5 model, so I whacked it into the P1127. Sorry
if I have offended any rivet counters, but I can’t tell one control
panel from another.
I had all sorts of fun and games with the centre-line baffles and
intake lips. I decided to build up the intakes with Acryl Red.
Unfortunately I applied it too thickly, and it melted the plastic. I
was gutted. I’d have to prise my wallet open and buy another Hawker
P1127. £1.99 it cost me, plus about £3.00 in petrol.
Second time round, I applied thin (1mm) layers of Acryl Red,
allowing each layer to dry fully before applying the next. Then it
was sand, sand, sand, apply a touch more Acryl Red, sand, sand,
sand. Again, due to the diminutive nature of the kit, it didn’t take
long.
The centre-line baffles were made out of card. The extreme
scientific methodology of ‘trial, trim and fit’ was used to get the
two halves the correct shape. They were super-glued into place, and
faired in with Acryl Red. Unfortunately, I made the centre-line
baffles out of card, as in the cardboard business card variety. When
I smoothed the putty used to fair in the baffles, the card surface
got roughed up. Foolishly, I tried to ignore it. This cost me dear
as I had to remedy the fault.
The fit of the fuselage halves was quite good. Only a small amount
of sanding was required. The nose and tail cones, on the other hand,
required severe trimming with a knife, and sanding down to get a
smooth join. No wheel well detail of any sort. No effort on my part
to add any either.
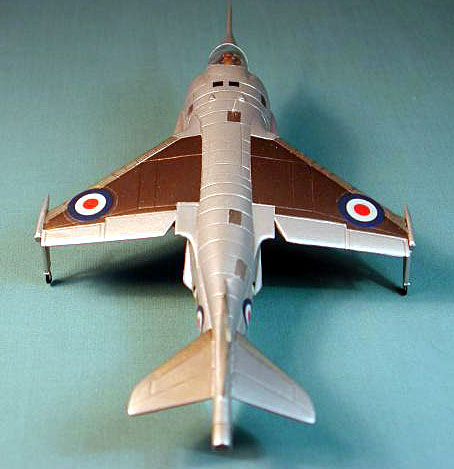
Now the wings. They had the aerodynamic qualities of a brick. A
metal working file was extensively wielded to butcher the wing into
an aerofoil shape. Trust me, its quite fun to attack a plastic kit
in this manner. The fit of the wings to the fuselage was reasonably
good, and a bit more hefty work with the file (and a bit of sand
paper) smoothed everything.
Now, the undercarriage. The term un-mitigated disaster does not come
close to describing the moulding. A considerable amount of paring,
trimming, swearing (at the pattern maker) and sanding, particularly
of the nose gear, is required to get a half decent rendition.
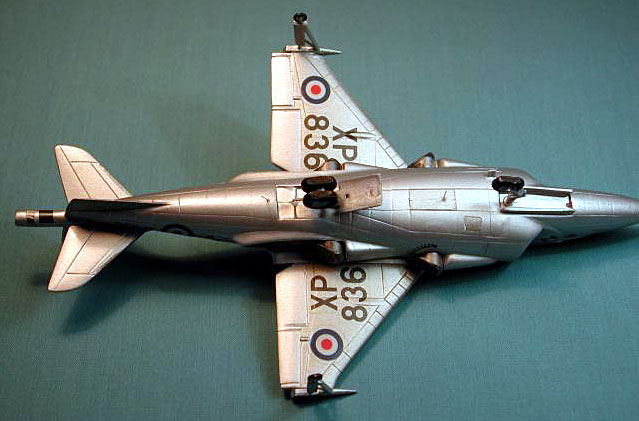
Similarly, the exhaust nozzles (solid) show extreme wear and tear of
the mould. Hack, hack, hack, trim, trim, trim, etc, and you get half
decent nozzles.
Various Halfords metallic sprays were used, its
my first BMF! As they are gloss they provided an ideal surface for
decals. The two original prototypes are provided, and for once, the
Airfix decals were halfway decent, if a little on the thick side.
Respond to setting solutions, they did not. However, with a lot of
trimming and solution, I got them down. Not entirely happy, but
life’s too short to worry.
 Finally,
that undercarriage. I can’t work out if I didn’t give the wings
sufficient anhedral, or if the U/C is too long, or if the outriggers
are not long enough, or a combination of all three, but the net
affect was the wheels on the out riggers did not touch the ground at
the same time as the main U/C. Of course, I only discovered this
when the model was all but finished. Finally,
that undercarriage. I can’t work out if I didn’t give the wings
sufficient anhedral, or if the U/C is too long, or if the outriggers
are not long enough, or a combination of all three, but the net
affect was the wheels on the out riggers did not touch the ground at
the same time as the main U/C. Of course, I only discovered this
when the model was all but finished.
Hmmm, what to do? Well, I carefully put the U/C of the complete
model onto a hot iron for a few seconds, and then trimmed the wheels
to get that pronounced weighted look. Still the outrigger wheels did
not touch the ground.
OK, so then I squashed the U/C onto the hot iron for about 15
seconds, and then trimmed the wheels for that heavily loaded look.
Still the outrigger wheels did not touch the ground.
Finally I forced the model, as hard as I dared, onto the
blisteringly hot iron for about 30 seconds, and then trimmed the
wheels for that flat tire look. One of the outrigger wheels was
still shy of the ground by about 1mm. Close enough!
I had a blast making this kit. The paltry
outlay of £1.99 meant I could experiment with all sorts of
techniques, and if things went wrong (as they did) I could start
again. I screwed up here and there, but learnt a lot.
As for accuracy and shape; say what you will about Airfix on the
whole (apart from a couple of well documented travesties) they do
tend to be accurate. Remembering that they were modelling prototypes
(whose shape changed continually e.g. like having completely
different wing planforms), I personally think they did a fine job.
It looks like a Hawker P1127 and it’s about the right size of a
Hawker P1127.
The somewhat odd shape to the nose is my fault. As for those wheels,
I think I can disguise them if I build a diorama with the aircraft
on grass.
Recommend for those who want something different and are prepared to
do a little modelling or to practise their skills on something
inexpensive. Recommended for kiddies who do not care about rivets
and detail, and simply want to slap something together for
enjoyment.
Images, Text and Model Copyright 2003 by
Angus McDonald
Page Created 27 July, 2003
Last Updated 17 March, 2004
Back to HyperScale
Main Page
|
 Home |
What's New |
Features |
Gallery |
Reviews |
Reference |
Forum |
Search
Home |
What's New |
Features |
Gallery |
Reviews |
Reference |
Forum |
Search