|
PZL P.24G
by
Lukasz Kedzierski
|
 |
|
PZL P.24 |

HyperScale is proudly supported by Squadron
The full history of PZL
P.24G and its use by the Hellenic Air Force in World War 2 were described
in my earlier article about 1:72 scale kit of P.24G, which can be found on
HyperScale.
The 1/48 scale kit was
recently produced by Warrior Models from Poland and was already
presented here on
Hyperscale by Artur Golebiewski.
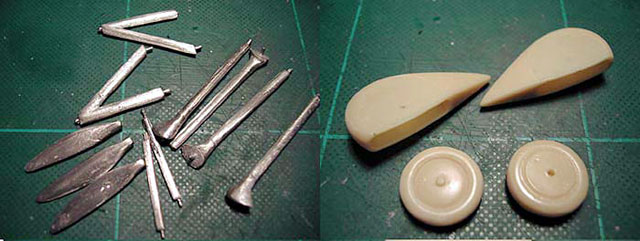
What you get in a box are beautifully done resin parts with a very good
surface detail, 2 vacuformed canopies, white metal parts for the cockpit,
landing gear and wings struts and a nice sheet of decals. The box says you
can build either the P.24G or the cannon armed P.24F, but the cannon pods
are not included in the kit, however, you get the decals for the F version
on the decal sheet.
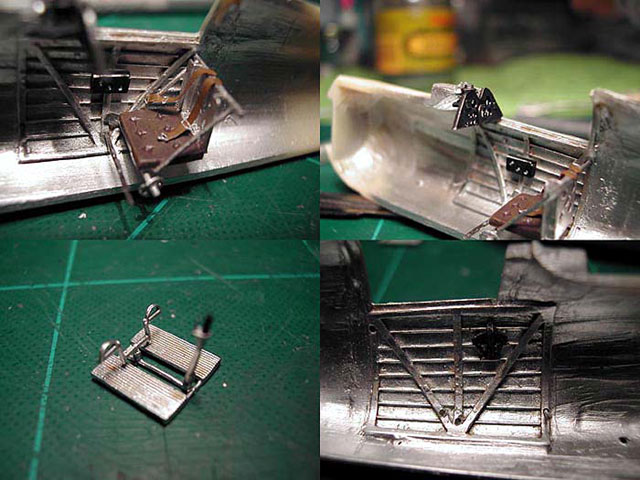
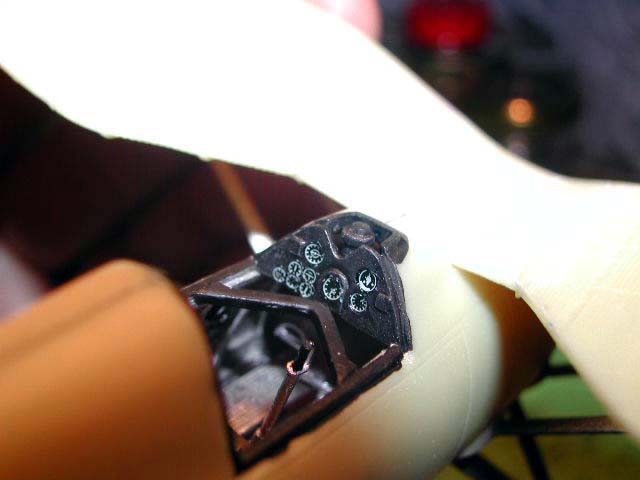
Construction started in the
cockpit, which goes quite nicely together although working with the metal
parts is a bit tricky since they are very soft and easy to damage. The
only additions were photoetched seat belts and instrument faces on the
instrument panel. The former came from a spare Part PE set, while the
latter were cut out from Tamiya D.520 sheet, which contains a nice
instrument panel decal. Each individual face was snuggled down with help
of Aeromaster Sol solution and sealed with a drop of Future. The entire
cockpit was sprayed silver followed by a wash with raw umber.
The construction is then
pretty straight forward, but all the parts require cleaning and
preparation.
The white metal parts need a
lot of sanding and polishing, but I do not recommend the same treatment
for the resin parts. Sanding (with fine wet and dry paper) brought up to
the surface hundreds of little bubbles, which were almost impossible to
fill in later on. It looks like the resin problem and in my opinion it is
the only letdown of the otherwise excellent kit. Initially, I filled the
tiny little holes with a gap filling superglue, but that did not help much
since all of the bubbles showed up again after priming as well as some
more, previously unnoticed. Sanding and spraying again resulted in more
holes, and at tis point it started getting on my nerves. Finally, I
decided to coat the troubled areas with Mr. Surfacer 1000, which was
airbrushed in a few light coats, followed by some gentle sanding with
micromesh. This was then airbrushed with gloss black in preparation for
Alclads. Some bubbles were still there, but I decided not to worry about
that anymore and proceed with the construction.
There is no major problem
fitting the wings, horizontal stabilizers and the engine cowling, but
landing gear was a bit tricky. There are two different types of
undercarriage legs either for the uncovered wheels or for the wheel spats
and they differ slightly. The whole lot needs to be carefully aligned and
it has to be done quickly since the superglue does not leave much room for
any late adjustments. The assembled undercarriage did not look strong
enough for me, but to my surprise it’s still standing without any
problems. I managed to destroy the tail skid and had to scratchbuilt one,
which is not ta difficult thing to do.
There are two vacuformed
canopies included in the kit, but the fit is not that great in this area
and I sealed some gaps with white glue. Radiators on the portside of the
fuselage are done in resin as well, but they can be replaced by
photoetched ones from Part’s PZL P.11c set. I used the resin units
provided in the kit. However, I utilised photoetched gun sight and antenna
masts for the wings and the fin, which came from the aforementioned P.11c
set. The guns are provided as short fragments of steel tubing, but I
decided to use photoetched gun jackets from Part’s Vickers machine gun
set, which necessitated the replacement of the provided tubing with tubing
of a smaller diameter.
From the onset I was
determined to build a NMF aircraft with either Greek or Turkish markings.
In retrospect, I think I should have chosen a camouflaged example given
all the problems I had with the surface preparation. However, I already
had a camouflaged P.24G in 1:72 scale and NMF was my primary choice.
There are two excellent
references for PZL P.24 – Wydawnictwo “Militaria” monograph by Andrzej
Glass and ACE Publication monograph by Przemyslaw Skulski. Both are worth
having since I think they complement each other. The latter has an English
summary and also deals with model kits of PZL P.24 available on the
market.
After some reading it became
apparent that the Turkish Air Force had only two P.24Gs and that the
decals offered in the kit have markings for the preserved example so in
the end I decided to make a Greek aircraft. The decals are of outstanding
quality being very thin (otherwise good luck trying to get them down on
that corrugated wing surface) and of good colour density. There are
markings for the Turkish museum example and plenty of markings for the
Greek P.24s, however, the instructions only show one camouflage scheme,
therefore the references are a must.
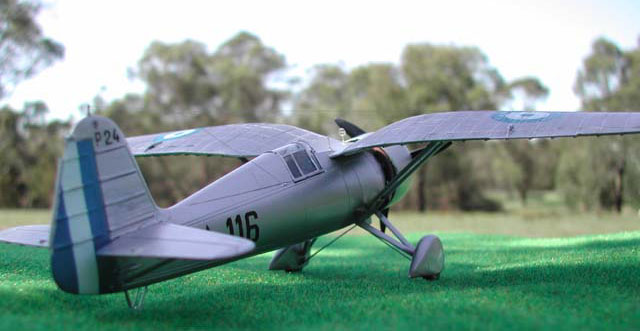
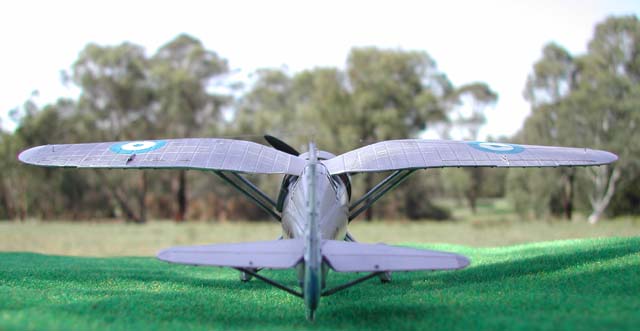
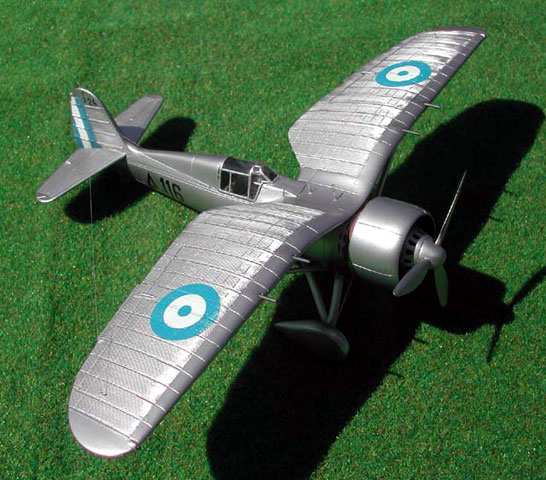
Also note that the NMF
examples carried the Greek national markings on the upper wing surface and
these are not provided on the sheet (mine came courtesy of Artur
Golebiewski).
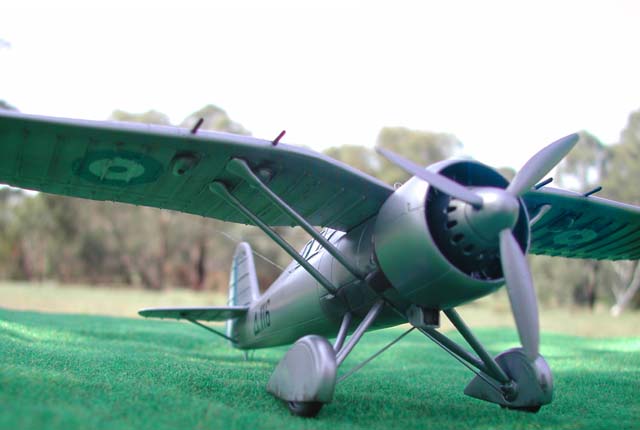
The entire kit was
airbrushed with gloss black, which was then lightly polished with
micromesh. The corrugated wing and stabilizer panels were airbrushed with
Alclad white aluminium, whereas the remaining areas were airbrushed with
Alcald aluminium.
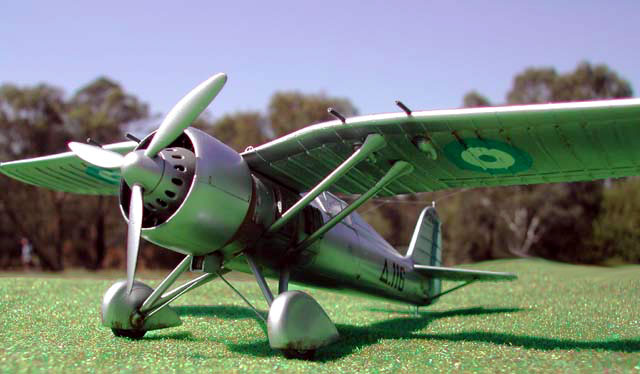
A little bit of a wash was
applied here and there and the rest of weathering is limited to the
exhaust and gun smoke stains and some mud on the wheel spats.
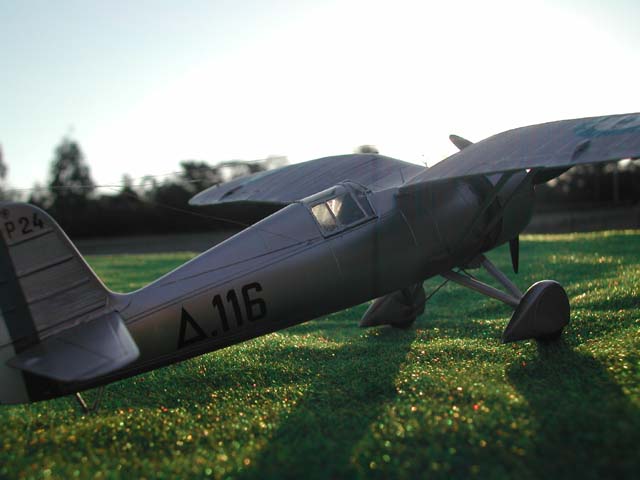
There are a couple of photos
of black Delta 116 and I decided to make this particular example.
Decals
The only problem I
encountered while applying decals was the position of the national
insignia on the upper wing surfaces. While there are photos showing that
the markings were placed in the central position on the lower wing
surfaces there is no evidence to support the placement of the markings on
the upper surfaces. My internet searches came up with nothing, I tried to
contact IPMS Greece, but there was no response and the post on HyperScale
did not bring any solutions.
In the “Militaria” monograph
there is a drawing showing markings on the upper surface in exactly the
same position as the lower surface. I have contacted Przemek Skulski and
asked for help, but he said that it’s impossible to know. They were there
for sure, however, their size and position is unknown and later on these
markings were overpainted when the camouflage was applied to the Greek
P.24s. So I decided to follow “Militaria” drawings and placed decals right
in the middle of the upper wing surfaces.
And here we are, PZL P.24G
in 1/48 scale, an excellent addition to the recently released PZL P.11c.
Click the thumbnails below to view larger
images:
Model,
Images and Text Copyright © 2003 by
Lukasz Kedzierski
Page Created 15 May, 2003
Last Updated
17 March, 2004
Back to
HyperScale Main Page |
 Home |
What's New |
Features |
Gallery |
Reviews |
Reference |
Forum |
Search
Home |
What's New |
Features |
Gallery |
Reviews |
Reference |
Forum |
Search