|
Revell Germany's 1/72 Scale
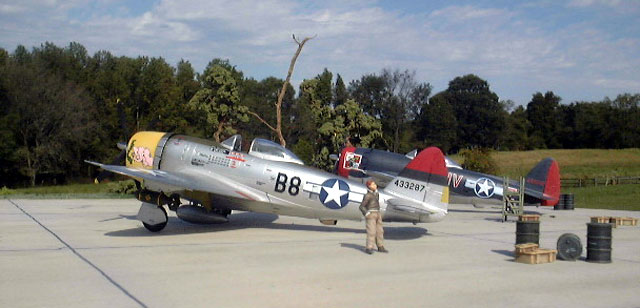
P-47 D and P-47M
Thunderbolts
by Rafe Morrissey
and Floyd S. Werner, Jr.
|

|
|
Republic P-47 D and P-47M
Thunderbolts |

Revell's 1/72 scale P-47D and
P-47M are available online from Squadron.com
The P-47 developmental history has been well covered so we won’t go
into it here. However, it is worth noting the differences between the
D and M models.
With the introduction of the P-51 in the European Theater, P-47 units
transitioned to the Mustang until only the 56th Fighter Group flew the
P-47 in escort duties. Republic sought to improve performance and
endurance to enable the Thunderbolt to better compete in air-to-air
combat.
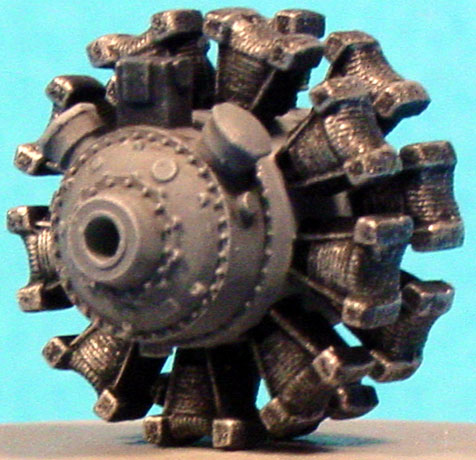
The M model was basically a D model with an upgraded engine. Pratt and
Whitney upgraded the R-2800 to a 57C series with a new supercharger
and gearbox.
For the model builder, the gearbox is the same as the one used on the
F4U-4 Corsair and the P-47N.
The R-2800-57C engine was plagued with developmental problems that
weren’t ironed out until the final months of the war. All but a few
developmental airframes were sent to the 56th Fighter Group in
England.
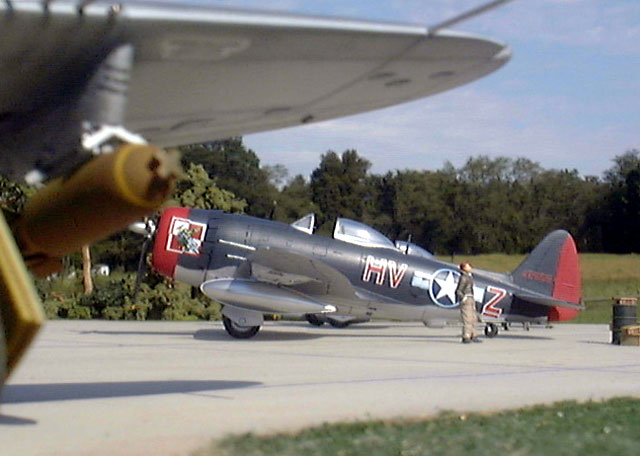
Revell Germany's
1/72 Scale P-47s
|
The Revell of Germany 1/72 scale P-47 kits are little gems.
Available in the US for under $6.00 these kits are a testament to the
state of the art in 1/72nd scale. Molded in light silver or gray
plastic, the two kits differ only in the engine and under wing
ordinance sprue that is included.
The D model offers two 75 gallon and one 108-gallon flat drop tank, as
well as, two 250 lbs bombs.
The M model offers only two long range “P-38” style drop tanks and
under wing rockets, (not a likely weapons load for an air-to-air
fighter in the ETO).
The canopy is a two-piece affair that is rather thick.
The decals for both kits are very thin, opaque and well registered
(the stenciling is legible even in this scale), but a bit brittle.
They wouldn’t stretch enough to suck down into panel lines even with
Solvaset.
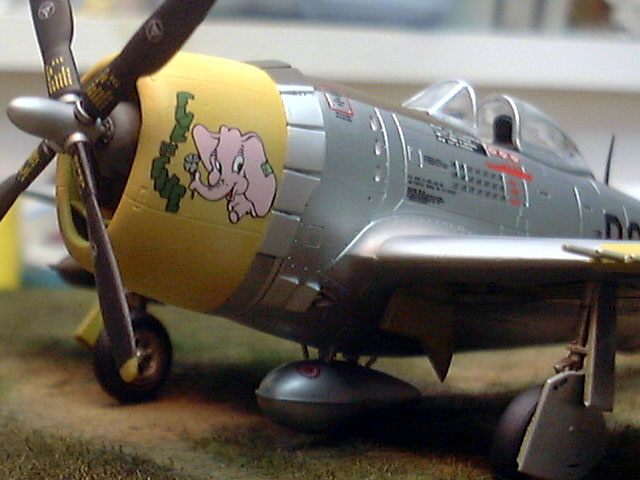
Cockpit
The cockpit is a joy to put together. The detail is equal to or
greater than most 1/48th scale aircraft. It is very complete and
contains all the major elements. It just needs a coat of bronze green.
Floyd used a Humbrol color with a dry brush of zinc chromate yellow
and some silver pencil chipping.
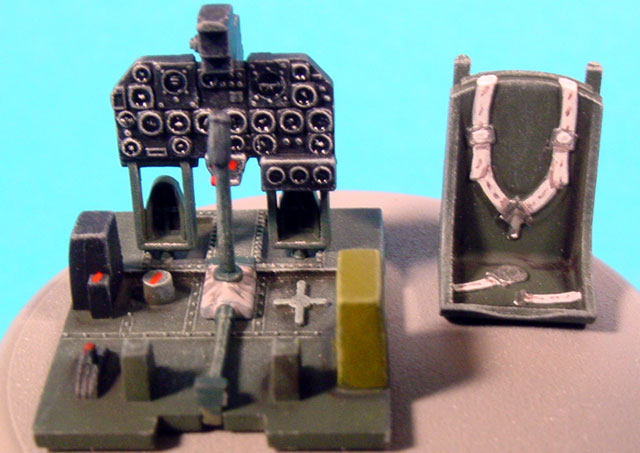
Rafe used a custom mixed color. The instrument panel turned out great
after a coat of flat black paint and a little dry brushing. Details
were picked out with Prismacolor artists’ pencils. The overall effect
once assembled conveys the sense of a great deal of detail with
relatively few parts. There is no need for an aftermarket cockpit set
here.
Fuselage
The fuselage fitted together with no major problems and little need
for any filler. The fillet for the vertical stabilizer is conveniently
provided as a separate part for those who want to do earlier models.
It needs some carving and careful fitting where it meets the
stabilizer. Rafe forgot to test fit it on the P-47M and had to do a
lot of unnecessary shimming and filling to get a good appearance. This
was his slip-up and not a problem with the kit. Floyd on the other
hand installed the antenna so that it sat on the spine. It wasn’t bad
except he forgot that he was going to put on the fillet too. Oh well
it looks better without one anyhow.
One minor gripe is the cowl flaps, which are molded with a significant
gap between them. On the real thing, a spacer would fill these gaps.
Revell doesn’t include them so Rafe fashioned some from .005 sheet
plastic.
Wings and Tail Plane
The wings are excellent and have a great deal of fine engraved detail.
The bomb pylons are separate parts, which is a nice touch again for
anyone wanting to do a P-47 without them. The fit wasn’t the greatest
and Rafe ended up gluing them on and filling the seam with Acryl Blue
Putty and removing the excess with Q-tips soaked in nail polish
remover. This technique worked fine but cutting off the locating pins
and rubbing the pylons over sandpaper held tight against the wing
surface would work just as well.
The guns are molded correctly so that the will be parallel to the
ground- a first for any 1/72nd scale Thunderbolt! Floyd did drill out
the guns but in this small scale only people with a microscope could
see them. Compressibility flaps are molded to the underside of each
wing. They will have to be filed off if a plane without them is to be
modeled.
One of our few minor gripes with the kit is the wheel wells. The kit
includes some really super detail, again the best we’ve seen in any
P-47 kit in this scale. Unfortunately, the model is tooled like the
old Monogram 1/48th scale kit so the seam between the wing and the
fuselage runs right through the corrugated roof of the well. Filling
the seam and maintaining all that detail would be darn near impossible
so Rafe just decided to live with it. Floyd filled it with Blue Acryl
and did his best to make it go away without losing too much detail. If
Revell had tooled this kit like the new 1/48 Tamiya P-47s, their kit
would be nearly perfect.
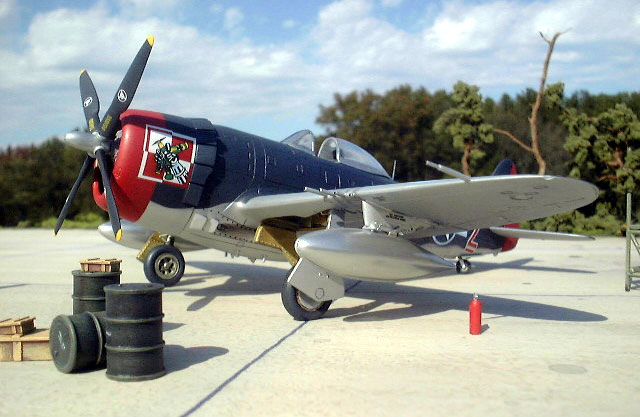
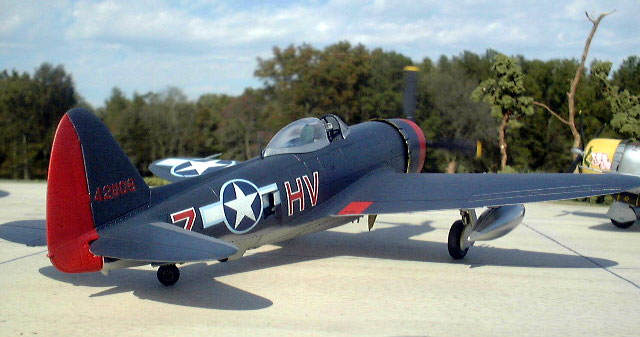
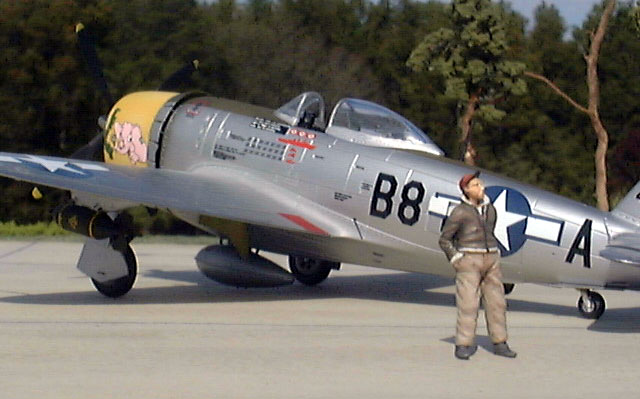
Painting
Rafe first painted red trim on the cowling and the rudder of the P-47M
with Testors Acryl Red with a tad of yellow mixed in. He masked the
areas to remain natural metal because he planned on using Floquil Old
Silver and knew the lacquer-based paint would craze an acrylic
undercoat.
After masking over the red trim, Rafe sprayed a base coat of Old
Silver thinned with a 50/50 mix of lacquer thinner and mineral
spirits. Good ventilation and a mask were a must here! The Floquil
laid down nicely and could be handled within 10 minutes. He let the
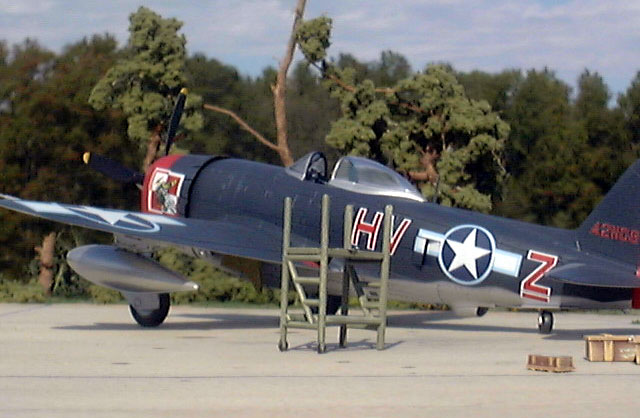
Old Silver dry overnight before masking just to be safe. Rafe masked
the undersurface and leading edge of the wing with drafting tape
before applying a custom mixed color of Acryl Flat Black with a bit of
purple added. When he peeled up the masking Rafe realized that he had
forgotten to mask the leading edge of the horizontal stabilizers. This
caused a real dilemma because you can’t spray the lacquer based Old
Silver over an acrylic top color.
Rafe ended up masking everything but the leading edge and spraying
Pollyscale Bright Silver mixed 50/50 with clear gloss. This turned out
great and the match between the acrylic Pollyscale and lacquer based
Floquil metal colors was perfect.
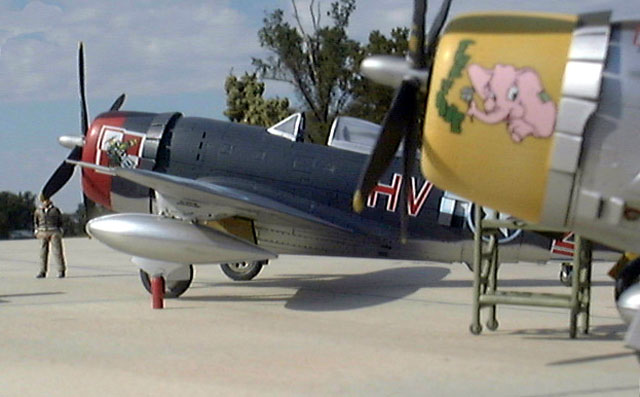
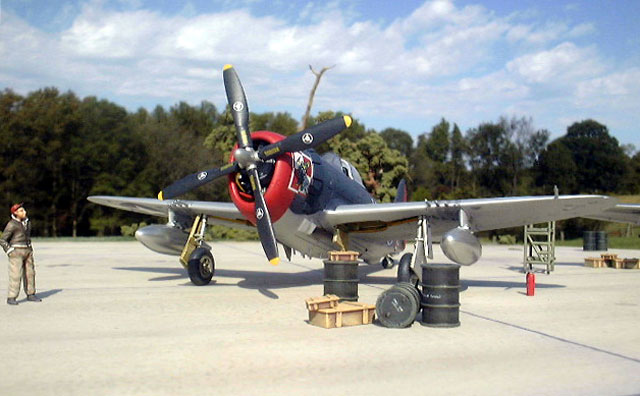
Floyd first sprayed his kit with Future floor wax in preparation for
the Alclad. He painted it with Alclad Aluminum overall. Then he went
back in and painted the control surfaces and select panels with Alclad
Duraluminum for added interest. When that was all dry he painted the
cowling RLM 04 and the black stripes on the tail. The Olive Drab
anti-glare panel was the final touch.
Weathering
The P-47M was only in service for a few months so extreme weathering
wasn’t appropriate. Rafe lightened the base color of the topcoat with
a few drops of white and sprayed this along the very top of the
fuselage and the front edge of the wings. He applied a pastel sludge
wash to the panel lines on the bottom of the plane using a blue gray
color similar to Payne’s Gray.
Control surfaces received a sludge wash with black pastel. He brushed
on exhaust stains with a mix of black and raw umber pastels. Finally,
Rafe added a few ticks with a silver Prismacolor artist’s pencil
around the cockpit, gun bay doors and trailing edge of the wing next
to the fuselage.
Floyd opted for just a light wash of Paynes Grey in the panel lines.
Not wanting to dirty it up too much as he liked it a lot. He did use a
burnt umber wash to discolor the turbosupercharger exhaust.
Finishing Touches
Landing gear, wheel bay doors and under wing ordinance were attached
with white glue. Rafe painted the drop tanks on the P-47M with SNJ and
polished them with aluminum powder to get a high shine to set them
apart from the rather dull finish under the wings. A bit of dry
brushing and a wash of raw umber oil paint brought the tires and
wheels to life.
The P-47 is one of the most well known allied fighters of World War
Two. Up until now, no manufacturer had really done this significant
plane justice. The Revell Germany P-47s give the modeler everything he
or she could ask for in a kit at a great price. Our only hope is that
they will add a razorback version to their excellent line of P-47s and
a series of Bf-109s.
-
"Thunderbolt, The Republic P-47 Thunderbolt in the European Theater"
McDowell, Ernest, Squadron Signal, 1998 ISBN 0-89747-393-0
-
"56th Fighter Group" Davis, Larry, Squadron Signal, 1991 ISBN
0-89747-240-3
Click on the thumbnails
below to view larger images:
Model, Images and Text Copyright © 2003 by
Rafe Morrissey and
Floyd S. Werner Jr.
Page Created 21 November, 2003
Last Updated 17 March, 2004
Back to
HyperScale Main Page
|
 Home |
What's New |
Features |
Gallery |
Reviews |
Reference |
Forum |
Search
Home |
What's New |
Features |
Gallery |
Reviews |
Reference |
Forum |
Search