|
Angel in Harlem
P-51B Mustang
by
Caz Dalton
 |
|
P-51B Mustang
302nd FS, 332nd FG
USAAF 1944 |

Revell
Germany's 1/72 P-51B Mustang is available online from
Squadron.com
Kit Used: 1/72 Revell of Germany, kit no. 04137
On Jul. 19, 1941, the USAAF began a program in Alabama to train black
Americans as military pilots. The Division of Aeronautics of Tuskegee
Institute, the famed school of learning founded by Booker T. Washington in
1881, conducted primary flight training. Once a cadet completed primary
training at Tuskegee's Moton Field, he was sent to nearby Tuskegee Army
Air Field for completion of flight training and for transition to combat
type aircraft. The first classes of Tuskegee airmen were trained to be
fighter pilots for the famous 99th fighter Squadron, slated for combat
duty in North Africa. Additional pilots were assigned to the 322nd Fighter
Group, which flew combat along with the 99th Squadron from bases in Italy.
In September 1943, a twin-engine training program was begun at Tuskegee to
provide bomber pilots. However, World War II ended before these men were
able to get into combat.
By the end of the war, 992 men had graduated from pilot training at
Tuskegee, 450 of whom were sent overseas for combat assignment. During the
same period, approximately 150 lost their lives while in training or on
combat flights.
Additional men were trained at Tuskegee for aircrew and ground crew
duties--flight engineers, gunners, mechanics, armorers, etc. Others were
sent to Texas and New Mexico for training as navigators and bombardiers.
Their success was particularly evident when the 99th was paired with the
79th Fighter Group on October 9, 1943. The 79th was an all-White Squadron
led by Col. Earl Bates. For the first time they were integrated in the
missions to eliminate their German opponents. They were no longer
restricted to escort duties, but instead were assigned to bombing key
German strongholds.
Operation Strangle, the last assignment of the team of the 79th and the
99th marked the end of the 99th Squadron unit. On July 4, 1944, the 99th
was joined into three other Squadrons: the 100th, 301st and the 302nd to
form the 332nd Fighter Group. All three groups were new to the combat
zone, and like the 99th had been trained at the Tuskegee institute. While
their initial union was strained, the new group continued to demonstrate
that they had the commitment, the drive and the technical ability to carry
out successful military assignments.
Consequently, when the war ended, the War Department and the federal
government were forced to reassess their segregated military policy. After
several committee reports, President Truman was forced to issue two
executive orders that effectively paved the way for the integration of the
Air Force.
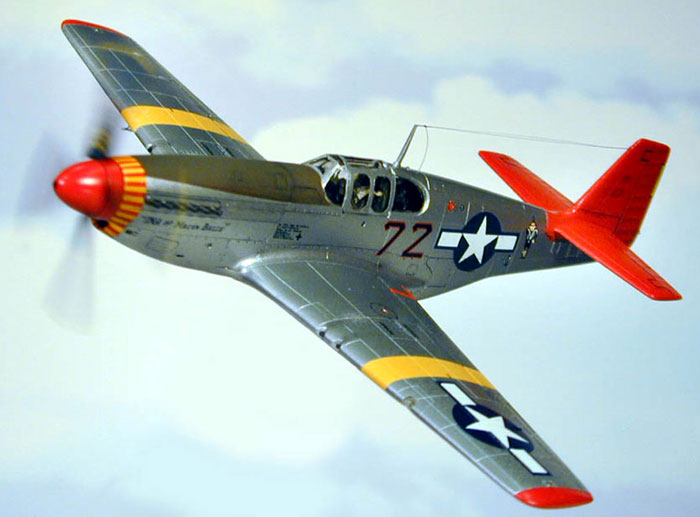
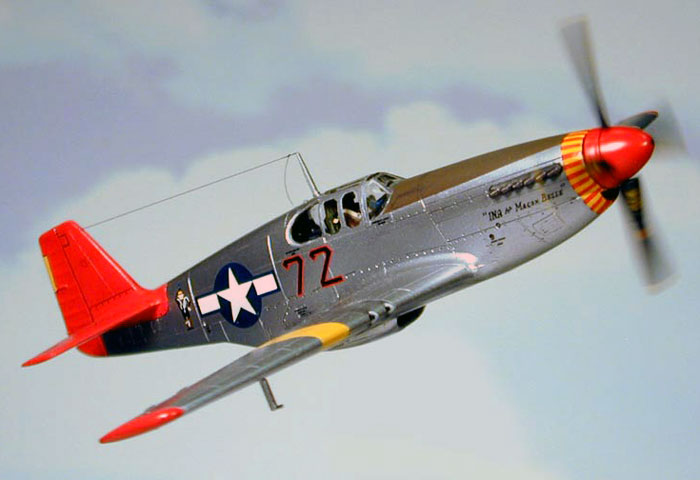
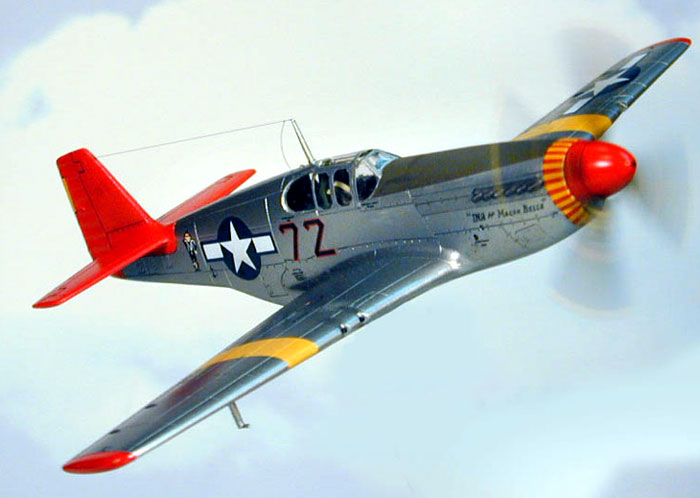
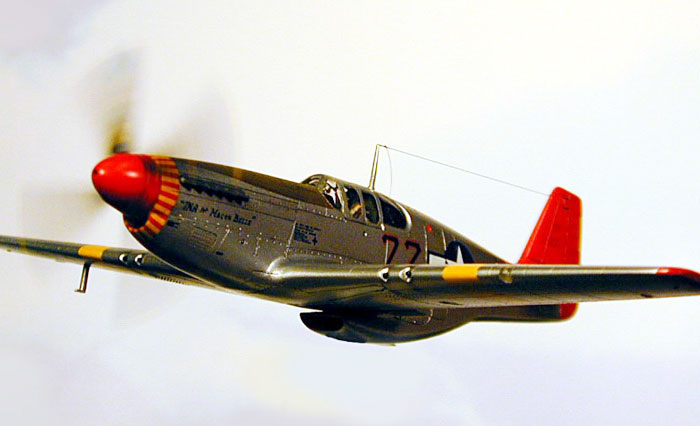
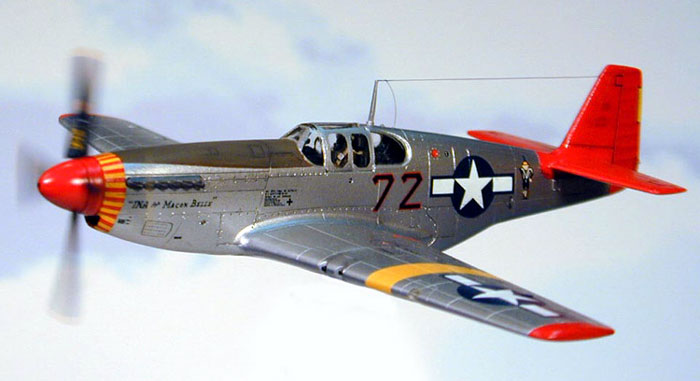
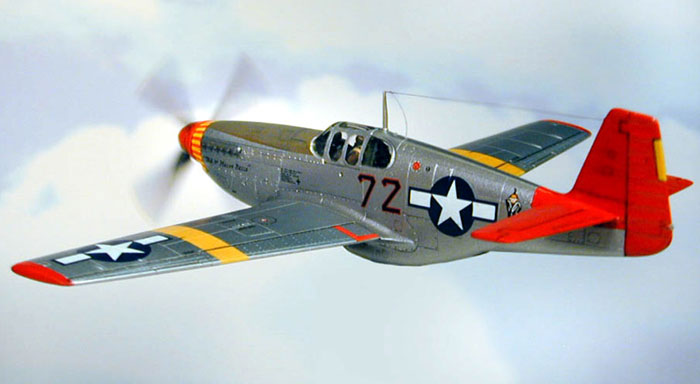
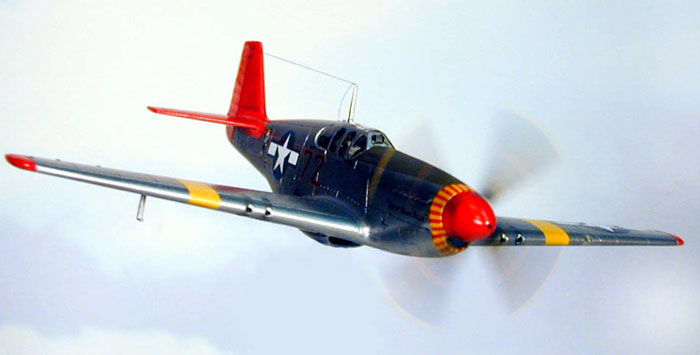
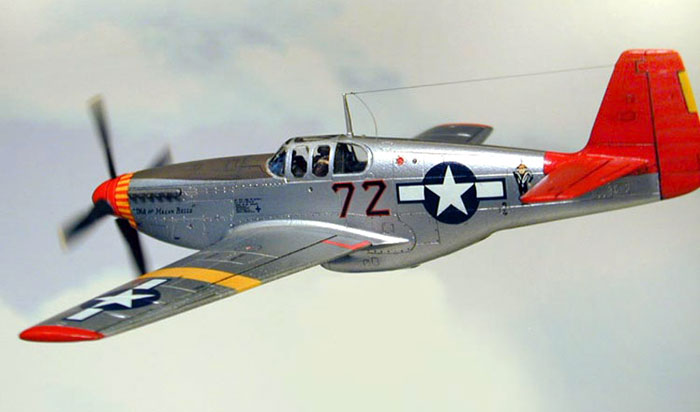
The model represents a P-51B from the 302nd Fighter Squadron of the 332nd
Fighter Group serving bomber escort during 1944. The marking for this
models are the P-51B flown by Lt. Lee “Buddy” Archer. To the credit of the
332nd Fighter Group, not a single bomber was lost to German fighter
aircraft when escorted by them.
This is Revell Germany's 1/72 scale P-51B Mustang, kit no. 04137
Interior
The cockpit is very simple, consisting of a seat/armor plate
combination, cockpit floor, control stick, fuel tank, radio, and front and
rear closures. Rudders were molded to the kits instrument panel, which has
some raised detail, but an instrument panel decal for gauges. I cut the
decal closely into five separate pieces and applied each piece to the
raised detail, after first painting the instrument panel gloss black. A
sealant of clear flat was applied and then a finish of clear flat. Gauges
were given a drop of Future. I cut the molded in reflector on the gunsight
and replaced it with a piece of sheet styrene.
A little detail is molded into each fuselage half also. I painted all
interior pieces save the instrument panel Polly Scale Interior Green. The
cockpit flooring was painted wood, giver an umber wash in the recesses and
highlighted with dark brown. Radio and control boxes were brushed Polly
Scale Steam Power Black. Some details were picked out in red, yellow,
white, and silver. A few Reheat Control and Data Placards were utilized to
spice things up after spraying a prep coat of clear gloss. I finished with
a coat of clear flat. The seat bottom and rear cushion were painted Polly
Scale Olive Drab with the headrest painted MM Leather. I had to cut down
the sides of the seat to accept my pilot. I didn’t bother painting the
harness, as I used a harness on my pilot made from sanded masking tape.
The pilot is a PJ Productions resin figure and I can only highly recommend
them. The arms are separate and this enable one to simulate the pilot
actually holding the stick and not masturbating, ala Airfx and early
Hasegawa. I primed the figure in light gray and brush painted it staring
with light colors and working up to darker colors. There are 12 different
paints used in the general painting, four more were used in washes and
highlights.
Oh, I also paint applied some Tamiya Clear Smoke to the goggle lens after
all finish painting. This is the pilot all glossed up and awaiting washes.
I also printed off a radiator grill for the rear of the intercooler,
although one cannot even see it with the door closed. C’est la Vie!
Landing Gear:
What! I don’t need not steenkin’ landing gear! When one of my MUG
buddies sent this little kit to me and I test fitted the doors, I said,
“In-flight”. The fit of the main and rear doors was spot on. Only a couple
of small sink marks in the main doors required any sanding.
Exhausts:
Be forewarned here, the fit of either the shrouded or unshrouded
exhausts will need some surgery. They stick out too far without trimming
about 1/32-in off the side towards the fuselage. One can sand it with
coarse paper or cut, but it must be done, otherwise the exhausts will
stick out like a sore thumb.
I had to use the shrouded exhausts for my model. They were first painted
steam power black, then Polly Scale Graphite. The individual exhausts were
paint Gunze Burnt Iron, followed by a wash of Pactra Rust. After all was
dry, the end of each exhaust was picked out with a 0.005-in tech pen and
black ink. The exhausts were set aside for final assembly and simply
Elmered in.
Propeller and Spinner:
Kind of a problem child here also. I really didn’t like the way RoG
engineered the fit of the individual propeller blades to the two spinner
pieces. I cut the plastic mounting stubs on the props off and replaced
them with 0.025 wire. The spinner pieces were cemented and the fit was not
terrific either. But it was an easy fix. I filled the ill fitting join
with CAN and after super gluing my 1/16th-in brass rod to the back of the
spinner, chucked it in my Dremel tool and gave the piece a good spin and
sand. I worked down to fine used sand paper, always checking to make sure
I did not sand too much where the spinner fit the fuselage. After sanding
the spinner to my liking, I took a stiff drink and chucked the spinning in
my old motor lathe. I then spun it and lightly rested a #11 blade against
it to rescribe the filled in line. Lastly, new holes were drilled to
accept the props. Spinner and props were painted separately and the props
cemented in the final assembly with a dab of Elmers. I had to maintain a
rather large pitch so that the prop would spin using my hair dryer for the
in-flight photos.
The spinner was first painted Polly Scale Reefer White, then Gunze Primary
red #3. Prop blades were painted steam power black with the tips in reefer
yellow. A small Waldron punched disk of black trim film was used for the
spinner’s front.
Machine Guns, Land Lighting Light, etc:
I replaced the poorly molded machine gun stubs, as they interfered with
sanding in the first place. I used 25-gauge hypo tubing stubs Elmered into
predrilled holes in the final assembly. Guns were first painted steam
power black, followed by MM Acryl II Gunmetal.
I used a piece of styrene tube to simulate the landing light. After
painting it silver and cementing it in the opening between the wing, I
applied a drop of Krystal Kleer for the light’s lens. I then super glued
the ill fitting kit’s glazing, sanded it smooth and polished it with
Meguiar’s Mirror Glaze #7 and # 3, respectively. It was then masked for
painting, along with the canopy with Bare-metal foil.
The kit’s antenna and pitot proved no problem and were used, but I painted
these items separately and attached them in the final assembly. The
antenna wire is my trusted old 0.008-in smoke-colored invisible thread
Basic Assembly:
Fit of the basic parts is excellent. I had no problems with the fit of
the cockpit to fuselage halves, fuselage halves, wing halves, wing to
fuselage fit, horizontal tails, or the nose and intercooler intakes. Great
work here Revell. The canopy, however, was not so good. Engraving for the
framework is way oversized and though fit is good, it could be better. My
recommendation would be to get a Squadron replacement from Tue Details.
Engravings on the kit are petite with most recessed, but some raised where
required, so watch your sanding. Done correctly, no filler should be
required either.
As mentioned, the canopy and landing light were masked with bare-metal
foil.
Painting
 The
entire assembly was primed in Polly Sale Reefer White and this rubbed out,
reprimed and rubbed out again (used an old T-shirt for this). Once
finished, the wings were masked and the yellow stripes painted using Polly
Scale Reefer Yellow. Once dry, the yellow was masked and the wing tips and
tail were painted Gunze Primary Red #3. Next, the anti-glare panel area
was masked off and this painted Polly Scale Olive Drab. All was allowed to
dry a day and I masked the tails, wingtips, stripes, and anti-glare panel.
The entire assembly was then given two coats of Alcad II Aluminum, which I
let dry for an hour. I then masked the wings and painted the fuselage
Alcad II Highly Polished Aluminum. I let this dry for an hour, rubbed it
out a bit, masked around the exhausts areas and painted the panels Alcad
II Dark Aluminum. All masking was removed saved the bare metal and the
model was given two coats of clear gloss for decal prep. The
entire assembly was primed in Polly Sale Reefer White and this rubbed out,
reprimed and rubbed out again (used an old T-shirt for this). Once
finished, the wings were masked and the yellow stripes painted using Polly
Scale Reefer Yellow. Once dry, the yellow was masked and the wing tips and
tail were painted Gunze Primary Red #3. Next, the anti-glare panel area
was masked off and this painted Polly Scale Olive Drab. All was allowed to
dry a day and I masked the tails, wingtips, stripes, and anti-glare panel.
The entire assembly was then given two coats of Alcad II Aluminum, which I
let dry for an hour. I then masked the wings and painted the fuselage
Alcad II Highly Polished Aluminum. I let this dry for an hour, rubbed it
out a bit, masked around the exhausts areas and painted the panels Alcad
II Dark Aluminum. All masking was removed saved the bare metal and the
model was given two coats of clear gloss for decal prep.
Decals
Decals are from AeroMaster’s Tuskegee Airmen sheet, no. 72-175 and are
excellent. I was expecting problems with the yellow and red nose stripe,
but applied one at a time and keeping a constant watch, using a nudge
here, a bit of MicroSol, everything worked supped. I only had to touch up
two places where the two decals joined. Nice work gang. The remainder of
the decals were a piece of cake; apply, position, check, relax. I just
love decals this good.
After letting the decals dry a day, I seal all in a coat of clear gloss.
Ink washes were used for the control surfaces and all engine, cooling
vents, and access panels on the fuselage. Wings access panels were not
washed, as on actual Mustangs, these were sealed with Aluminum dope. The
canopy’s masking was removed and the canopy cleaned with a Q-tip and warm
water, I do not recommend polishing out a canopy with Mequire’s Mirror
Glaze if it has a NMF finish, regardless of the brand of paint used. After
cleaning the canopy and landing light lens, the clear parts were given a
brushing of Future.
Weathering
I did only a smidgen of weathering, using black and gray pastel chalk
for the exhausts and some black for the machine gun cordite stains. A tiny
bit of a mixture of red and black ink was applied to the intercooler
exhaust rear. Wing tip navigation lights were painted clear red on the
port wing and clear green starboard. Two Waldron punched disks treated to
a drop of Krystal Kleer form the beacon lights on the fuselage behind the
antenna and on the rudder.
All told, this was a brilliant kit, I thought it better than Hasegawa,
with the only flaw being the clear parts and the error in the exhausts,
which was an easy fix. Should one wish a gear down version, unfortunately
the kit suffers from the same shallow wheel bay as Hasegawa’s offering.
I’d like to thank Bill Leyh for sending this kit to me and sparking my
muse into doing a Tuskegee Airmen and for the fellas at MUG that voted Lee
Archer’s aircraft as the one I should do. Hope I didn’t let anyone down.
Click the thumbnails below
to view larger images:
Model,
Images and Article Copyright © 2003 by
Caz Dalton
Page Created 13 December 2003
Last updated
17 March 2004
Back to
HyperScale Main Page
Back to
Features Page |
 Home |
What's New |
Features |
Gallery |
Reviews |
Reference |
Forum |
Search
Home |
What's New |
Features |
Gallery |
Reviews |
Reference |
Forum |
Search