|
YP-59 Airacomet
by Allen K. Hess
|
|
|
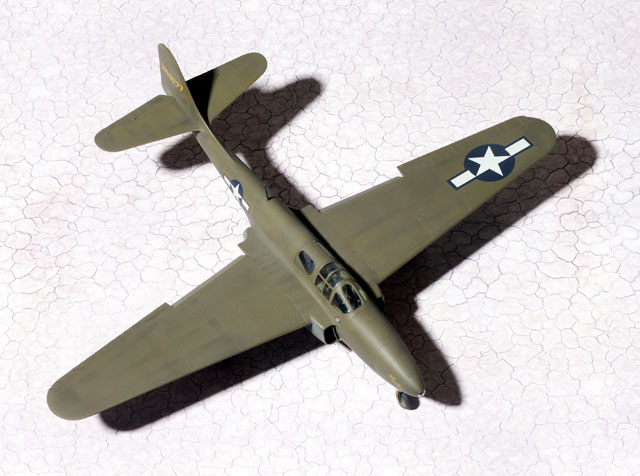
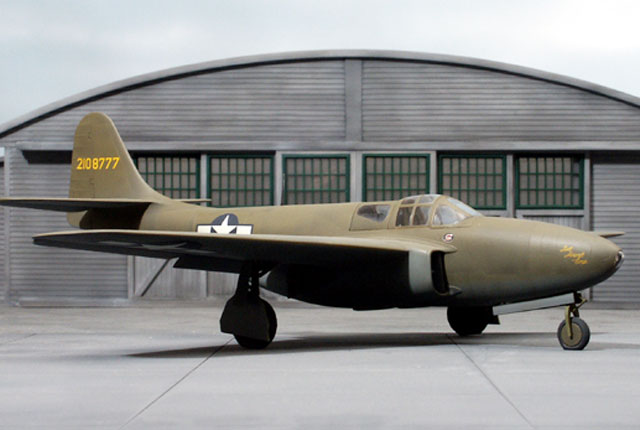
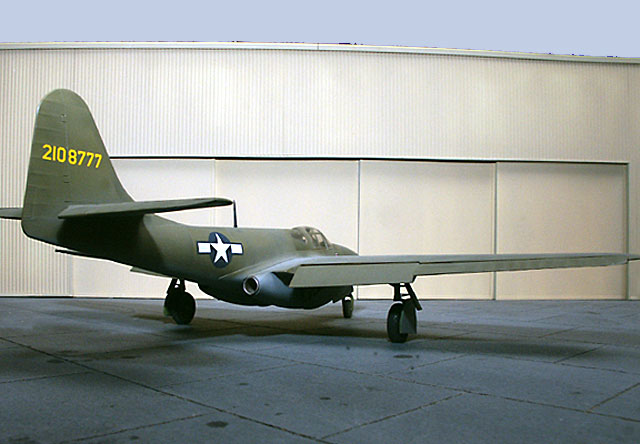
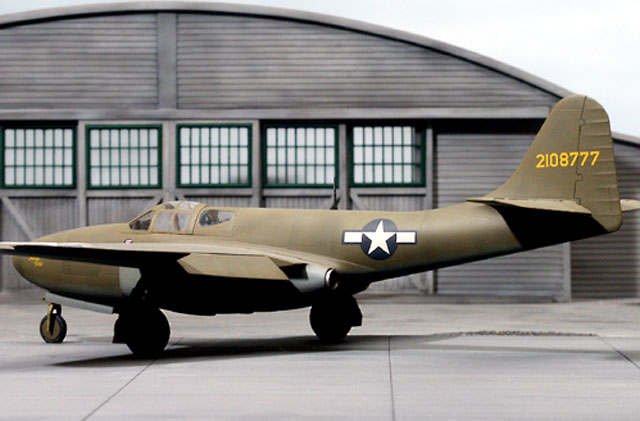
YP-59 Airacomet |

Hobbycraft's
1/48 scale YP-59 Airacomet is available online from Squadron
I started Hobbycraft's new 1/48 scale YP-59 Airacomet when it was first
released, hoping it would take a couple of weeks.
Six months later, after a much rework, many interruptions, much
frustration, and a lot of "I don't want to work on it" days, it
is finally finished.
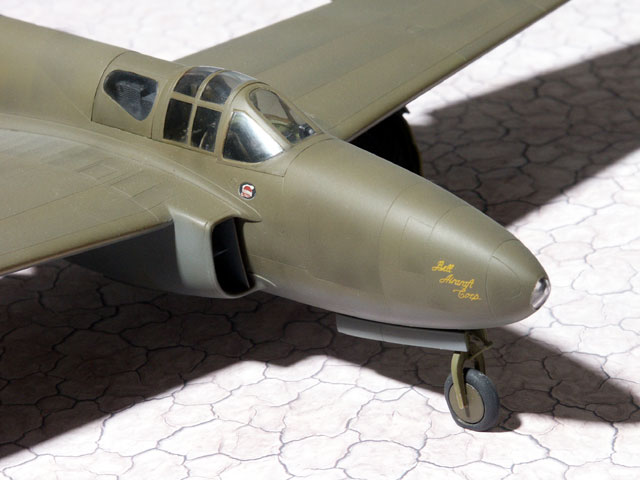
I wanted to keep it quick and simple but did add the wheels and
cockpit set from "True Details" and "Cutting Edge" respectively. Both
are very well done and added some extra detail to the model, however I
had some trouble closing the fuselage around the resin cockpit tub and I
would highly recommend a lot more test fitting than I took the time to
do.I also felt that the bulge on the bottom of the tires was a little
excessive so I cut that down with a little scraping and sanding.
The kit looks excellent in the box, crisply molded and finely recessed
panel lines, so it was a big disappointment when things didn't go
together all that well. The model is made to accommodate multiple
versions, adding an extra joint in the rear fuselage and wing tip that
wasn't all that good. By the time I was done filling and sanding I had
to rescribe a good portion of the panel lines.
There were also some things looked like the manufacturer just didn't
bother to finish.
-
The wing tip ( which on this version
includes a cut out for the aileron) should have a "V" on the
trailing edge to match the rest of the wing and to provide a uniform fit
for the aileron (molded separately). Instead it is molded with a half
"V" on top and nothing on the bottom leaving a 1/16 gap. this is easily
fixed with a scrap piece of plastic but it's not a really good design on
the manufacture's part.
-
The intake splitter should match the
contour of the fuselage but is molded flat and has no mounting
provisions, as well as being too thick at the leading edge. This
required sanding to make it thinner, bending to match the fuselage,
adding strip plastic to the inside to provide a gap with the fuselage,
plus a lot of test fitting and tweaking.
-
The top outside corner of the inlet forms a
sharp corner, not a smooth radius as it should be...more sanding and
filling required.
-
The leading edge of the horizontal tail
doesn't blend into the vertical tail with a smoothly curved fillet...
more rework.
-
The canopy is excellent. A little filling
was necessary around windshield but the two rear pieces fit perfectly in
the closed position. The problem is that for the open position the
thickness of the plastic won't allow the forward piece to slide over the
rear without it raising up above the rails. Maybe with a little pressure
and glue it could be forced down into the proper position, but at this
stage I didn't want to push my luck and elected for the cosed position.
Happily the fit was so good that I didn't need any glue leaving me the
option to open it later if I should want to.
I also had a major problem with the wing dihedral, but I don't know if
was inherent in the kit, or caused by the resin cockpit tub making the
fuselage too wide. The problem occurred because the bottom half of the
wing and nacelle is molded as one piece, with each each upper wing piece
butting up against the side of the fuselage. If the fuselage is wider than
the space between the upper wing panels it forces them apart causing the
wing to droop. The fix was to scrape about 1/32" off of the inside edge of
each upper wing panel.

The upper wing fillet is very well designed to overhang the wing and
once enough material had been scraped away to correct the dihedral angle
it fit perfectly and required no filling. The underside required some
filling and sanding but wasn't too bad. I would strongly recommend dry
fitting the fuselage halves (with the cockpit tub in place), to the wing
assembly. It would be much easier to fix any problems before things are
glued together.
After a lot of primer, sanding and rescribing, I finally painted the
model with dark gray and khaki Gunze "Mr Color" (lacquer), followed by
Testor's Glosscoat to give the decals a good surface to stick to.
I normally use oil base, gloss paint to eliminate the glosscoat step but I
was having trouble mixing the right shade of green when I found some Gunze
that had just the look I was after so I used it instead.
 I
used the kit decals which went on without any problem, then oversprayed
them with Glosscoat to match the sheen of the rest of the model. Testor's
Dullcoat, with a little dark olive drab added, was then applied for
weathering and to accent the panel lines. A final application of Dullcoat
with a little dark gray added for a faded look was the final topcoat. I
used the kit decals which went on without any problem, then oversprayed
them with Glosscoat to match the sheen of the rest of the model. Testor's
Dullcoat, with a little dark olive drab added, was then applied for
weathering and to accent the panel lines. A final application of Dullcoat
with a little dark gray added for a faded look was the final topcoat.
As I said the kit needs a lot of work, but I think if you know this
going in would cause a lot less frustration. I have seen pictures of
several built up models that looked really good and with enough care and
patience it can be an attractive addition to any collection.
Click the
thumbnails below to view larger images:
Model, Images and Text Copyright ©
2004 by Allen K. Hess
Page Created 02 January, 2004
Last Updated
17 March, 2004
Back to
HyperScale Main Page |
 Home |
What's New |
Features |
Gallery |
Reviews |
Reference |
Forum |
Search
Home |
What's New |
Features |
Gallery |
Reviews |
Reference |
Forum |
Search