|
PWS-26
by
Lukasz Kedzierski
|
 |
|
PWS-26 Advanced Trainer |

HyperScale is proudly supported by Squadron
Before WWII, Polish pilots
were trained on two major types of trainer aircraft - the RWD-8 and
PWS-26. The basic training was done on RWD-8 then pilots moved to the
advanced training on PWS-26.
Although only 320 aircraft were built (compared to 600 RWD-8s) the
aircraft was the ultimate development of a long family of trainers
initiated in 1929 by PWS-12 designed by Augustyn Zdaniewski. PWS-12 was
followed by PWS-12bis, PWS-14, PWS-16 and PWS-16bis. PWS-26 was designed
at the beginning of 1935 and the concept was based on PWS-16bis. The major
changes included overall strengthening of the airframe, which allowed
performing fast diving and training in dive-bombing. The aircraft could
perform a full set of advanced aerobatics, which was not possible on the
previous models PWS-16 and PWS-16bis. The aircraft also carried a single
7.92 mm machine gun and a gun camera.
The type was introduced into production in 1936 and 320 aircraft were
built before the onset of the war. As the type was being introduced into
service Augustn Zdaniewski was designing its successors PWS-27 and PWS-28,
however, the outbreak of hostilities in September 1939 did not let him
finish his work. After the war, for today unknown reasons, the communist
regime did not let him go back to the aviation industry. Zdaniewski
retired in 1968 and died in Poland in 1988.
The PWS-26 was used in all flying schools in the pre-war Poland. Apart
from Polish pilots the Bulgarian Air Force also trained a group of pilots
on the type during the period of May-June 1939 as a part of a contract for
the purchase of PZL P.43 bombers.
In September 1939, most of PWS-26 were destroyed on the ground during the
first days of war. Those which survived were mainly used for liaison and
reconnaissance duties, but some of the crews from the 13th training
squadron attached to the Army Group "Polesie" used their PWS-26 to bomb
German units using hand grenades. PWS-26 from this unit were the last
aircraft bearing the Polish checkers to be seen on the Polish skies in
1939. After the war some PWS-26 were flown by the Polish pilots to Rumania
where all of the aircraft were ceased by the Rumanian authorities and
incorporated into the Royal Rumanian Air Force. Those captured by Germans
were sold to Rumania later on (30 aircraft). One PWS-26 survived the war
and today is a part of the collection of the Aviation Museum in Krakow.
There is only one kit of
PWS-26 in 1/48 scale – Broplan vacuform kit.
I do have a few of different Broplan’s kits and this is a second one I
built. They do offer interesting subjects, which nobody else is going to
make however, some serious work is required to build them. In case of
PWS-26 all the major components are vacuformed plus there are some
injection moulded parts for the wing and landing gear struts, cockpit and
some other detail. These are hardly usable, but after extensive clean up
can be utilised. The instructions show that two windshields are part of
the kit, but I could not find any in my PWS-26. There is also a decal
sheet with markings for two aircraft, but the decals are unusable (bit
more about that later on).
As with all vacs the parts were cleaned up prior to any construction.
Fuselage and Cockpit
The fuselage halves fitted
together very well, but I must say I do not like the surface detail on the
fuselage. The panel lines are very uneven and the fabric effect is not
that well represented.
On the other hand, the wings
are done very well with nice fabric and rib effect on the upper surfaces.
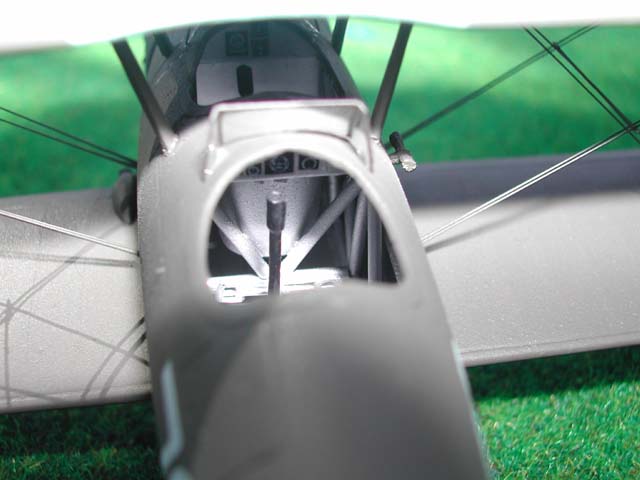
I decided to scratchbuild the cockpit interior and assembled together a
tubular frame from Evergreen styrene rods based on drawings.
To this I added seats with
seat belts made from aluminium foil and instrument panels with instrument
faces cut out from spare decals (I think it was Tamiya’s F4U). The cockpit
was supplemented with two control sticks and rudder pedals. The interior
was airbrushed with Humbrol aluminium and after some surgery I fitted it
into the fuselage.
Because the fuselage halves
were a bit flimsy and thin I strengthened them with two bulkheads cut
according to drawings and positioned them behind and in front of the
cockpit tubular frame. As I mentioned before, the fuselage halves fitted
together without any problems, although some putty was required on the
joints. It’s a vacuformed kit after all.
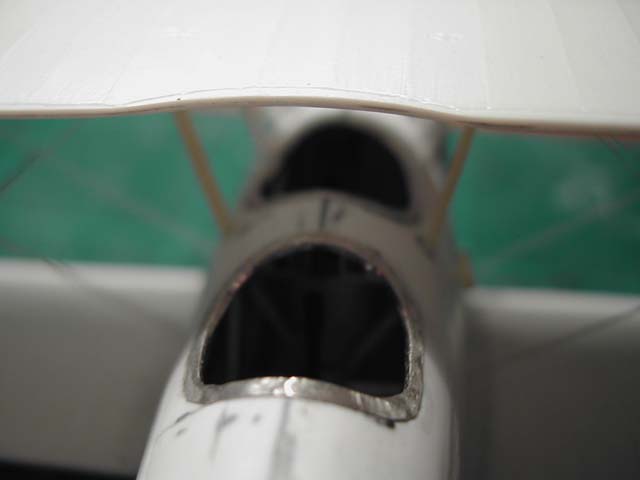
The lining around cockpit
openings was manufactured from the aluminium foil from a wine bottle.
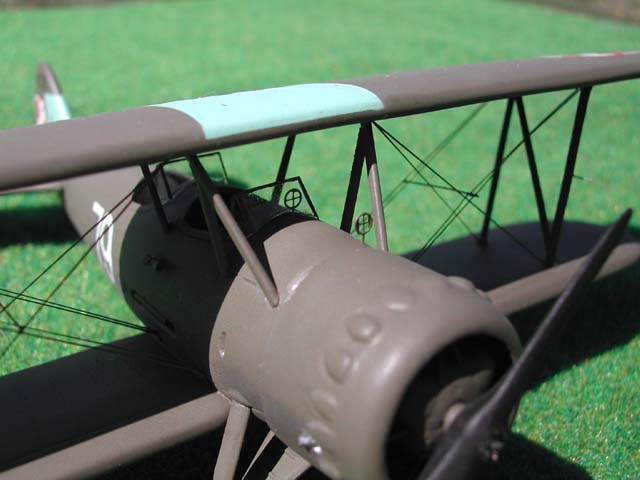
Wings
The upper wing and both
lower wings were strengthened with lengths of sprue and required a smear
of Mr. Surfacer here and there to fill up some minor gaps in the leading
edge. That was also the case with the horizontal stabilizers.
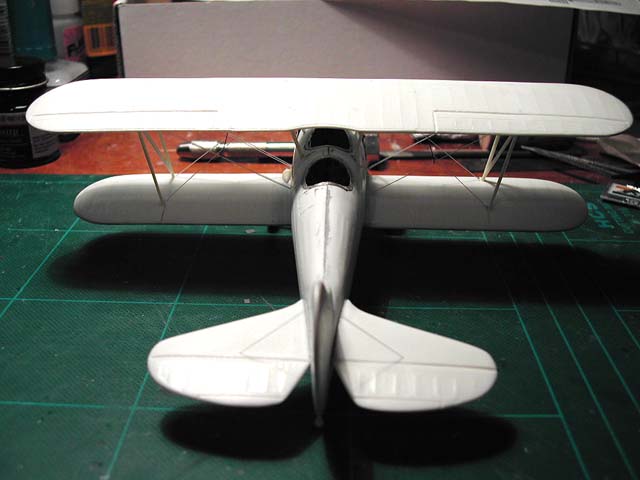
I decided to use the
injection moulded parts and cleaned up the wing struts and landing gear
supports along with wheels. At the end I was happy with the final effect
however, I had to scratchbuilt the short struts which are positioned
between the fuselage and the upper wing. The engine and engine cowling are
the worst parts of the kit.
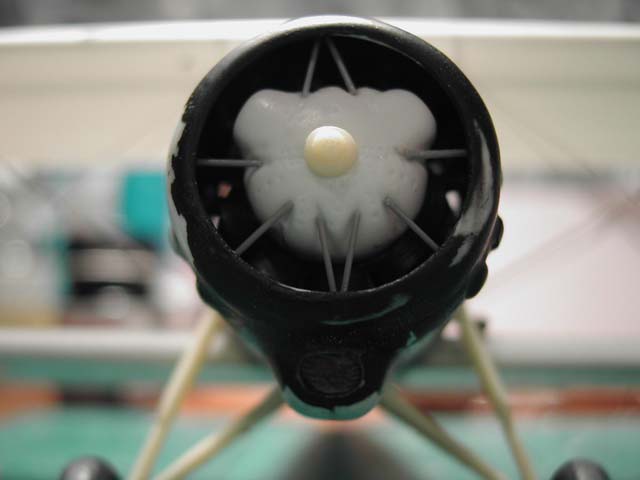
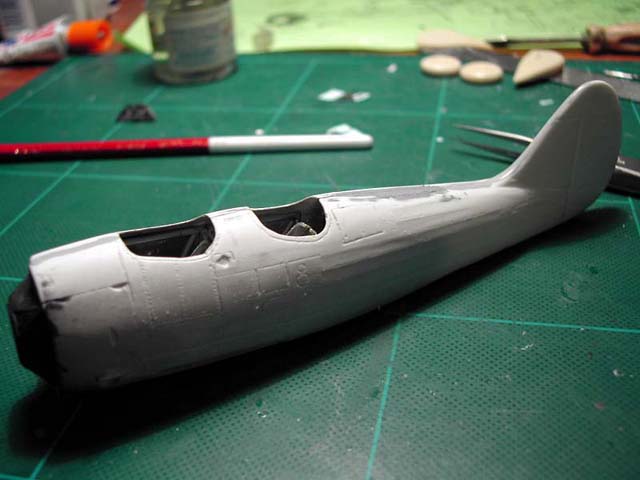
Engine
I made no attempt to use the
vacuformed engine and replaced it with one from my old 1/48 Lublin RXIII
kit. The size and number of cylinders is right and it can be hardly seen
anyway. The cowling consists of two side covers with the air intake at the
bottom and a front ring. The side covers are really bad since the plastic
is as thin as tissue paper and during clean up I managed to tear apart one
of them and I ended up with very ragged edges.
The entire cowling was
assembled with use of strengthening strips of thin plasticard, then
covered with Tamiya putty and sanded smooth. I decided that I can live
with out any surface detail as long as the whole thing is of the right
shape and size. I also reshaped the intake underneath the cowling and
inserted there a fine mesh of unknown origin (I got a few pieces of it
from one of my friends long time ago). The front engine cover came from
the kit and the support frame was made from thin rods made from a
stretched sprue.
The propeller comes with the kit and requires some serious cleaning and
filling up the sink marks, but at the end is quite acceptable.
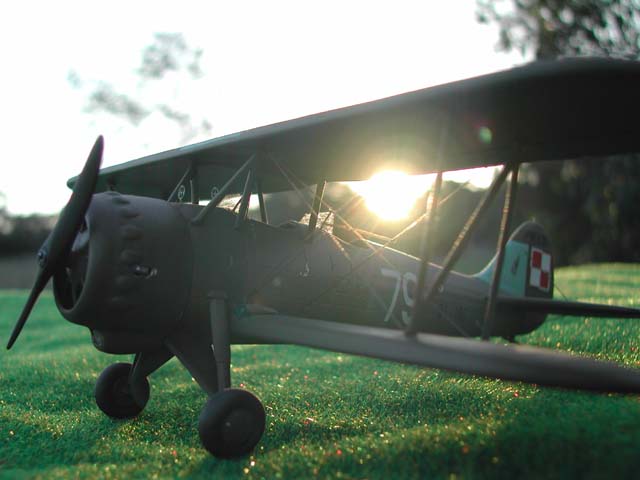
Rigging
Because the aircraft was
painted the same colour overall I decided to assemble the wings before
painting and include all the rigging. This was my first attempt at rigging
since it’s my first biplane in the collection! I used stretched sprue,
which was inserted into pre-drilled holes in the wing and fuselage and
secured with tiny drops of superglue. The attachment spots were then
sanded smooth. After painting I added windshields cut out from a clear
plastic card and dipped in Future as well as photoetched gun sights (from
P11c kit) and a machine gun on the starboard side of the fuselage made
from steel tubing.
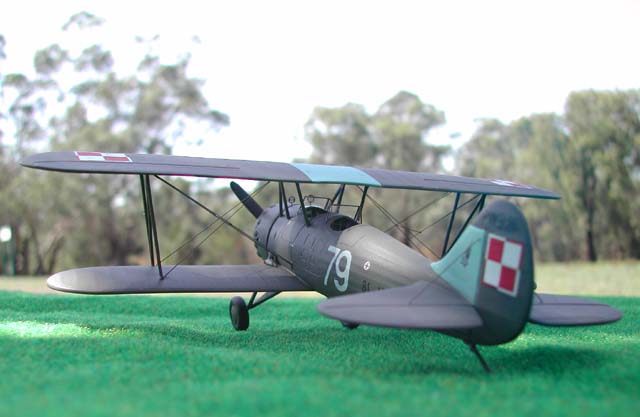
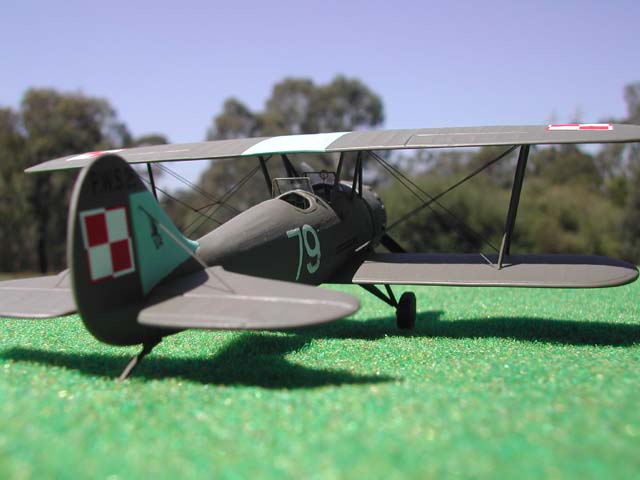
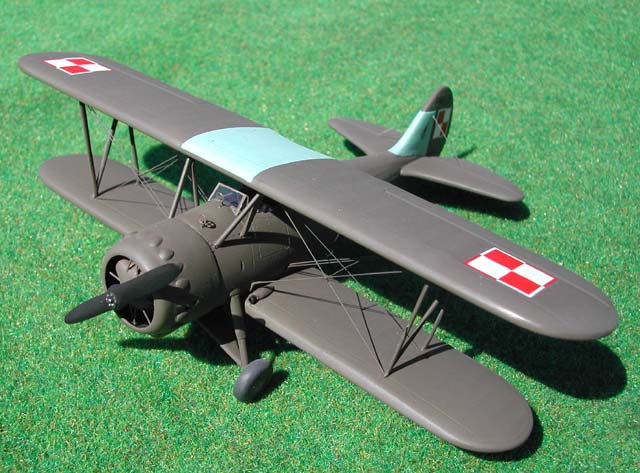
PWS-26s were painted either
overall aluminium or Polish khaki. My references also show a colour
profile of an example with aluminium fuselage and khaki wings, but I have
no photographic evidence to support it. The aircraft used in the flying
school in Deblin also had light blue centre section of the upper wing and
the tail (some sources say white or silver). I decided to make an overall
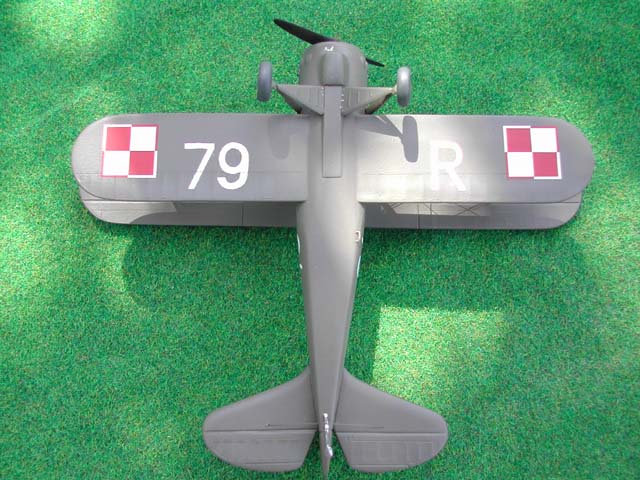
khaki PWS-26 from Deblin as depicted in kit’s instructions.
Polish Khaki was my own mix of Tamiya XF-51 and XF-52 sprayed using the
medium nozzle in my Aztek 470 airbrush, and for the light blue I used
Humbrol 65 followed by a coat of Future.
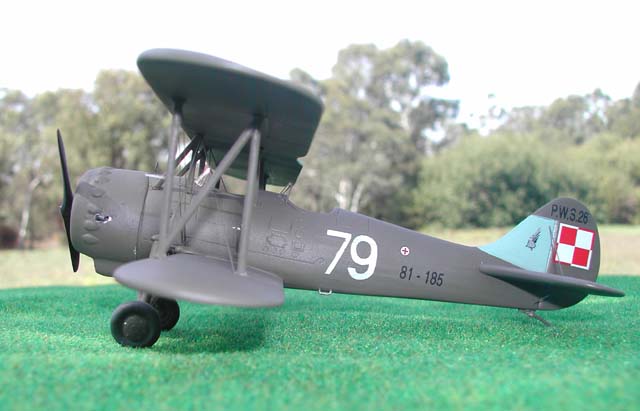
My previous experience with Broplan’s decals taught me that they are
pretty much useless being undersized and disintegrating in water into
hundreds of pieces. There was no problem finding the correct size Polish
checkers which came from Techmod sheet, but I decided to use aircraft
numbers and Deblin insignia included on the kit decal sheet since I could
not find any suitable replacements in my spares. Broplan decals were
coated with Microscale Decal Film, but it did not help me much and some of
the decals broke while being applied to the model. Furthermore, Broplan
made the mistake of supplying two identical Deblin school insignia,
whereas they should be a mirror image of each other. The starboard one was
applied at a slightly different angle to resemble the proper insignia.
I applied some post-shading with a slightly lighter shade of Polish khaki
and some limited paint chipping around the metal panels at the front of
the fuselage, but kept the weathering to minimum.
The entire model was then airbrushed with a semi-gloss clear to seal the
decals and paint job.
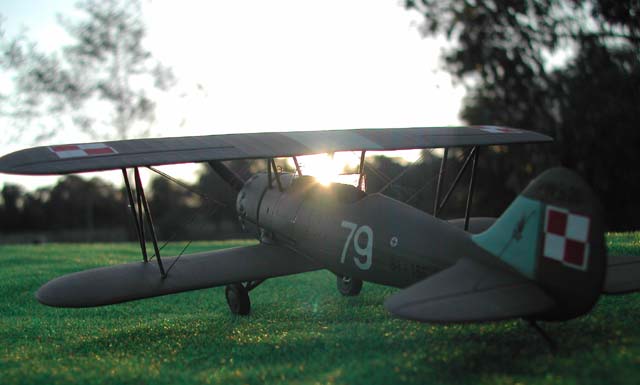
So now there it is one more addition to my September 1939 collection!
Click the thumbnails below to view larger
images:
Model,
Images and Text Copyright © 2003 by
Lukasz Kedzierski
Page Created 20 June, 2003
Last Updated
17 March, 2004
Back to
HyperScale Main Page |
 Home |
What's New |
Features |
Gallery |
Reviews |
Reference |
Forum |
Search
Home |
What's New |
Features |
Gallery |
Reviews |
Reference |
Forum |
Search