|
QF-4B Target Drone
Phantom II
by David W. Aungst
|
 |
|
QF-4B Target Drone
Phantom II |

HyperScale is proudly supported by
Squadron.com
I started working on this Phantom kit back in the middle 1980's when
I started scratch-building a new cockpit for the model, accurate for a
US Navy F-4B Phantom. Long before Kendall Model Company starting
releasing their F-4 Phantom II resin cockpit sets, I had recognized that
there was plenty of room for improvement inside the cockpits of the
Hasegawa F-4 Phantom kits. After two years of on-and-off working on
the model, I had pretty well finished the cockpit interior. It was
amazing to me when KMC released their F-4J cockpit in late 1996,
just how much it was the same as my twelve year old scratch-built
cockpit.
My working on the kit in the 1980's was not limited to the cockpits.
I was also working on other items like the intakes and engine exhausts.
The trouble was that with all the work I was investing in the model, I
wanted to build just the "right" markings on the kit. My inability to
decide on which markings lead to the eventual re-boxing of the kit.
There it laid for ten years.
What sparked me back to working on the model was a request from one
of the members of my model club, Ron Picciani. Ron asked for the club to
build aircraft that had flown from the Naval Air Development Center (NADC)
near where the club met. The base that had been NADC for many years (NAS
Johnsville in Warminster, PA) was closing and they wanted to hold a
party for the remaining employees. The models were to make a display at
this party.
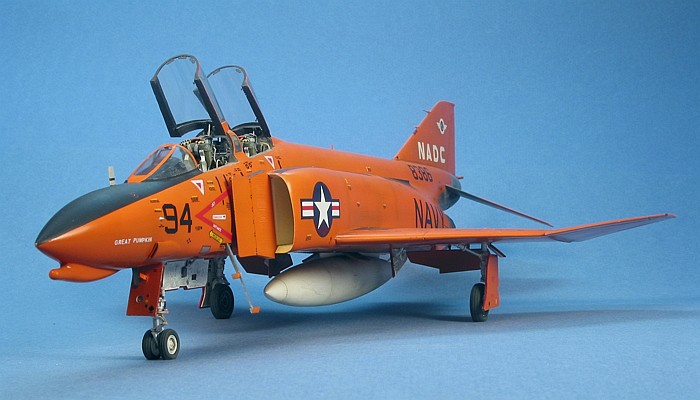
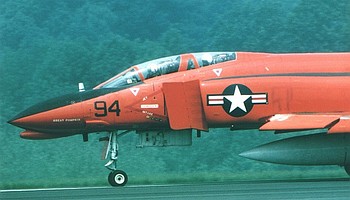
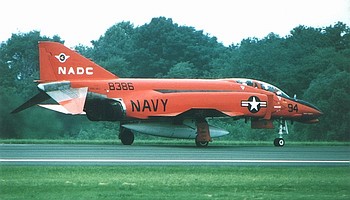
NADC was the conversion facility for all the early QF-4B Phantoms. I
knew the QF-4B "Great Pumpkin" had flown from NADC. I had always wanted
to build a model of it, someday, and Ron had lots of photographic
coverage of "Great Pumpkin". I decided to dig out the kit and complete
it in those markings for the base retirement party display. "Great
Pumpkin" was even one of the markings options I had considered ten years
prior for this very project.
Hasegawa's 1/48 Scale
F-4B/N
|
This kit is the original release of the Hasegawa F-4B Phantom
(stock P005). I was quick to buy it when it was first released. Getting
bogged down in the cockpit and other details delayed its completion for
many years.
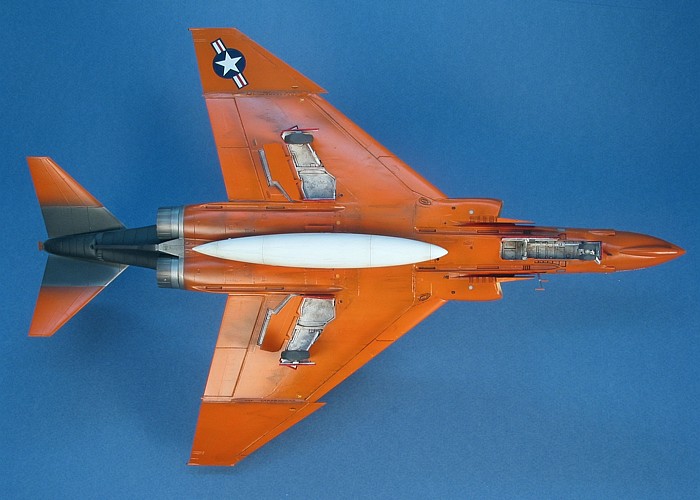
The kit is an accurate representation of an F-4B/N Phantom, being the
only 1/48th scale kit to provide the
correct unbulged wings of the F-4B/N. Being one of the earliest
Hasegawa Phantom releases, it has raised scribing. The tails in the
kit are slotted, which is correct for many F-4B and all F-4N aircraft.
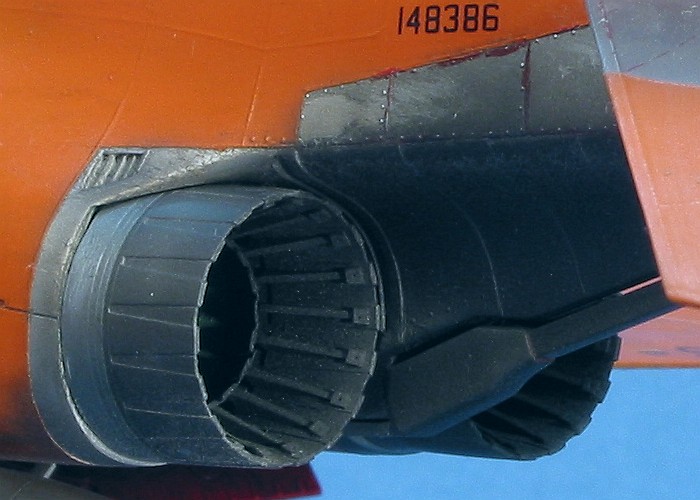
The engine exhausts are the correct early style. Separate pieces are
provided for the ECM fit on the intake shoulders of the F-4N. Two sets
of main wheels are provided in the kit. The "common tree" provides the
standard fat wheels of most F-4 variants. The special F-4B/N insert tree
provides the needed thin wheels unique to these versions.
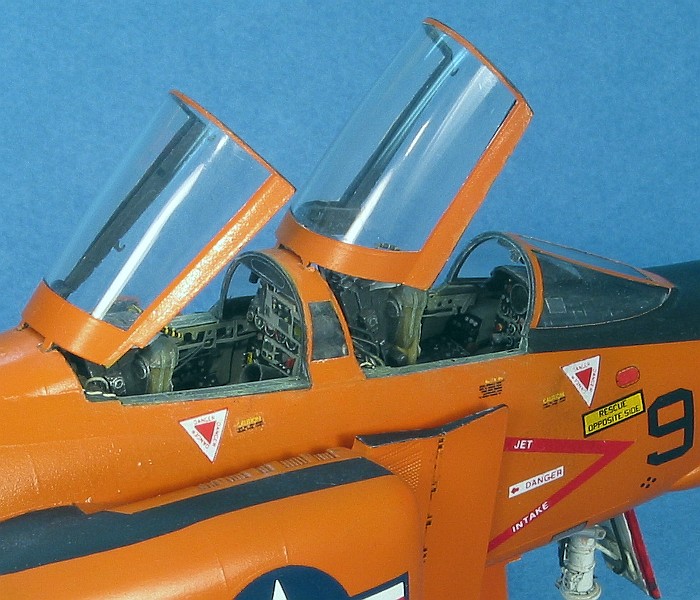
The kit's biggest downfall of the kit is the cockpit, which is mostly
an Air Force F-4C cockpit. Tell-tale signs of this are all over the rear
cockpit and include a control stick (Naval Phantoms have to rear-seat
flight controls), a right side instrument panel (instead of a padded
wall that covers the in flight refueling probe), and no boxes to clutter
the left side wall. With both Aires and Black Box
providing well-molded resin replacements for the F-4B/N cockpit, this
downfall is not the big issue it was when I started building the kit in
the middle 1980s.
As I mentioned at the start of this posting, I did quite a bit to
upgrade the kit. The full list of things I did to the kit during
construction is as follows.
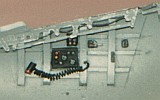
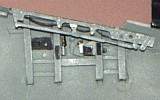
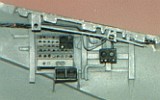
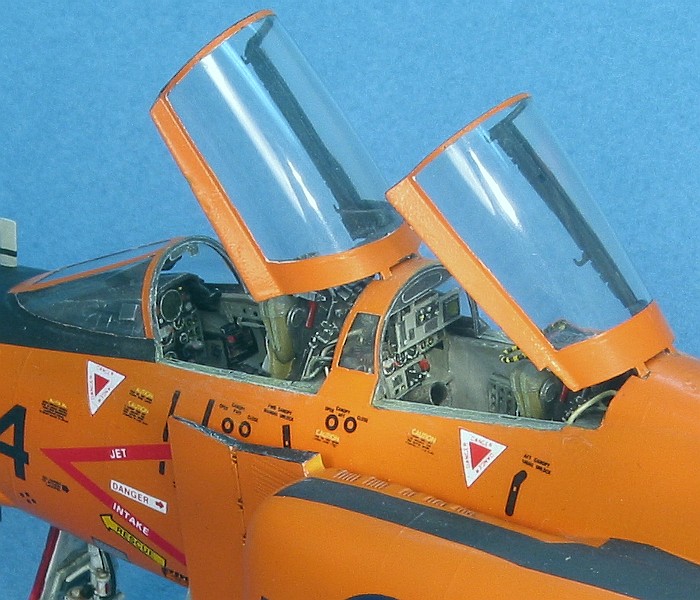
- I gutted the cockpit and scratch-built a new interior. This
involved doing the following.
| |
|
Disclaimer: I have to admit that when I did all of this
cockpit work, I had no idea what changes in the cockpits were
made to do the QF-4B conversion. Hence, I created a standard
fleet F-4B aircraft cockpit. Ron was able to provide some
diagrams of the QF-4B cockpit, but it was too late in the
project to incorporate the changes by the time I got the new
information. The most noticeable change was the deletion of the
radar scopes in the cockpits. Other minor changes were done as
well, including the replacement of the control stick and
throttle grips in the front cockpit. Please accept my apologies
that the cockpit is not a true QF-4B cockpit ... ;o) |
|
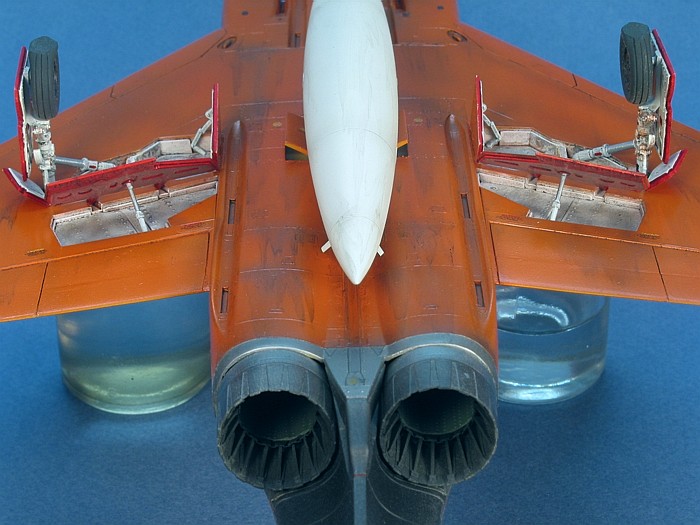
- I scratch-built new detailing inside the kit engine exhausts using
strip styrene. There are 108 tiny pieces of strip styrene cut into the
appropriate shapes and attached inside each engine exhaust cone.
Aires resin engine exhausts would have been so much easier had I
had them to use back then.
- I added the pitots inside the engine intakes and replaced the tail
pitots with brass wire and styrene stock.
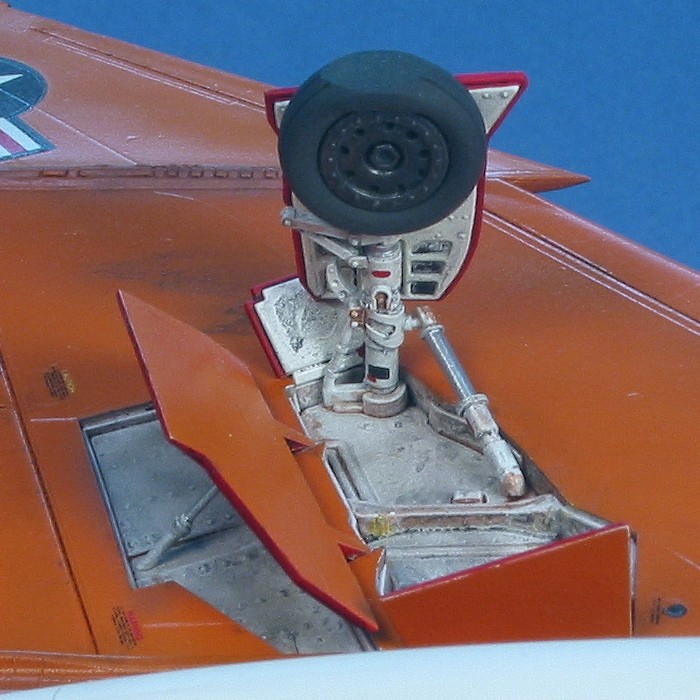
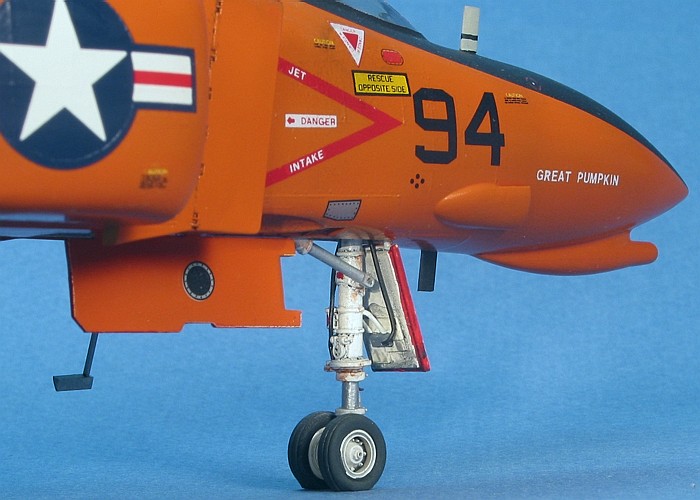
- I replaced the plastic kit landing gear legs with Hasegawa's
white metal landing gear, adding plumbing and electrical lines. These
are other goodies that come from the Hasegawa "high-grade"
Phantom kits.
- I replaced the wheels with True Details products, but I
sanded down the molded tire bulges. The tires in all the True
Details Phantom wheel sets look like they are flat, not just
weighted. Removing most of the tire bulges improves the look of the
tires.
- I substituted unslotted horizontal tails from a Hasegawa
F-4C/D kit. Images I received from Ron of "Great Pumpkin" showed it
was never updated to have the slotted tails.
- I filled the locating holes for the wing weapons pylons since I
did not want to hang these on the model. This necessitated grinding
off the pylon sway braces that Hasegawa has molded to the lower
wing for stations 2 and 8.
- I replaced all the blade antennas with etched metal antennas from
the Hasegawa Phantom cockpit and canopy etchings set.
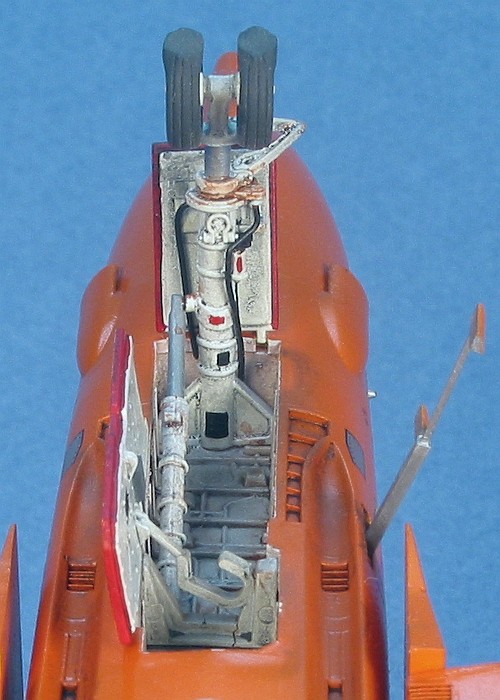
- I scratch-built and added the nose antennas that are, themselves,
the distinguishing features to the QF-4B target drone Phantom II
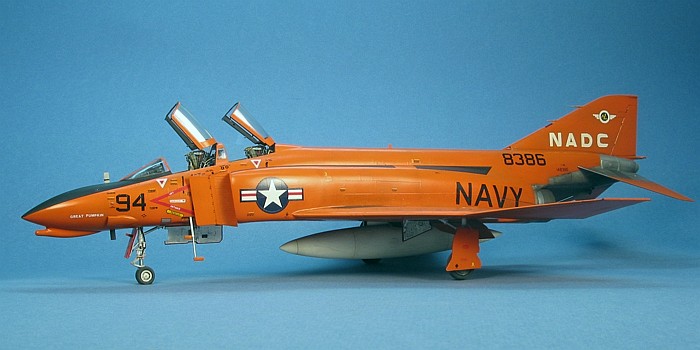
(other than the orange paint).
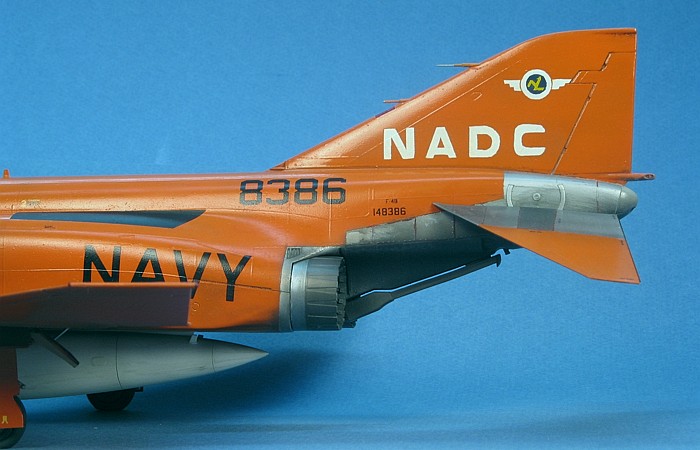
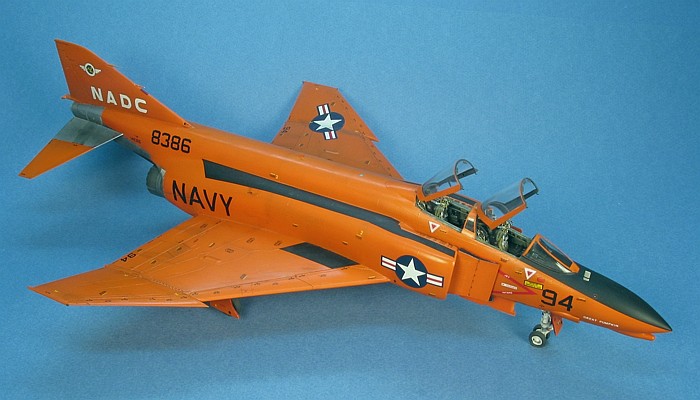
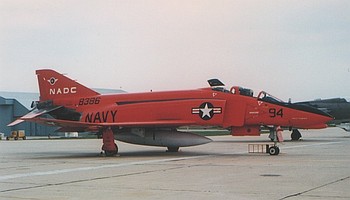
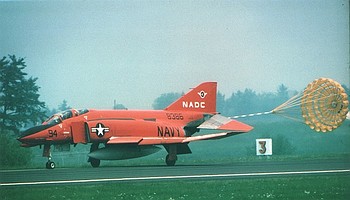
"Great Pumpkin" was finished in overall International Orange
(F.S.12197). With the permission of Ron, I have included scans of some
of his images in this posting. Without a question, this is one of the
"loudest" paint schemes I have ever completed. The following photos are
by Ron Picciani:


 I
used Testors Model Master and Humbrol enamel paints. As
the model predates the release of International Orange (F.S.12197) in
the Model Master line, I needed to mix my own color. I mixed want turned
out to be a very convincing International Orange using the following
mixture. I
used Testors Model Master and Humbrol enamel paints. As
the model predates the release of International Orange (F.S.12197) in
the Model Master line, I needed to mix my own color. I mixed want turned
out to be a very convincing International Orange using the following
mixture.
- 12 parts Insignia Yellow (F.S.33538)
- 4 parts Fluorescent Red (F.S.28915)
- 1 part Crimson Red (Humbrol #20)
The unit markings, as stated above, are specific to NADC. The "Great
Pumpkin" is a real aircraft and not just one of my imaginary named
models. No manufacture has ever released markings for this aircraft in
decal. As this model also predates my acquiring a home PC for creating
custom decals, I had to piece this one together with decal scraps and
use masks to create the tail markings.
I cut custom scotch tape masks and painted the tail markings since I
could find no lettering decals to match the exact style of the writing.
I also masked and painted the NADC badge on the tail. The "Great
Pumpkin" writing on the nose is done with "N" scale railroad decals and
applied one letter at a time. All the rest of the markings are standard
Phantom data markings taken from Hasegawa's kit decals and
various SuperScale decal sheets.
For weathering, I used my typical style of thinned down enamel paint
washes and air brush shading. As the model has raised scribing, I could
really only do the washes around the flight control surfaces. I finished
the weathering with some dry brushing to pop out the surface details.
For a more complete discussion of what I do to weather my models, see my
posting on
"Weathering Aircraft".
This qualifies as one of my longest builds ever, carrying over about
a ten year stretch. Of course, I was not actively working on the model
over much of this time span. I have a couple other uncompleted models in
my work room right now that are actually longer than this time span, but
until they are completed, this model will hold the title.
|
Additional Images and Project
Summary |
Click the
thumbnails below to view images full-sized.
Click the "Back" arrow on your browser to return to this page.
|
|
|
Project Statistics |
|
Completion
Date: |
27 November, 1994 |
|
Total Building
Time: |
118.8 |
|
Research:
|
10.6 |
|
Construction:
|
11.0 |
|
Painting:
|
41.4 |
|
Decals /
Markings: |
11.4 |
|
Extra Detailing
/ Conversion: |
44.4 |
|
| |
Model, Description and Images Copyright ©
2003 by David Aungst
Page Created 22 December, 2003
Last Updated 17 March, 2004
Back to HyperScale
Main Page
|
 Home |
What's New |
Features |
Gallery |
Reviews |
Reference |
Forum |
Search
Home |
What's New |
Features |
Gallery |
Reviews |
Reference |
Forum |
Search