|
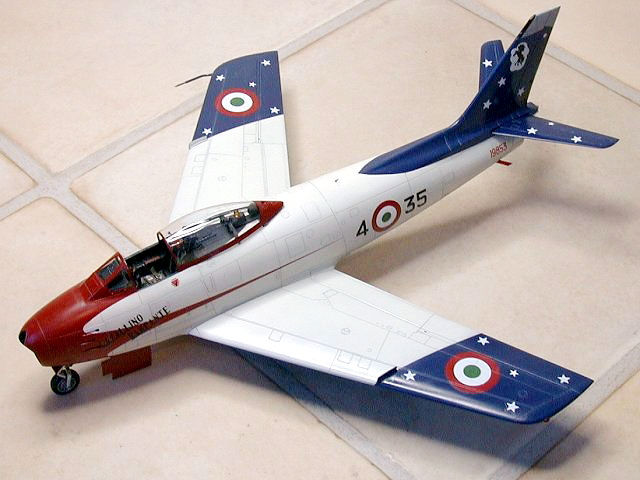
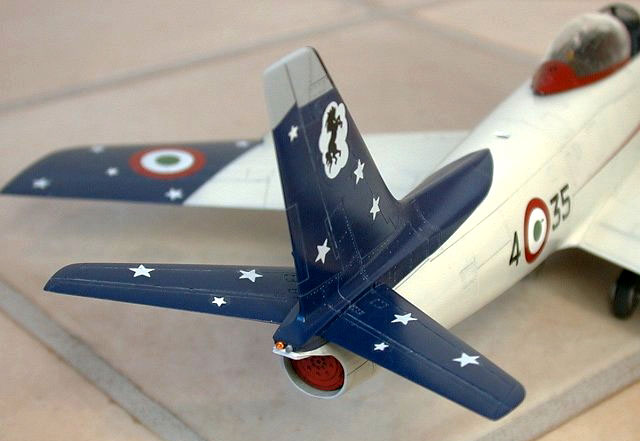
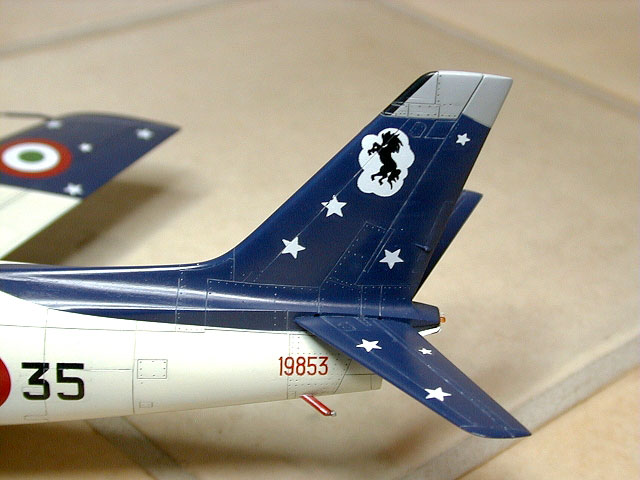
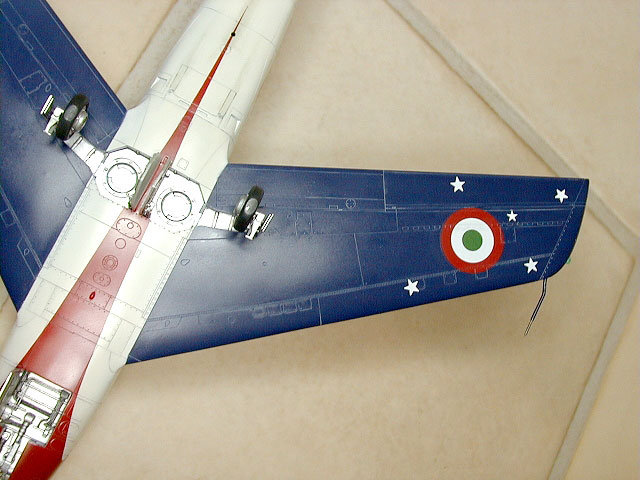
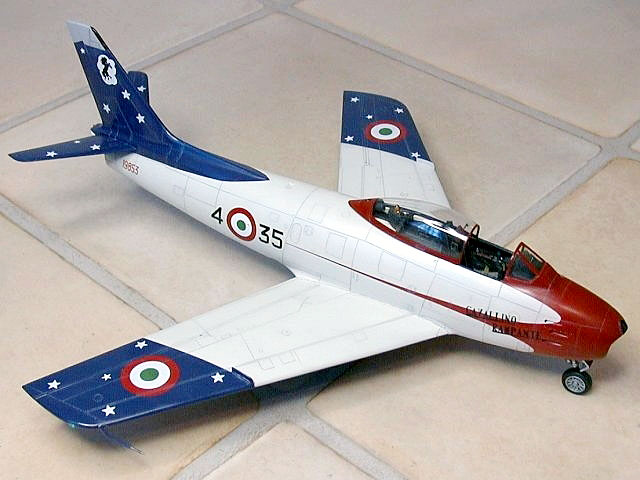
Cavallino Rampante
Academy's
1/48 scale F-86F-30
converted to F-86E(M) Sabre
by Craig Sargent
|
|
|
F-86E(M) Sabre |

Academy's 1/48
scale F-86F-30 is available online from
Squadron.com
This project was built for our club’s “Build The Same Kit”
competition, where members voted on the kit they wanted to build, and
then had a two-month timeframe in which to complete the chosen models,
with no limit on what could be done to the kit in that time. Judging was
by members’ popular vote, not IPMS standards to give all comers a fair
chance. The kits chosen were the Academy Sabres in 1/72 and 1/48.
I wanted to find a subject that fitted in with my modelling interests,
and was different from the run of the mill NMF Sabres. After some
research, I came across a couple of interesting Italian aerobatic Sabre
schemes, and a set of matching decals from Tauro in Italy. The final
scheme chosen is that of the Cavallino Rampante. The other decision was
how to build this aircraft, and what to do to it, in the 2 months
allotted timeframe.
Construction Commenced
The easiest way to cover up the lack of detail in the gun bays and
shallow speed brake wells (once again trying to limit resin costs) was
to close them up. The first thing was to Dremel out the speedbrake wells
and gun bays, which allowed me to easily fit the gun bay covers and
speed brakes closed, before joining the fuselage halves.
Also being an airshow aircraft, and wanting to keep down the tasks
associated with the build due to the timeframe, I elected to use the
very nice intake and exhaust blanks supplied in the kit. This meant
being able to leave out the intake ducting, and the engine, which would
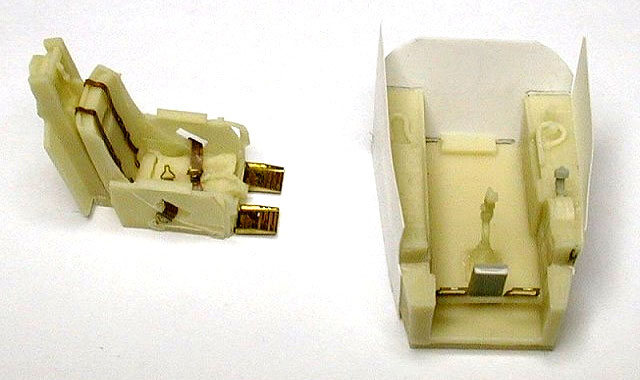
have added time to the build. The Aires cockpit set was purchased to
dress up the cockpit, as this would be the most prominent part of the
kit that needed improving.
The first step in main construction was to join the fuselage halves. I
discovered that the exhaust on the Academy Sabre sits too far inside the
tail, so simply removed the mounting pins, and pushed the exhaust pipe
as far back into the tail as it would go, being careful to get the
alignment correct. With an application of thin glue, the pipe was in
just the right place.
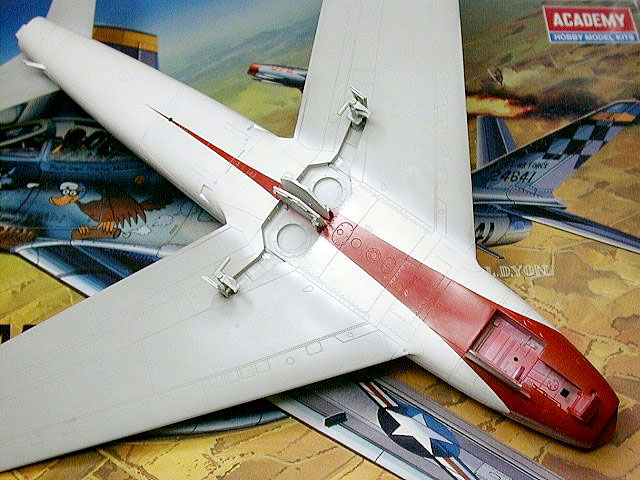
The wings were assembled next, but I found a 10 thou styrene shim was
needed between the wing root and fuselage on each side to fill a gap.
This appears to only be a problem with later batches of the kit as
comparisons with others who had an earlier batch did not have this
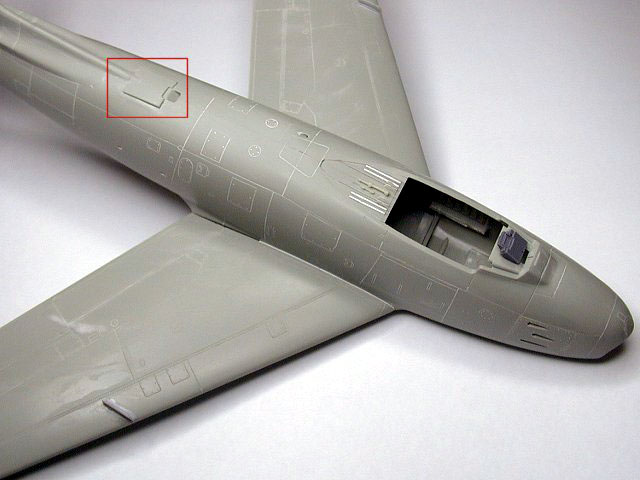
problem. It was also pointed out to me that Canadair-built Sabres did
not have the box like panel at the root of the fin, as was found on the
NA Sabre depicted in the kit. This was duly shaved off (red-outlined box
in image below).
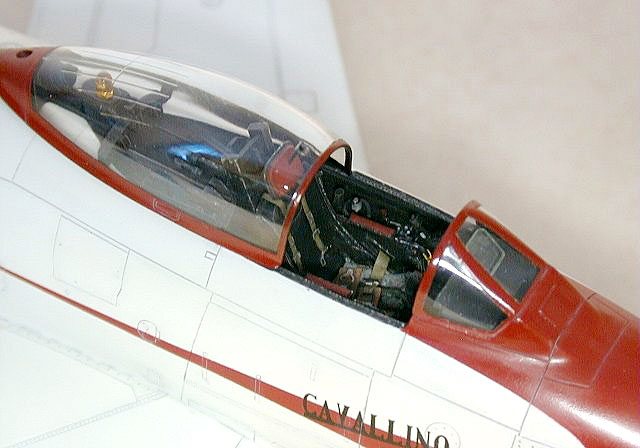
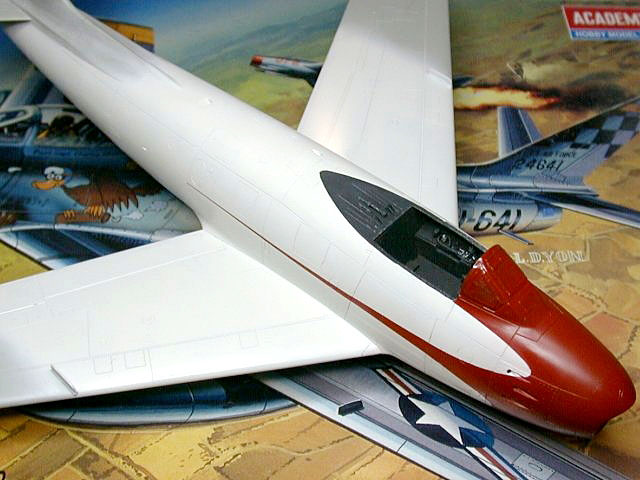
Interior
Attention was then turned to the cockpit and seat.
 The
Aires set is very nice. The only problem is that it lacks sidewalls, and
therefore a few problems were encountered. Fitting the cockpit is not
straightforward either. After some experimenting (and a lot of cursing),
I found the easiest way to fit the cockpit tub was to remove the rear of
the resin part at the rear bulkhead. This included the rear decking and
part of the side consoles beyond that point. Rear deck details were
scratchbuilt onto the fuselage halves - copied from the Aires resin. The
Aires set is very nice. The only problem is that it lacks sidewalls, and
therefore a few problems were encountered. Fitting the cockpit is not
straightforward either. After some experimenting (and a lot of cursing),
I found the easiest way to fit the cockpit tub was to remove the rear of
the resin part at the rear bulkhead. This included the rear decking and
part of the side consoles beyond that point. Rear deck details were
scratchbuilt onto the fuselage halves - copied from the Aires resin.
A new rear bulkhead was made to fit the cockpit at the right height
below the decking, and prevent a see through look from the cockpit.
Sidewalls were also added from 5 thou Evergreen sheet. These were made
taller than needed so they could be trimmed after the cockpit was glued
in place. The base was removed from the kit instrument panel and fitted
to the Aires tub along with the throttle. The Aires etched and acetate
panel was added on top of the pedestal after painting. This method of
assembly allowed me to finish all fuselage assembly quickly, and still
gave me time to work on the cockpit.
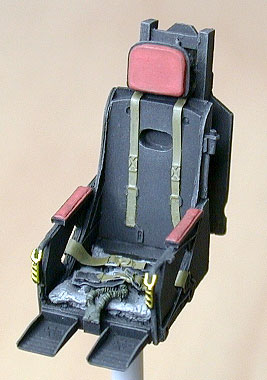
The cockpit, seat and rear deck were painted with Gunze acrylics and
installed. The picture of the seat shows the finished construction with
the etched seat belts, but with painting and weathering yet to be
finished. A Cutting Edge resin gunsight was fitted after removing the
corresponding part on the fuselage halves. I used the kit gunsight
glass, sanded it thinner for a scale thickness, polished it and added a
clear green tint painted on the sides only. After that was all painted
and installed, I found another defect only present in later batches of
this kit. The windshield is deformed on the lower front corner. It
actually curves inwards 1 – 2mm too much in that corner. I duly swapped
mine with that of a friend with an earlier boxing of the kit.
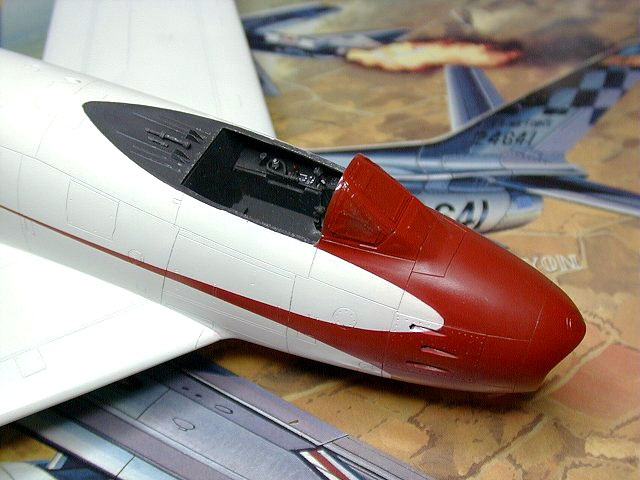
Painting, Decals
and Weathering
|
Canopy and windshield were masked with Tamiya tape and the model
preshaded with thinned Gunze flat black acrylic. I removed most of this
again with a rag and thinner, as it would be too hard to cover under the
lighter colours of the scheme. The black was left around the
transparencies to form the inner colour of the canopy/windshield
framing. The main parts of the fuselage and upper wings were painted
with Gunze H21 Off White mixed with some tan to get the FS 17778 match
suggested by Tauro for the ivory. This is only approximate, as
apparently the real aircraft was painted with a colour from Lancia cars.
The areas to be painted red were then masked and Gunze H327 Red (FS
11136) was airbrushed to give the striking red scallops and canopy
framing.
The grey and black fin tip was painted and masked, as was the ivory, and
blue was airbrushed on to the tail surfaces, outboard upper and lower
wings. Each of the three main colours, when dry, was lightly sanded with
4000 grade polishing cloth to give a nice even finish. Finally, the
wheel wells were masked and airbrushed Gunze silver and details in the
wells picked out. Everything was then given a coat of Gunze gloss
varnish in preparation for decalling (can you tell I like Gunze
acrylics?).
Click on the thumbnails
below to view larger images:
The Tauro decals were VERY thick and don't seem to react to any known
chemical solution - I imagine concentrated acids wouldn't harm them. The
film was still quite noticeable even after multiple applications of
MicroSol, and some silvering occurred despite the glossy surface. I also
found that there are not enough stars provided for the scheme, and so I
had to cut all of the stars for the lower wings (10 in all) from white
decal film. One wing roundel went to the dogs and was damaged beyond
recognition after applying - luckily I had a whole sheet of them (you
have to buy them SEPERATELY from Tauro). The decals were then glossed
over for weathering.
Weathering was a wash using a mix of 80% white, 10% Payne's grey and 10%
raw umber oil paints thinned with mineral turpentine to a dirty thinner
consistency. The same wash colour was applied to the whole model,
appearing dark on the ivory and pale on the red and blue.
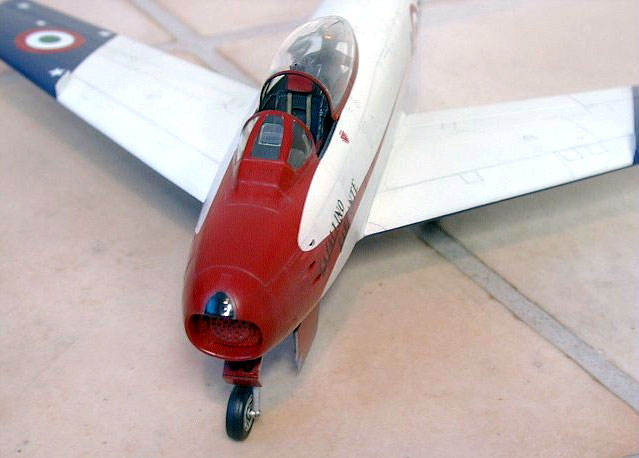
The final assembly involved installing the finished seat, attaching the
canopy, gluing the painted intake and exhaust blanks in place (which had
copper wire handles added), and gluing Cutting Edge’s tinted clear resin
red, green, white and orange navigation lights in the appropriate places
(wingtips, tail, lower fuselage). I mixed up some 5-minute clear epoxy
glue and filled the two under nose lights to represent the landing
lights there. I also attached the landing gear, painted the tip of the
pitot tube, and added some oil streaks using thinned raw umber under the
rear of the fuselage and in the gear bays.
I got the kit finished in time. Doing an aerobatics scheme meant no
pesky stores or pylons and preserved the nice clean lines of the
aircraft. My argument is that the aircraft has just shut down, hence the
speed brakes have not bled open and the intake and exhaust blanks are
fitted. The Academy kit is a very nice build, and certainly cheaper than
the Hasegawa kit. And I still have enough decals left over to build a
Sabre from the Lanceri Neri aerobatic team…
Click on the thumbnails
below to view larger images:
Images and Text Copyright © 2003 by
Craig Sargent
Page Created 18 December, 2003
Last Updated 17 March, 2004
Back to HyperScale
Main Page
|
 Home |
What's New |
Features |
Gallery |
Reviews |
Reference |
Forum |
Search
Home |
What's New |
Features |
Gallery |
Reviews |
Reference |
Forum |
Search