|
Schwimmwagen
by David Harmer
|
 |
|
Schwimmwagen |

Tamiya's
(new and improved!) 1/35 Scale Schwimmwagen is available online from
Squadron
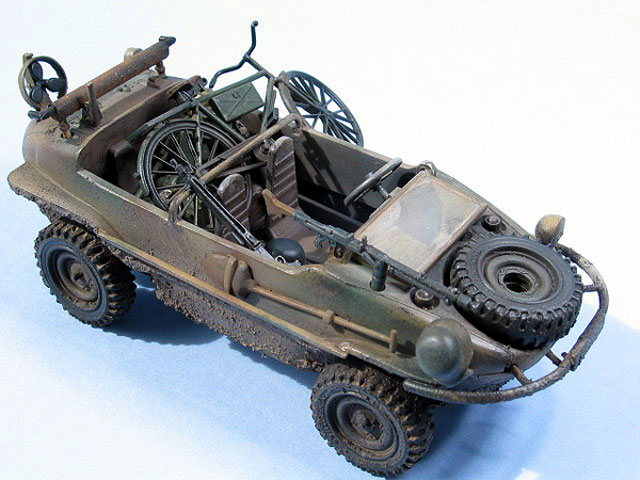
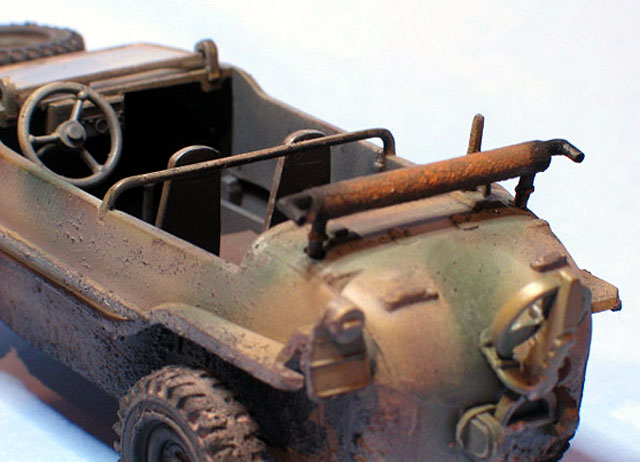
Here is my 1/35 Tamiya Schwimmwagen. This kit
will be familiar to many of you as it was first released in the year
I was born - i.e. it has been around for 30 years!
Like me, the kit is starting to show it’s age. It is inaccurate in
shape, grossly over simplified in places - the steering mechanism is
not replicated at all -- and it has been replaced by younger,
stronger, faster versions (Tamiya, in particular, has released a
more accurate and detailed version).
There were, nevertheless, two good reasons to build this kit.
Firstly, it was free. It was given to me by a friend following a
recent trade. Secondly, it would give me an opportunity to try out
MIG’s weathering powders and resin which have only recently become
available at my local hobby store.
While few will be interested in the story of this kit’s
construction, I thought some of the beginners amongst us (of which I
am one when it comes to vehicles) might be interested in my
experiences using the MIG products.
There are better kits of the Schwimmwagen out
there… end of story. Nevertheless, I opted to build this one
(almost) out of the box.
The only deviations from the instructions were
to chop the exhaust pipes off and replace them with tube, and to add
some plastic card inserts to fill large gaps behind the rear wheels
(where the upper hull joins to the lower hull).
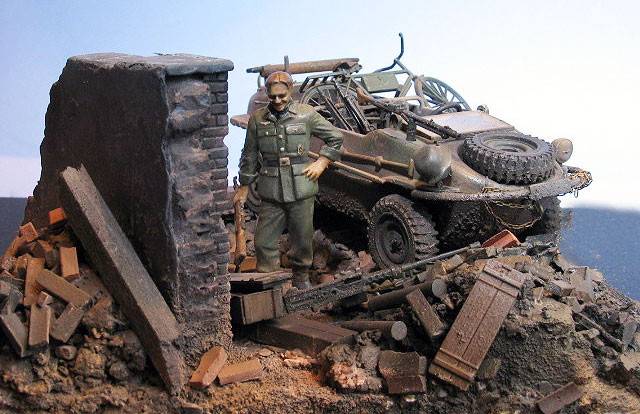
Painting, Markings and Mud
|
I opted for a three tone sand, red-brown and
olive green finish described in the instructions. As I planned to
bury the car in mud and dust, I didn’t bother with markings other
than the rear number plate.
About those MIG products...
Anyone who reads Tamiya International Model
Magazine will be familiar with MIG weathering powders. A number of
recent articles have illustrated how they can be used to stunning
effect.
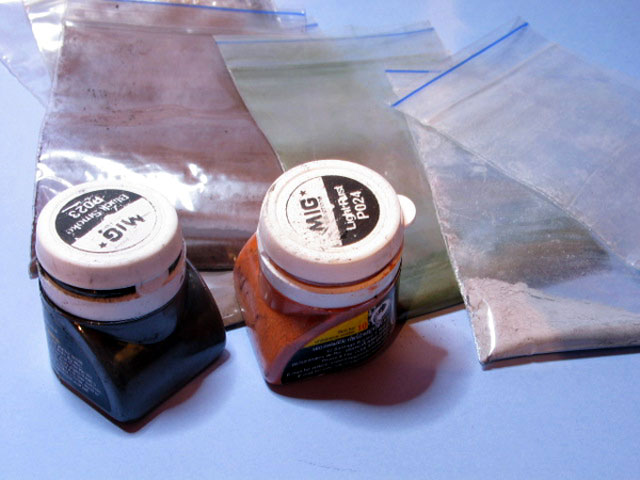
Besides a wash and some localised drybrushing, the Schwimmwagen was
weathered using a combination of MIG powders and pastels.
The MIG powders can be mixed together with isopropyl alcohol or
Tamiya acrylic thinners to make a wash or applied straight from the
container and applied in much the same way you would use pastels
chalks . They can also be mixed together with plaster dust and MIG's
resin product to produce a mud mix which can be applied directly to
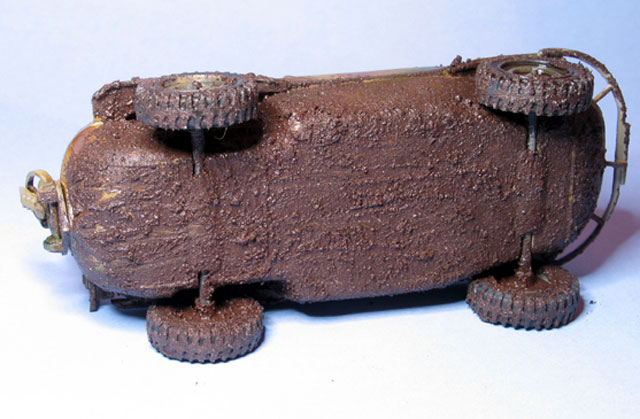
whatever you are modeling for textured mud effect.
People have been producing similar mud effects for years using
celluclay or whatever so it’s not as though MIG are offering
something you can’t replicate with other cheaper products. However,
the resin mix does dry in 10-15 minutes and gives superb results.
Basically, the mud mixture comprises:
You will notice as you are mixing the plaster
mix and powders together that the mixture only ever looks to be a
pale brown colour. Don’t do what I did and add lots and lots of dark
brown in an attempt to correct the situation. Things come right (or
wrong, if you’ve added to much colour as I did) when you add the
resin into the mix.
Once you’ve created a mud mix you simply paint it on then clean your
brushes out in water. I discovered, the mixture works well as
filler. So, if you know your going to be applying mud to your
vehicle, don’t worry about the odd blemish, you can cover it with
mud.
I am not entirely sure whether it is worthwhile
replacing the ubiquitous pastel chalks with MIG’s powders as they
are more expensive. However, they do seem to offer a greater
intensity of colours and appear to be more versatile than the
traditional pastel sticks.
For this reason, I will supplement my use of
pastels with the MIG products.
Model, Images and Text Copyright ©
2003 by David Harmer
Page Created 11 December, 2003
Last Updated
17 March, 2004
Back to
HyperScale Main Page
Back to
Reviews Page
|  Home |
What's New |
Features |
Gallery |
Reviews |
Reference |
Forum |
Search
Home |
What's New |
Features |
Gallery |
Reviews |
Reference |
Forum |
Search