|
Building Roden’s 1/72
Scale
Sd Kfz 231 (8
Rad)
by Glen Porter
|
|
|
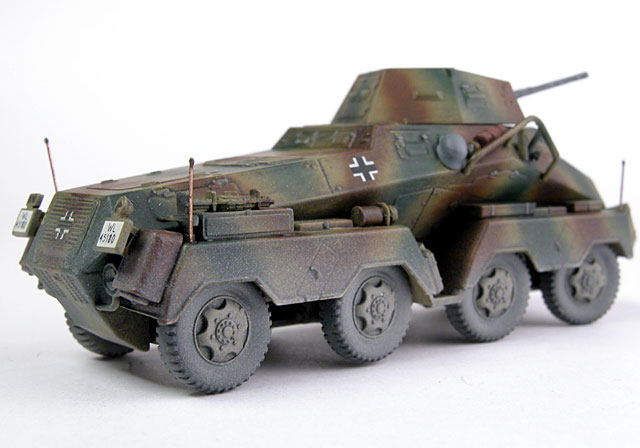
Sd Kfz 231 (8 Rad) |
images by Brett Green

Roden's 1/72 scale Sd Kfz 231 is
available online from
Squadron.com
The Achradwagen (eight-wheeled car) or A.R.W. spawned a whole
family of armoured cars starting with the 231 in 1937, culminating with
the Puma at war’s end.
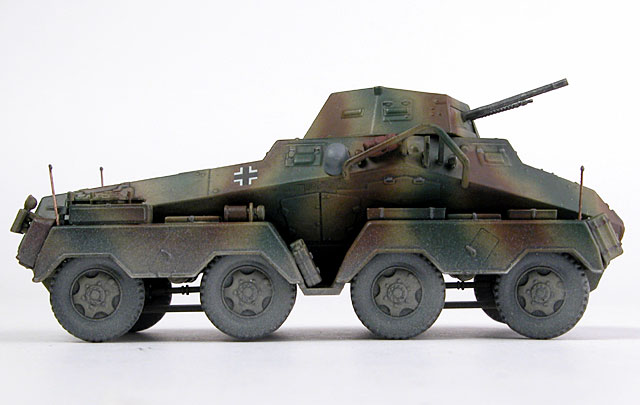
With eight-wheel independent suspension and steering, plus front and
rear driving positions, this vehicle was quite unique and successful,
but by no means perfect. One of its weaknesses was its height, which
tended to make it an easy target at times.
Roden is currently releasing a whole series of these vehicles in 1/72
scale and the subject of this construction report is the first of them –
the Sd Kfz 231 (8 Rad).
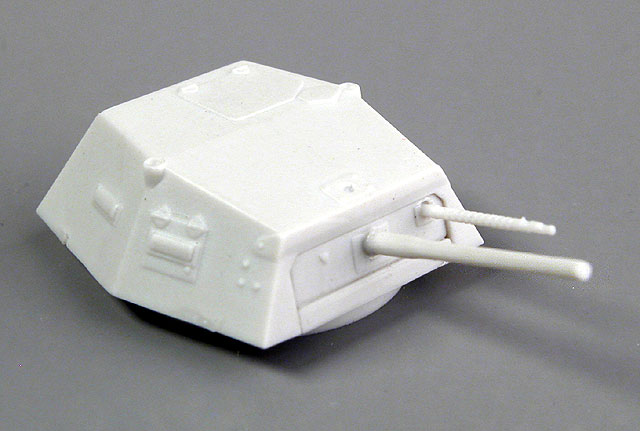
I was very impressed when I reviewed this kit a few months back here on
HyperScale. The only faults I thought worth mentioning at the time were
that all the hatches were moulded closed, making it difficult to display
the model manned, and it looked like it would be hard to pose the wheels
in any position other than straight ahead. I have since found some other
niggling issues, namely sink marks on the outside of the road tyres
which I did not fix but I now wish that I had! Some decals were out of
register too. Having said that, I am still very impressed with this kit
as the level of detail is excellent.
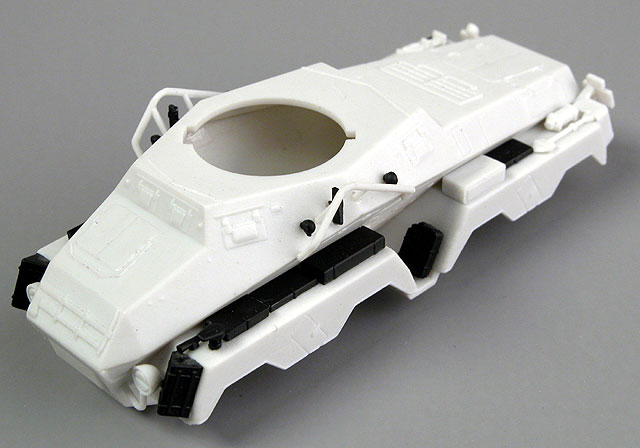
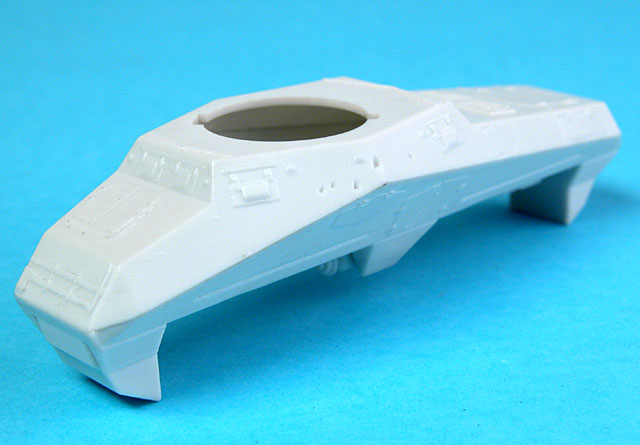
Right from the start, I must say that this kit goes together without
any problems. The join between the upper and lower hull parts disappears
with ease. In fact, I did not need to use any putty on the model at all,
although I should have on the tyres.
Roden supplies a beautiful little jack but does not advise where to
install it. Also, positions of the equipment on the mudguards is not
especially clear. To be fair though, photographs suggest that no two
vehicles had identical stowage positions so perhaps it was left to the
crews to decide on the best positions.
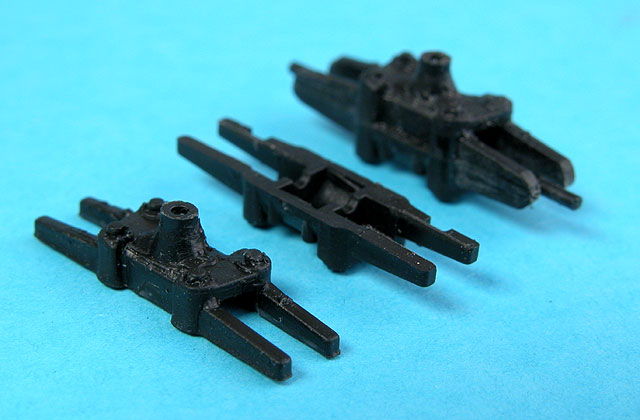
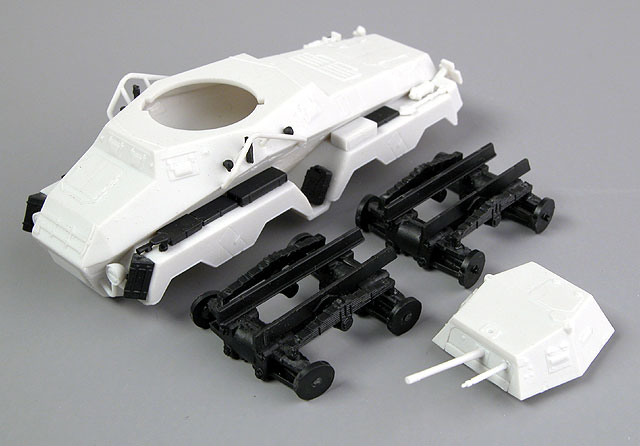
The kit is supplied on four sprues, two black and two white. I do wish
that Roden would change to overall grey plastic in common with the rest
of the industry. It is much easier to see detail and flaws on plain grey
plastic. All unique parts are provided on the white sprues while
duplicate parts are in black plastic.
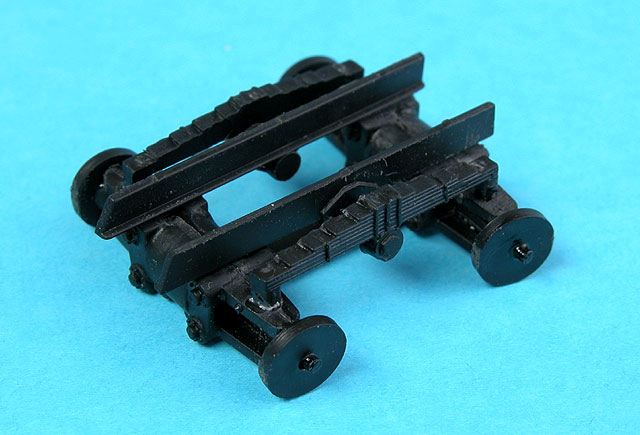
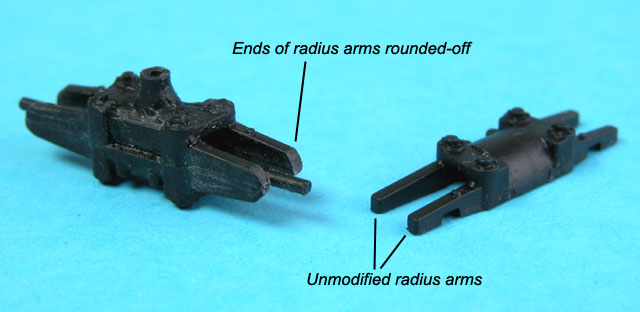
As the eight wheel steering is one of the hallmarks of this vehicle, I
decided to try to turn all the wheels. It turned out to be much easier
than I had expected. The hole through each wheel backing plate (parts
A16 x 8) is much bigger than it needs to be and this allows the plate to
be repositioned without having to cut and rejoin the driveshafts (parts
A14 x 8). All I had to do was to round off the square outer ends of the
radius arms and each backing plate could be glued on as if the steering
was turned.
Construction was undertaken in four distinct steps – the two suspension
bogies, the hull and the turret. The headlights and tail lights look a
bit overscale but fit on well enough, and Roden gives you four German
Army helmets but they are noticeably underscale and are best not used. I
found three good helmets in a Preiser figure set that I will add after
painting, along with some other personal crew equipment. The jack was
placed on top of one of the side-opening equipment boxes on the right
side rear guard, as this seemed to be a logical place for it. All other
construction went as planned, without any problems.
Click on the thumbnails
below to view larger images:
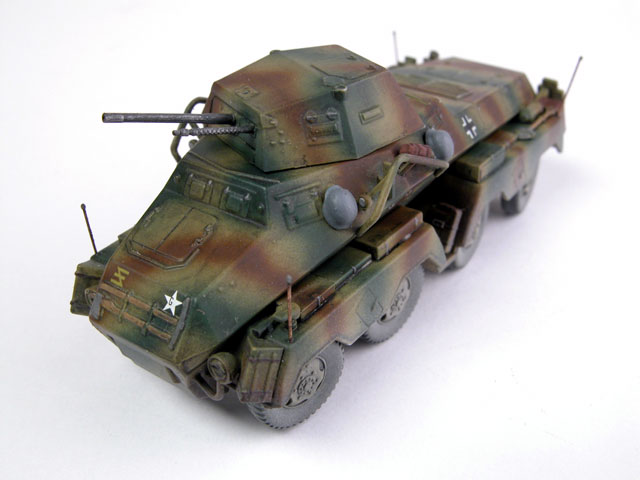
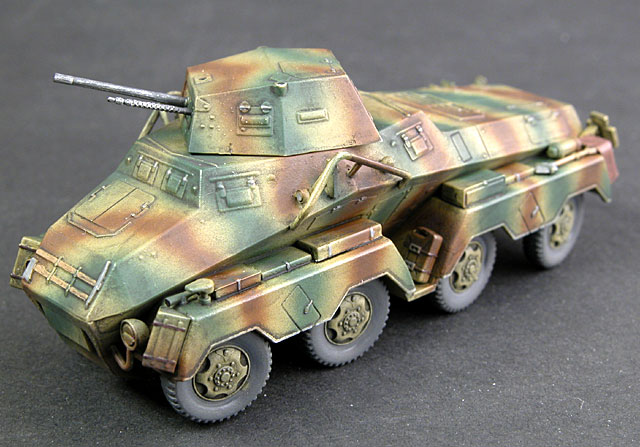
I have always liked the three-colour German armour scheme so it would
come as no surprise that I should pick that option out of the four
schemes in the kit. The other three were Panzer Grey.
Although the Dark Yellow and Red Brown colours were okay, I used a Green
that was, in my opinion, way too green and too dark. I then added a
black oil wash over the entire vehicle and then the whole paint job was
too dark!
Oh what to do? Well, nothing. It was too late. If I had realized how
dark the paint was going to look I would have simply resprayed the Green
with a lighter shade, but to lighten the colour now would also lighten
the wash and hide the detail. I will just have to live with it.
At this stage I glued the bogies on to the chassis and also the road
wheels which had been painted on the sprue. The tools, side light lenses
and exhaust guards were painted by hand and then a coat of Tamiya
Acrylic Gloss was sprayed over the entire model in preparation for
decals.
The kit decals had some register problems so I borrowed some crosses
from a Revell Tiger and these went on with no complications. Each decal
was then oversprayed with Tamiya Gloss to seal them.
I now made what might have been a major mistake. Still worried about the
mode looking too dark I decided to give it a dusting coat of Dark Yellow
to fade the finish. I thinned the paint to much and sprayed it on too
wet. The consequence was that, like a wash, the thin mix pooled in all
the crevices and corners, exactly where I did not want it to be. As I
only use enamel paints with the exception of washes and gloss coats
which are acrylics, I was able to take off this paint with a cotton bud
moistened with enamel thinners. Phew!!
Some of my fellow modelers are surprised that I still use enamels. I do
not deny that there are advantages to acrylic paints, but I have a good
selection of enamel paints and although the law may force me to use
acrylics in the future, I can make mistakes and I still have some idea
of a remedy.
Back to the model...
The next step of the painting process is the overall coat of Model
Master Dull Coat to flatten the finish. With this completed, I then made
an effort to give the vehicle’s lower surfaces a dust coat as the
vehicle was operating in the summer of 1943. A light coat of Tamiya Buff
was used for this purpose.
I added Preiser bedrolls to the helmets hung in the manner seen in some
photos. These were all painted appropriate colours when they were glued
in place.
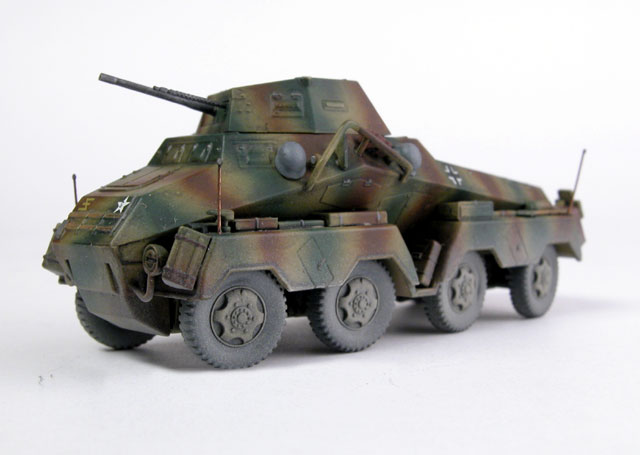
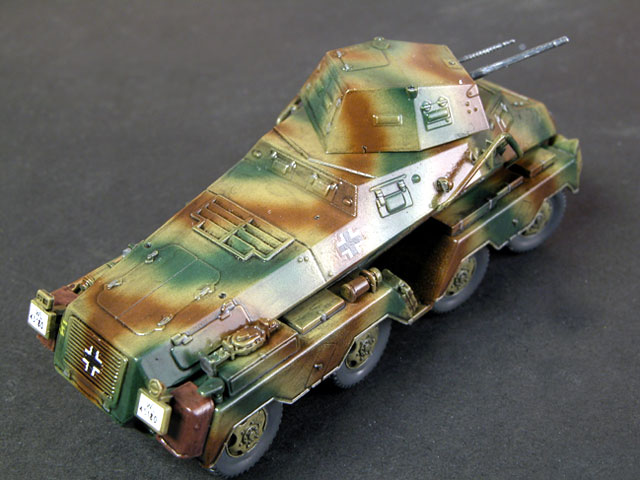
Four small holes were then drilled in the mudguards at the corners of
the vehicle, and four small lengths of wire were inserted to form
clearance rods for the driver. These rods were not necessarily identical
to each other, as they were shortened when they were bent or damaged. To
complete these rods, a small bead of Araldite was placed on the top to
form a tiny ball.
In summary, I must say that I am not totally happy with my
modelbecause I chose the wrong shade of Green.
However, Roden’s 1/72 scale Sd Kfz 231 is a super little model and I
would heartily recommend it to anyone interested in small scale armour
models.
Click on the thumbnails
below to view larger images:
Model and Text by Glen Porter
Images Copyright © 2003 by
Brett Green
Page Created 11 November, 2003
Last Updated 17 March, 2004
Back to HyperScale
Main Page
|
 Home |
What's New |
Features |
Gallery |
Reviews |
Reference |
Forum |
Search
Home |
What's New |
Features |
Gallery |
Reviews |
Reference |
Forum |
Search