|
T-55A
by
Mark A. Sindiong
|
|
|
T-55A |

Tamiya's 1/35
scale T-55A is available online from
Squadron.com
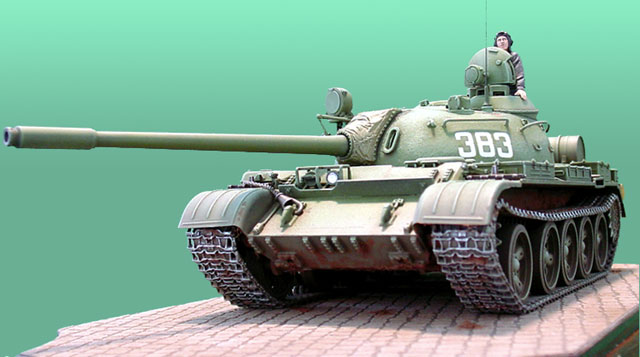
This is Tamiya’s new 1/35th scale T-55A, built box stock (except for
a couple of MV lenses) while on a short business to Japan & Korea.
I made two previous trips to Japan over the last couple of months but
failed to find a T-55A. This last trip proved more fruitful as the T-55A
had been released for at least a few weeks by then. I had planned to
build this tank during the trip from the start and had a mini “travel
kit” of tools ready to go. I was looking at general construction while
on the road and finishing up once I returned. If it all went as planned,
I’d have the model ready for display at our local IPMS chapter meeting
the day after I returned. Well, as usual, all didn’t go as planned and I
forgot my travel kit at home!!! So this build became a “basic tools
only” affair, tools I picked up at the shop from which I purchased the
tank (Domo Shima san!).
After buying this beauty and returning to my lodging, I did a quick look
to get a feel for the model but didn’t really have any time to dive on
in (too many good restaurants & good food to pass up on!). The model
therefore sat for a couple of days and then was packed up for the trip
to Korea.
Once at my hotel in Korea, after a good night’s rest, I chose my
version (Soviet T-55A, sans loaders MG) and cut some plastic. I finished
the lower hull rapidly, adding all the bits including the tracks. I’d
say it took all of two hours to complete, maybe a little less. I set the
whole lot aside to dry while I hit the town with some friends.
After cutting the evening a bit short and departing the Bar we normally
hang out at, I rushed back to the hotel and started on the turret. After
thawing myself out, I dived right into building this final assembly. The
turret took a bit longer due to its many tiny parts but overall it was
still pretty easy to finish up. I believe I spent three hours on the
turret give or take. At that point the completed but unpainted model was
packed up for the long ride home to Hawaii.
 Home at last and ready to paint! Home at last and ready to paint!
I was pushing the deadline so I
decided to cheat a bit, allowing more time for weathering. I painted the
T-55A using my Thayer & Chandler airbrush shooting Testor's Model
Master Enamels thinned with Lacquer thinner to expedite drying time.
I didn’t bother priming the model and went ahead putting paint on
bare plastic.
I first pre-shaded the entire vehicle with Model Master 2 Aircraft
Interior Black, followed up with the base coat of Model Master Interior
Green mixed with a few drops of MM2 Soviet Armor Green. How did I come
up with that mix? I don’t know, I can’t really tell what color T-55A’s
are/were, all the ones I’ve seen had been repainted and picture are
tricky to go by as well. So I went with a best guess and hoped it would
turn out.
After completing the base coat, I shot earth tones on the lower hull and
running gear (including tracks). The model was left to dry for a couple
of hours so I started working on the figure to pass time. I started back
on the model with dry-brushing the base color mixed with white oil
paint. I gradually increased the amount of white in the mix with each
dry-brush application but stopped short of using straight white during
this process. Once the upper hull was completed, I started on the lower
hull using the same technique but this time using the earth tones mixed
with oils.
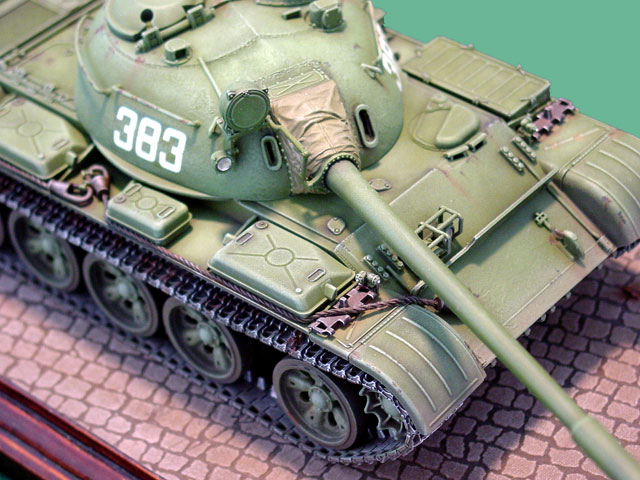
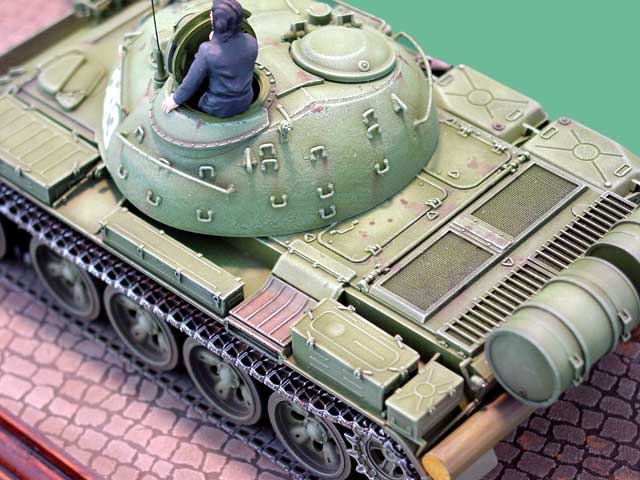
After blending the lower hull with the upper hull slightly, I commenced
on “chipping” the paint using ultra thinned flat black. The small chips
were then carefully dry-brushed with Tamiya Paint Marker Chrome Silver
and I moved onto the final weathering step. I took out my pastel chalks
and mixed up some rust tones & some earth tones, applying them to select
areas for effect.
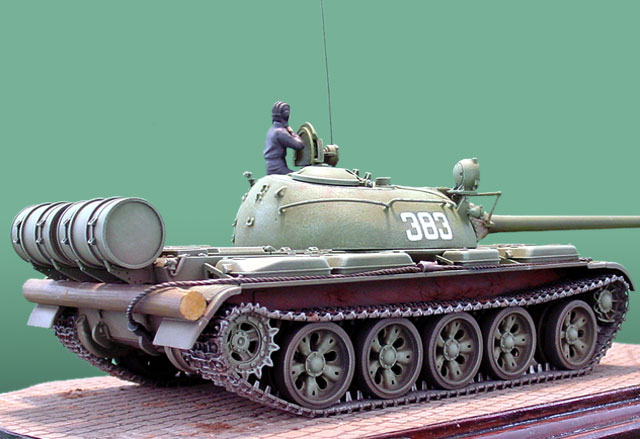
The only washes were applied sparingly to the fuel
drums & tanks.
Thinned oil paints were also used to simulate grease &
oil stains often found on the back decks of tanks. The whole tank was
then coated in a slightly flattened Testor's MM Semi-Gloss Lacquer,
placed on a simple base (not the one in the images) and whisked off to
the IPMS meeting.
Mission accomplished!
In conclusion, this was one of the most enjoyable armor projects I’ve
ever completed. The model itself is engineered beautifully and all the
parts are of top quality so building it overnight was a simple task.
The only quibble I have concerns the tracks, and how they don’t sag, but
that’s easily fixed with a little patience.
This project also reminded me that one doesn’t need all the wiz-bang
tools or a fancy workshop to finish up a straight build, this model
being built with only a hobby knife, CA glue (no accelerator), and some
sand paper. Yes, I did airbrush it but if I had found a suitable color
in a spray can… I would have applied the paint that way as well.
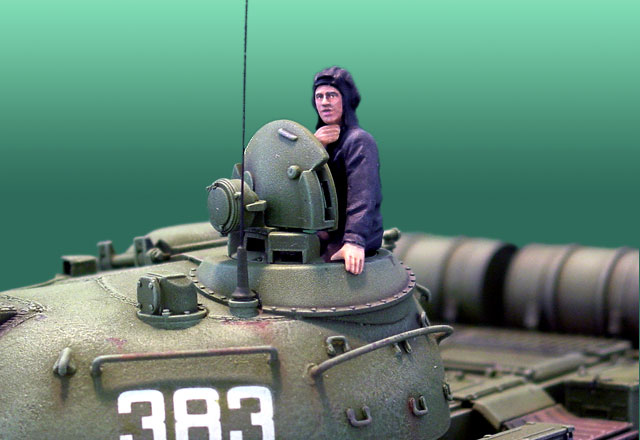
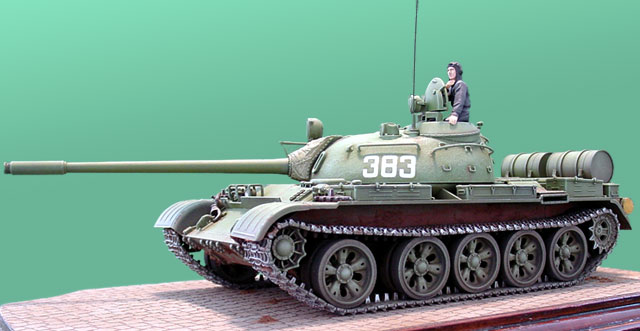
Oh, before I forget, the crew figure was added after the IPMS meeting
and was finished in Testor's Model Master 2 “skin tone” enamels. I’m
okay with the finish on the figure but still have a long way to go & a
lot to learn when it comes to painting faces!
Thanks & Happy Modeling!
Model, Images and Text Copyright © 2003 by
Mark A. Sindiong
Page Created 28 January, 2003
Last Updated 17 March, 2004
Back to HyperScale
Main Page
|
 Home |
What's New |
Features |
Gallery |
Reviews |
Reference |
Forum |
Search
Home |
What's New |
Features |
Gallery |
Reviews |
Reference |
Forum |
Search