|
T-55
by
Chris Wauchop
|
|
|
T-55 |
images and text by Brett Green

Tamiya's
1/35 scale T-55 is available online from Squadron
Chris Wauchop was very
impressed with Marcus Nicholl's Tamiya T-55 in Issue 97 of Tamiya Model
Magazine (April/May 2003). He was therefore delighted when a regular
client asked him to build Tamiya's excellent 1/35 scale T-55 using that
magazine article as a guide to detail and finish.
Armed with Tamiya Model
Magazine as his sole reference, Chris started his first 1/35 scale armour
kit in more than six years.
Although Chris does not make it a habit of using
after-market accessories on his models, he did employ a few in this case.
They were the Lion Roar photo-etch set, specifically designed for the
Tamiya T-55; and the Armor Track Models workable track links.
Basic construction was a breeze. No problems were
encountered at all, and the model would have been completed very quickly
if it was finished straight from the box. However, Chris wanted to
supplement and improve much of the detail that was moulded onto the kit.
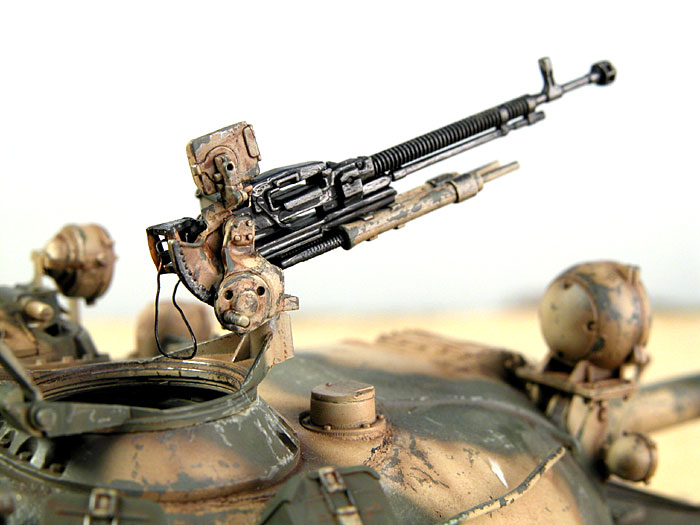
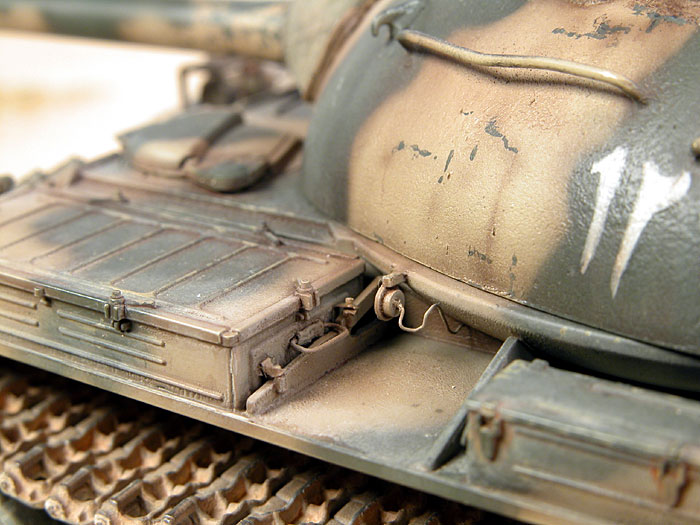
Copper wire of various gauges was used extensively to
replace grab handles, handrails, fuel lines and electrical wiring. This
wire proved to be a little uncooperative, springing back to its original
shape after being bent into tight curves. After several attempts, however,
the small parts were tamed. In-line fuel cocks were also fabricated from
wire.
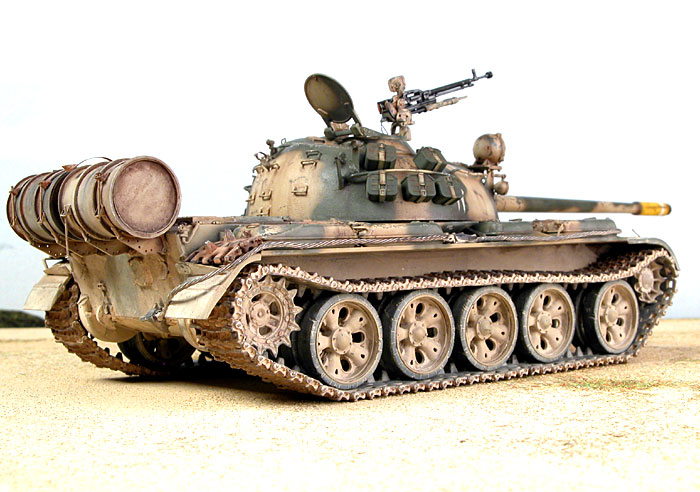
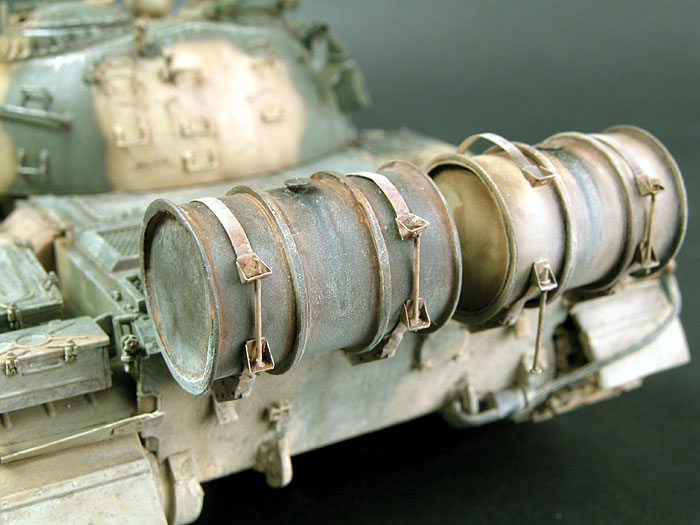
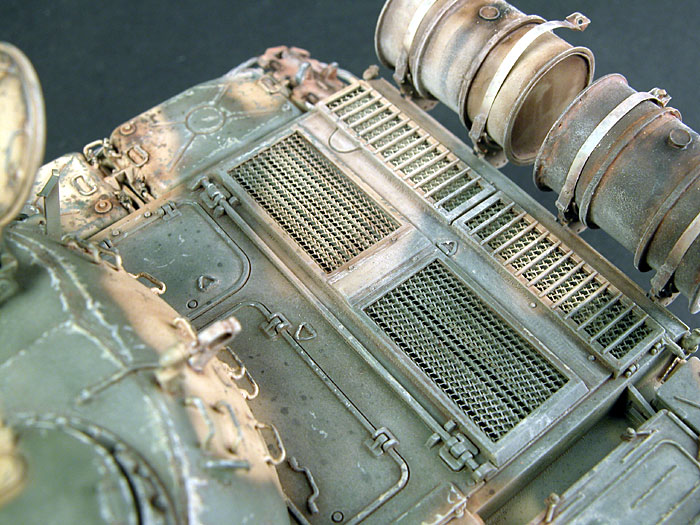
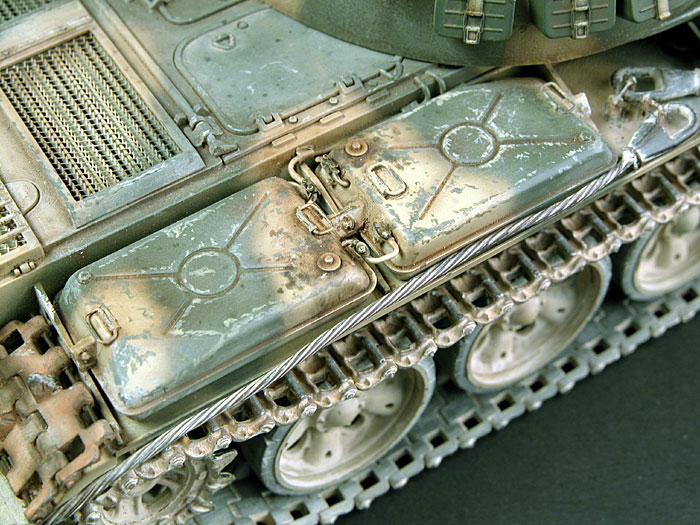
The Lion Roar photo-etched set provided mesh for the rear
deck vents and the two distinctive fuel drums and fittings on the rear of
the vehicle. Chris described folding the large photo-etched drums as "a
pain", but the results are well worthwhile. One of the separate straps
was left undone to display the detail of the securing bolts.
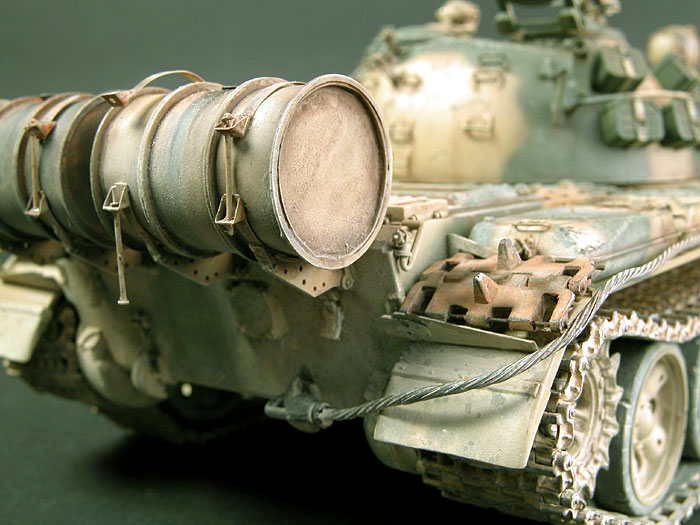
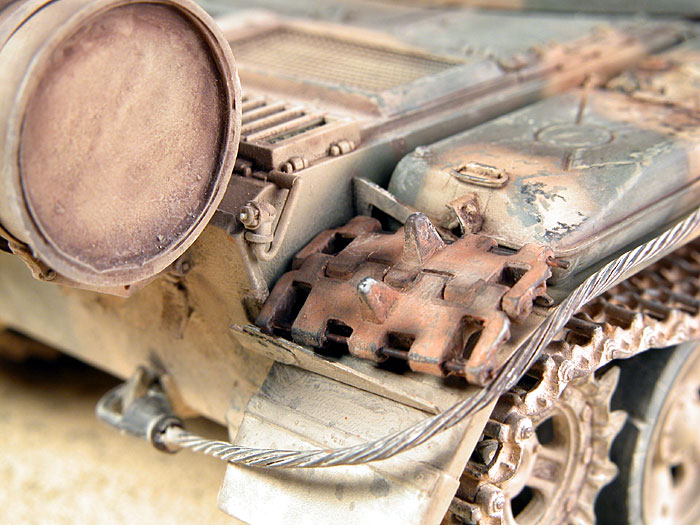
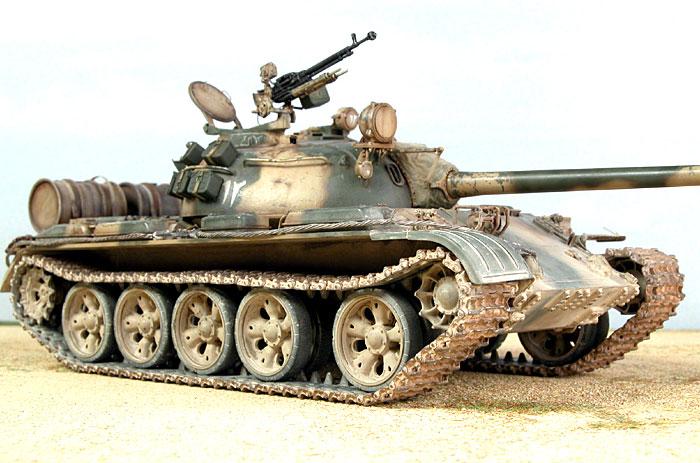
Copper picture-hanging wire substituted the string tow
cables on the kit. The copper wire is quite flexible compared to steel
cable, and also features finer individual strands.
The kit upper exhaust guard was replaced with lead foil.
The lead foil was embossed over the kit part before being beaten up
somewhat, and secured in place.
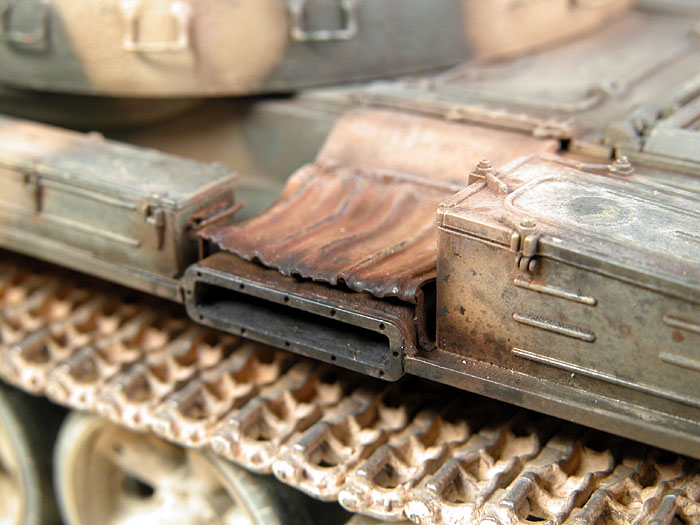
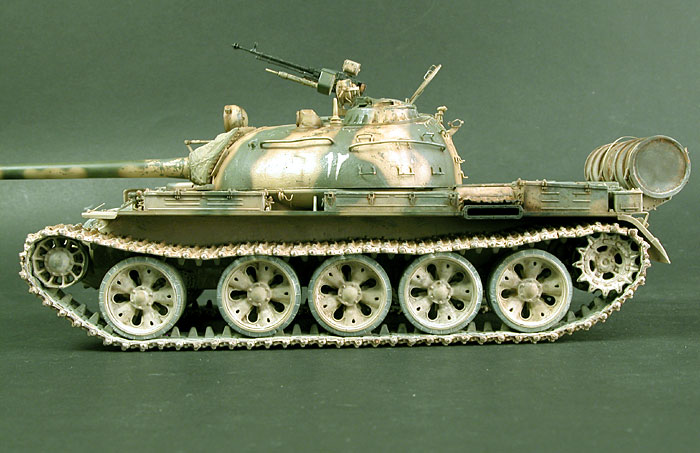
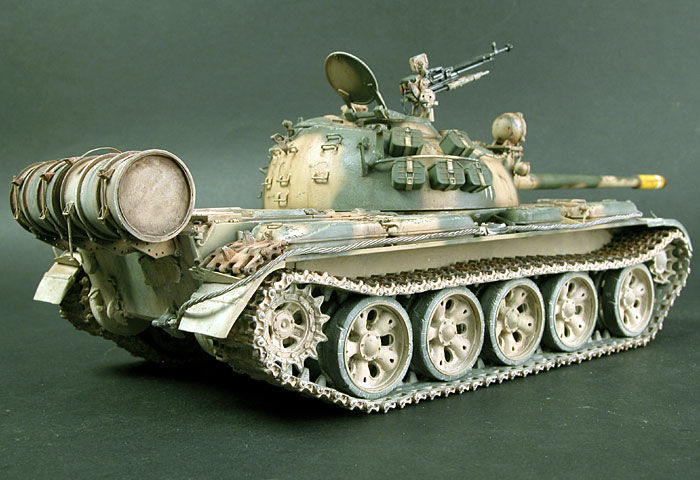
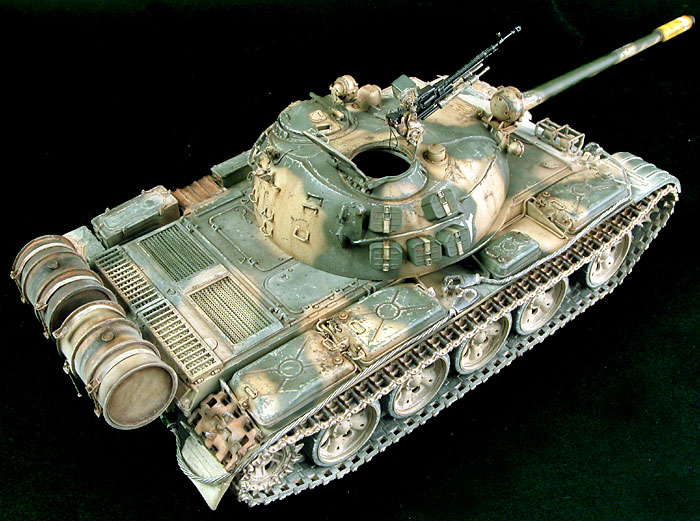
The Tamiya kit supplies vinyl tracks which do look good,
but cannot entirely capture the weight and sag of the heavy metal links on
the real vehicle. Chris's client offered the Armor Track Models track
links as a substitute. These links were probably designed for the
Trumpeter family of T-55s, but they work quite well on the Tamiya kit.
Each link required clean-up, and the track pins had a nasty habit of
either launching into space or blunting their points. Fortunately, Armor
Track Models provided plenty of spare track pins! These factors meant that
assembly was time consuming (Chris said that they took him two days to
complete), but the outcome is undeniably good.
The track set includes resin drive sprockets and idler
wheels, but Chris used the kit parts instead.
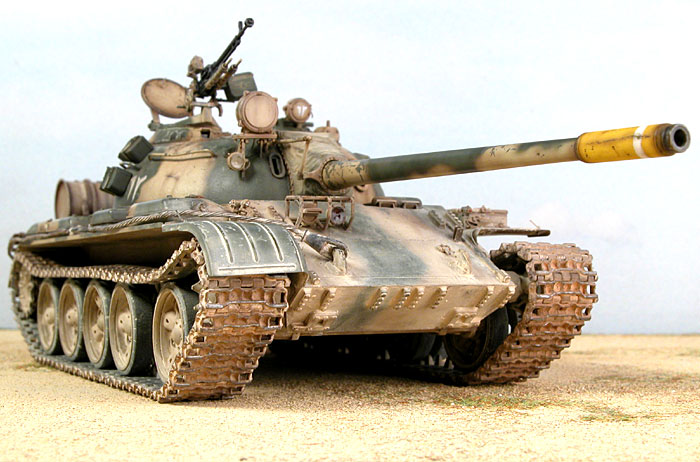
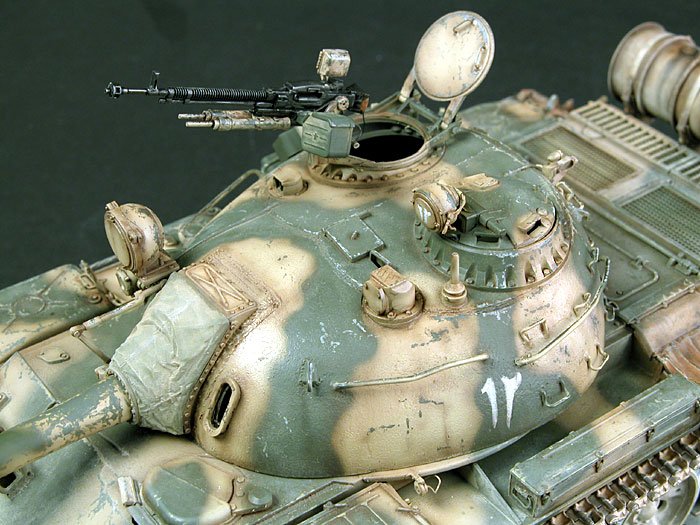
 The
model was destined to wear Iraqi desert colours with a disruptive green
camouflage pattern as used during one of the conflicts with Iran. All the
camouflage paints were applied with the Testor Aztek A470 airbrush. The
model was destined to wear Iraqi desert colours with a disruptive green
camouflage pattern as used during one of the conflicts with Iran. All the
camouflage paints were applied with the Testor Aztek A470 airbrush.
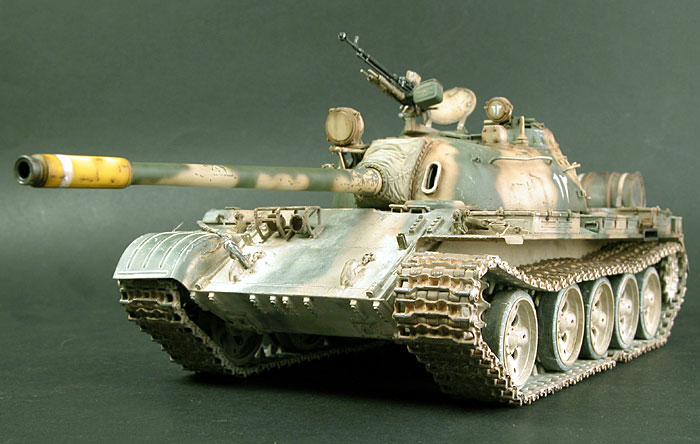
Chris's T-55 received a base coat of sand colour, mixed
according to Marcus Nicholls' recipe of 60% Tamiya Desert Yellow and 40%
Flat White.
This was followed by a disruptive green pattern. Once
again in line with the Tamiya Magazine article, the colour used was Tamiya
Field Grey. In this case, though, Chris felt that the colour needed to be
"greened up" so he sprayed a thin coat of Tamiya Olive Green over the
Field Grey.
Markings were hand painted using Flat White acrylics.
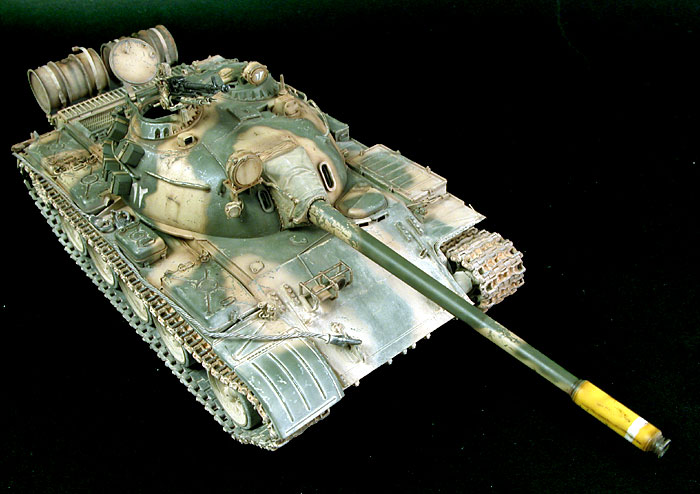
Weathering and Final Details
Marcus Nicholls used MIG Pastels in his article but Chris
did not have access to these. Instead, he mixed standard artist's pastel
chalk with Mineral Turpentine to achieve a similar result.
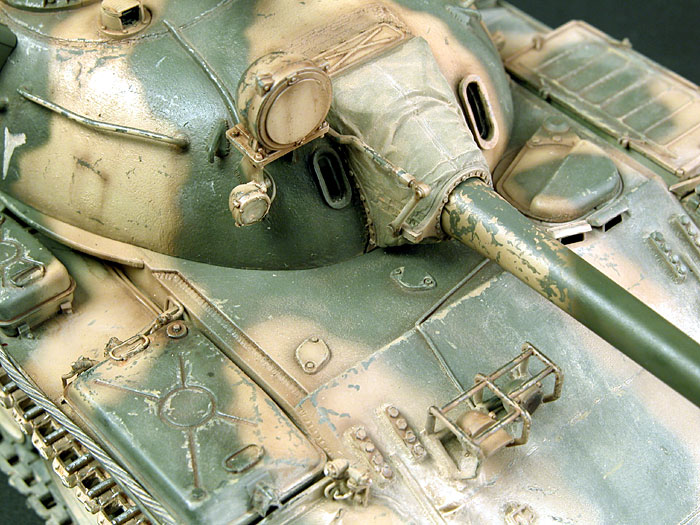
Tamiya Field Grey was applied in small, random patches
over the Sand colour in places to simulate scratches and worn paintwork,
revealing the original Soviet Green colour beneath. Grime and oily streaks
were also airbrushed onto the surface of the vehicle.
The headlight was hollowed out and lined with shiny Bare
Metal Foil, before being filled with several layers of Testor's Clear
Parts Cement. This worked fairly well, but the third coat resulted in a
slight yellow caste on the surface of the lens. The small Infra Red lamp
was also filled with Testor's Clear Parts Cement after the inside was
painted black. When dry, the lens received a coat of Tamiya Clear Red.
An oil wash (per the article) helped pick out some of the
details, and a 2B clutch pencil was applied to the high points of the
track links to simulate wear and tear.
When Chris and I discussed the model and this article, he
suggested that the text should include "with apologies to Marcus
Nicholls".
Well, as far as I am concerned, imitation is the sincerest
form of flattery; and Chris's styrene homage to Marcus' article looks like
a high compliment indeed!
Click the
thumbnails below to view larger images:
Model by Chris Wauchop
Images and Text
Copyright © 2003 by
Brett Green
Page Created 11 August, 2003
Last Updated
17 March, 2004
Back to
HyperScale Main Page |
 Home |
What's New |
Features |
Gallery |
Reviews |
Reference |
Forum |
Search
Home |
What's New |
Features |
Gallery |
Reviews |
Reference |
Forum |
Search