|
Focke-Wulf Ta 154A-0
by Brian Criner
|
 |
|
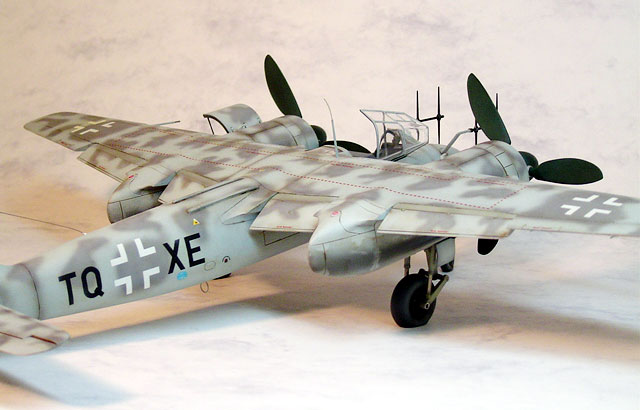
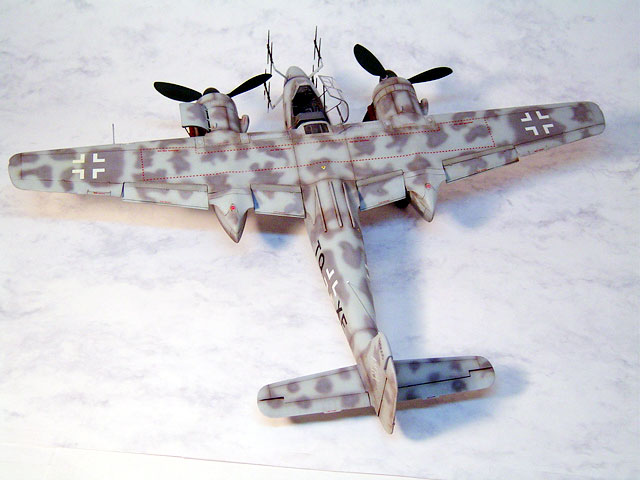
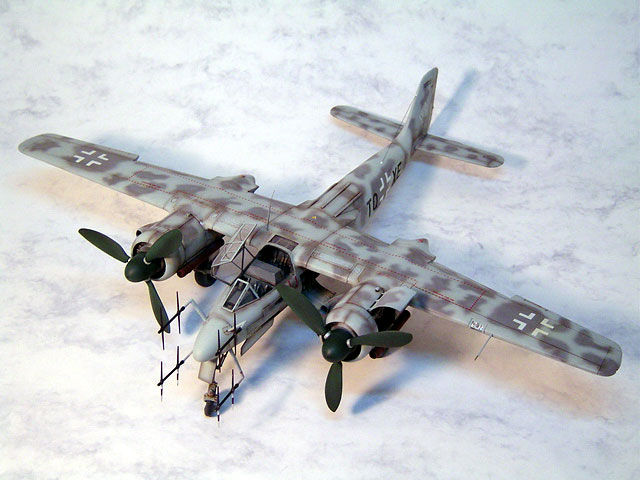
Focke-Wulf Ta 154A-0 |

ProModeler's
1/48 scale Ta 154A-0 is available online from Squadron
Here is my 1/48 scale
ProModeler Focke-Wulf Ta 154A-0 "Moskito". I picked up the kit the first
day it showed up in the stores several years ago and promptly shelved it.
Several build-up reviews
identified serious fit problems, inaccuracies as well as warped parts.
Disappointed with the bad reviews, I moved it to the bottom of my to-do
list.
A few years later I ran
across the Verlinden update for the Moskito, and picked it up, just in
case I ever became a little sick in the head and decided to actually build
the beast. Last year, I came across yet another set of detail parts for
this model from Cutting Edge (VS 9 props and new spinners), and for some
reason decided to buy them.
Now I was in that
"Modeller's Catch-22". I didn't really want to build the kit, but I had
invested too much money to let it just sit on my shelf. Somebody help me!
Well, once I started on this
monster, I was determined to do a decent job.
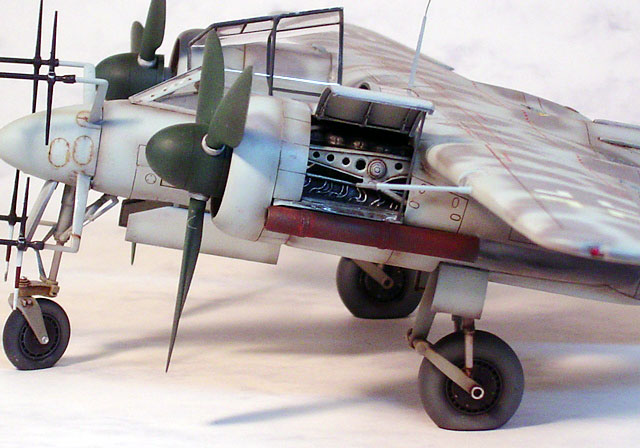
I started prepping the
fuselage to receive the Verlinden parts. Though the Verlinden cockpit is a
big improvement over the kit parts, I found the resin cockpit difficult to
fit.

The next hurdle was the
warped wing. Right out of the box, there was a very noticeable torsion in
the wing. I tried the "hot water" technique for softening the plastic, and
basically just twisted the thing until the wing started to crack. Once the
wing was straight, I cut out the flaps in order to add the resin dropped
flaps.
One characteristic of the Ta
154 that was noticeably absent from the basic kit was the characteristic
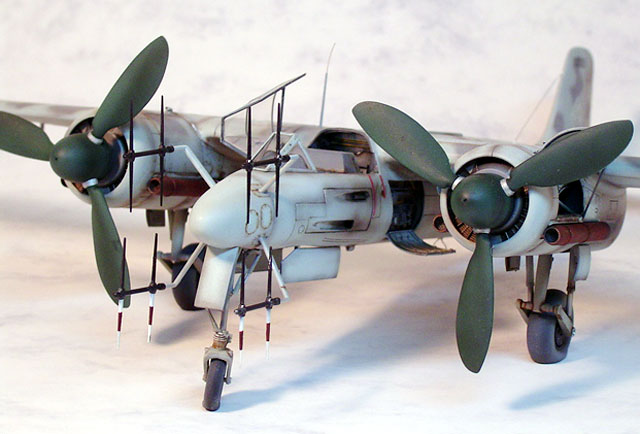
nose-high squat. I decided to recreate this by cutting the main gear oleo
struts out and adding Minimeca tubing. This dropped the main gear by about
2 millimeters. I then added a cut piece of a syringe needle to size and
replaced the nose oleo. This added about 2 mm to the nose gear strut.
With the new stance, I knew
I would encounter some serious center of gravity issues, so I started
adding leading fishing sinkers, hammered out to shape, into the engine
nacelles, lead shot to the leading edge of the wing and to the nose cone.
I dry-assembled the parts to see if I had added enough weight for a normal
sit. It wasn't enough! The aircraft teetered and then gently squatted back
on it's tail.
Dismayed, I thought maybe
the addition of the resin props from Cutting Edge might be far enough in
front of the CG to pop the nose down.
Sure enough, with the
addition of those props, the nose gently rode down.
Painting,
Markings and Finishing Touches
|
After enduring the
construction woes of this model for almost 13 months (I shelved it several
times to work on some more, um, user-friendly kits), I was finally ready
to paint.
The rest of the kit
construction went relatively smooth, although I must have used half a
bottle of micro-sol getting the decals to disappear.
In addition to the Verlinden
and Cutting Edge resin parts, I also added photo-etch antennas from an old
DML kit and wheels from True Details.
Though I came close to
pitching this model a few times, I liked the final result.
I hope you enjoy it as well.
Click the thumbnails below to view larger
images:
Model,
Images and Text Copyright © 2003 by
Brian Criner
Page Created 08 October, 2003
Last Updated
05 May, 2005
Back to
HyperScale Main Page |
 Home |
What's New |
Features |
Gallery |
Reviews |
Reference |
Forum |
Search
Home |
What's New |
Features |
Gallery |
Reviews |
Reference |
Forum |
Search