|
Focke-Wulf Ta 183B-1
by Richard Chafer
|
 |
|
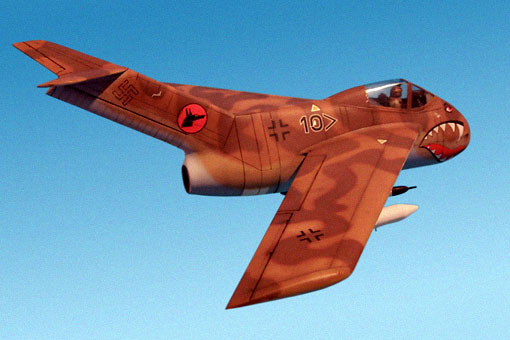
Focke-Wulf Ta -
183B over Egypt 1946 |

AMtech's
1/48 scale Ta 183 is available online from Squadron.com
This is AMtech's 1/48 scale kit of the Focke
Wulf Ta-183 "Huckebein".
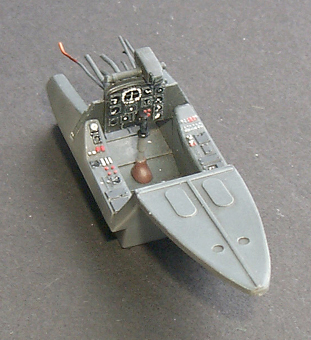
Construction began with the cockpit. The only
addition here was to add copper wire behind the instrument panel
instruments, which can just be seen on the completed model.
 Instruments, dials and switches
were detailed using a toothpick and enamel paint. The cockpit itself
was painted Tamiya acrylic dark grey, sealed with Shine Magic
(Future), left to dry for a day, then washed with a black / raw
umber Winsor & Newton oil paint wash thinned with Turpentine. Excess
wash was removed with a lint free cloth, then once dry, the cockpit
was dry bushed with light grey enamel paint, then sealed with Polly
Scale Flat finish. Instruments, dials and switches
were detailed using a toothpick and enamel paint. The cockpit itself
was painted Tamiya acrylic dark grey, sealed with Shine Magic
(Future), left to dry for a day, then washed with a black / raw
umber Winsor & Newton oil paint wash thinned with Turpentine. Excess
wash was removed with a lint free cloth, then once dry, the cockpit
was dry bushed with light grey enamel paint, then sealed with Polly
Scale Flat finish.
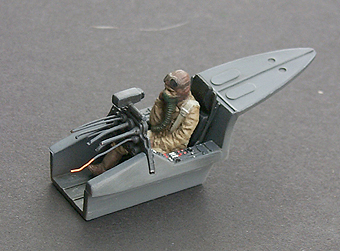
Pilot figure is from the Tamiya
MiG-15 kit. Actually trying to find a 1/48 scale pilot figure to
fit into the cockpit proved problematic. I tried an Eduard pilot
figure out of their Airacobra kit, but it was too wide. The pilot
figures out of the Tamiya Corsairs were too big! The Tamiya MiG-15
pilot however was just right.
Since this model was going to be
'wheels up' a stand would have to be manufactured accordingly. The
logical place for the stand to go was 'up the tailpipe'! So a
section of plastic tube was superglued into position to accept the
acrylic rod and keep the model stable once on the stand.
Construction was straightforward.
The fuselage, wings and main undercarriage doors all went
together well. The front undercarriage doors however were a problem.
Fitting these doors in the closed position caused a large gap, also
the doors would not 'sit' in position very well and they needed some
pretty heavy filing to blend-in to the fuselage. Once done the
surrounding gap and filing damage was filled with thick superglue
and accelerator then sanded smooth and re-engraved.
The nose and tail sections also needed some slight filling and
sanding, but nothing too drastic.
I began building this model three weeks before a major
competition here in South Australia. I have never completed a model
in three weeks in my life! Usually a 48th scale kit can take me up
to six months to complete depending on how complex it is. However
this kit goes together VERY quickly, especially building it 'wheels
up' like I have. So if you need to build a kit to get yourself back
into the swing of kit building again I highly recommend this kit!
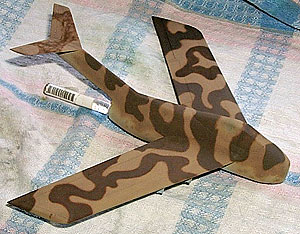
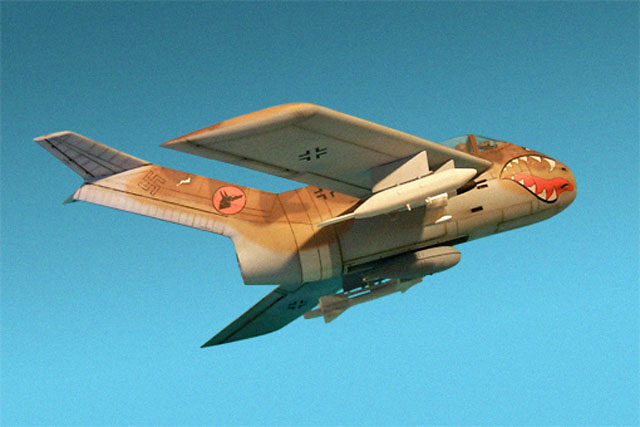
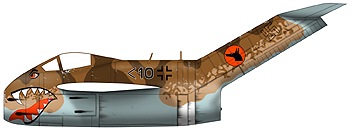 Trying to replicate the complex camouflage scheme I had created
caused me more problems than I could have ever imagined. Trying to replicate the complex camouflage scheme I had created
caused me more problems than I could have ever imagined.
Painting the camouflage scheme on the computer in
Photoshop is a piece of cake, trying to replicate it with an Aztec
A470 in a hurry was just simply not working. In fact I ended up
stripping the Tamiya acrylic paint off this model twice! Luckily
removing Tamiya paint with Mentholated Spirit is easy to do.
Colours used were all custom Tamiya paint mixes
sprayed at 20 PSI using an Aztec A470 with a new tan tip:
|
Tamiya paint mixes
|
|
Dark Brown
|
Light Brown
|
Sand
|
Light blue
|
|
XF-64:4
XF-61:2
XF-57:3
|
XF-52:8
X-6:2
XF-59:4
|
XF-57:10
XF-59:2
|
XF-8:1
XF-2:10
|
|
20 drops of Tamiya thinner.
|
20 drops of Tamiya thinner, & 1 drop of flat base.
|
20 drops of Tamiya thinner.
|
20 drops of Tamiya thinner.
|
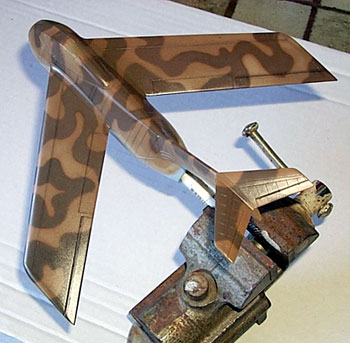
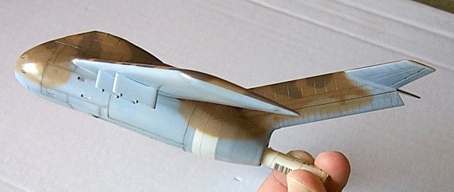
In the end I compromised with the camouflage scheme
eliminating the mottling and settling for a feathered edge. In the
above photo the model has just been lightly sprayed with Shine Magic
(Future) at 20 PSI which despite the way it looks in the photo gave
a glass smooth finish.
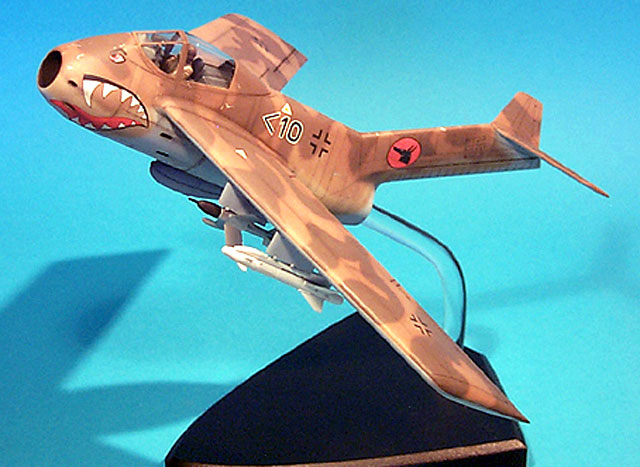
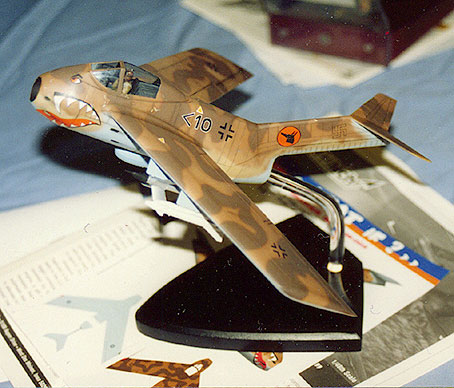
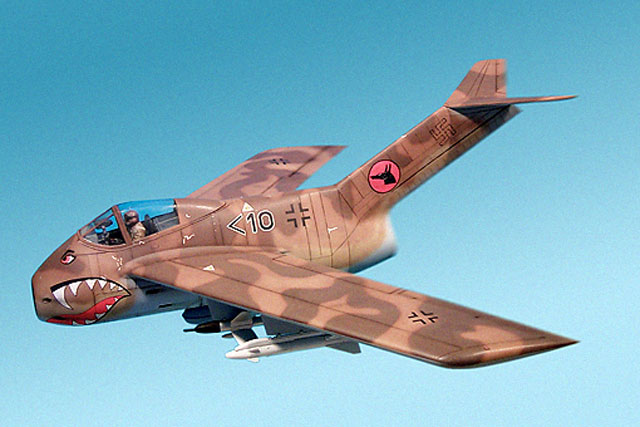
Here's the finished model with decals applied. No great problems
were encountered with the decals. However because they are quite
thin care is needed, particularly with the Shark Mouth.
Decals were helped along with Gunze Sangyo Decal setting soloution
which sorted out any silvering 95% of the time. The decals were
sealed-in with Polly Scale Flat finish.
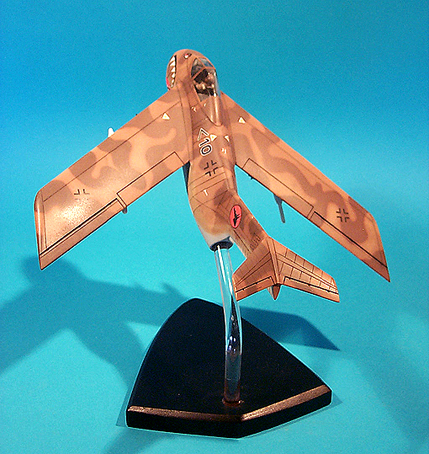
The stand was created for me by a friend by the name of Peter
Murrie who got it done in one day, two days before the
competition!
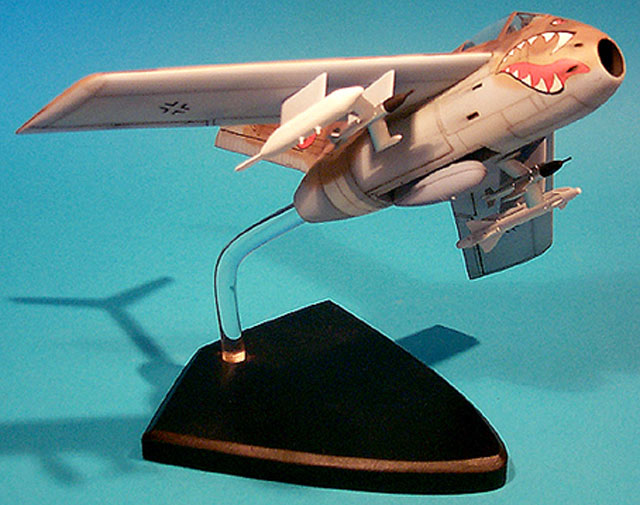
Light weathering was achieved with a heavily
thinned mix of dark brown / black Tamiya acrylic paint thinned
with 95% Tamiya thinners airbrushed at 20PSI along the panel lines
and very light streaking along the wings following the direction
of airflow. Additional washes were applied with a very dark brown
oil paint wash thinned with Turpentine. The weathering was
completed with some pastel streaks and patches.
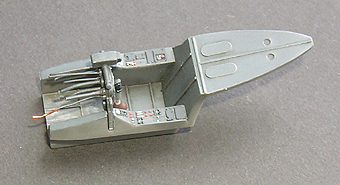
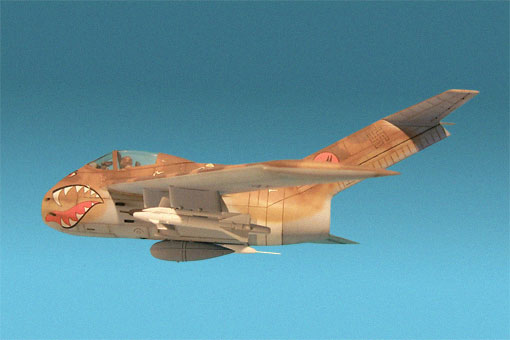
The "Wild Weasel" weapons fit came from the Dragon
1/72nd scale Modern Soviet Aircraft Weapons set 2. Plus two of the
missiles and drop tank that came in the AMtech kit.
The decals are from Gekko Graphics, which is the
decal company I run. More information can be found here:
http://www.gekkographics.com.au/images/Ta-183%20003/Ta-183%20GGWI48003.htm
http://www.gekkographics.com.au
Anyway I hope you like my three week wonder. If
you have any questions please don't hesitate to email me.
Click on the
thumbnails below to view larger images:
Model, Images and Text Copyright ©
2004 by
Richard Chafer
Page Created 14 February, 2004
Last Updated
17 March, 2004
Back to
HyperScale Main Page |
 Home |
What's New |
Features |
Gallery |
Reviews |
Reference |
Forum |
Search
Home |
What's New |
Features |
Gallery |
Reviews |
Reference |
Forum |
Search