|
Tupolev Tu-22 Blinder B
by Bill "C2C" Dye
|

|
|
Tupolev Tu-22 Blinder B |

HyperScale is proudly supported
by Squadron.com
I built this model several years ago and
was fortunate enough to have it place first in a few contests in the
mid 90’s in the Northern California ‘circuit’. About that time I
prepared a rough draft of the following article but never finished it.
For the last 5 or 6 years, I’ve been focused on N scale trains after
building 1/72nd scale aircraft for 25 adult years before that.
Recently I decided to pick up where I left off. With the encouragement
of Dave Hansen, who left the San Jose, California area to pursue his
flying endeavors, I dusted off this article. Dave introduced me to the
HyperScale website and encouraged me to submit this particular
subject. (I think he liked the model!)
While active in the San Jose contest circuit, I guess I was known for
attempting the more difficult kits. Not necessarily because they were
difficult, but because they just happened to be the only kits
available for the unusual subjects I wanted to build. Hence, I’ve
built a lot of vacuforms and many turkey kits. Roy Sutherland, aka
Cooper Details, once said at a Fremont, California modeling meeting,
“Bill, once again, has turned Crap into Cake!”. So I guess I’m Bill
(C2C) Dye.
This kit is by no means ‘crap’ but does
fall under ‘unusual’ for an injection molded product.
That said, this article is a tad old, so the prices, etc. may be out
of date. I’m hoping it will encourage those that have this kit in
their closet to build it!! I simply love this a/c. Like the XB-70, it
looks like it’s going Mach 2 just sitting on the ground! (The XB-70 is
another story!)
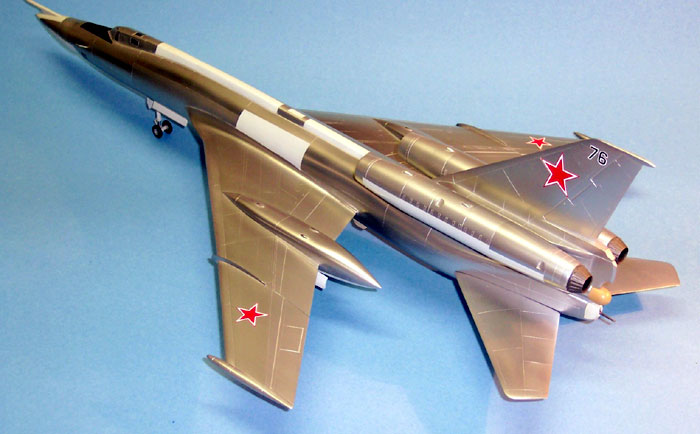
The Tupolev
Tu-22 Blinder B
|
The
Tu-22 was the Soviet Union’s first attempt at a truly intercontinental
bomber. Unfortunately, after initial testing in the early 60’s it was
soon discovered that the range was far less than anticipated. An aerial
refueling probe was added making the bomber at least something of a
threat. But the primary ‘work horse” intercontinental bomber for many
years was the turboprop Tu-95 Bear.
The Blinder B model was fitted with the ‘Kitchen’ air to surface
standoff missile (460 mile range) in the late 60’s that compensated only
somewhat for the still deficient range.
Many Blinders were exported, particularly to Iran and were even spotted
during the Desert Storm operation.
ESCI's 1/72
Scale Blinder B
|
ESCI
marketed the 1/72nd scale Blinder A and Blinder B with the missile for
USD$36.00 in (around) 1993. At the time, this seemed a little steep but
with the aid of a gift certificate I bought one. (I had a feeling that
AMT wasn’t going to release the same kit for $15.00 any time soon.
They’re on to us – the “gotta have it NOW”!! Syndrome.)
Although quite large, about the size of a B-47, the ESCI engineering of
the kit is pretty close to a typical jet fighter. I wouldn’t sink a lot
of money or time detailing the cockpit because after painting maybe
you’ll see the seat and that’s about all. Even the people playing
‘Plastic Model Doctor’ with their tiny flashlights looking into plastic
model orifices wouldn’t see much!
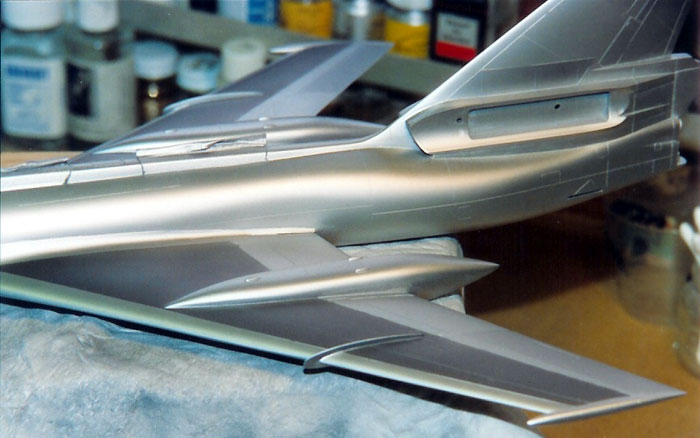
Construction The wing fuselage joint on the
top surface, naturally, is not too hot – I put a fairly large fillet of
putty to get the joint close to that of the real aircraft.
After assembly I sanded the entire aircraft with 400 grit - yes 400 - to
try to alleviate the way too deep panel lines. Then 600, then 1000, then
1500 then 2000.
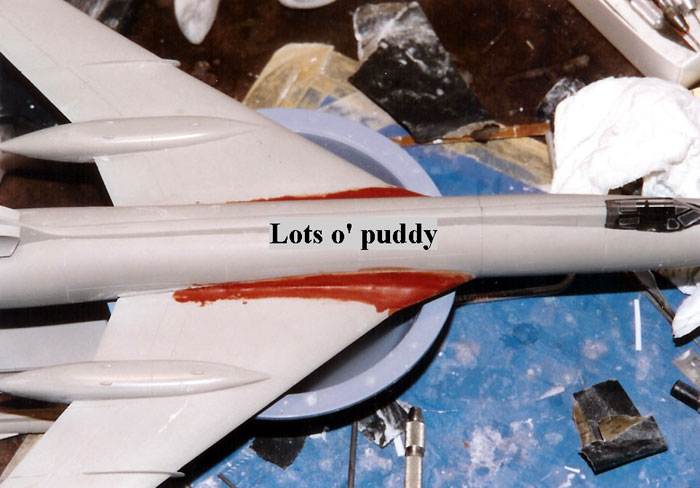
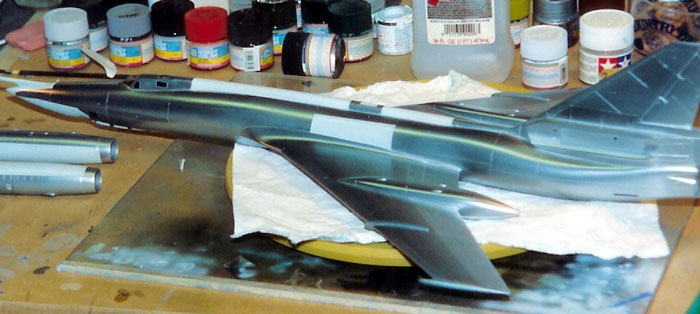
I
painted the entire aircraft with SnJ and found lots of sanding scratches
(Dave Hansen likes to point these out – his eyes are younger and
better!). So, I wet sanded it all off with 1000 grit paper. Sand, sand,
sand, dunk (water), sand, sand, sand, dunk, s,s,s dunk; repaint, sand,
sand, sand, dunk . . you get the picture. If you don’t, there’s what the
mess looked like:

Finally I repainted it with about 5 light coats of SnJ with 15 min to ½
hour between coats – one coat about each commercial on TV. Now the fun
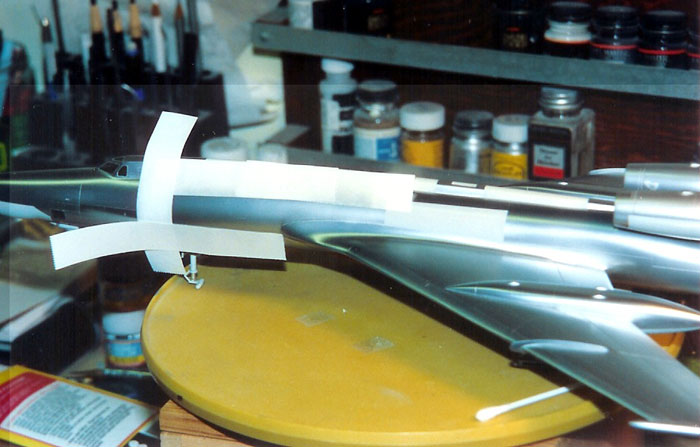
begins. To get the paneling effect or, what I call ‘quilting’ one must
mask off certain areas and re-spray that panel with a slightly different
color. Trouble is that with SnJ the trick is to get the polish on ASAP;
like with in 30 minutes. Tape takes a long time to get just right and I
found another, faster way. It may sound a little strange, but it worked.
I used strips of wet three ring binder paper that adheres nicely to wing
surfaces as masking. These strips were dunked (that word again) it into
a small bowl of clean water and pulled from the water across the top of
the bowl to squeegee off the excess water. I laid the wet strip next to
one of the panel lines on the wing. I repeated this three times
surrounding the panel with wet strips of paper with no water drops on
the ‘target panel’. After the paper was on the mark, I loaded the bowl
of my airbrush with SnJ and a drop or two of Stainless steel (or
titanium or even a gray paint) and lightly sprayed this onto the panel.
No, the paper did not fly away because the water and paper has enough
surface tension to hold it in place. And use a low spray air pressure.
You can successfully blow it away if you really try. I got tired of
repairing pulled up polishing powder and notice that wet paper stuck to
glass quite will. So with a glass like surface, like one ready for SnJ,
it should work and it did!
I did most of the ‘quilting’ in one night (you can work really fast with
wet paper strips) Remember, it’s got to be not rock hard dry when you
polish. I donned my respirator and polished the whole model with SnJ
polishing powder. Ooooo - Shiney! Then, I let the model sit for about
two or three days. Then I washed it! The water cleans off all of the
excess powder. Buff with a very soft cloth. Additional ‘quilting’ was
done using 3M Label tape as shown below.
One or two evenings were needed for masking and painting the many white
areas on the model. I used an “off-white” but if I had it to do over
again, I’d use a very light gray for a better scale effect.
The box decals are OK. I flattened the ‘wing box’ with clear flat after
the decals were dry. Pastels on the engine exhausts and black or ‘grime’
wash on the gears. Add pitots, probe, remove window masking; DONE!
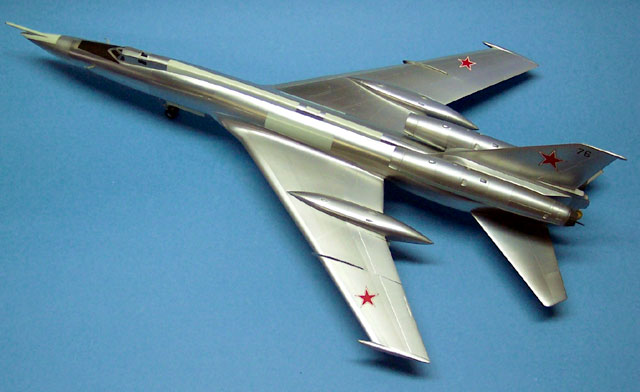
Bottom
line: The panel lines are too deep and the wing fuselage joint is a
challenge but it builds into a very nice model of an unusual aircraft
subject.
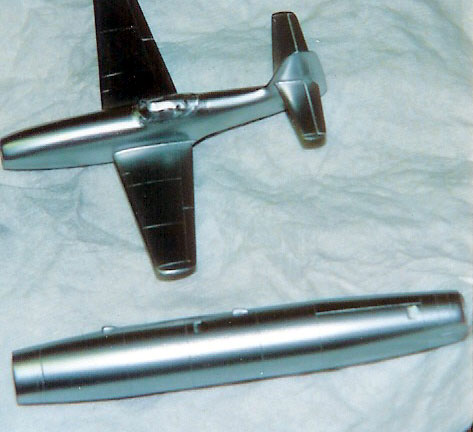
As a side light, check out the size of a Single TU-22 engine pod with a
KP kit YAK-23 (in work).
I used
a “Profile” which has sufficient drawings, photos and color schemes to
build the kit. Other references are:
-
Taylor, M., Warbirds Illustrated, No. 30,
‘Strategic Bombers 1945 to 1985’
-
Illustrated Encyclopedia of A/C #211 Vol
18 issue 3
-
Gunston, Soviet War Planes, 1977
-
AW&ST “Soviet Weapons” index, March 1975
-
AW&ST June 15, 1981 photo
Click on the thumbnails
below to view larger images:
Model, Images and Text Copyright © 2003 by
Bill Dye
Page Created 24 January, 2003
Last Updated 17 March, 2004
Back to HyperScale
Main Page
|
 Home |
What's New |
Features |
Gallery |
Reviews |
Reference |
Forum |
Search
Home |
What's New |
Features |
Gallery |
Reviews |
Reference |
Forum |
Search