|
Shorts Tucano T.1
by Michael Johnson
|
 |
|
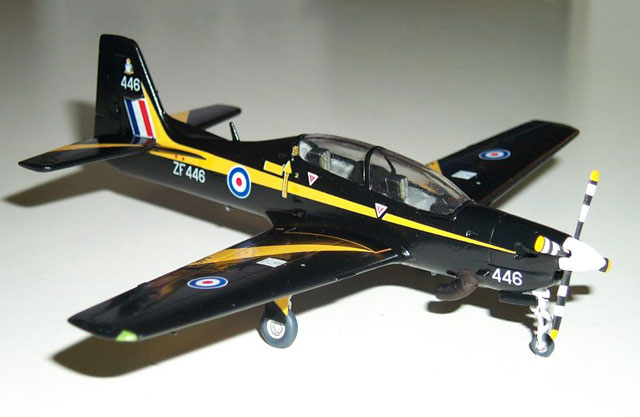
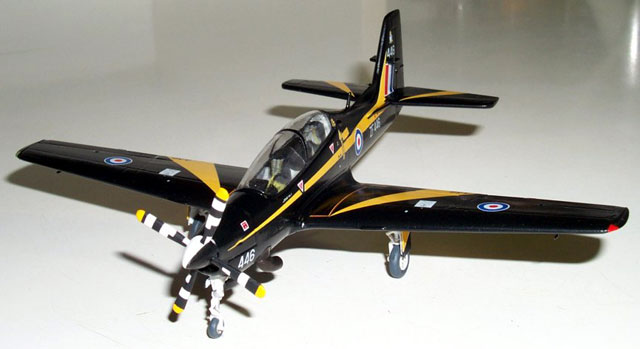
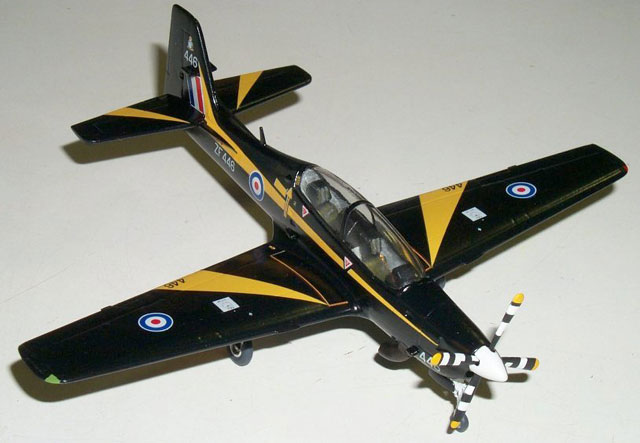
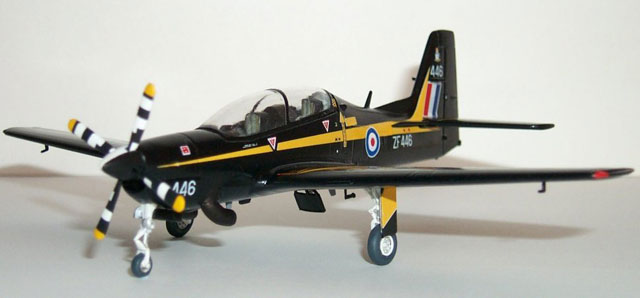
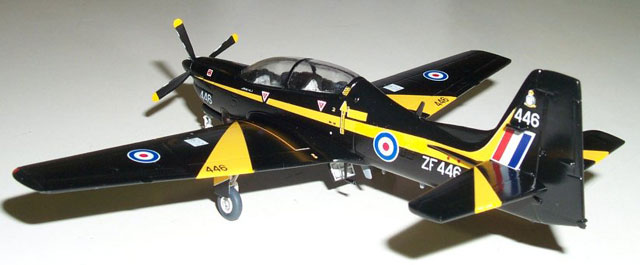
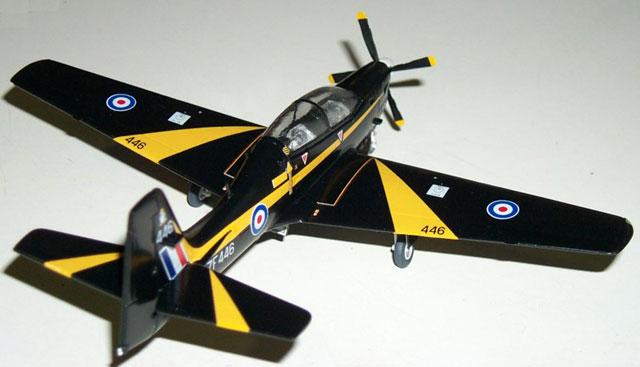
Shorts Tucano T.1 |

Airfix's
1/72 scale Tucano T.1 is available online from
Squadron
The Shorts Tucano T.1 serves with the RAF as a basic
two seat turbo prop trainer. Selected in the face of fierce competition to
meet RAF requirement AST-412 for a Jet Provost replacement, the Tucano has
a high performance combined with a considerable economy of operation.
(Whilst evaluating a replacement for the MB326 Aeromacchi, the RAAF also
considered the Shorts Tucano. Eventually the RAAF selected the Piletus
PC9).
Developed from the Embraer EMB-312 Tucano, which is also in widespread
service, the RAF version has a more powerful engine in a redesigned nose,
a four bladed propeller, ventral airbrake and restyled wingtips. Less
obvious is the structural strengthening to give 50% longer fatigue life,
new BAe Hawk style cockpit layouts and strengthened cockpit canopy; plus
the crew are provided with Martin Baker MB 8LC ejection seats.
Following a lengthy development programme, the Tucano entered service with
the Central Flying School at RAF Scampton in mid 1988 and as the 130
machines on order were delivered into service they replaced the Jet
Provost with the Flying Training Schools, No. 7FTS being the first. The UK
Ministry of Defence also has an option for 15 Tucano T.1’s and the Kenyan
Air force has also ordered 15.
The Tucano T.1 is powered by a Garrett TPE331-12B turboprop engine
developing 1100 shp and has a maximum speed of 514kph (312 mph) at 4567m
(15,000’). Wing span; 11.2m (37’ 0”) and length 9.85m (32’ 4”).
I snapped this kit up at a recent club night held at a local hobby shop,
the incentive being an attractive discount of 25% and the vision of the
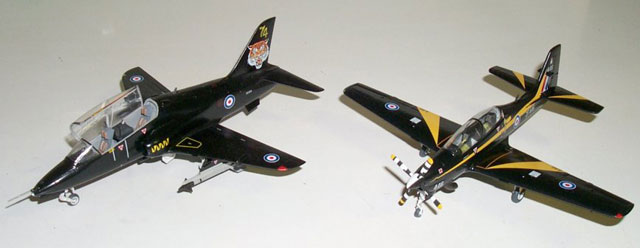
completed model positioned next to my BAe Hawk T.1A.
The Kit
Resides in a typical top opening Airfix box, with box
art depicting the attractive all black scheme adopted by the RAF for their
trainer aircraft. Opening the box reveals two light grey plastic sprues,
one clear, an excellent decal sheet and a comprehensive instruction sheet.
On the whole, all parts are clean and flash free, with fine, nicely
defined engraved panel lines.
My one gripe, as usual, is that the clear parts are not bagged separately,
so protecting them from scratches and the like. It would be no more
expensive to do and would save extra work for us all!
Decals were dense and slightly thick; however there were no details at all
on some of the placard markers and squadron badges. What had printed was
blurred and lacked definition. However I decided to use them as there
appeared to be no aftermarket options available at all. I also decided not
to use the out of register roundels, substituting them with perfect, but
slightly smaller roundels of the correct type from my Mike Grant Decals
Hawk decal supply.
I also did the rounds of the Hobby shops here in Perth and looked at two
other Tucano kits, with all suffering from out of register roundels, but
the stencils were much more sharply defined. During this process I ordered
another sheet online from Airfix. C’mon Airfix, give us some quality
control here!
Construction (as always) started in the cockpit. The
instrument panels were painted neutral grey and the kit provided
instrument panel decals were added. The standard interior finish for the
Tucano is grey, for this I used Humbrol H64 grey. The plain looking
ejection seats were painted black, cushions picked out in olive drab and
masking tape seatbelts added to “busy them up a bit”. They were a tight
fit for the cockpit tub, needing a little shaving of the lower sides to
allow a better installation.
A quick dry fit ensured the completed cockpit tub fitted well so it was
then cemented into place along with as much lead weight as would fit in,
and the fuselage sides joined together. The fuselage only needed minor
amounts of filler which were then cleaned up with wet and dry used wet to
remove any seam lines. The nose and radiator assembly was another story
altogether, requiring a fair amount of filler and associated work with wet
and dry to eradicate the seam and to smooth it in to the rest of the
fuselage.
While the fuselage was drying, I assembled the wings. These needed careful
filling and re-scribing to remove the joins of the upper and lower wing
halves. Gaps in the wheel well where the well sides were too short were
attended to with applications of PVA glue, the excess wiped away with a
moist cotton bud (That’s a Q-tip for our cousins across the Pacific). I
did check to see if the top wing half could be forced to meet the wheel
well sides but the distortion caused by doing this would have been too
obvious.
The wings attached to the fuselage fairly well, with small amounts of
filler required, smoothed over with the nail polish remover dipped cotton
bud. This is a fantastic way to fill gaps in areas such as wing roots or
hard to access areas. I apply the filler as normal, leave it to cure for 5
minutes and then run an cotton bud dipped in nail polish remover (make
sure the remover is of the acetone type) along the filler. The moist
cotton bud softens and smooths the filler into place perfectly, removing
any excess in the process. Once dry the whole process can repeated if
required. I then carefully sanded any remains of the small step created
after the filler had dried thoroughly.
The underside, where the one piece lower wing abutted to the fuselage was
another matter, requiring filling and sanding to eradicate the join line.
Care is needed to be taken to preserve the complex shape of the rear lower
wing; this was complicated by the ventral aerials close proximity to the
join lines. The wheel wells and air brake well were then painted white
with several thin coats of Citadel Skull White. Once the paint had dried
for 24 hours, I masked all the wells with moist tissue paper, which was
then covered in Humbrol Maskol.
Once the wings and tailplanes were on, I realised that the trailing edges
should have been thinned out as they have a real “chunky” look to them,
reminiscent of earlier kits. Unfortunately substantial thinning would have
to be done and I was not willing to buy into re-scribing and replacement
of moulded features.
The exhausts were cleaned up and hollowed out with a hobby drill and
painted with Testors Metalliser Burnt Iron. I elected at this stage to
leave the exhausts off. This was to be a decision to that was to cause
problems at a later date.
The canopy was polished with Novus plastic polish and brush painted with
Future inside and out to improve clarity. Once the Future had cured,
Tamiya masking tape was used to mask the canopy and it was then cemented
in place. PVA glue was then used to fill any gaps.
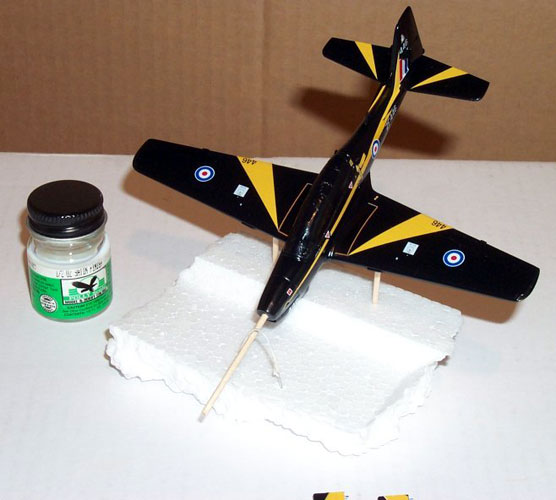
I took the quick way out with the overall black
finish of the Tucano, laying down a number of mist coats of Citadel Chaos
Black straight from a spray can. This gave a wonderful flat back finish
which would later form a perfect base for gloss coating.
While the airframe was drying I began to mask the complicated black and
white spinner and propeller scheme so prominent on the Tucano. This nearly
drove me to distraction, but worked perfectly and I was most impressed
with the end result, breathing a very deep sigh of relief and reminding
myself how much I prefer building 1:48 scale kits!
I sprayed the undercarriage legs and wheel well door interiors white and
applied Future to them in preparation for some weathering. Weathering was
a disaster, and I had to cut back the paint with Mr Muscle oven cleaner
and start over. This time the weathering turned out rather well and
another sigh of relief was breathed as the finished items were flat coated
and set aside to dry.
Once all the paint on the airframe had cured, I applied several coats of
Johnsons Future with a wide flat brush, kept especially for this purpose,
to seal everything in and prepare the surface for the application of the
decals.
Applying the decals was time consuming and frustrating but once in place
they settled wonderfully onto the model with no silvering at all. Most of
the yellow stripes had to be touched up with Aeromaster Orange Yellow to
remove white edging and to fix up gaps caused by adjusting their ill
fitting nature. I used Aeromaster Sol II decal solvent to help bed them
all down with no adverse reactions. Once the decals had dried, the
fuselage was washed very carefully with a damp cloth to remove any glue
and solvent residue and the decals where then sealed in with yet another
coat of Future. As I mentioned earlier, Airfix has real problems with
quality control and decals vary wildly from kit to kit.
As this is a trainer aircraft, I decided that it would be kept pretty
clean by overzealous ground crews, with weathering kept to the bare
minimum. So I contained the “dirtying up” to the wheel wells and the
undercarriage legs.
Once again the model was put aside to cure and finally sprayed with Polly
Scale Low Sheen Clear, to give an all over “scale” gloss finish.
Canopy masking came off now and to my horror the Tamiya masking tape had
marked the Future coated canopy. I nearly threw the Tucano against the
wall for the umpteenth time but taking a firm grip on my feelings and
squashing my frustration again, I removed the remainder of the masking and
brushed on a thin coat of Future, thus restoring the canopies clarity.
What a wonderful boon for modellers Future is!
Funnily enough it was only recently at the WASMex (Western Australian
Scale Model expo) weekend that I was discussing Tamiya masking tape with
some fellow modellers. Seems as though this problem has occurred before
and seems to depend on certain batches of tape. I might buy another roll
with a different batch number and see how that fares.
Placing the undercarriage opened up another can of
worms. The pegs for the undercarriage legs were incorrect, forcing me to
remove them and butt join the legs to the correct locations within the
bay, reinforced later with some CA glue. Once the retract struts were in
place each leg assembly appeared quite strong. Citadel Skull White
followed by re-washing and Aeromaster flat coat was used to touch up the
insitu undercarriage assemblies.
Placement of the pre painted twin exhaust pipes proved problematic, with
some careful filling, sanding and re-painting having to be undertaken to
ensure a better fit. It would have been better to fit these before
painting of the fuselage.
Now the moment of truth arrived, I had read several reviews about the
Tucano, reinforcing the tail sitter aspect of the kit. I had hoped that
there was adequate weight enclosed within the nose. WRONG!! I had a tail
sitter. The Tucano nearly flew into the wall after this discovery and this
build was supposed to be part of my AMS cure?
I held my breath, sipped the nice hot cup of tea my wife brought
downstairs to me and contemplated the situation. Cold logic cut in and the
Tucano did not look too bad, nothing a smidgen of blue tac on the nose
wheel wouldn’t fix, something I used to do as a kid! This would suffice
until I secured a decent resin or Verlinden card base. At WASMex this year
I purchased some aftermarket ejector seats from Aeroworks, a South
Australian based mail order Company run by Craig Chidley. Craig had some
fantastic resin concrete tarmac bases for sale for around AU $35 which
would be just the ticket for displaying the Tucano.
So, feeling much better about the state of all things Tucano, I finished
off adding all the remaining items and finally the Tucano was done!
After much undue pain and gnashing of teeth over
badly fitting smaller parts, poorly printed decals and other issues, I now
have a Shorts Tucano in my model cabinet. With an all over black finish
and yellow stripes, it does look quite nice.
Airfix is the only mainstream manufacturer to offer the Shorts Tucano as
part of its catalogue at present, although Premiere marketed a Tucano some
time ago which would be an alternative if it could be found, either at
club sales, swap meets or eBay. As such I would recommend this kit only to
those who want a Tucano in their modelling cabinet!
Mind you, it really does look great parked next to the Bae Hawk T.1A
trainer….
-
The Internet
-
World Aircraft Files
Click the
thumbnails below to view larger images:
Model, Images and Text Copyright © 2003
by Michael Johnson
Page Created 04 September, 2003
Last Updated
17 March, 2004
Back to
HyperScale Main Page |
 Home |
What's New |
Features |
Gallery |
Reviews |
Reference |
Forum |
Search
Home |
What's New |
Features |
Gallery |
Reviews |
Reference |
Forum |
Search