|
Hawker
Typhoon Mk.Ib
Bob
Laskodi
|
 |
|
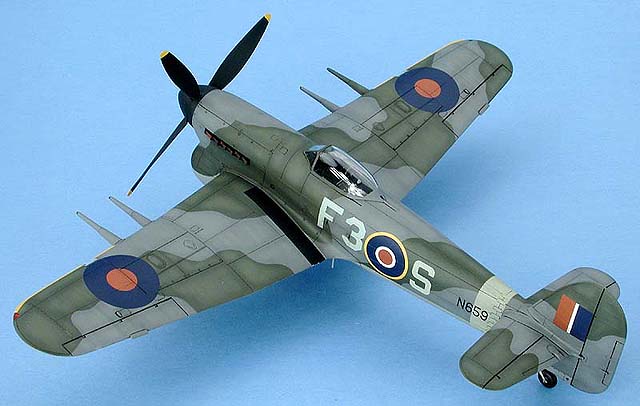
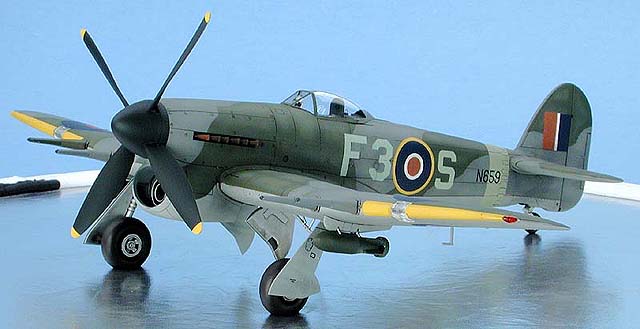
Hawker Typhoon Mk.Ib |

Hasegawa's 1/48 scale Typhoon Mk.Ib is available online from
Squadron.com
The main purpose of this article is not to focus on
the history of the Typhoon, but instead to focus on those brave men that
flew them in combat. I became involved in this project, when out of the
blue, I got an e-mail from Gordon MacDonald who asked me to build the
Typhoon his father flew during WWII.
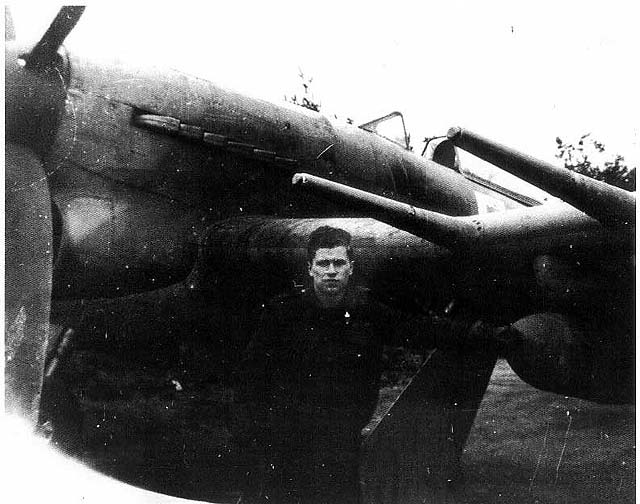
Alec MacDonald was not a fighter ace (just like
most WWII pilots!); he was simply a Canadian flying Typhoons on
unglamorous ground attack missions. Like many WWII veterans, Alec
MacDonald is now in poor health and details of his war stories are now
fading from his memory. This was an attempt to document the man and his
aircraft. The following history was written by Gordon MacDonald and is
reproduced verbatim:
"Dad joined the RCAF in 1941 and was assigned as
a training instructor in High River Alberta. In 1944 when it became
apparent that an invasion of Europe was going to happen he volunteered
for overseas duty as his brother was in the Army and he felt as only one
son had to go overseas it would be safer in the air than the ground.
While in Britain he flew Spitfires and Hurricanes, and when RCAF 438
Squadron was assigned Typhoon Mk1B dive-bombers, he was assigned to that
squadron.
He was not happy as he enjoyed flying Spitfires
and as the British had a habit of assigning their
Commonwealth Air Crews to least desirable aircraft, he had no choice.
The pilots were afraid of the Typhoons as they had ignition problems
causing fires, and their tails had a habit of falling off while
dive-bombing. He did not fly the rocket firing typhoons as the British
squadrons had them, but he flew the model that had four 20 mm cannons
and carried two 500lb bombs.
On his first operation out of Eindhoven, Holland
in December 1944 he was preparing to take off, and was given clearance
to take off, as the ground was covered with powder snow they had to rely
on the ATC for clearance. Once given clearance he and his wingman
prepared for takeoff and half way down the runway the aircraft in front
of him aborted the takeoff.
Unfortunately my Dad could not stop and ended up
cutting his aircraft in half. Luckily both he and the other pilot
escaped injury but both aircraft were destroyed. Not a very good way to
start your operational tour. Dad went on to complete 31 missions and
participated in the fly-past in Copenhagen and returned to Canada in
1945.
He stayed in the Air Force Reserve (National
Guard) and flew Harvards (Texans) and P-51 Mustangs on the weekends.
When the squadron made the transition to De Haviland Vampires and F-86
Sabre Jets he could not take the training as it was in eastern Canada
and he was attending law school at the University of B.C.
In the book Typhoon and Tempest by Hugh A.
Halliday it has a small story about him. You do not see many articles
written about Typhoon pilots, as they did not generate the interest that
the fighter pilots did. They did have encounters with Bf 109s and Fw
190s but unless they had the height advantage they were in trouble."
Hasegawa's
1/48 Scale Typhoon Ib
|
The kit (Hasegawa 1/48 Typhoon Mk.Ib) is typical
Hasegawa; a high quality injected molded plastic with detailed
engraving. The kit consists of 85 injected molded plastic parts that are
the envy of the business in quality. The instruction sheet is typical
Hasegawa, an eight-page foldout with color references for Gunze-Sangyo
paints.
Construction
After washing the parts in mild dishwater soap and
letting them dry, I then pre-painted all the parts as indicated in the
instructions. Starting with the interior, I built up the kit as per the
instructions. The interior builds up very nicely with no significant
problems but detail is a little on the sparse side (as is typical with
most early Hasegawa kits).
The only major construction hurdle of the entire
kit was the fitting of the fuselage inserts (J1, 2, & 4) that permit
Hasegawa to offer both the early and later variants of the Typhoon with
the same basic mold. As is usually the case, the inserts do not fit all
that well and some puttying was needed. I chose to install the inserts
so they would line up with the panel lines and the basic curvature of
the fuselage. This left a small gap along the spine joins that required
filling. In addition, since the rear portion of the inserts does not
fall along panel lines, putty was required there also. This was the only
bad mark that I gave the kit. Unfortunately, it changes the build from
an incredibly easy one capable by anyone to a slightly more complex
build best left to modelers with some experience at lining up parts and
gap filling.
Main wing assembly and installation was flawless,
without the all too typical Hasegawa wing root gap. Filing off the mold
lines and dry fitting the horizontal stabilizers will also permit a
flawless, putty free installation. After a quick sanding down of all the
joins (no putty needed) the model visited the paint shop where it was
painted, decaled, and weathered before final assembly took place.
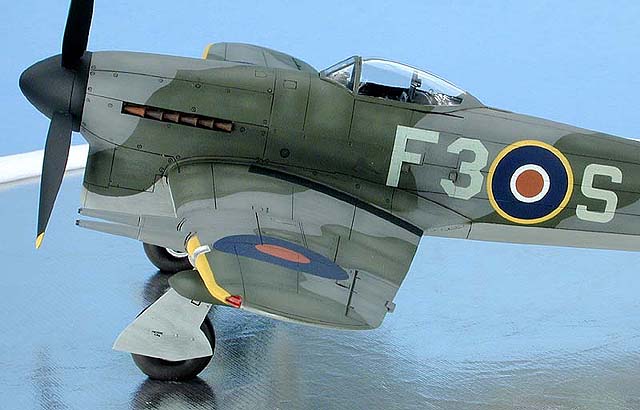
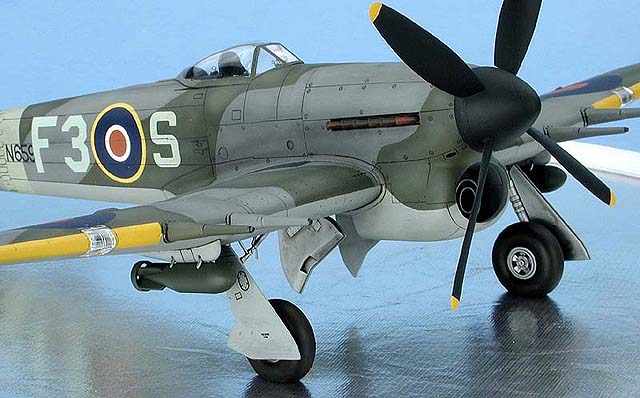
For final assembly I installed all the landing gear
components, bombs, fuselage pieces, and cockpit details. The propeller
was from an old Monogram kit since Alec MacDonald’s aircraft had the
four-bladed propeller. All pieces went together easily.
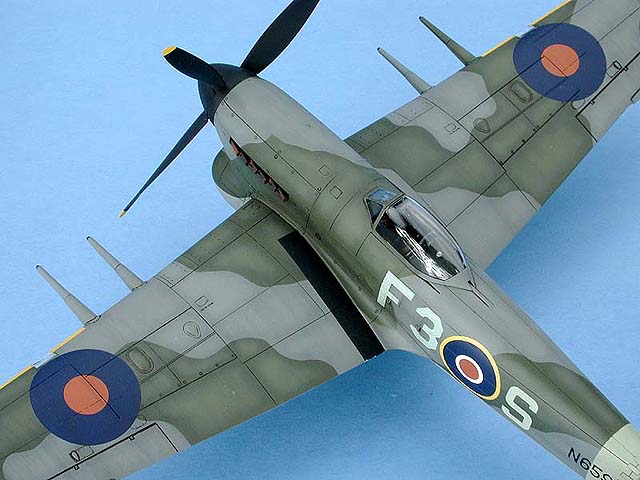
Painting,
Markings and Weathering
|
The model was painted with Floquil Military Colors
(enamel) in British Ocean Grey, Medium Sea Grey, UK Dark Green, and
British Sky.
I used paper masks to do the topside camouflage
pattern. Using my scanner, I enlarged the painting pattern provided on
the instruction sheet to the correct size and then used Tombo Mono Multi
Liquid Glue to coat the backside of the cutout masks. This is really a
great product for paper masks. The adhesive (when dry) will not pull up
paint but is fairly tacky so you can use paper masks around curves.
I then carefully lifted the edges with a toothpick
to provide a slight amount of overspray. A light topcoat of Future to
prepare the flat surface for decaling followed this.
Since I was doing Alec MacDonald’s Typhoon, I had
to replace the kit decals with some from the spares box and a variety of
aftermarket sources. I applied MicroSol setting solution and the decals
responded very well to the setting solution with no permanent wrinkling.
After drying overnight, I wiped the decals off with
a Polly S Plastic Prep to remove any residue and after drying I shot a
very light coat of Future thinned with rubbing alcohol (50:50 mix) over
the decals to seal them.
For weathering, I chose to accentuate the engraved
panel lines and surface detail with a burnt umber oil wash. After
spraying a mix of Future, rubbing alcohol, and Tamiya Flat Base (X-21),
I then randomly applied some ground up black and burnt umber pastels
with a soft brush to simulate staining and exhaust.
 Hasegawa
has produced an excellent model of an important WWII aircraft. It would
be an extremely easy build suitable for first time modelers if not for
the fuselage insert fit problems. A little careful work with that
portion of the kit and you will be rewarded with an excellent model. Hasegawa
has produced an excellent model of an important WWII aircraft. It would
be an extremely easy build suitable for first time modelers if not for
the fuselage insert fit problems. A little careful work with that
portion of the kit and you will be rewarded with an excellent model.
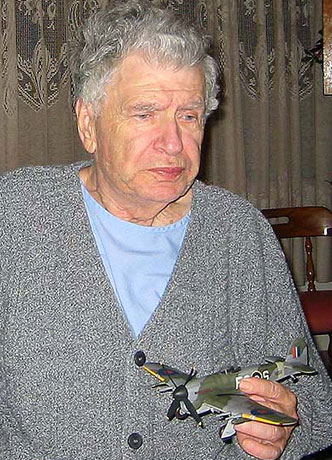
In closing, I would like to issue a call to all
modelers to build an aircraft flown by a veteran.
The pride and joy on their face when they see
“their” airplane is something that every modeler should experience.
Please feel free to contact me via e-mail and I can
put you in touch with Gordon MacDonald who maintains contacts with many
Canadian WWII pilots if you can’t locate any veterans on your own.
|
 Home |
What's New |
Features |
Gallery |
Reviews |
Reference |
Forum |
Search
Home |
What's New |
Features |
Gallery |
Reviews |
Reference |
Forum |
Search