|
U-Boat Type VIIC
by Larry Goodell
|
 |
|
U-Boat Type VIIC |

Mirage's
1/400 U-Boat Type VIIC is available online from Squadron
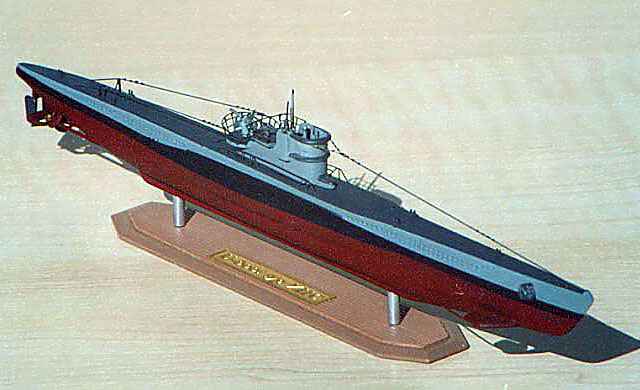
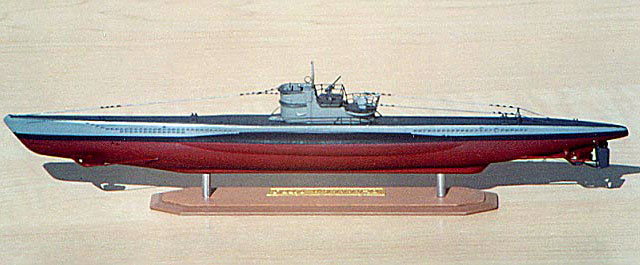
Here is Mirage's 1/400 Type VIIC U-boat.
When my buddy Gus Hager here with IPMS First Coast showed me a catalog
of these little kits I thought about doing one. When he showed me a
picture of the photoetch frets you could get for them - I really wanted to
do one. So Gus ordered two - a Type VIIC with the antiaircraft fore and
aft of the conning tower and a Type IXC. When they arrived Gus said pick
one. I chose the VIIC.
My line of business is kitchen and bath cabinetry so Gus cut me a deal.
I gave up some wood drawer fronts and he gave up the kit and photoecth.
Gus builds a lot of larger scale subs and the drawer fronts make great
bases.
I decided to do mine as a generic late war Type VIIC without the forward
wintergarden or a deck gun. The photoetch fret provides a two piece main
deck, twin 20mm deck, 30mm wintergarten deck, forward gun plarform deck,
railings for all platforms and main deck, props, anchor, 20mm gun braces,
30mm armor, ladders, DF loop, and parts for the rudder assembly.
I started by gluing the hull halves together then sanding the detail
off of the main deck. Dry fitting the deck showed I needed to add a shim
to each side of the deck as the PE deck is wider. Next the underside of
the PE deck was roughed up and glued to the hull with white glue.
I worked several applications of white glue along the step between the
PE and the hull to achive a flush rounded edge all the way around. The kit
screw drive assembly, rudder locations and dive planes are either
oversized or mislocated so a little modifying has to be done in these
areas. Dry fit and more dry fit. I used hypodermic tubing for my screw
shafts and wire for the dive plane anti foulers and when all hull parts
were in place I shot everything with Model Master gray primer.
The conning tower halves were glued together. The deck is supposed to go
in at this time but I elected to make it so I could slide this part in
later because I wanted to carve away the block of plastic that represented
the inside forward part of the bridge. After reshaping the bridge, I added
the plastic deck which had the detail removed (none of it was scale) of
which would be scratchbuilt later. The wintergarden was added and the
respective PE decks glued in place.
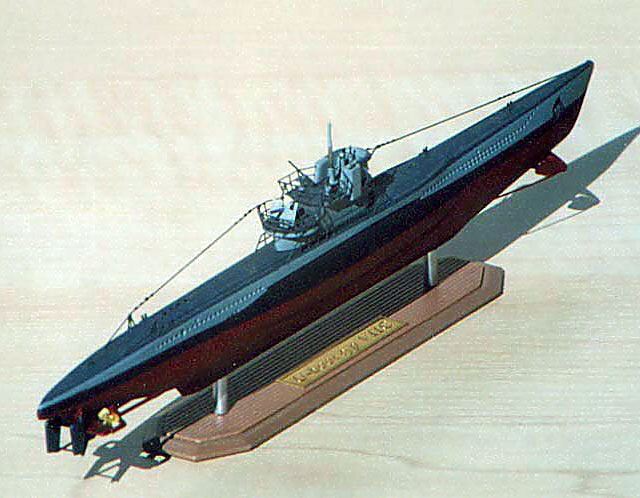
All detail in the conning tower was now scratchbuilt from hypo tubing,
stretched sprue and wire.
The kit 20mm and 30mm guns were way oversized so they were cut down and
sprue and wire were used to replace barrels, etc. The 30mm armor was
added, the 20mm mounts were shortened then placed in their respective
positions and the all conning tower PE railings were added. The conning
tower was then primed, detail painted and left off the hull til final
assembly.
I masked and sprayed the four colors on the hull then added the main
deck railings and other items. I had already predrilled the keel for the
alum tubing parts of the base. The display base is from the kit and the
brass plate is from the PE fret. NIce touch. I glued the hull to the base
then added the conning tower. I added the fore and aft cables made from
sprue and fine wire. The insulators are white glue. A small sheet of
decals are provided but I used none of them.
A liitle extra work and patience is required but the end result is a
great little model of an important vessel in the history of WWII.
Model, Images and Text
Copyright © 2004 by
Larry Goodell
Page Created 18 January, 2004
Last Updated
17 March, 2004
Back to
HyperScale Main Page |
 Home |
What's New |
Features |
Gallery |
Reviews |
Reference |
Forum |
Search
Home |
What's New |
Features |
Gallery |
Reviews |
Reference |
Forum |
Search