|
Building a
1/32 scale XA-32
|
The model was scratch built in pretty much my usual
way, but there were some problems that required a bit of thought, among
them the fact that the cockpit interfered with the wing assembly, mounting
the large stabilizer high on the fin, and dealing with the fairly complex
cowling.
The in-progress pictures pretty well tell the story,
but here are a few notes to accompany them.
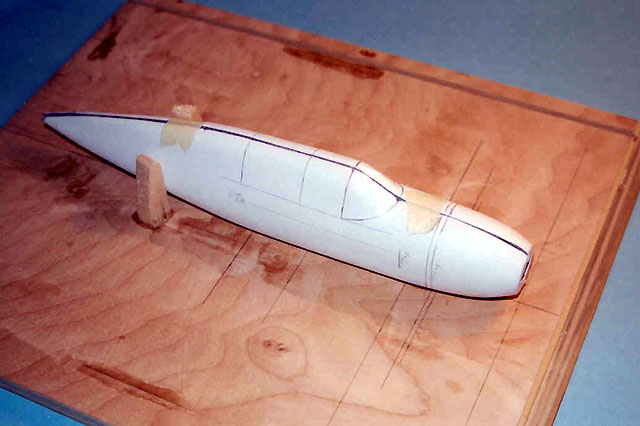
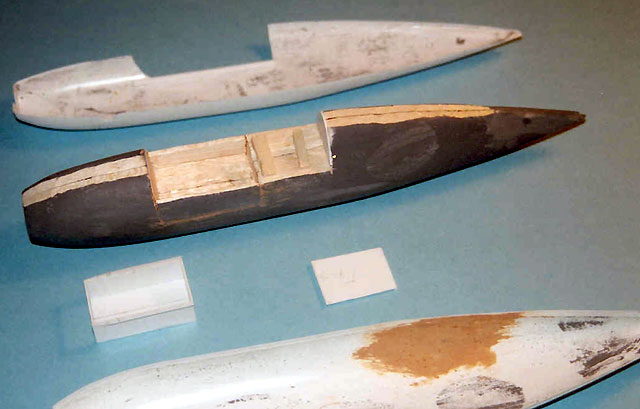
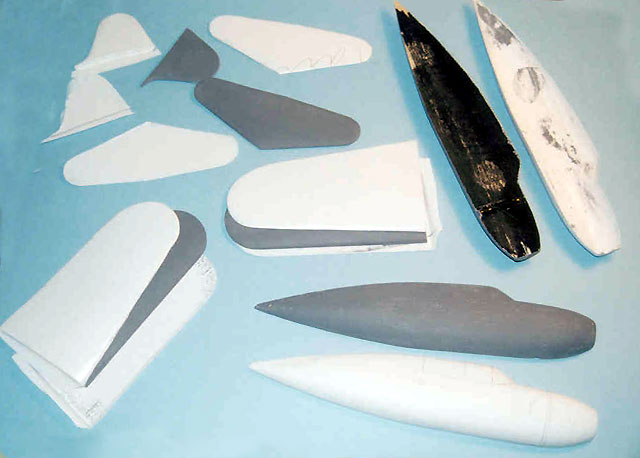
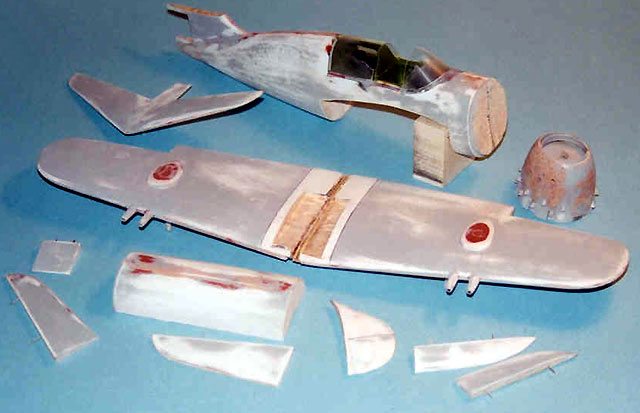
Basic construction was the usual vacuum-form-over-balsa-molds for the
wings, fuselage and tail surfaces.
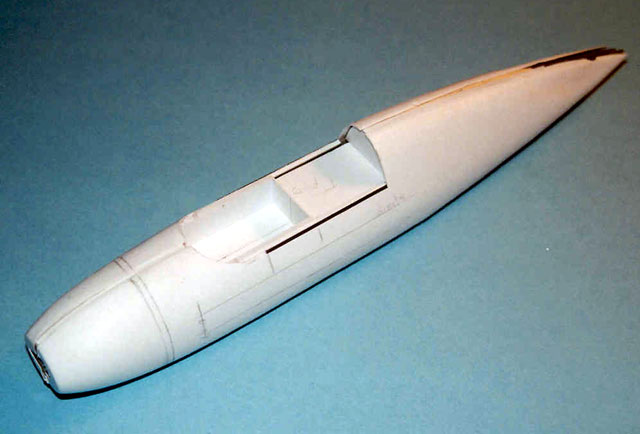
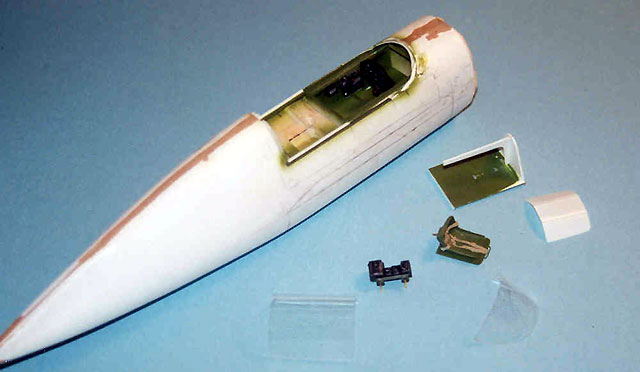
The plastic fuselage forms were glued onto the molds after the appropriate
wood was removed for the cockpit. The cockpit itself was built as a tub
inserted into the fuselage. The interior was mostly scratch-built using a
number of Waldron pieces and the Cutting Edge 1/32 scale posable seatbelts
from Meteor Productions (which I think are great, by the way). The canopy
was molded from 1/32nd plexiglass, and the gunsight was scratch-built.
Click the
thumbnails below to view larger images:
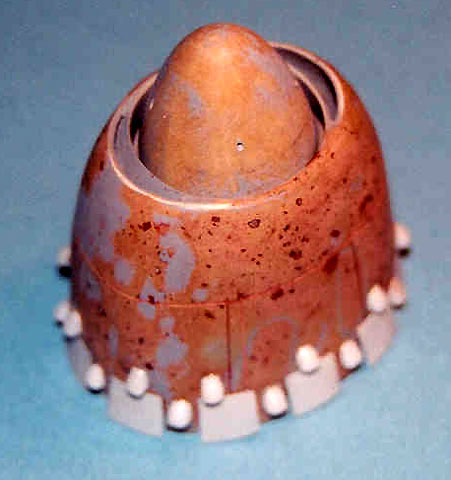
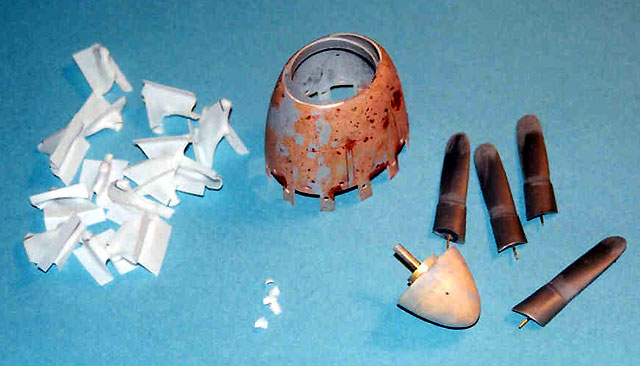
The cowling probably took as much time as several of the other pieces
combined. It was first vacuum-formed without the upper and lower scoops.
After the front opening was cleaned up, two more pieces of plastic were
heated-and-smashed on the top and bottom of the cowling and these were
glued into place thus making the scoops.
I chose this way because, from the side, the cowling
curves up more on the bottom than it curves down on the top; therefore, I
needed the formed plastic to keep the proper compound curves.
The spinner was turned from basswood and the prop
blades were cut-down 24th scale Bandai P-51 left over from a Mustang I
conversion. The most tedious part of the cowling was at the rear. The cowl
flaps were cut out and then replaced in the open position. After that, 18
holes were drilled around the cowling (they were staggered and not equally
spaced), and 18 small deflectors (pretty much like those on the B-25) were
formed over a mold, cut, sanded and then glued in place over each hole.
Tedious, but satisfying when finished.
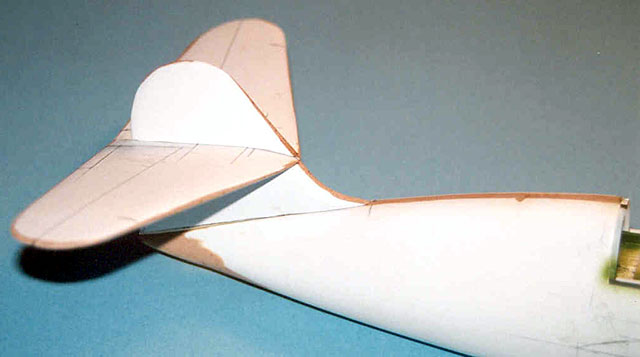
The vacuum-formed tail surface skins were epoxied onto the balsa cores.
The stabilizer was then cut in half and re-glued to the proper dihedral
using brass pins for strength.
The vertical tail was cut in two and the chord-shape of the stabilizer
removed. The lower half was then glued to the fuselage and the stab and
upper section of the rudder added on top of that. All attachments were
made using long brass tubing or wire to give the required strength.
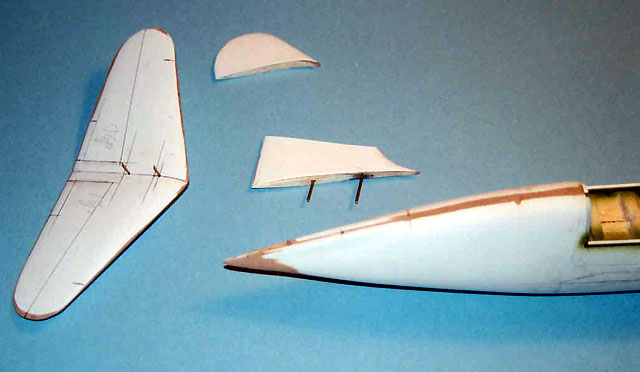
The wings were made by first cutting the wood mold in half and removing a
section from the upper center section that would have otherwise interfered
with the cockpit tub. The wings were then re-glued with the proper
dihedral, and braced with some brass tubing.
The wheel well openings were cut from the wood, and the upper plastic
surface attached with epoxy. Detailing of the wheel wells was then done
followed by construction of the landing gear. The wheels, tires, and parts
of the gear leg were also taken from the remains of the Bandai 24th scale
P-51. The rest of the gear was scratch-built. After this detailing was
done, the bottom surfaces of the wings were epoxied in place and the wing
was cleaned up.
The gear doors needed a bunch of pieces, but were fairly straightforward.
It was nice to have only one gear door per side (the retracted wheel was
not covered). The tail wheel is non-retractable. Landing and nav-lights
were also added.
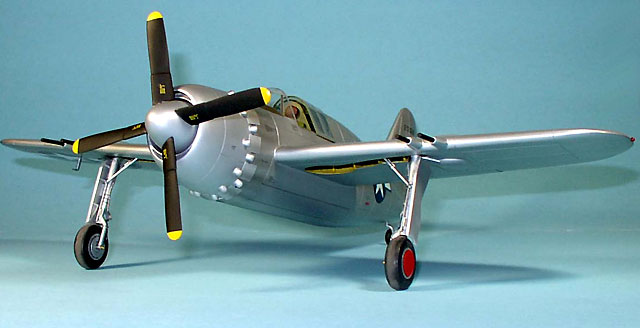
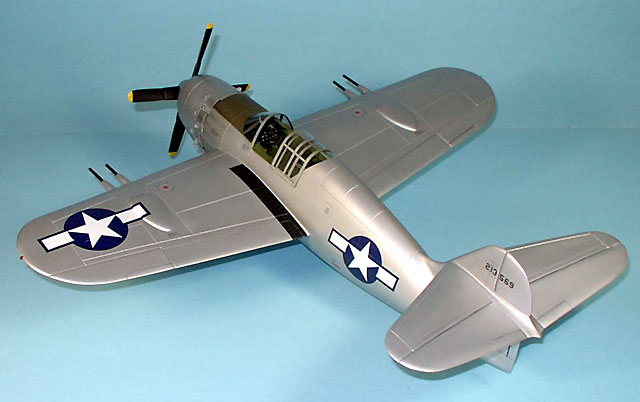
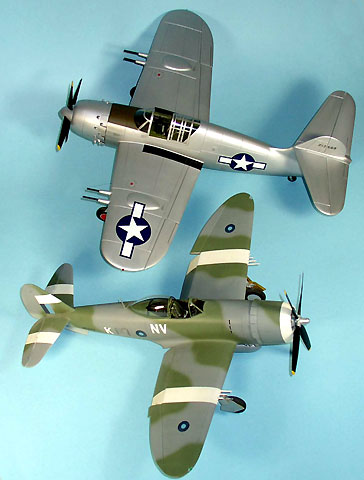
This particular bird is the XA-32A, the armament test aircraft. I chose it
because I thought the cannon looked cool. The cannon housings were made by
heat-and-smashing 8 halves over a turned mold and gluing them together
after trimming. The barrels were aluminum tubing which had to be plugged
and filled since, at least at the time the pictures were taken, they were
dummies.
Click the
thumbnails below to view larger images:
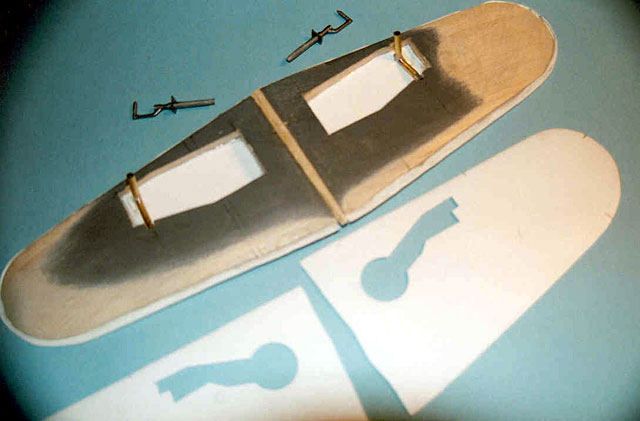
All the control surfaces were cut out
and re-installed, and for once, I did not open the flaps/dive brakes (it
had them on both the upper and lower surfaces).
After priming and sanding, all the parts were
scribed. I know that I will always lose some of the scribing during the
assembly process, but it always seems easier to me to repair rather than
try to do it all after the main pieces are assembled.
The wings and tail were attached to the fuselage and all the fairings were
added/cleaned.
Sanding, puttying, sanding, etc., was then done and
the scribing touched up where necessary.
The finish on the airplane was silver lacquer, which
is kind of boring, but it did avoid a lot of natural-metal work.
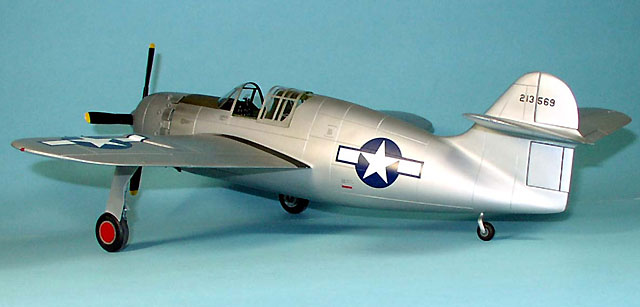
Decals were scrounged from the scrap box. When it was finished, I just had
to picture the thing alongside a Revell P-47 dating from many years ago.
It was big.
Bottom line: One more weird airplane to add to the shelves. At least
Trumpeter won’t be bringing it out a month after it was finished.
Click the
thumbnails below to view larger images:
Model, Images and Text Copyright © 2003
by Frank Mitchell
Page Created 31 July, 2003
Last Updated
17 March, 2004
Back to
HyperScale Main Page |
 Home |
What's New |
Features |
Gallery |
Reviews |
Reference |
Forum |
Search
Home |
What's New |
Features |
Gallery |
Reviews |
Reference |
Forum |
Search

 The
Brewster-designed XA-32 was a mid-wing, single-seat attack aircraft with
an internal bomb bay.
The
Brewster-designed XA-32 was a mid-wing, single-seat attack aircraft with
an internal bomb bay.