|
Republic XP-47H
by Jerry Soetewey
|

|
|
Republic XP-47H |

HyperScale is proudly supported by Squadron
The Republic XP-47 H was originally intended to be
used with the big inline Vee-12 engine Chrysler had produced.
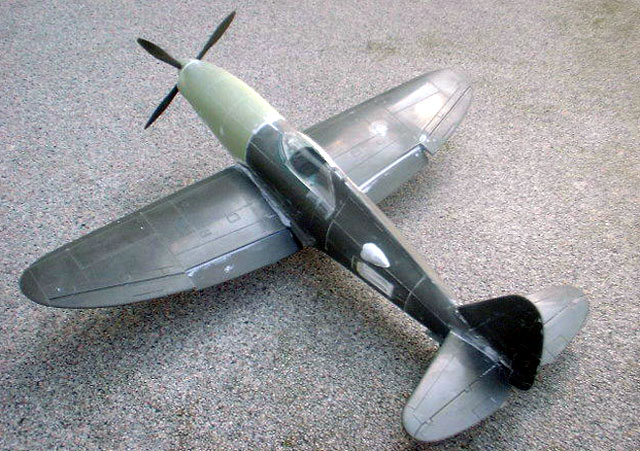
This is my model of the Republic XP-47H in 1/48
scale.
All of this started when I made my first Hyperscale
trade with Michel “Borderline” Beekveld from Holland a few years ago at
the Dutch IPMS Nationals. He gave an old vacuum formed XP-47 H conversion
set from a German company called Air-Model as a bonus.
The kit only consisted of two vacuformed fuselage
halves and a spinner and was intended to be used with the old Hawk/Testor's
P-47 Razorback/Bubbletop kit.
Since I’m not that fond of the inaccurate Hawk/Testors
kit, I opted to use the old Monogram P-47 Razorback, which I picked up at
an earlier model show. This kit is far more accurate representation then
the ancient Hawk kit and has nicer detail.
I began construction by cutting out the Air-Model vac
formed fuselage halves. I then soon realized that these lacked a lot of
detail and that some panel lines and most prominent, the intercooler doors
were the wrong shape and at the wrong place.
After a Google search and an inquiry at the Plane
Talking board, I got a e-mail from a nice HyperScaler with pictures and
side view drawings of the XP-47 H. I then soon realized there where more
problems with the Air-Model fuselage.
Action had to be taken, since I told Michel
“Borderline” I would build this kit in no time. This I would deeply regret
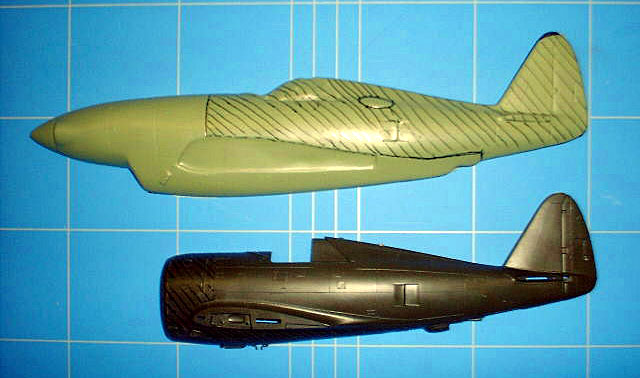
later on. So up came the razor saw and of went the Monogram P-47 nose. The
rest of the fuselage was laid aside and I started cutting up the Air-model
fuselage and only kept the nose and belly. This was then carefully matched
with the monogram fuselage, et voila, an XP 47 H fuselage with correct
outline. Unfortunately I was not done here (sigh) I had to remove the
intercooler doors from the Monogram kit and replace them with the correct
doors from the XP-47 H. The Air-Model fuselage was of no help, so some
scrachtbuilding. had to be done. Luckily I had the drawings, which I
scaled up to 1/48th. I also cut out some of the detail of the
Mongram P-47 Belly and glued and used them on the Air-Model part.

I spent the following evenings applying loads of
putty and did a lot of sanding and rescribing. Now I really started to
regret what I said to “Borderline”.
But after a while things started to take shape and I
felt a great relief. It was at this time AM Tech announced their XP-47 H.
So now I had to finish this project.
The rest of the construction was pretty straight
forward. The Monogram kit is an amazingly easy build and the fit of this
kit is not bad at all. Since I recribed the whole fuselage I had to do the
wing and tailplaines as well. I used an Olfa P-cutter for this job as I
find it easy to work with and there is less sanding involved.
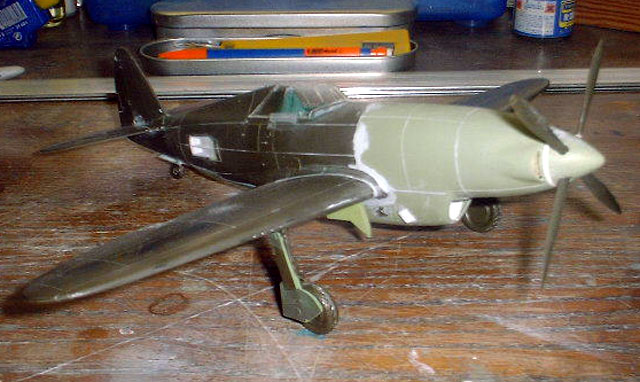
I decided to drop the flaps as well since the XP-47 H
is always pictured with it’s flaps dropped. I cut the kits flaps, added
some plastic rod an repositioned them.
I used the Monogram windshield on a rebuilt Hasegawa
Razorback, so instead I used a Falcon P-47 canopy from their WWII fighter
set. I also reshaped the propeller blades as the XP-47 H was fitted with uncuffed
propeller blades (among others used at various experimental flights).
At last
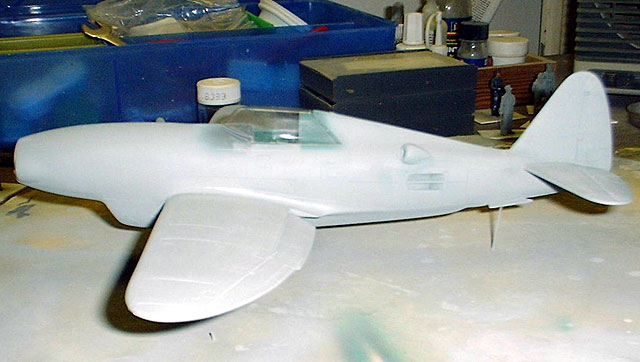
I reached the
painting stage. I first sprayed a good layer of primer and got rid of the
small blemishes.

The XP-47 was olive
drab over neutral grey , so I applied these colors from the Model Master
range with my Aztek A470 Airbrush. The usual pre-shading was done and I
did some experimenting with post shading as well. I used paper masks for
the demarcation lines of the olive drab.
I really liked XP-47
H serial No.223298, since it had the big air intake at the intercooler
doors and the nice demarcation line. I also had better pictures from this
aircraft as well.
I used markings from
various sheets and a very kind Polish Hyperscaler helped me out with the
serial numbers. I owe him a lot of thanks.
The data stenciling
came from on old Superscale sheet. Weathering was done with oil paints and
pastels. 223298 had a worn paintjob and this was what I tried to recreate.
This was not an easy build, but I learned a lot from
it. What started out as a joke, kept me busy for over 4 months. And as the
real thing, this model was a test bed for me as well to use different
building and painting techniques.
I could not have done this without the help of the HyperScale
discussion
board as it proved to be of great help. And I would like to thank all
those who helped me out on numerous occasions and with numerous questions
and parts. Thank you guys!
The model is by no means 100% accurate as my skills
and my knowledge over this aircraft type were not that big, but I really
enjoyed it.
Click on the thumbnails
below to view larger images:
Model, Images and Text Copyright ©
2004 by David Vanhoucke
Page Created 11 January, 2004
Last Updated
17 March, 2004
Back to
HyperScale Main Page |
 Home |
What's New |
Features |
Gallery |
Reviews |
Reference |
Forum |
Search
Home |
What's New |
Features |
Gallery |
Reviews |
Reference |
Forum |
Search