|
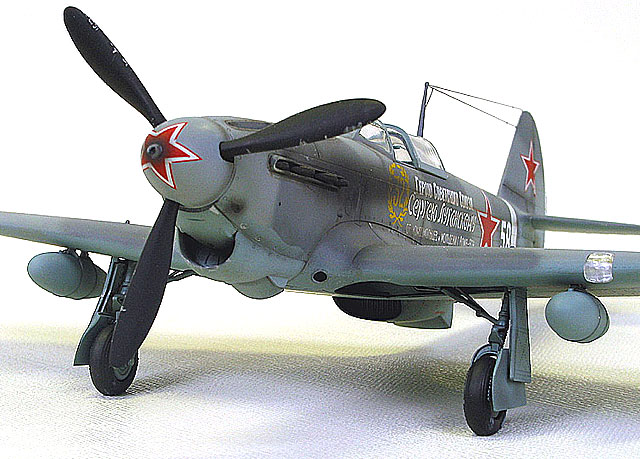
Yak-1b
by
Tony Bell
|

|
|
Yakovlev Yak-1b |

Accurate
Miniatures' 1/48 scale Yak-1b is available online from Squadron.com
The progenitor of a long
series of Soviet fighters culminating in the Yak-9, the Yak-1 was produced
from 1940 through to 1944. A fairly conservative design for it’s day, it
featured a tubular frame fuselage with aluminium skins over the nose with
a plywood and fabric rear fuselage, much like the Hawker Hurricane. The
wings and empennage were plywood with fabric control surfaces. The -1b
version differed externally from the Yak-1 in that it had a cut down rear
fuselage and carried a single 13mm machine gun.
Accurate
Miniatures' Yak-1
|
Upon opening the box, one is
treated to the usual Accurate miniatures packaging. All the sprues are
bagged separately and there is a false bottom under which are the clear
parts and decals. The surface detail consists of finely recessed panel
lines and fasteners, with restrained rivet detail in places, most notably
on the lower wings. The kit is entirely devoid of flash, sink marks or any
other moulding flaws.
Having built both the
Accurate Miniatures F3F-2 and B-25C, I was already well aware of the
wisdom of reading, studying and following the kit instructions carefully.
As usual, the construction started with…
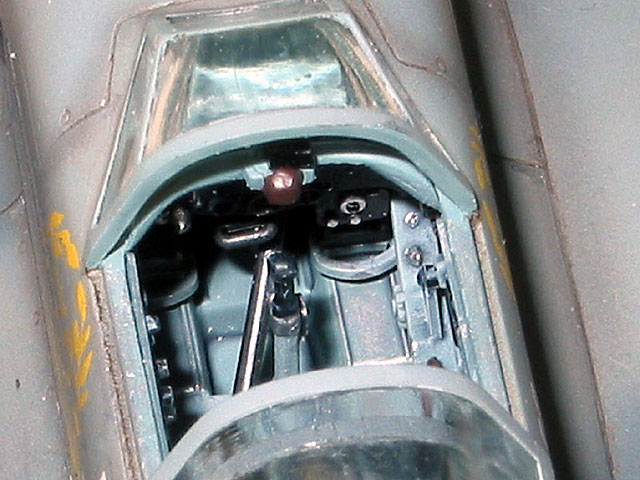
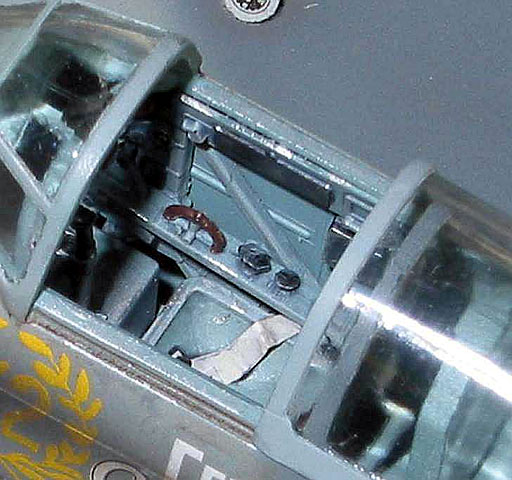
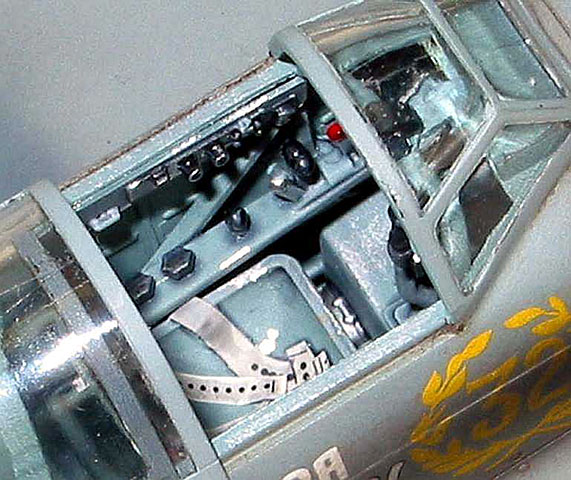
The Cockpit
As this was to be a
"straight from the box" build, I added nothing to the kit cockpit, which
was assembled per the instructions.
 The
cockpit was painted overall Testor Russian Underside Blue, with details
picked out in black and silver with a few red bits for some colour. I
applied a “wash” of Poly Scale flat mixed with black ink and thinned with
water and then drybrushed the whole thing with light grey oils. The seat
harness decal was applied to masking tape for a more three dimensional
look. It too received the Poly Scale wash to give it more depth. The
instrument panel is typical of Accurate Miniatures, being moulded in clear
styrene with a reverse printed decal to be applied to the back side of the
panel. The
cockpit was painted overall Testor Russian Underside Blue, with details
picked out in black and silver with a few red bits for some colour. I
applied a “wash” of Poly Scale flat mixed with black ink and thinned with
water and then drybrushed the whole thing with light grey oils. The seat
harness decal was applied to masking tape for a more three dimensional
look. It too received the Poly Scale wash to give it more depth. The
instrument panel is typical of Accurate Miniatures, being moulded in clear
styrene with a reverse printed decal to be applied to the back side of the
panel.
Easily the highlight of the
kit, the Yak cockpit went together easily with no problems whatsoever, in
contrast to my experience with the F3F-2 cockpit. It’s no surprise that
the aftermarket resin companies have ignored the Accurate Miniatures Yak
cockpits, as the detail is superb right out of the box.
Click the
thumbnails below to view larger images:
The Fuselage
This is where I started to
encounter some problems. The fuselage consists of three main components:
the left and right halves and the upper deck. I had read about the tricky
fit of the upper deck and so was prepared to do some dry fitting and
fiddling to get it right.
First I glued one fuselage
half to the upper portion, let it dry completely and then attached the
other half. This resulted in a nice, tidy join along the length of the
fuselage, but left a seam on the deck behind the cockpit which would be
visible through the rear canopy. This seam was filled with Mr. Surfacer
500 and sanded smooth with bits of sandpaper glued to pieces of wood cut
to fit in the opening. After this was accomplished, the cockpit area was
painted Underside Blue and the armoured glass behind the pilot attached
with white glue. The forward and rear portions of the canopy fit well and
were attached with liquid cement. A bit of Mr Surfacer 1000 was all that
was required for a perfect join. The canopy was masked off with Tamiya
tape. Because the frames were well defined, it was possible to trim the
tape in situ with a new No. 11 blade, having taken care not to consume any
caffeine in the previous six hours!
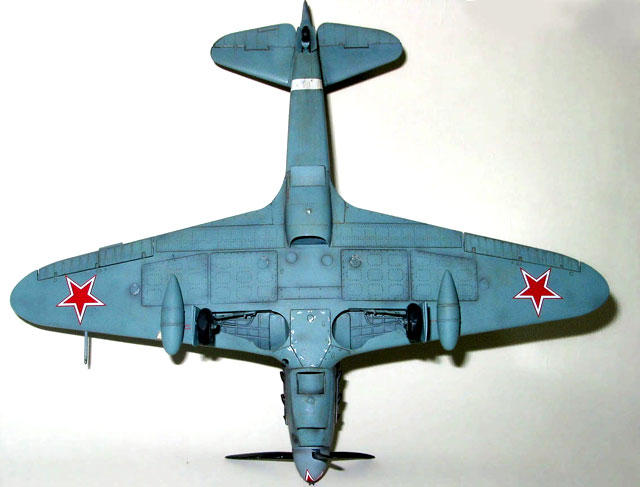
Another problem was the oil
cooler outlet door under the nose. This absolutely refused to sit
properly, and in the end I had to cut the hinge pins off, thin the forward
edge of the fuselage opening and aft edge of the door and carefully glue
it in place while holding it with a pair of tweezers to prevent it from
falling inside. The radiator outlet door was somewhat easier and only
required thinning on the trailing edge. The seam on the underside of the
fuselage was filled with Mr. Surfacer. The fabric detail was masked off
with electrical tape to avoid damage when sanding the seam smooth. Lost
rivet detail under the nose and radiator was replaced with a pounce wheel.
The horizontal stabilisers
fit well, only requiring a bit of Mr. Surfacer to fill the seam. The Mr.
Surfacer was brushed on and allowed to dry for about 20 minutes, and the
excess wiped away with a cotton swab moistened with methyl hydrate,
avoiding the need for any sanding.
The Wings
I had also read that the
wing root join was potentially troublesome, so I elected to attach the
upper wing halves to the fuselage first. This is where not following the
instructions got me into trouble as I had neglected to install the cockpit
before hand. A substantial amount of bending and prying was necessary to
get the cockpit into place, but fortunately nothing broke or split in the
process.
The wing spar was clamped in
place in the lower wing to force the two together and generous amounts of
liquid cement were used to ensure a strong bond. The carburettor intake
was a separate piece and required considerable shimming, trimming and dry
fitting before it could be attached to the lower wing without the need for
filler. It should be noted that the intake is completely inaccurate, being
too small, round and flush, as well as missing the splitter plate. The
intake in the Eduard Yak-3 is much more accurate.
The lower wing was attached
to the rest of the model, with the spar locking the cockpit into place.
The left wing was fine, but the right wing had a pronounced warp to it.
This was straightened out by steaming and twisting the wing back into
shape.
The separate ailerons fit
nicely and were attached with liquid cement. The wing tip lights fit
poorly but, due to the lack of surface detail in the area, were easy to
fill and blend in. I applied instrument decals to the back sides of the
wing tank fuel gauge covers, which were then glued into place and sanded
and polished to blend them in with the wing surface. Circles of Tamiya
masking tape were punched out with the Reheat punch & die set to mask the
gauges off.
Painting,
Weathering and Decals
|
As is my usual habit, I
started off by spraying Tamiya black along the panel lines to “pre-shade”
them. The undersides were painted Testor's enamel “Russian Underside Blue”
(how could I go wrong?) Instead of thinning the paint with mineral spirits
or lacquer thinner as usual, I decided to experiment and thinned it with
“automotive paint reducer”. This is actually a lacquer thinner, but is
considerably less volatile (i.e. “hot”) than the regular stuff. The paint
flowed beautifully, adhered well and dried hard with a slight sheen.
Once the undersides had
hardened for a few days, I masked the demarcation line between the upper
and lower colours with a roll of Blu Tac. The upper camouflage colours
were sprayed with Aeromaster enamels Russian light and dark grey (9070 and
9071, respectively), again thinned with automotive paint reducer. If
anything, the Aeromaster paints worked even better than the Testors.
A coat of Future floor
polish was sprayed on as a precursor to applying the decals. Oddly enough
the Future beaded up horribly on the Aeromaster colours, but went down
fine over the Testors. I overcame this by applying a heavy, almost runny
coat of Future over the upper surface. I had never encountered this
problem before and attributed it to the paint reducer. Some
experimentation revealed that wetting the surface with alcohol immediately
before spraying the Future allowed it to cover properly.
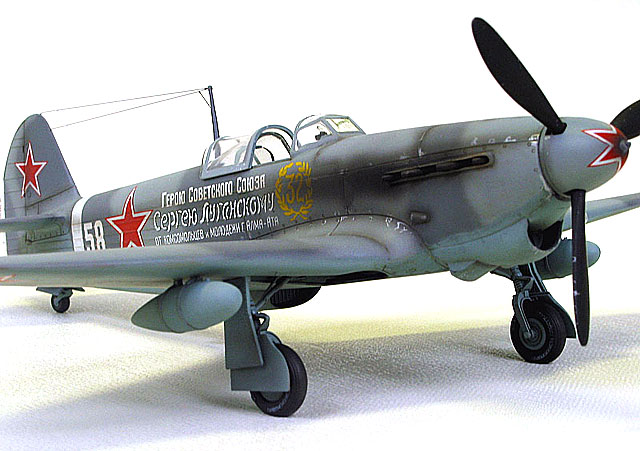
The kit decals were thin,
well printed and reacted well to both Gunze Mr. Mark Softener and Microsol.
I managed to wreck the starboard patriotic slogan decal when I handled the
model too soon after applying it. Fortunately I had a spare set of decals
and was able to replace it after carefully removing the remains of the
first attempt. The rest of the decals went on without incident, including
the potentially tricky spinner decal.
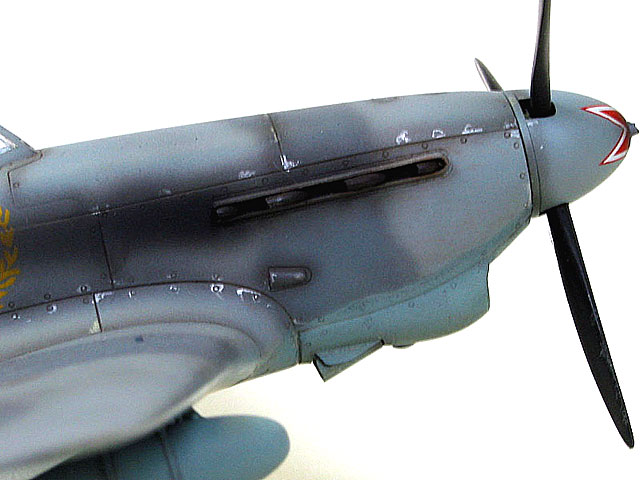
Weathering consisted of a
Windsor and Newton burnt umber oil wash in the panel lines and paint
chipping done with Humbrol silver No. 11 and a 0000 brush. Because the
wings were wood and the rear fuselage was fabric, I made sure I applied
chipping only to those areas that were actually metal on the real
aircraft.
The whole model was sprayed with Aeromaster acrylic flat, and the exhaust
stains airbrushed on with a brown/black colour mixed from Tamiya paints
and thinned 90% with rubbing alcohol.
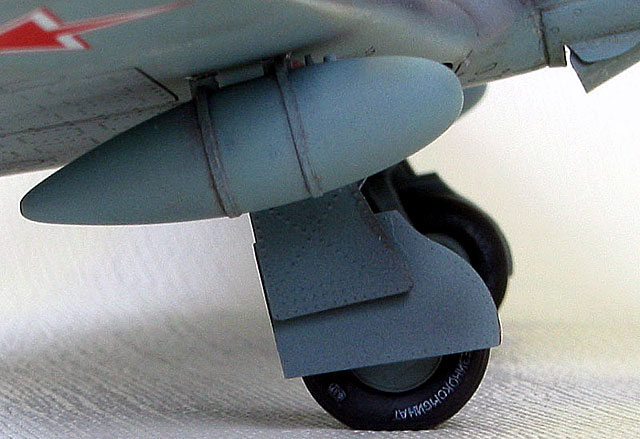
Accurate Miniatures
thoughtfully provide separate wheel hubs and tires, which simplifies
painting. They also provide the option of round or slightly flattened
tires. I opted for the flattened tires and painted them Aeromaster acrylic
tire black and the hubs were painted underside blue and glued to the
tires. The tail wheel was painted in a similar manner and glued in place.
The landing gear legs were
painted the same colour as the undersides, with Testor Raw Umber for the
leather oleo covers.
Attaching the landing gear
gave me considerable difficulty. While the lateral location of legs is
fool proof and impossible to misalign, the fore-aft rake allows for
approximately 20 degrees of play. I had to break off and reattach the left
leg twice to try to align it with the right, and still I didn’t quite get
it right. My advice is as follows: glue the lower (inner) gear door to the
gear leg temporarily with white glue and glue the upper (outer) door
permanently to the gear well edge. Next glue the gear leg and retraction
strut to each other and to the wing spar, lining up the trailing edges of
the doors. Let everything set up completely and repeat for the other side
and take the time to line both sides up. Check the alignment from the
sides, top, bottom, front and back.
Once everything has dried
completely, pop off the lower (inner) gear doors and attach the wheels,
taking care to get the flat spots to sit properly. Finally, reattach the
lower gear doors.
I have determined that a great deal of my modelling enjoyment is derived
from my expectations of the kit in question.
For instance, when I set out
to build the ICM MiG-3, I was expecting to have to put a lot of effort
into test fitting, detailing, refining, etc. As it turns out I was
correct, but still enjoyed the kit immensely. In contrast, I was expecting
a shake & bake OOB when it came to the Yak. After all, it was Accurate
Miniatures, wasn’t it?
Because of this unrealistic
expectation and in spite of the fact that it was a much easier build than
the MiG, I didn’t enjoy this kit nearly as much.
Click the
thumbnails below to view larger images:
Model, Images and Text Copyright ©
2003 by Tony Bell
Page Created 24 June, 2003
Last Updated
17 March, 2004
Back to
HyperScale Main Page |
 Home |
What's New |
Features |
Gallery |
Reviews |
Reference |
Forum |
Search
Home |
What's New |
Features |
Gallery |
Reviews |
Reference |
Forum |
Search