|
Yamamoto's Betty
April 18, 1943
by Bobby McElroy
|
|
|
Yamamoto's Betty |

Tamiya's 1/48
scale G4M Betty is available online from
Squadron.com
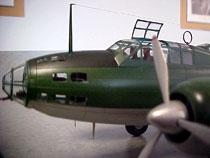
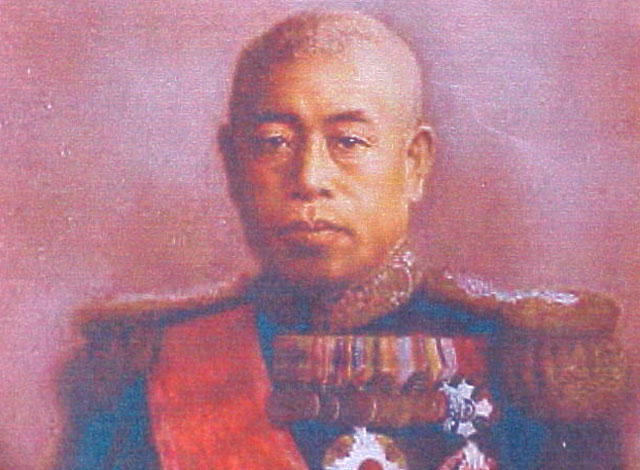
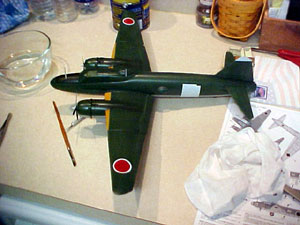
I decided
to build Tamiya's 1/48 scale Betty kit depicted as Yamamoto's personal
transport on April 18, 1943, immediately before he met his fate.
Let me just
start out by stating that this is an excellent kit. Tamiya has done an
outstanding job with the production of this kit. Everything fits
together nicely with a minimal amount of sanding on the seams. The
transparencies are crisp, clear and thin. There are several options that
one can choose as to which version of a G4M1 to build.
Bomber, Torpedo Bomber, or simply the Transport
version as I have chosen. The Decals are super. Thin, and the
proper colors, they even lay down with no problems. The fit of the
engine nacelles to the main wings always seems to be a problem with many
of the kits out on the market. Tamiya has remedied this and they have
done a wonderful job. They have expanded their creative genius to the
way the main landing gear doors attach into the nacelle. The fit is
superb and one does not have to worry about breaking a fragile gear door
off at the little seam. As far as details are concerned, the interior is
nice, it could be enhanced with scratch- building or an after market
supplement. The exterior is really smooth. The panel lines are nicely
recessed and lend themselves to enhancement during the finishing
process.
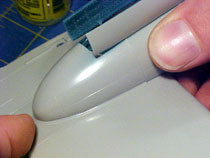
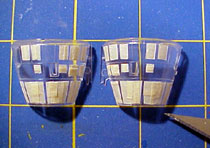
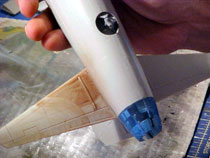
My first task was to mask all of the
transparencies. I accomplished this by using a variety of methods. I
wanted to see which one gave the best results, and which medium was the
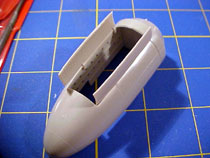
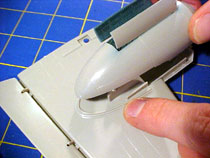
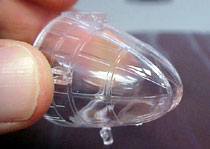
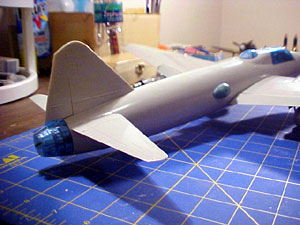
easiest to work with. My second task was to modify the tail cone to
match the version used by the crew of Adm. Yamamoto’s Betty. This was a
bit tricky but rather easy now that I look back. I used my tabletop belt
sander to remove the sections of the tail cone I did not want. I was
concerned about splitting the transparency if I tried to cut it with a
razor saw. Sanding it down was a cinch. I left just enough to be
polished off with 600 grit sandpaper. I was rather pleased with the out
come.
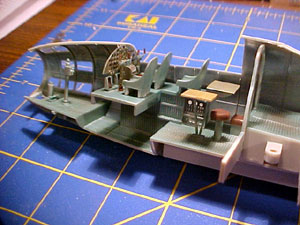
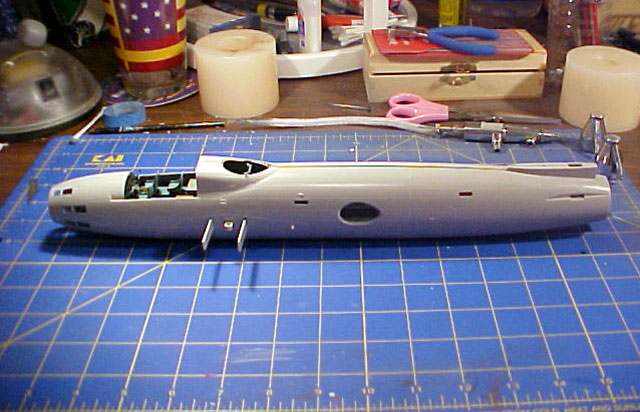
Interior
Possibly the best time I had
was while constructing the interior. This section of the kit went
together with no flaws, and I was surprised at how easy it was. While
under constructions I painted the sections before gluing them together.
By doing this I was able to get the extra details looking really good. I
tried to make this part of the kit very accurate, and Robert Mikesh’s
book, Japanese Aircraft Interiors 1940-1945 was especially helpful. I
suggest if you do not have this text it is a must!
After
completing the interior it was time to start piecing the fuselage, the
nacelles, and wings together. Due to the excellent job done by the
manufacturer these subassemblies fit together very well, and I came
across no problems.
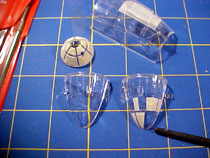
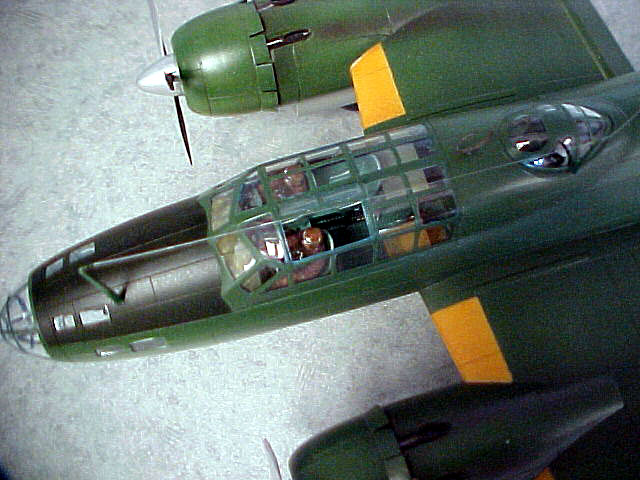
After completing the attachment of all of the
subassemblies it was time to place the transparencies on the fuselage.
Before gluing them into the proper places I sprayed the main canopy and
the nose cone as well as the window frame that would be open, with
interior blue/green. I did not want this color to interfere with the
exterior colors.
Once all of the sections were glued into place I
tried a different method to highlight the panel lines. Using Model
Masters Enamels I thinned down Italian leather to almost a 5:1 ratio and
sprayed the wing, covering just a small section at a time and then wiped
the surface leaving the brown paint in the panel lines. It worked very
well.
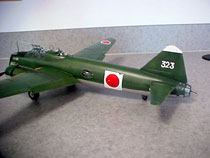
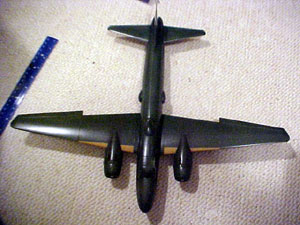
After finishing the highlighting of the panel lines
it was time to start getting this Betty looking right. I used model
masters Imperial Japanese Navy Gray on the underside. After letting the
paint dry over night I masked the identification lines on the leading
edge of the wings. I referred to the Francillion book for the proper
areas to apply these. After they dried I sprayed the top of the AC with
a mixture of Imperial Japanese Navy Green and Japanese Army Green. Why?
The Navy green is just TOO green so by mixing the colors it dulls the
Navy Green down. It is still very green. Yamamoto’s AC was almost new
but not brand spanking new.
 |
 |
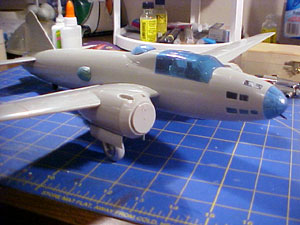
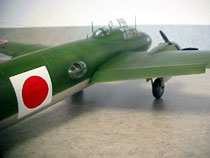
Upon completing the majority of the painting on the
upper and lower surfaces, I decided to start putting the flaps and other
larger pieces of the model together. I left the antennas, props and
other protruding parts off until after I was finished painting,
weathering and detailing. Once I finished that process I applied the
decals and all the final touches. The decals provided by the kit were
pretty good. I was concerned the white background for the insignia on
the side of Yamamoto’s Betty would not work when it was time to put the
Hinomaru on top. It worked out fine. The only problem is the way the
decals do not allow the details below come through. They are not thick,
and I did try solve-set to make the decals suck down and adhere better
but to no avail. I am working on a new technique for painting the
Hinomarus on to a white background; I shall let you all know how it
turns out.
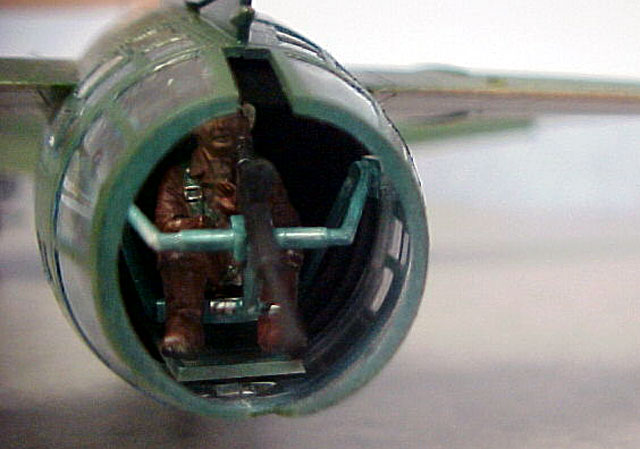
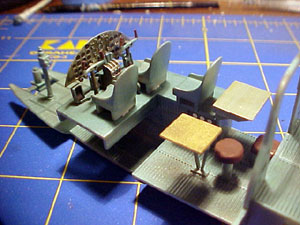
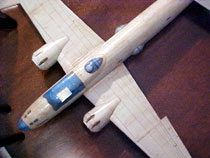
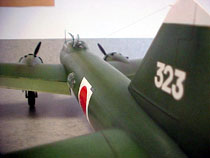
This angle gives a good view of the tail gunner’s
position. Next time I build this kit I would like to attempt to add to
this interior section. I just have to get better resource materials that
cover the interior of this AC. I would love to be able to root around in
the example up in the Smithsonian.
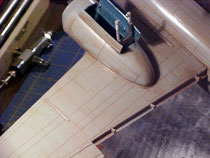
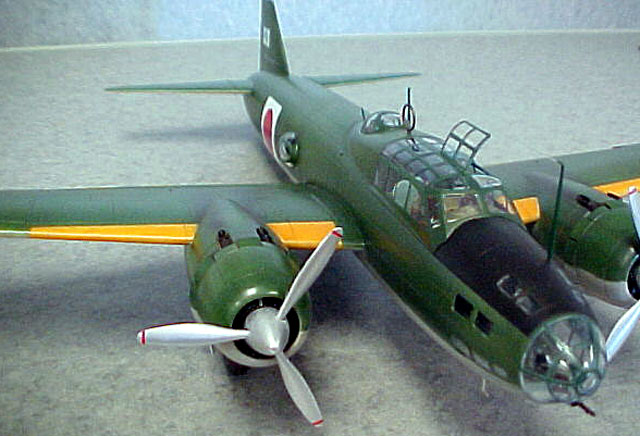
Antenna Rigging
Although this part of the kit can be tricky and
downright a pain in the @$$, the antenna
wires are one of my favorite things to put on a kit. This is also my
wife’s favorite part too. She loves to break these, well…not really but
this seems to be the parts that always end up broken when she is around.
The G4M1 had a tricky antenna to copy.
I chose to used a long piece of stretched spruce and connect it to the
various points as one long continuous piece. I used Tenax liquid welder
to attach the wire to the various antenna points and the tail. I was
very pleased with the outcome, and it was one of my better jobs. I feel
that adding the antenna wires adds a vital finishing
touches on an AC model.
Over all I believe this to be one of the better
kits on the market.
Although it is somewhat pricey, the kit has many
elements that make this a good-looking model built out of the box. The
fit of the many parts, the several options that are offered and the
detailed instructions as well as the decals make the kit worth the
price. I have not honed my scratch-building skills to the level of
proficiency that I feel comfortable putting into a kit of this type, but
for those of you out there in MODEL LAND that are; you guys and gals
could have a field day with this BETTY. The interior really lends itself
to that type of modeling expertise.
Soon after completion of this kit I gave this kit
to a good friend of mine who is also an avid historian and shares the
day of April the 18 as his birthday. The same day
and year Yamamoto was shot down. He was very impressed with the
final results and now has the kit displayed nicely in his library.
-
Imperial Japanese Navy Bombers of
World War Two Dr. Rene J. Francillion, Illustrated by Ronald Percy
1969. Hylton Lacy Pub. Ltd. Coburg House, Sheet
Street, Windsor, Berkshire, England
-
Osprey Combat Aircraft 22 Mitsubishi Type
I Rikko “Betty” Units of World War Two.
Osama Tagaya.
-
Japanese Aircraft Interiors 1940-1945.
Robert C. Mikesh. Monogram Aviation Pub.
Images and Text Copyright © 2003 by Bobby
McElroy
Page Created 03 July, 2003
Last Updated 17 March, 2004
Back to HyperScale
Main Page
|
 Home |
What's New |
Features |
Gallery |
Reviews |
Reference |
Forum |
Search
Home |
What's New |
Features |
Gallery |
Reviews |
Reference |
Forum |
Search