|
Messerschmitt Bf 109G-10
by
Aleksandar Mladenovic
|
 |
|
Messerschmitt Bf 109G-10 |

Revell of
Germany's 1/72 scale Bf 109G-10 is available online from
Squadron
The post WWII Yugoslav Air
Force used Messerschmitts Bf 109Gs. Some were captured from retreating
Luftwaffe and Croatian forces but most of the type came from Bulgaria.
Delivery started in 1947
after the Paris Peace Treaty which limited the size of Bulgaria’s Air
Force. The last Bf 109s were received in 1949.
A total of 59 Bf 109Gs were
sent disassembled and transported by rail. Some were 2-seaters, 6 in
total, by some sources two of the G series were converted to two-seat
trainers in Bulgaria on Yugoslav request.
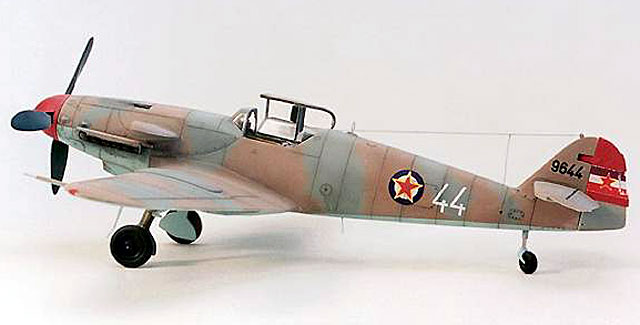
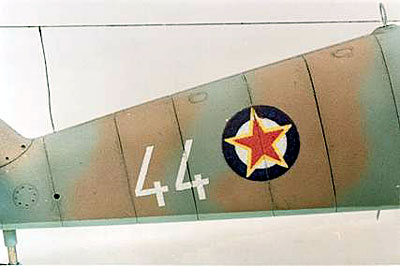
Of particular interest for
me was "White 44", a Bf109 G-10 (Yugoslav registration 9644). This
aircraft was actually a Bf 109G-10/ U4 wk. nr. 610937 captured at Zeltweg
Airfield in Austria at the end of the war, handed over to Bulgaria and
finally to Yugosalv AF.
"White 44" served with the
172nd fighter wing based at Zadar airfield. Some sources say it may have
been active on patrol sorties along the Italian frontier during so-called
"Trieste crisis" the (fortunately non aggressive) confrontation between
Yugoslavia and Italy over the free zone of Trieste. "white 44" retired in
1953 with total flight time in service 35 hours and 15 min.
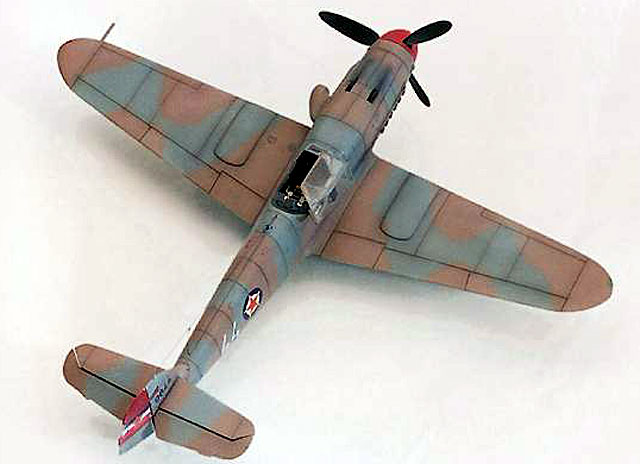
This is Revell's 1/72 scale
Messerschmitt Bf 109G-10. Generally speaking this is a good kit.
Unfortunately there are a
few mistakes which makes it an inaccurate representation of actual
aircraft such as the spinner, air intake, canopy and of course (almost 2mm
shorter in span) propeller! I've replaced those parts with ones from
Heller's Me-109K. Both kits are identical in size and fit of parts was
great .
The original machine guns
(MG 131) were replaced with some more realistic from spares box .
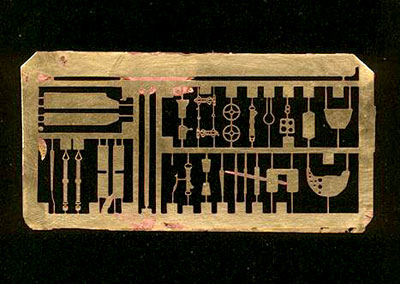 I
also made so-called 'contact' copy of Eduards PE zoom set, that home made
PE set lost 3D effect but my intention was to use only a few parts and
most of them without surface details ... antennas ,seat belts, pedals,
cockpit grips and handles. I
also made so-called 'contact' copy of Eduards PE zoom set, that home made
PE set lost 3D effect but my intention was to use only a few parts and
most of them without surface details ... antennas ,seat belts, pedals,
cockpit grips and handles.
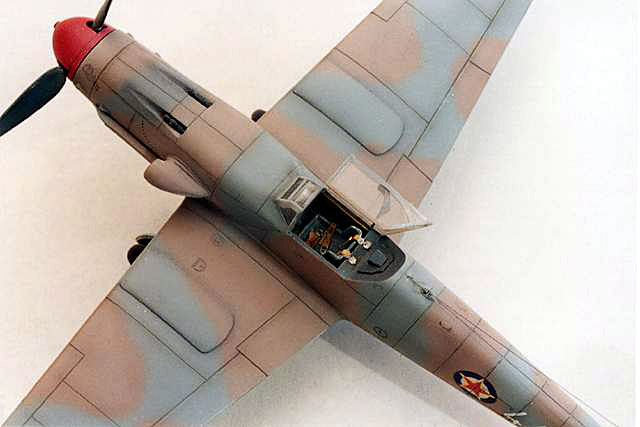
Furthermore, I redesigned
the cannon cover, five part gun sight in scratch built accompanied with
acetate instrument panel from personal production line completed realistic
cockpit look. The tail wheel leg was extended using metal tubing (medical
needles). The Fo 987 radiator interior was made from plastic net (silver
dry brushed), previously painted in black .
Make sure to correct angle
of main wheel and undercarriage leg because it will look more like Spit's
than Me109's undercarriage.
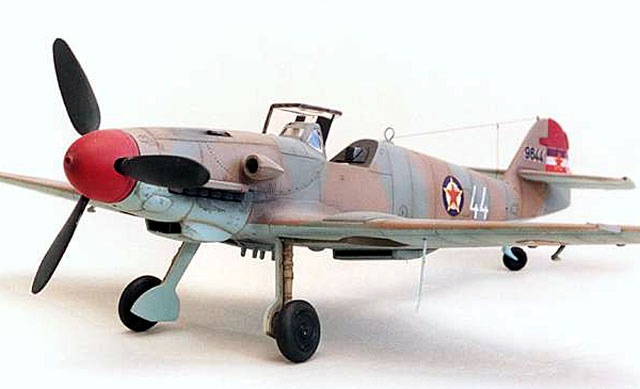
This aircraft was finished in an unusual camouflage scheme.
Basically it is standard
scheme for the period of 1950's of Light Blue underside ( close match FS
35450 ) and Middle Gray upper surfaces (so called 'pigeon grey FS 35237),
however the Dark Brown areas (close match FS 20117 ) are non standard
(though some Yak's reportedly wore similar camouflage in same period) with
addition of red spinner and ruder makes this post war Bf 109 attractive as
one post war machine could be.
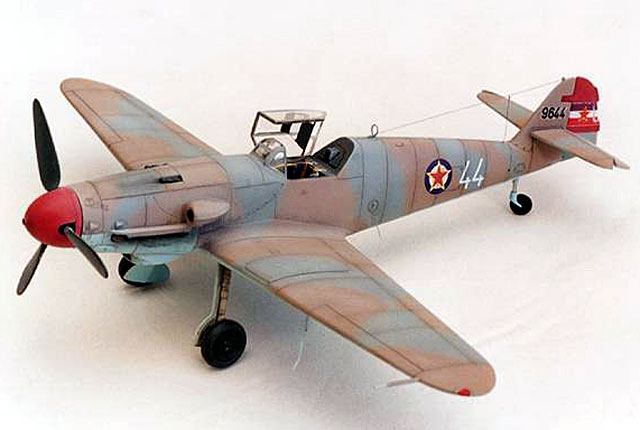
National markings are in 4
standard positions - 2 on the fuselage sides and 2 on wing undersides.
White code 44 fuselage only, black registration code 9644 and rudder flag.
Painting
I didn't used any primer.
For the underside Light Blue
color I mixed two ABCModelfarb's enamels plus Testors 1721 for Middle
Gray. This part was really fun Unfortunately I'v diluted Dark Brown
(ABCModelfarb's) too much and spent an hour and half painting Dark Brown.
The result was really great since I was able to spray very fine lines and
I didn't use any kind of masking but after such long time I was at the end
of my nerves!
A few days after panel lines
received dark grey pastel powder and engine section received oil leaks and
real rust powder ( I'v collected it during restoration work on my WW2
period Bulgarian helmet ). Finally panel lines were subtly over-shaded
with water diluted ink ...blue for underside and black for upper surfaces.
Decals
 I
used Corel 9 for the decal artwork. I
used Corel 9 for the decal artwork.
With a little help of my
friend I had free access to color laser printer (thanks Zvonko). Tango
Papa's clear decal paper is great for this kind of printing, with a light
overcoat of Humbrol Matt Cote to protect from scratching and home-made
decals were done .
Tango Papa's white decal
paper with digital cutter was used to produce white "44" codes also white
marking surfaces . The white areas were applied first (with dimensions
exactly the same as roundel or a flag) due to thin printed layer decals
are very transparent for example red star's outline which is yellow over
green paint become greenish yellow !
Special thanks to Zvonko
Gabaldo for his kind assistance and free access to color laser printer and
to Djordje Miltenovic and his excellent web :
http://members.tripod.com/YUModelClub/
Click the thumbnails below to view larger
images:
Model, Images and Text Copyright ©
2003 by Aleksandar Mladenovic
Page Created 05 August, 2003
Last Updated
17 March, 2004
Back to
HyperScale Main Page |
 Home |
What's New |
Features |
Gallery |
Reviews |
Reference |
Forum |
Search
Home |
What's New |
Features |
Gallery |
Reviews |
Reference |
Forum |
Search