|
Messerschmitt Bf 109G-10
by Anthony Manzoli
|
 |
|
Messerschmitt Bf
109G-10 |

Hasegawa's 1/48 scale Messerschmitt Bf 109G-10 is available online from Squadron.com
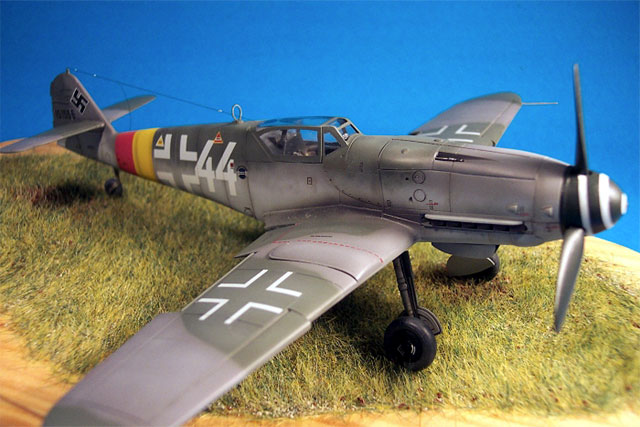
This is Hasegawa's 1/48 scale Messerschmitt Bf 109G-10.
Much has already been said about the Hasegawa line of Bf 109's so I will
stick to the build of this kit.
I chose to build it out of the box with some minor
augmentations such as adding seat belts from Extra Tech, fuse wire for
brake lines, ribs made from plastic card for the inside flaps and
antennae wire from invisible thread. The insulators are made from
Krystal Clear.
I followed the instructions step by step with no need
for filler. Primary steps include assembling the cockpit, adding any
details such as the seat belts, painting it as well as the inside
portions of the fuselage RLM 66 Dark Grey.
Once painted I dry brushed the raised details using a
light grey mixture of oil paints.
With the cockpit painted, the major assembly of the
kit can take place. This includes gluing the fuselage and wing halves
together as well as the tail. I usually do not glue the landing gear on
until they have been detailed and painted, but I did use a small amount
of 'Blue Tac' to hold them in place to aid in painting later. I added
some small ribs to the inside lower flaps and glued them in the open
position, the slats were glued in the open position as well. All the
small details were glued on except for the antennae wire.
The canopy was masked and glued in place, and the kit
was ready for painting.
My first choice was to paint the G-10 in ANR colours,
but I decided to save that for my G-14 kit. Instead I opted for the 2nd
choice on the instruction sheet. I only used the instructions for
camouflage placement, but I should point out the colours on the
instruction sheet are backwards on the upper wings.
I first painted the panel lines with matte black, when
this was dry I painted the RLM 76 right up to the top of the fuselage.
The preshading usually gets covered up on the sides but remains on the
underwings and lower fuselage, but this can be fixed later with post
shading and fading.
After the RLM 76 has dried, I set my Aztek A470 at it's
finest setting and painted the RLM 75 Grey Violet on the upper wings as
well as the upper fuselage. As I brought the colour down I went lighter
into the mottling. Some of the camouflage may appear dark at first, but
when both RLM 75 and 82 are applied you can touch things up with the RLM
76. I allowed the RLM 75 to dry over night and then made mask using
post it notes. I blue tacked these down leaving a tiny gap to allow a
soft edge to be produced. Once in place I painted the RLM 82.
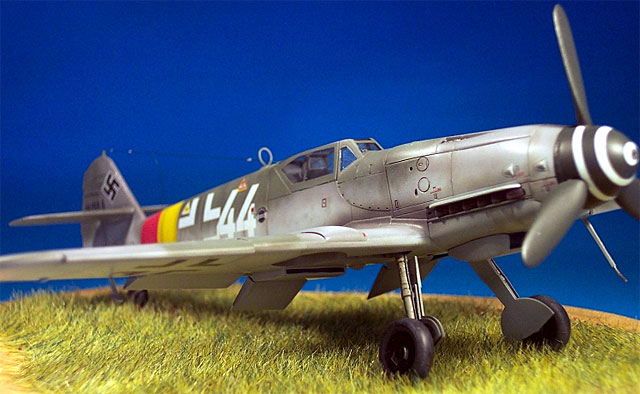
With the basic colours now on the model I mixed some of
the RLM 76 with the RLM 82 and RLM 75 and began lightly painting the
centre of the panels, this gives the model a weathered appearace without
having to dry brush or use allot of pastel chalk later.
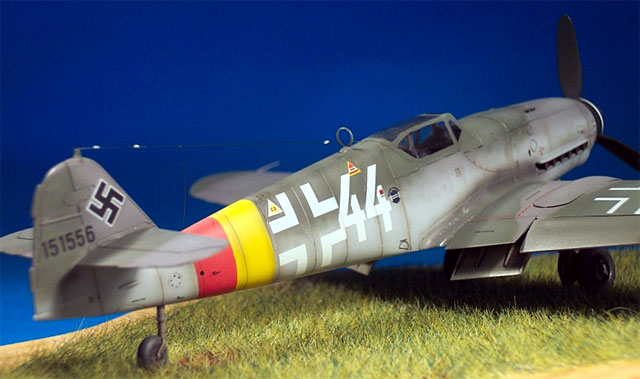
Once the fading was completed I masked the fuselage and
painted the RLM 04 and RLM 23 RV band of JG301. I should point out at
this stage that the kit instructions call for the decal to be used which
that of JG7, but from what I was told this plane was actually from
JG301. With most of the painting done, all that was left was masking
and painting the wheel wells, the inside of the flaps, and the struts
with RLM 02 and painting the prop and spinner RLM 71.
When the paint had cured for a good two days, I used
Pascoes Long Life and applied it with a flat brush. This product is
much like Future and is self levelling.
With the major parts of the aircraft glossed, I applied
the decals. The kit decals are a little on the thick side so solvent is
needed to help them settle into the panel lines.
The final step in the finishing is matte coating the
plane and lightly weathering it. I use Tamiya Flat Base mixed with
Pascoes Long Life for the matte coat, this works pretty good and allows
me to increase or decrease the amount of dullness I desire.
I used a sharpened pencil for most of the panel lines,
and a very thinned down black and brown ink from Citadel's range of
paints for the remainder of the washing. I also added some pastels to
tone down some of the weathering which I did with a silver pencil.
The final detail was adding the antennae wire which was
made from invisible thread and insulators made of Krystal Clear.
This was a quick build and I basically wanted to stick
to out of the box for the exception of the minor details I added. I
didn't have much reference material to go by for this particular plane
but from what I have been told, Eagle Editions is going to be releasing
a book very soon which will have some interesting information about this
aircraft "White 44".
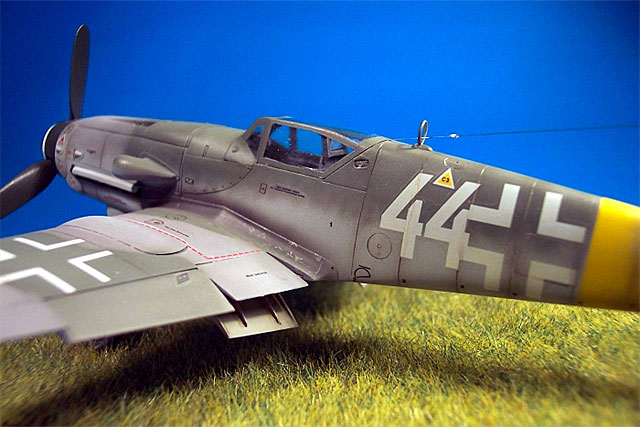
There is also an article on
Hyperscale
written by Floyd Werner that describes how to change the cowling on this
kit to the "Type 110 Variant". This being an aircraft from
werknummer block 150 would have had this type of cowling.
I hope you like the finished product, I enjoyed building
it as most who enjoy the 109 do and it was fun trying out some of the
painting techniques I have been picking up reading articles on
HyperScale and magazines.
Model, Images and Text Copyright ©
2003 by Anthony Manzoli
Page Created 28 August, 2003
Last Updated
17 March, 2004
Back to
HyperScale Main Page
|
 Home |
What's New |
Features |
Gallery |
Reviews |
Reference |
Forum |
Search
Home |
What's New |
Features |
Gallery |
Reviews |
Reference |
Forum |
Search