|
Painting the
Black Box Combat Series
1/32 F/A-18C
Cockpit
Part One
by Dave Roof
|
 |
|
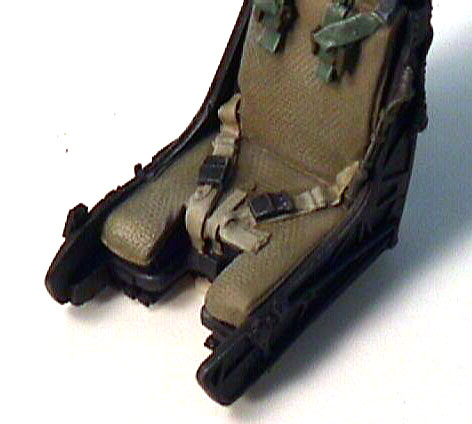
Close-Up of 1/32 Scale F/A-18C Seat |

HyperScale is proudly supported by Squadron.com
Here is the F/A-18C cockpit painted and ready for installation.
I will also point out assembly tips to assist those modelers that may need them.
This is only one of literally dozens of ways to paint, assemble and install a
cockpit. I hope what I have done will be useful to others.
Enjoy!
Painting the
Combat Series F/A-18C Cockpit
|
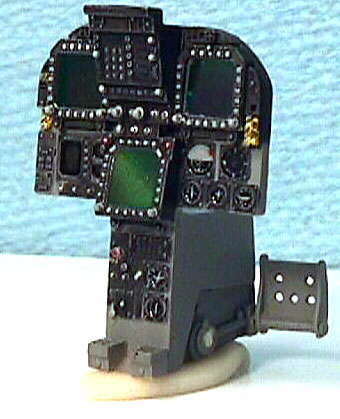
1. The Instrument panel and foot pedals
First, remove the panel and the foot pedals from the carrier
blocks. Be very careful removing the pedals. I used a scalpel to gently press in
between the pedal and carrier block until the parts separated, then cleaned them
up with a sanding stick.
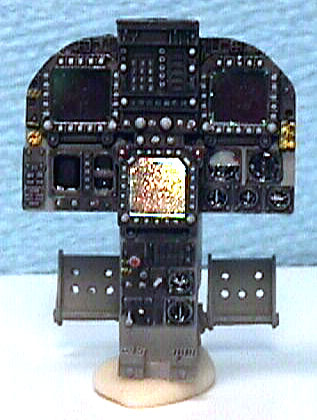 The panel and pedals were then airbrushed with Model Master
Enamel FS 36231. I let that dry overnight, then applied a gloss coat using
Pollyscale Acrylic Gloss. After that dried overnight, I applied a wash of
Humbrol Flat Black (33) to the instrument dials, CRT displays, and HUD control
panel. Once the wash dried to the touch, I followed with thinned Humbrol Black
and painted the areas that received the wash. The panel and pedals were then airbrushed with Model Master
Enamel FS 36231. I let that dry overnight, then applied a gloss coat using
Pollyscale Acrylic Gloss. After that dried overnight, I applied a wash of
Humbrol Flat Black (33) to the instrument dials, CRT displays, and HUD control
panel. Once the wash dried to the touch, I followed with thinned Humbrol Black
and painted the areas that received the wash.
After the black had dried
overnight, I airbrushed the panel with Pollyscale Flat Coat, then followed it up
with a dry brushing of MM Enamel FS 36375. All of the switches were picked out
using Humbrol Light Compass Ghost Gray (127), MM Enamel Silver FS 17178, and
Yellow craft paint from Wal-Mart.
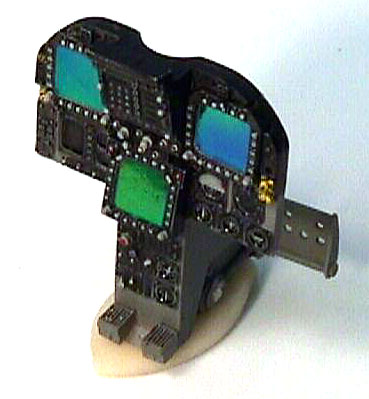
I painted the inside of the CRT displays Clear
Green from Tamiya and all of the dial faces received Tamiya Gloss to represent
the glass. The pedals just received a dry brushing.
The screens for the CRT displays? Well, you’ll have to wait a few more days for
that secret! No, they are not painted. Yes, they change colors (look at the
various photos I have provided) depending on the light and angle they are viewed
from.
Once the instrument panel was finished, I attached the foot pedals and set it a
side.
**NOTE: Look at where the pedals attach to the base of the instrument panel! The
instructions are wrong and have you glue them to the disc closer to the pilot.
This is being corrected, but is noted here in case you get the incorrect
instruction sheet.
Click the thumbnails below to view
larger images:
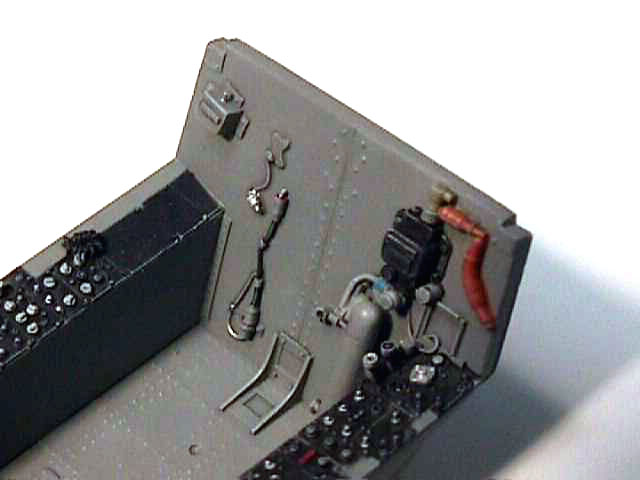
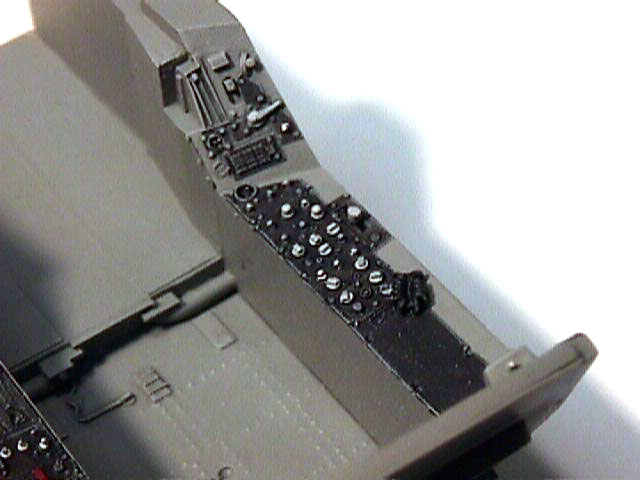
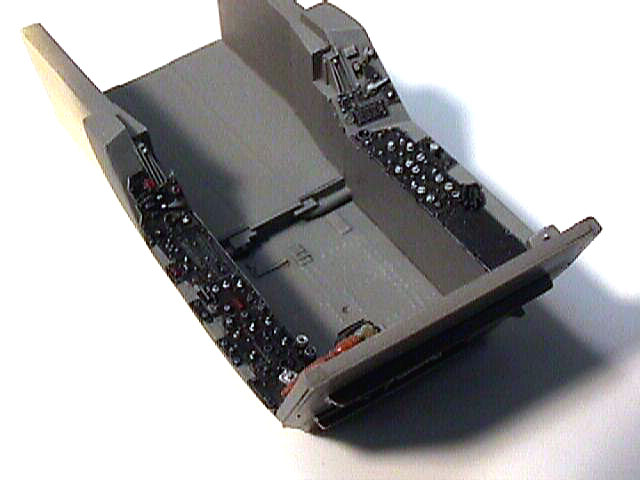
2. The Cockpit Tub
The tub was painted using the same techniques as the instrument
panel, and was done at the same time. The Orange ‘tube’ is really a cable that
is covered with an Orange colored tape. The Orange is actually Humbrol Matt Red
Brown (100). The cannon plug on top of the Black box on the aft bulkhead is
painted with MM Enamel SAC Bomber Tan FS 34201. I found this color to be an
almost perfect match for that particular item.
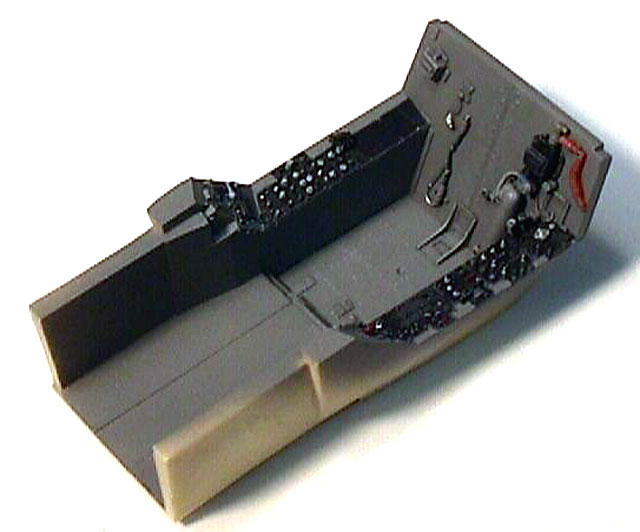
As I have stated before, Jef got this cockpit correct down to the rivet pattern
on the deck and aft bulkhead. If you had the inclination to depict your Hornet
in a maintenance setting with the seat out, all of the detail in the real thing
would be visible.
Click the thumbnails below to view
larger images:
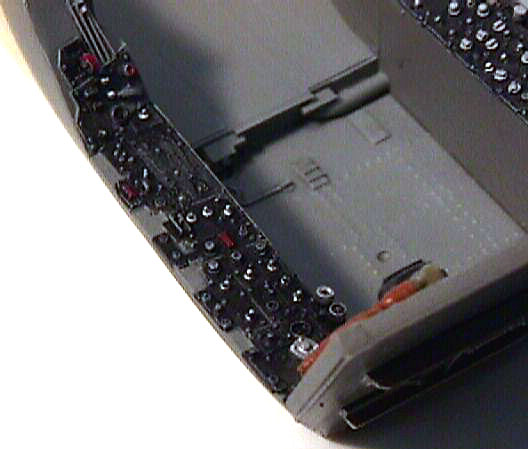
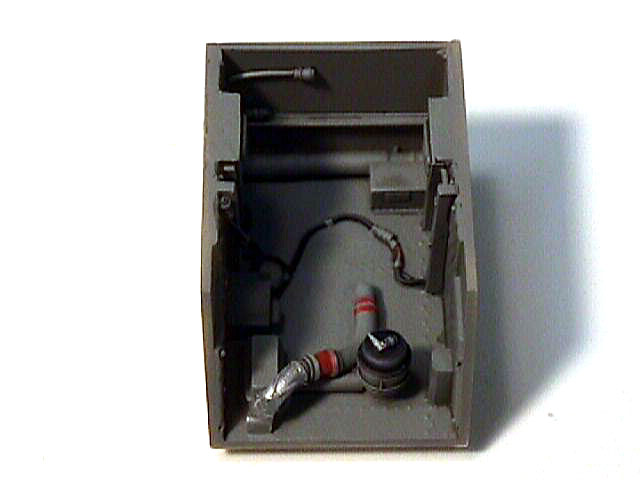
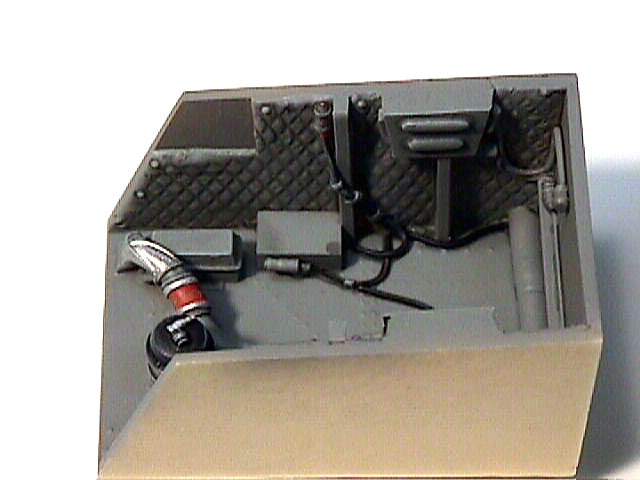
3. The ‘Hell Hole’ (Avionics Bay)
Once again, the same painting techniques that were used for the
panel and tub were used here.
Click the thumbnails below to view
larger images:
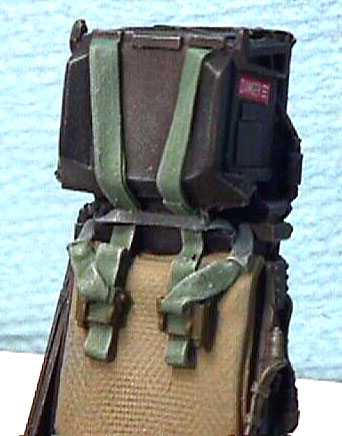
4. The SJU-17 NACES Ejection Seat
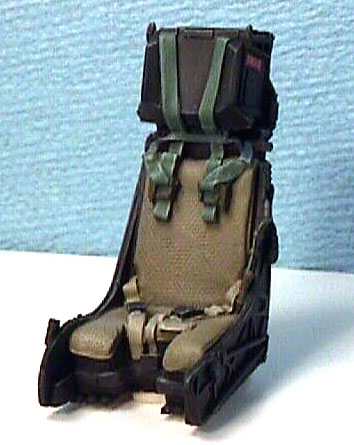 The ejection seat and rocket tube were airbrushed Tamiya XF69
NATO Flat Black. Once that dried overnight, I gave it a clear gloss coat using
Pollyscale Gloss. The ejection seat and rocket tube were airbrushed Tamiya XF69
NATO Flat Black. Once that dried overnight, I gave it a clear gloss coat using
Pollyscale Gloss.
After the Gloss dried overnight, I gave the seat a wash using
Humbrol Flat Black (very subtle, but noticeable). The seat cushion was painted
using Model Master Enamel SAC Bomber Tan and lightly dry brushed with MM Flat
White.
The seat belts were painted with SAC Bomber Tan lightened with White, and
the buckles were painted Flat Black. The harnesses were painted with Humbrol
Matt Uniform Green (76) and MM Enamel Intermediate Blue FS 35164.
Once
everything had dried, a coat of Pollyscale Flat was applied. A dry brushing of
MM Enamel FS 36375 and Flat white finished the seat.
The ejection pull ring was made from fine copper wire bent to
shape around a piece of styrene rod. It was then dipped in Yellow paint. Once
dry, the rings were painted with Flat Black. It was then super glued to the
seat.
Click the thumbnails below to view
larger images:
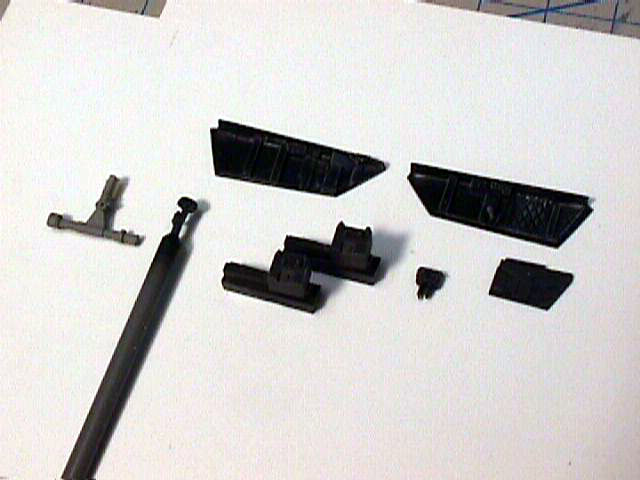
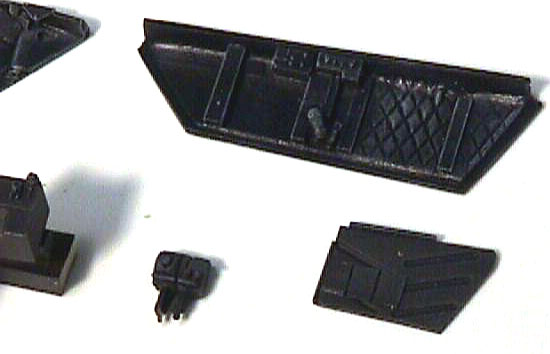
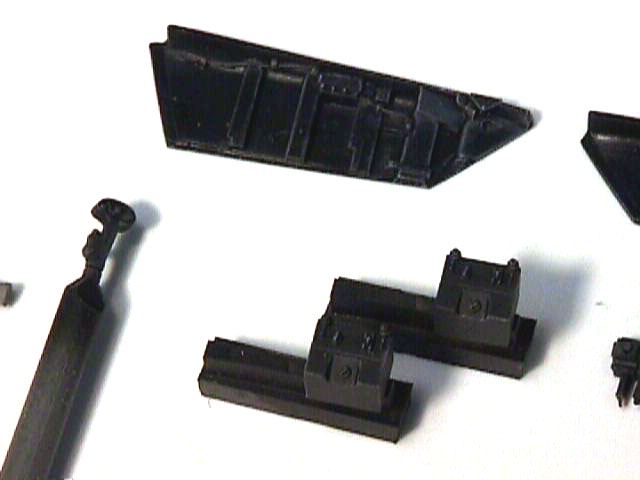
5. Sidewalls and Other Cockpit Items
The side walls, top of the control stick, map case cover,
avionics boxes, and throttle were all airbrushed Tamiya XF69 NATO Black. The
base of the control stick was painted FS 36231 and given a wash using Black.
Once dry, all of the parts were given a dry brushing of MM Enamel FS 36375 and
set aside.
Click the thumbnails below to view
larger images:
Click Here to go to Part
Two
Click Here to go to Part
Three
Text and Images Copyright © 2003 by
Dave Roof
Page Created 06 July, 2003
Last updated 17 March, 2004
Back to HyperScale Main Page
|
 Home |
What's New |
Features |
Gallery |
Reviews |
Reference |
Forum |
Search
Home |
What's New |
Features |
Gallery |
Reviews |
Reference |
Forum |
Search