| I had a blast building this
kit, finishing it within a month of Monogram releasing it
back in 1992.
I had always wanted a model of an A-37,
and Monogram's kit was no disappointment. The kit is
getting old, now, but it is still a really nice little kit. I
recently picked up several of these kits at a bargain price to
put away in my stash. I definitely would like to build some more
of them, sometime.
Monogram's
1/48 scale A-37 Dragonfly
|
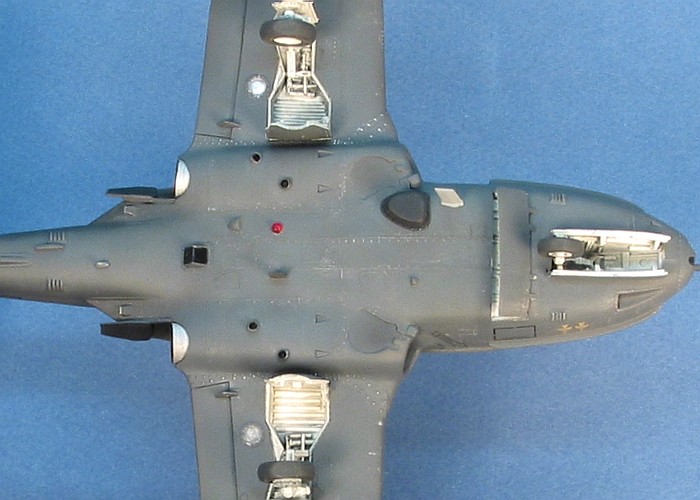
The kit is molded in basic gray. The scribing is raised, but
somehow fits the rugged appearance of the aircraft. The lines
around the control surfaces are engraved. I was a little unhappy
at the extreme size of the rivets on the tail surfaces, but a
quick (and light) sanding reduced them to a more manageable
size.
The biggest problem with the kit relates to Monogram's
molding in specific details, whether I wanted them or not. As
case in point, the wheel well doors are molded as portions of
the wheel well sides. To build the aircraft in flight requires
surgery in order to free the doors and close them. Also, the
speed brake does not fit very nice into place in the closed
position. I accepted all these things being open on the finished
model and had no trouble with them after that.
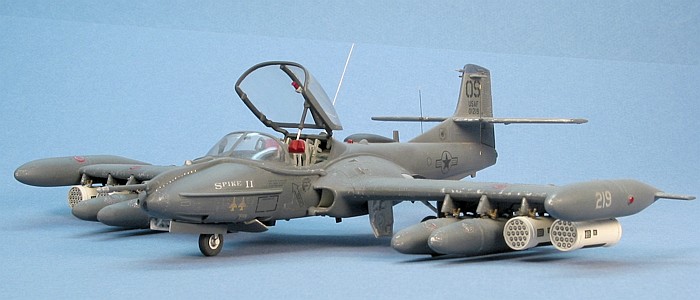
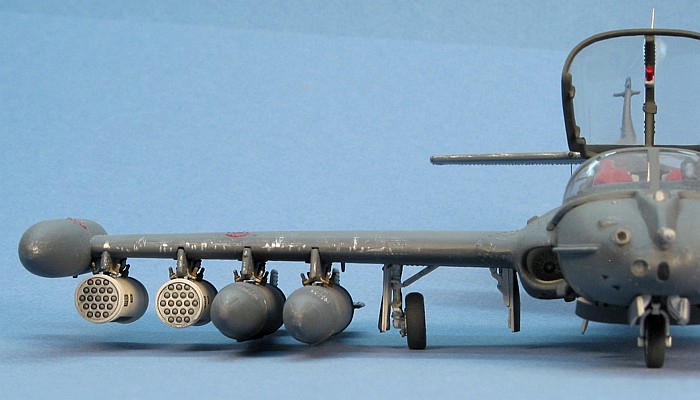
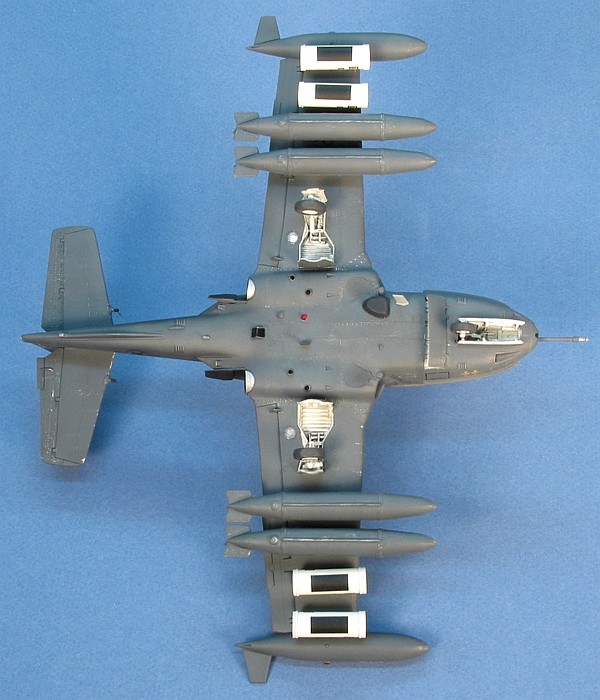
Monogram is one of the better companies for giving
well detailed stores for under the wings. The kit has beautiful
weapons pylons and anti-sway braces that just beg to have things
hung under them. Provided in the kit are the customary four wing
fuel tanks that were nearly always present on U.S. aircraft, two
500lb low drag bombs (with the fuse arming wire molded on them),
two napalm tanks, and two simply gorgeous 7.62mm minigun pods.
No kits by any maker to date include such wonderful renditions
of this gun pod. The manner in which the weapons pylons are
molded shows Monogram's acknowledgement to alternate
weapons available by other manufactures. The kit does not simply
mold the weapons already attached to the pylons like so many
other Monogram kits have done. I chose to use rocket pods
available from the Hasegawa weapons sets and had no
problem attaching them on the pylons.
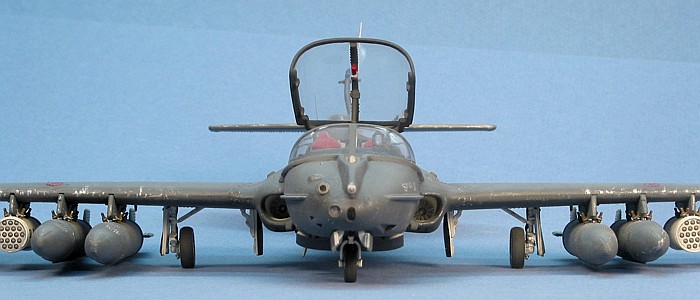
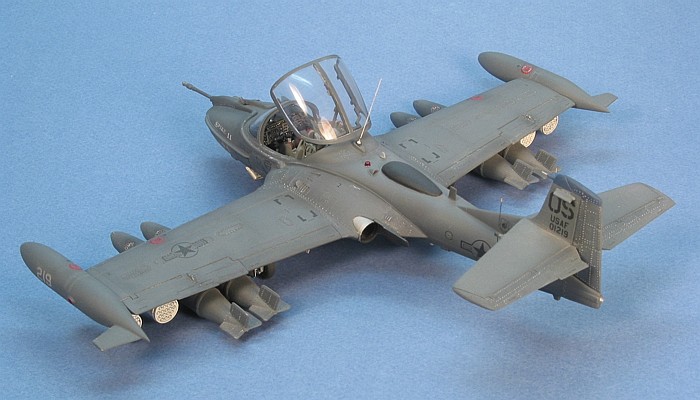
I built the kit mostly out-of-the-box. The fit of most of the
kit, including a tricky wing joint, was flawless. The only area
of concern was the wing-to-fuselage seam under the aircraft
between the engine exhausts. Considering the location of the
seam (being impossible to see without picking the model up), I
was not overly worried. The only modifications I made to the
basic kit were as follows:
- I substituted Hasegawa rocket pods on the outer
weapons pylons.
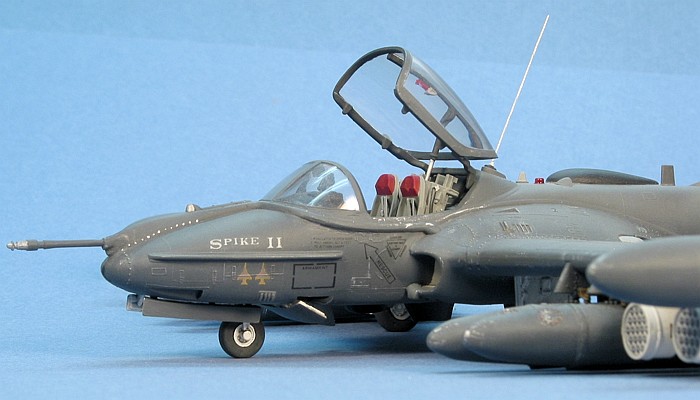
- I used fine brass wire to represent the whip antennas on
the tail and behind the cockpit.
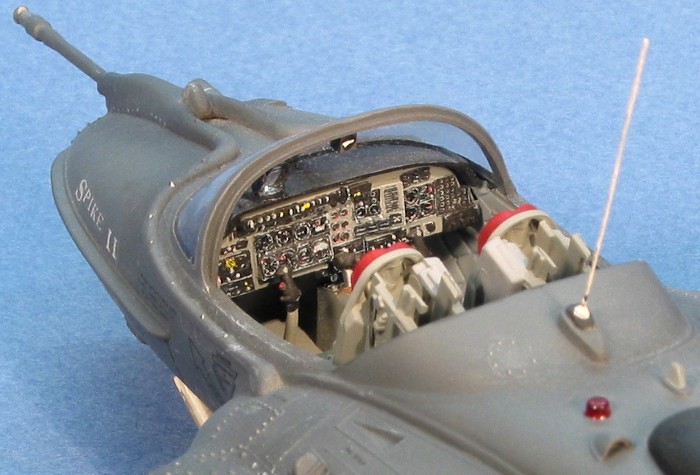
- I added seat harnesses to the ejection seats with .005"
sheet styrene and Waldron seat belt buckles.
- I added the backup magnetic compass to the interior
windscreen framing.
Some items I omitted from the kit when I
built it that I have never returned to fix are the FOD screens
that folded down below the engine intakes. Monogram's kit
parts for the FOD screens looked like barn doors, and I could
not bring myself to use them. I also could not find a convincing
way to scratch build them, so I just left them off figuring that
someone would provide me an etched metal solution. Since then, I
have acquired a couple different etched metal detail sets for
the A-37 (Eduard and True Details) that provide
these pieces, but I have never gotten around to painting and
attaching them.
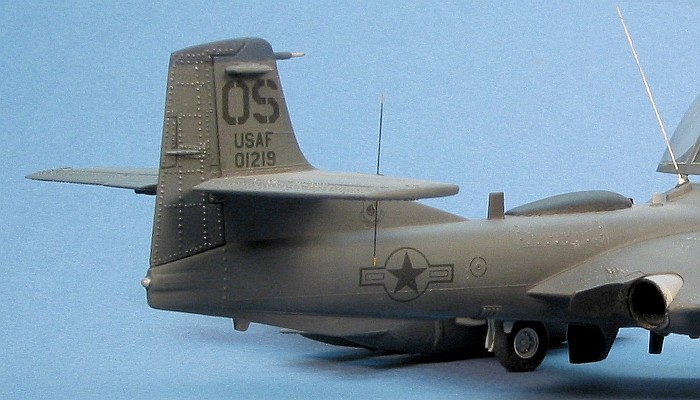
 I
used Testor's Model Master enamel paints to paint the
entire model. The aircraft is from the 19th TASS / 51st
Composite Wing based at Osan AB in Korea. This is the only place
I have noted where A-37's were camouflaged in overall Gunship
Gray (F.S.36118). I pieced together the markings and aircraft
data from spare decals. SuperScale released decals for an
aircraft of this unit just two days after I finished building
the model. I found that to be poor timing on their part. I
used Testor's Model Master enamel paints to paint the
entire model. The aircraft is from the 19th TASS / 51st
Composite Wing based at Osan AB in Korea. This is the only place
I have noted where A-37's were camouflaged in overall Gunship
Gray (F.S.36118). I pieced together the markings and aircraft
data from spare decals. SuperScale released decals for an
aircraft of this unit just two days after I finished building
the model. I found that to be poor timing on their part.
I needed gray numbers for the wing tanks. Lacking any at the
time, I decided to try an experiment. I applied the wingtip fuel
tank numbers in white decals. Then I misted some Gunship Gray
over them to "gray them out". It worked well and provided about
the right color shade for the numbers without having to go out
and find gray numbers.
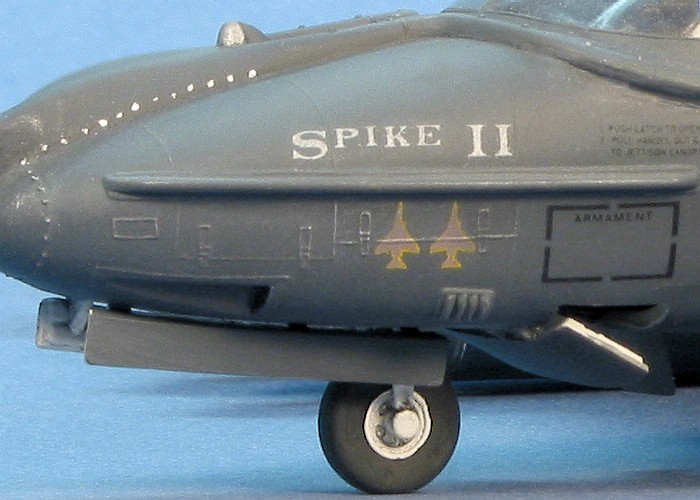
I could not resist spicing up the model a little bit. To that
end, I added an aircraft name, "Spike II", on the left side of
the nose. This is an indirect reference to a P-51D Mustang model
I built around the same time period which I named "Spike".
Perhaps the same pilot flew both. I grayed out the nose name
writing in the same way that I did on the wingtip fuel tank
numbers. I also decided to get a little more wild and say that
this little Dragonfly had managed to "sting" two F-4 Phantoms.
The Phantom kill markings come from an old SuperScale
A-10 Warthog decal sheet. Hey, it could happen...
For weathering, I used my typical style of
thinned down enamel paint washes and air brush shading. I
finished the weathering with some dry brushing to pop out the
surface details. For a more complete discussion of what I do to
weather my models, see my posting on
"Weathering Aircraft".
I had a lot of fun with this kit. It is a simple kit of a
very unique little aircraft. With the Black Box resin
cockpit and the Albatros decals that came out over the
last few years, I will surely do another Dragonfly or two in the
future. |
 Home
| What's New |
Features |
Gallery |
Reviews |
Reference |
Forum |
Search
Home
| What's New |
Features |
Gallery |
Reviews |
Reference |
Forum |
Search