|
ProModeler's 1/48 scale
Arado Ar 234C-4
by Bob Aikens
|
 |
|
Arado Ar 234C-4 |

ProModeler's 1/48 scale Ar 234C
is available online from
Squadron
Here is my 1/48 scale
ProModeler Ar 234C-4.
This is a good model kit but like most models it has a few challenges.
Floyd S. Werner Jr.'s
article on the Jumo-engined B version of this kit was quite
helpful, especially on wing-fuselage alignment.
In retrospect there are
two things that remain with me about this kit:
-
the work I had to
do to get the front section joined up nicely to the fuselage, and
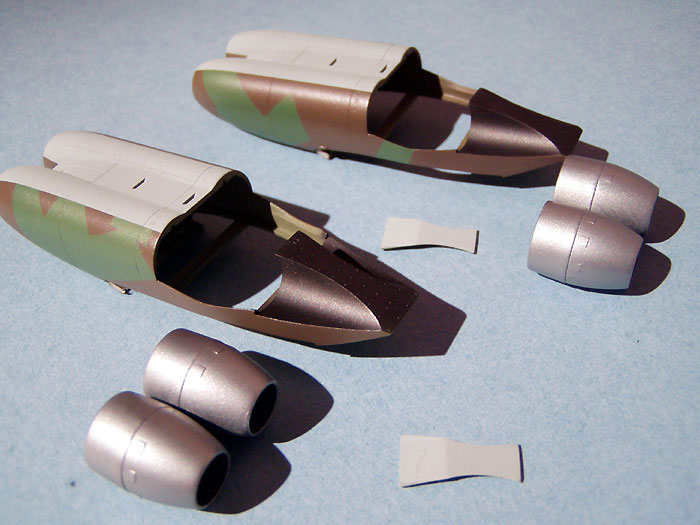
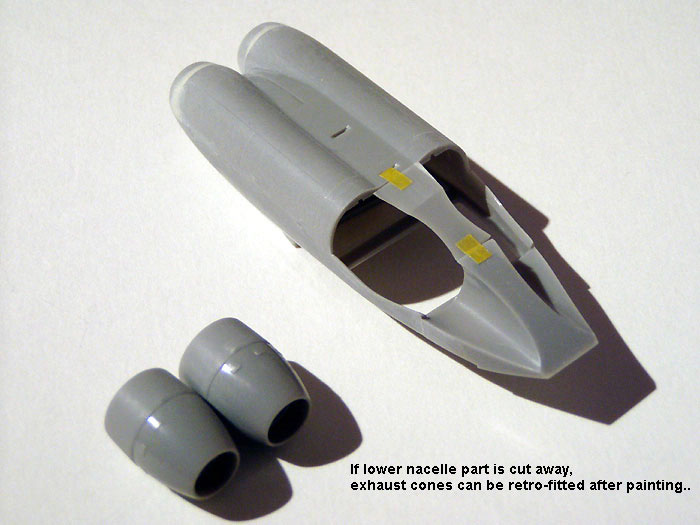
-
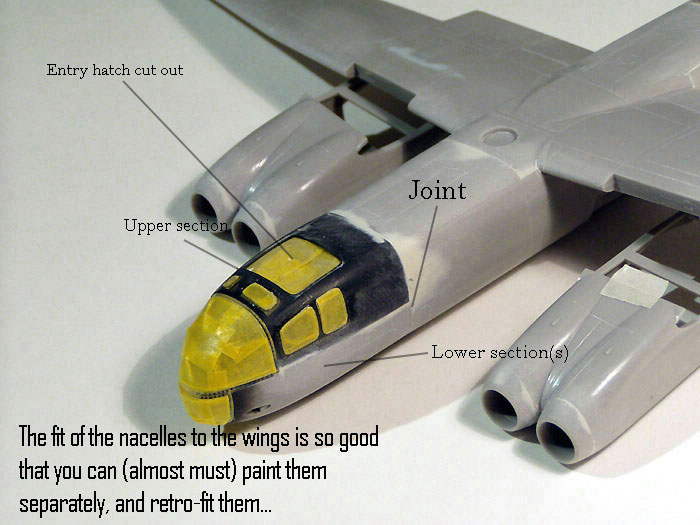
the beautiful fit
of the nacelles to the wings; truly a saving grace-they can be
popped on for aligning the masked areas, and popped off to
facilitate fuselage painting.
Click the thumbnails below to view larger
images:
Perhaps it was just my
ineptitude but I found the front section troublesome. It consists of 2
bottom pieces(gun section) and a top (clear) piece. These have to be
meticulously joined to avoid (if possible) the fit problems that may
attend. I built the lower front section first and joined it to the
previously assembled fuselage, thinking that I was cleverly avoiding
incipient problems-not so! It was a case of the dummy outsmarting
himself and the ventriloquist!
Alas, when I went to fit
the upper glazing, it didn't line up too well, and I spent hours - no,
days - blending the sections. Moreover, I'm still not convinced that if
I had done the opposite(building the whole front unit first and then
fitting that to the fuselage), that it would have been any different!
Two small pieces of
surgery were done. The first was the outside flaps. The inside ones were
almost flush to the fuselage and posed a bit more work than I wanted to
do as the front sections were occupying my resources mightily wonder
what Allenby or Gordon would have done had they been modelers).
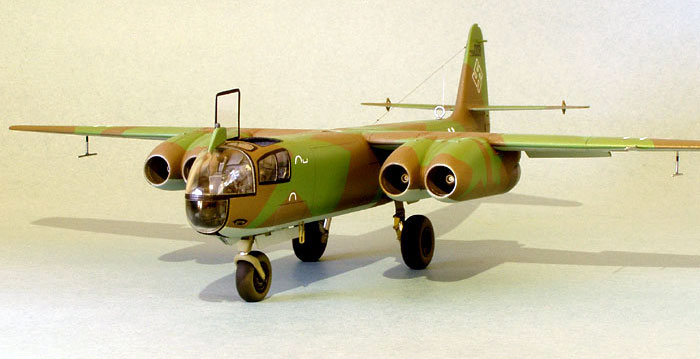
Next, the entry hatch
was cut out - how easily the phrase rolls off the keyboard! It took me
about two hours with a needle in a pin vise to scribe my way through the
canopy plastic - another fool's errand. But the cockpit is quite highly
detailed and better viewed with the transom open. It also enabled me to
retro-fit the seat and it's Eduard harness.
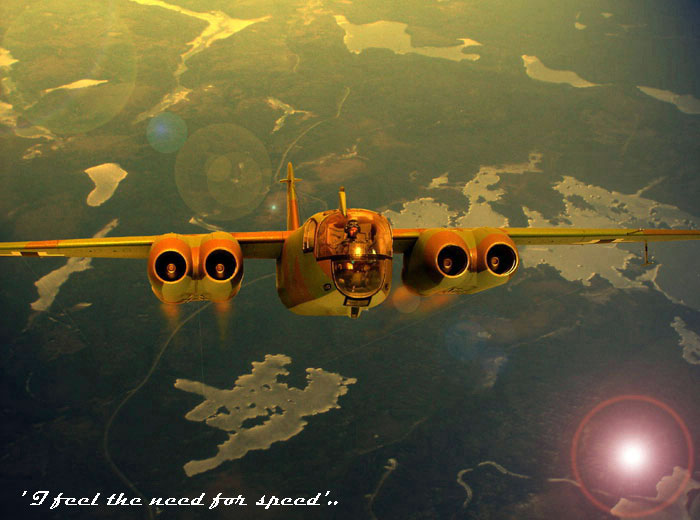
I had intended to mount
the rocket take-off assists (Walter RI 202) but the support mounts were
frangible-finnicky and overcame me. But, as you can see, when the
aircraft is clean it looks sleek and fast just sitting there . The drag
chute wire was also very breakable and was so replaced with solder wire.
Also of note- in
retrofitting the front wheel- the fit up into the forks is much too
snug. You can either widen the forks with a shim into the strut or sand
some of the plastic from the inside of the forks-otherwise it's a tight
fit.
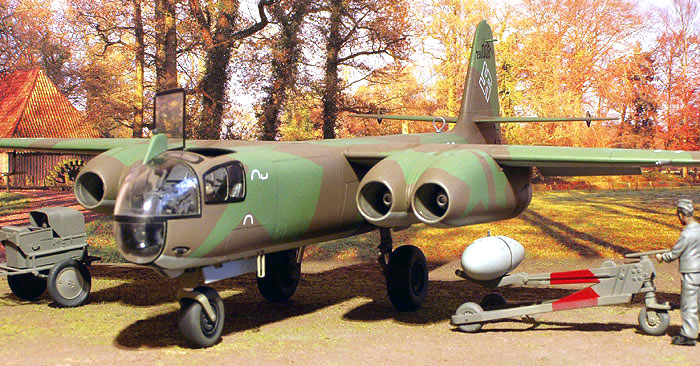
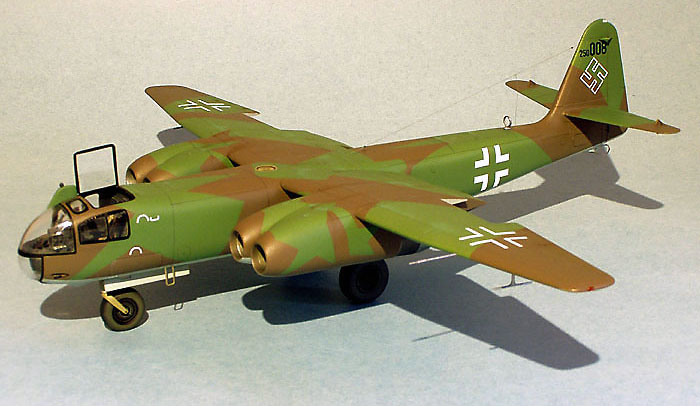
 I
used Model Master Braunviolett and Lightgrun for the upper surfaces. I
lightened the Braunviolett as it seemed, perhaps a bit too dark in the
bottle. I
used Model Master Braunviolett and Lightgrun for the upper surfaces. I
lightened the Braunviolett as it seemed, perhaps a bit too dark in the
bottle.
The lower surfaces were
done with MM RLM 76. Most of the panel and surface lines were
accentuated with a wash, and a bit of pastel treatment done on the broad
upper surfaces.
My model is Ar 234C-3/008-the 8th pre-production example. The second
version on the kit sheet is Ar 234C-4/022, a reconaissance version,
probably the production prototype (wm. Green WOTTR).
This is a nice, but
moderately challenging kit. Armed with my schooling on this one I'm
looking forward to the twin Jumo night-fighter version.
The looks of this
aircraft sort of grow on you.
Click the thumbnails below to view larger
images:
Model, Images and Text
Copyright © 2005 by
Bob Aikens
Page Created 28 January, 2005
Last Updated
28 January, 2005
Back to
HyperScale Main Page |
 Home
| What's New |
Features |
Gallery |
Reviews |
Reference |
Forum |
Search
Home
| What's New |
Features |
Gallery |
Reviews |
Reference |
Forum |
Search