|
1/48 scale Revell &
Hobbycraft Kitbashed
Messerschmitt
Bf 109G-6/AS
by
Floyd S. Werner Jr.
|
 |
|
Messerschmitt Bf
109G-6/AS |

HyperScale is proudly supported by
Squadron.com
The Controversy
About two months ago someone asked on Hyperscale
about a 109 with a different paint scheme. I had just received my copy
of the Jet & Prop magazine from Germany that had an all black 109 in
it. I suggested this to the guy who posted. It just so happened that
Luftwaffe im Focus was going to release a limited edition decal sheet of
this particular airplane’s markings, which were very unique. The unit
emblem had not been previously released and consisted of an owl on a
strange shaped shield, as well as, the aircraft number “5”. Jet and
Prop called for a “Green 5”. Pictures were posted to the net of this
particular airplane from the J&P article. It was suggested by Jerry
Crandall that the markings may, I repeat may, have been red. Someone
then posted a personal attack against Jerry. It was quickly removed but
the venom with which the posting was written was unmistakable. A
political comment: boys and girls it is just a hobby and people are
entitled to disagree with someone’s findings. Unless you were there, it
could have been…
Off my political soapbox.
Not to be one to shy away from controversy,
especially when it comes to German aircraft I decided then and there to
make one.
The Model
Why did I choose the 1/48 scale Revell-Monogram
fuselage?
Well, I got to tell you, every once in a while a
model just refuses to be built. That is what happened to this
particular fuselage. It was originally envisioned to be a G-6/AS from
JG-27 with the red legs and wheels using the KommanDeur decals. I
needed small bumps for the wheels so I decided to use a Medallion
conversion set which included new upper wings. Well the conversion set
I had was so old and the resin had shrunk so much that it was very
difficult to get a proper fit. I made all the changes to the fuselage,
but when it came time to put the wings on I just screwed the pooch and
did not like the results.
While it was waiting for me to get remotivated to
try and fix it, it “flew” off the stand and shattered the wings from the
fuselage. I took this as a sign from modeling gods and I trashed the
wings. Saving the wheels and the fuselage. I couldn’t get rid of the
fuselage as I put some nice work in the Cooper Detail cockpit that I
couldn’t get out. I used the fuselage to practice paint techniques on
until I stumbled on a hint on an Aeromaster sheet that suggested that
you mate the fuselage from the Monogram kit to the wings of the
Hobbycraft kit. That seemed easy enough. Let me tell you how I screwed
it up.
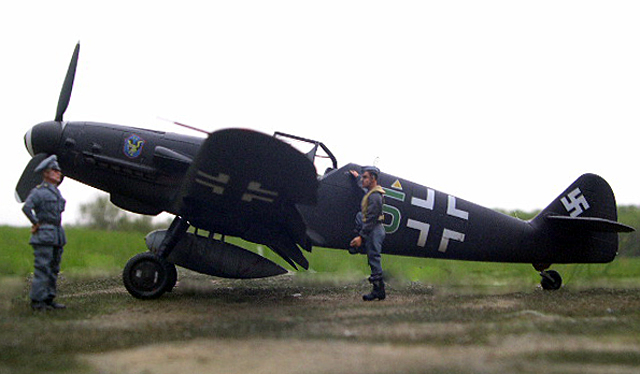
The AS conversion
First off, the AS conversion is a sly rascal to say
the least. Three different type of tails, may have a long or short tail
wheel, may or may not have bulges on the oil cooler panel, may or may
not have the Type 110 cowling, occasionally even has the larger oil
cooler but generally the AS versions were not G-10s. The G-6 and G-14
were the more common versions. I’m going to speak in general terms
here.
The G-6 had a larger tail which is a unique shape
made of metal, the wings contained small kidney bulges for the “normal”
G-6, short tail wheel strut and no bumps on the oil cooler. The G-14
seemed to contain the longer tail strut, normal G-10 oil cooler bumps,
and the tall tail made of metal (occasionally wood) but retained the
small wheels. Confused? Most 109 freaks, I meant to say experts,
myself included, have a hard time telling the difference as the work was
accomplished alongside of “normal” aircraft. I’m sure I’ll hear about
that!
What I did was sand the bumps off the nose, used
the shallow and spread the oil cooler from the Fujimi kit, as well as,
the Fujimi AS tail. This seems to depict the aircraft in the photos.
How I managed to
screw up a model and learned to live with it
The Monogram kit is still, in my eyes, a great
value and a great kit. The interior is sparse but with the addition of
the Cooper Detail Interior, now Jaguar the kit builds up nicely with
good fit all around. I think the Cooper Detail set is one, if not the
best, 109 cockpit available. I wanted to try the new Eduard Color Etch
seatbelts. They fit great looked nice and were quick but I think I like
to paint my own and weather them myself.
The AS conversion required a new type of tail. I
asked myself, “Self, I’ll bet the Fujimi AS tail would fit on that kit,
maybe even the oil cooler” I frequently talk to myself when modeling.
I’m not sure it is healthy or not but the voices inside my head say that
I’m alright and they are correct most of the time. Well they were
correct this time as well. I just cut off the Monogram tail just above
the panel line and along the vertical hinge area and scabbed on the
Fujimi tail. Perfect fit. The oil cooler was just as easy. It fit
like it was designed for the kit.
The Hobbycraft wings fit the Monogram fuselage real
well. I did need some shims of plastic on the front and back but it was
a decent fit. I couldn’t not let well enough alone and just attach the
Hobbycraft wings, I had to articulate the flaps with the KMC control
surface. This was my Waterloo.
First off, the wings are made of a brittle plastic,
especially around the oil coolers and I ended up breaking the plastic
while sawing off the kit control surfaces. Superglue on the inside
fixed that. When you saw the Hobbycraft control surfaces off you have
to do the upper and lower surfaces separately. The bottom of the wings
and the top of the wings don’t line up. You can’t tell on the model
when the control surfaces aren’t articulated, but you sure can when they
are. This created a problem, but not too bad. The real problem came
when I had the surfaces off and then glued the wings to the fuselage.
The wings were flexible with the control surfaces but with them gone
they were positively flimsy. I managed to induce a warp into them, one
that would not go away. This in turn caused the control surfaces not to
line up when they were attached.
The KMC control surfaces are nice but not perfect.
The inboard flaps are very nice. The outboard ones are too thin and too
small. Since this was the second iteration on the wings I said the heck
with it. I’m building this for me and I don’t mind too much. I
couldn’t hook up a Hasegawa wing as the panel break is in a different
spot, the Monogram, Hobbycraft and Fujimi being in a more logical place,
at a panel line and Hasegawa being in the center of a panel. The
problems kept building as I stated the outer flaps are a little thin and
could use a .005 on top and bottom of the flap, but this didn’t prove
easy to do. What I eventually settled on was adding the .005 to the top
and bottom of the wing with a bend so the KMC part had a place to sit
and the see through effect would vanish. I did add an Eduard photo-etch
wheel well insert to the top wing. This prevented me from having to
fill the wing bumps attachment points and they fit real well.
The landing gear actually fit real well. I
attached them early on as the whole airplane is black from the photos.
It was time to paint.
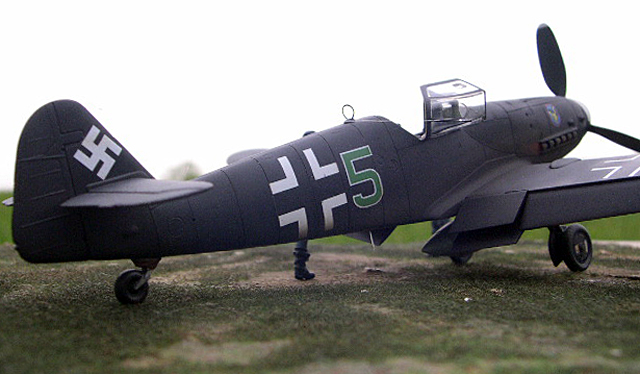
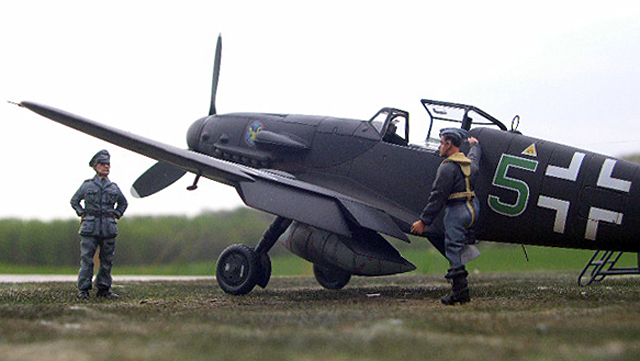
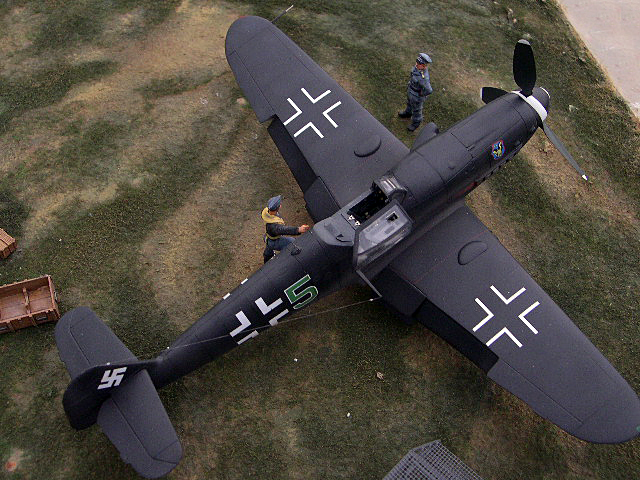
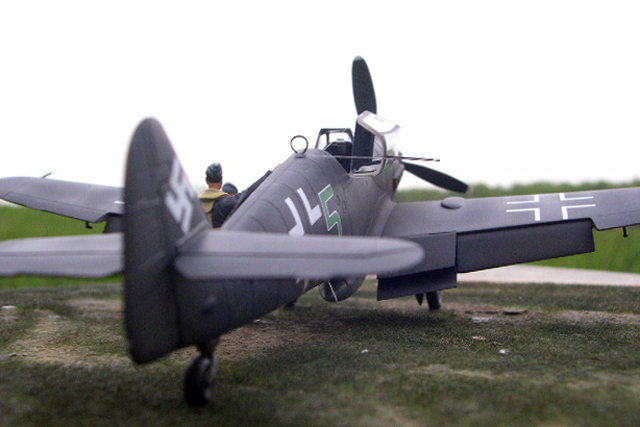
The airplane is BLACK, top and bottom. The
pictures seem to show at least a glossy finish, but I figured in scale a
semi-gloss finish would be fine. I wanted to break up the monotony of
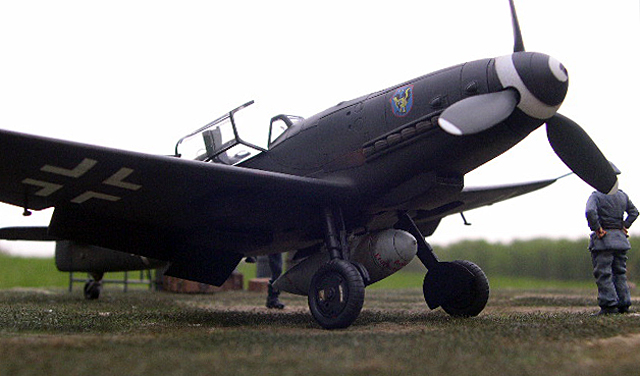
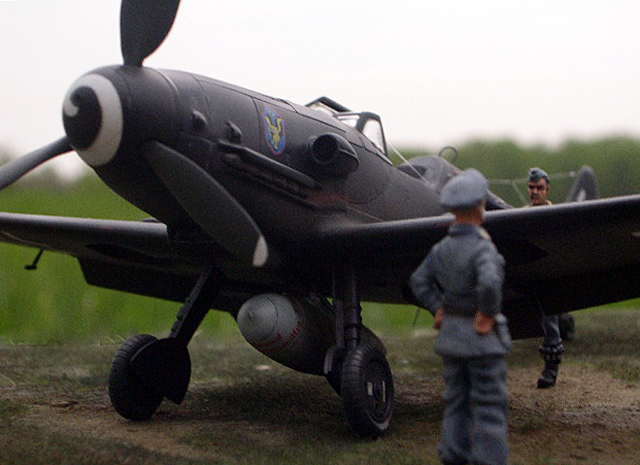
an all black finish. After cutting off the Cutting Edge spinner and
blades a coat of Tamiya Flat White was painted to the prop spinner and
tips. The white tips are unusual for a Luftwaffe airplane. The Cutting
Edge Spiral Masks were used to paint the spiral. I liked the results.
If I had to criticize them it would have been that I would have liked to
see what each spiral looked like before I applied them to the spinner,
but they worked like a champ. I loved them and I will use them again.
The blades were masked and Tamiya’s new Black Green was used to finish
off the Cutting Edge blades.
I used Brett Green and Chris Wauchop’s method of
mixing Tamiya 50% black and Tamiya 50% Red Brown. At first it looked
very red, but subsequent coats brought out the black. Once that was
done I added some straight black to the panel lines. It looked okay but
it still lacked the difference I was looking for. Milton Bell shared a
tip of using Polly-S Dust thinned applied to the center of the panels.
When done correctly it looks very convincing. Milton is much better at
it than I am, but the results looked nice. Then an overcoat of Future
prepared the aircraft for the decals.
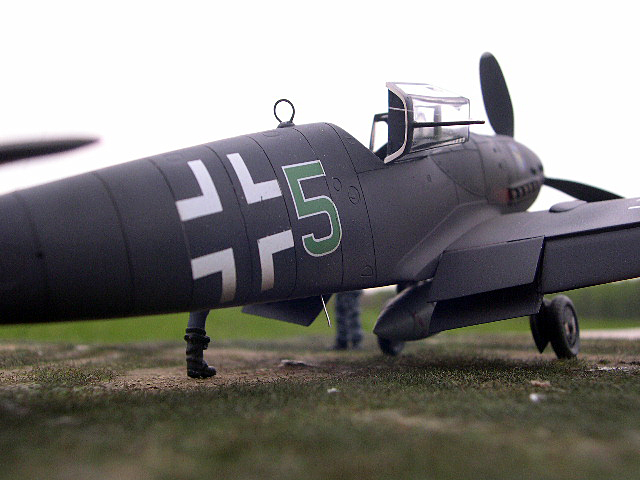
Luftwaffe im Focus provides decals in the three
major scales, 1/72nd, 1/48th, and 1/32nd
on this sheet. You can save money buy having two or three guys pitch in
to share the sheet. A word of caution, these decals are limited to 500
examples. When they are gone, they are gone. The Luftwaffe im Focus
decals went on without any problems. Initially I thought I would use my
ALPS printer and change the color of one side to red and leave the other
green but that was too Christmassy. One problem I noticed almost
immediately was that all my dust and panel highlights went away. After
all the work it was gone. I applied Model Master Semi-Gloss to the
whole kit and then used the dust again. Now I was happy with the
result. It is slightly shiny and not too monotonous. Hopefully that
comes out in the photos.
Weathering was as per the photos. All panel lines
were given a wash of Burnt Umber. An exhaust of Tamiya Flat Earth and
Flat Black were airbrushed on the aircraft.
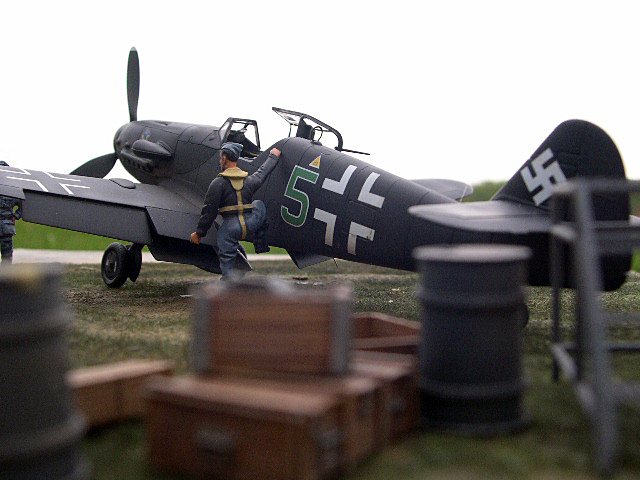
One thing that you will notice about the real
aircraft is that it has a window cutouts on each side. I wanted to
replicate this but after checking I found out that none of my vacuform
canopies were for the Monogram kit. I don’t know if the Falcon canopies
would have worked as mine was previously used on an unknown kit. The
Squadron one is for the Otaki/Arii kit. The Monogram cockpit is
slightly smaller fore/aft and slightly lower vertically. I would have
to use the kit canopy even though this was really thick. The windows
themselves were easy to accomplished. I used Dymo tape to outline the
panel and then drilled out around the perimeter. Final cleanup was done
with files and each side was aligned. The cuts are nice but I really
want to do it on a thinner canopy. Once cut the whole thing was dipped
in Future. The canopy was masked with EZ Masks, which made the job real
easy. The canopy was attached with a drop or two of CA and white glue.
The CA anchors it and the white glue fills it and gives it strength.
That is it. Done an all black Bf-109G-6/AS. What
could have been done next time? I would use the Hasegawa G-10 kit with
the Fujimi tail, plus an aftermarket canopy. That is the easiest way.
To be totally precise, an MDC G-6/AS conversion nose. See my article at
http://hsfeatures.com/bf109g10type110fw_1.htm for this conversion
part.
As far as aftermarket stuff goes the Cooper Detail
interior is beautiful and is the standard I judge all others by. The
Luftwaffe im Focus decals worked great and looked the part of the real
aircraft. The Cutting Edge Spinner and Prop blades were excellent and
fit beautifully. The Black Magic Spinner Spiral worked as they were
designed. The Eduard Color Etch seatbelts were very nice and very easy
to use. The EZ Masks are very fast and fit perfectly. I highly
recommend all of the aftermarket stuff I used, except for the KMC
control surfaces. If you are going to use the Hobbycraft wings just
stick with controls in the up position.
I may redo this airplane again another day. If
somebody wants to go in on the decals I only need the 1/48th
scale set. Bottom line: Remember modeling is fun. I like the look of
this aircraft in my collection. It is unique and guaranteed to start a
conversation, even with the wing warp. What more could you ask from a
model?
Cooper Detail Bf-109F/G
Detail Set CD4806
Cooper Detail Bf-109G-6
and G-14 Upgrade CD4817
Eduard Color
Etch Luftwaffe Seatbelts 49 002
Cutting Edge Bf-109K
Corrected Spinner and Wide Prop CEC48359
Cutting Edge/Black Magic Bf-109F/G/K Spinner
Spirals Masks CEBM48491
Luftwaffe im Focus “Green 5”
decals LIF.M004
EZ Masks Canopy
Masks for Monogram Bf-109G-10 #48
KMC Flight
Control Surfaces
Click on the thumbnails
below to view larger images:
Messerschmitt Bf 109
Modelling Manuals 17 |
|
|
|
|
US Price: $17.95
UK Price: £12.99
Publisher:
Osprey Publishing
Publish Date:
January 25, 2002
Details: 64 pages; ISBN: 1841762652 |
|
|
Model, Images and Text Copyright ©
2004 by Floyd S. Werner Jr.
Page Created 16 May, 2004
Last Updated 15 May, 2004
Back to
HyperScale Main Page
|
 Home
| What's New |
Features |
Gallery |
Reviews |
Reference |
Forum |
Search
Home
| What's New |
Features |
Gallery |
Reviews |
Reference |
Forum |
Search