|
Academy's 1/48 Bf 109G-14 as
a
Messerschmitt Bf
109G-6/Y
Part 1 - Construction
by Peter Kormos
|
 |
|
Messerschmitt Bf 109G-6Y |

Academy's 1/48 scale Bf 109G-14 is available online from
Squadron.com
I like to build Luftwaffe planes, but somehow I find
myself not really interested in some types, and the Messerschmitt Bf 109 is one of
them. Many years ago as a junior, I started to build one 1/72 scale Bf
109 from Matchbox, but actually I have never finished it.
Since then, I have seen many archive photos, decal
sheets and artists' profiles, but none of them really caught my
attention. But about 3 years ago, I saw a side profile on
the 109 lair site that I
found to be the coolest looking Bf 109 I've ever seen, and I knew this
is THE ONE. :-)
The base I used was Academy's 1/48 scale Messerschmitt
Bf 109G-14 kit. "Why the Academy kit?", you may ask. Before buying one
of the Hasegawa kits in 2003, I was awareded with this one on a model
competetion. Since I hadn't got any other Bf 109 kits in my stash, I
decided to build this one, no matter how good or bad it is compared to
the other offerings.
Besides the basic G-6 components, the kit contains the
short fin + long tail wheel strut, Erla canopy and the sand filter...
seemed like a jackpot for me to build a Bf 109G-6Y. I started to build
the kit out-of-box, but as you'll see, I added more-and-more detail
during construction.
Construction started in early spring, 2004.
I heard some rumors that the fit is not so good on this
kit, so I quickly removed the main components from the plastic tree, and
dry-fitted them together. To my amazement, fit wasn't that bad... and
according to the line drawings in the Aero Detail booklet, both the
fuselage and wings looked A-OK to me.
Accuracy wasn't really a priority for this project, so
after the fuselage and the wings were temporarely held together with
adhesive tape, the thing looked pretty much like a Bf 109 to me. As
usually, I didn't start with the cockpit, but rather worked on any other
components I currently felt like to fiddle with...
Exhaust gas fenders were thinned down to scale, sink marks and some
access panels (i.e. MW50, Mk108 reloader's oxygen connector) were filled
in with putty.
Next, the air intakes were hollowed out, excess plastic was removed
from unwanted areas (i.e. exhaust stubs, fresh-air inlets, shell
ejection ports, window for FuG16ZY mast), then I headed for the cockpit.
Strips of Evergreen styrene, copper wire and aluminium foil was employed
to dress up the pilot's office. In the end, I had a cockpit that
satisfied my eyes, although it's still not 100% like the original one,
but that's OK for me.

 Port side. More detail
was added later. Port side. More detail
was added later.
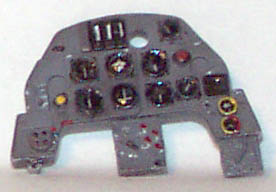
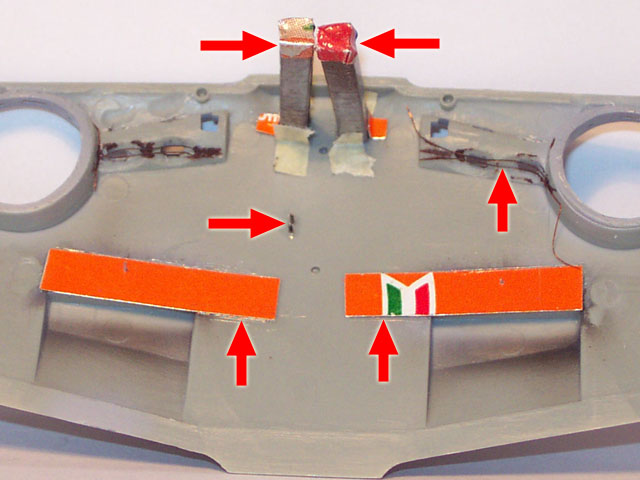
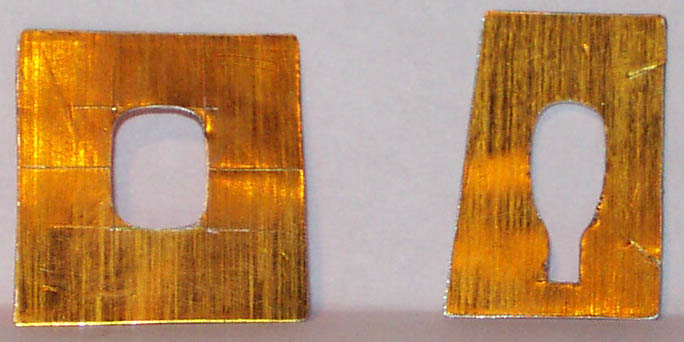
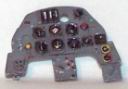 Instrument panel with
custom made bomb-panel and other goodies. Instrument panel with
custom made bomb-panel and other goodies.
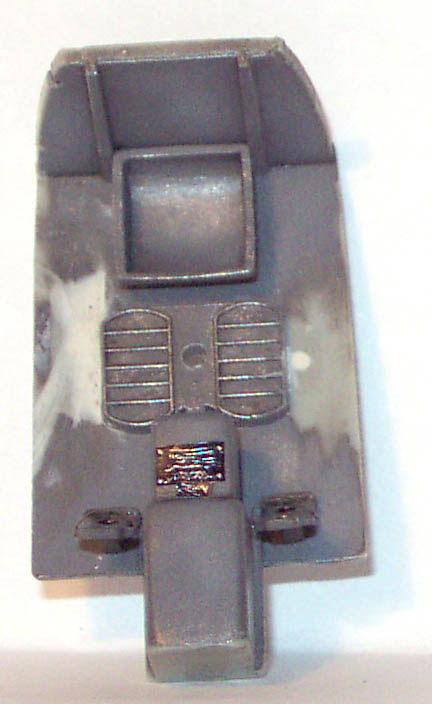
 Cockpit floor after
little electric boxes were shaved off. New ones were installed later. Cockpit floor after
little electric boxes were shaved off. New ones were installed later.
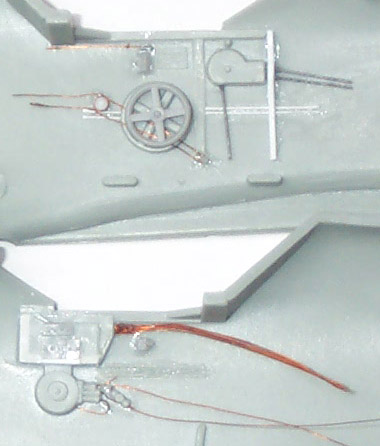
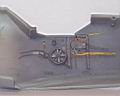
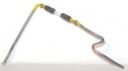 Completely new fuel
line, made out of steel wire, stretched clear sprue, electric wire
insulator and thin strips of aluminium foil. Completely new fuel
line, made out of steel wire, stretched clear sprue, electric wire
insulator and thin strips of aluminium foil.
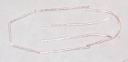 Internal canopy frame
and rubber seal for canopy made out of copper wire. Internal canopy frame
and rubber seal for canopy made out of copper wire.
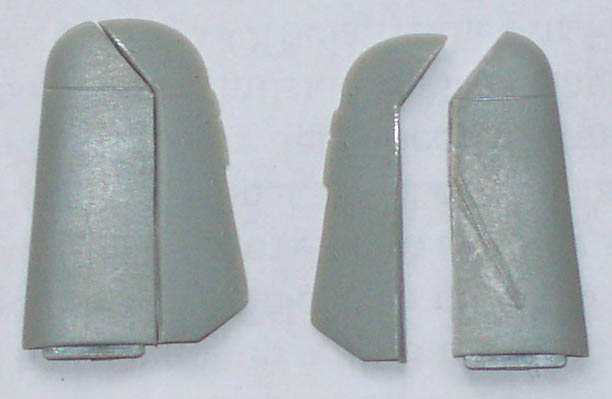
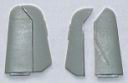
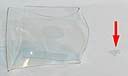
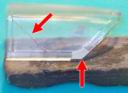 Corner of the canopy was
reworked to represent a later style Erla haube, and dive angle
indication line was scribed in with a pointy needle. Now where's my
bottle of Future to make this thing really shiny? Corner of the canopy was
reworked to represent a later style Erla haube, and dive angle
indication line was scribed in with a pointy needle. Now where's my
bottle of Future to make this thing really shiny?
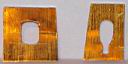
 Elevators have been
separated with saw blade. Note that the ugly scratch on the right hand
side part that was accidentally made when I separated the parts.
Luckily, it wasn't a big deal to eliminate that scratch. Elevators have been
separated with saw blade. Note that the ugly scratch on the right hand
side part that was accidentally made when I separated the parts.
Luckily, it wasn't a big deal to eliminate that scratch.
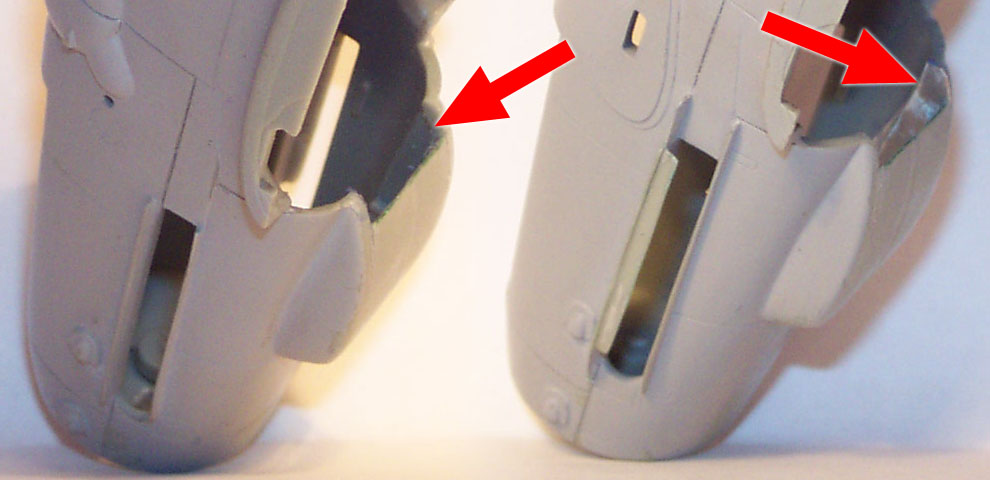
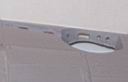
The rear vent door for the oil cooler was missing on this kit, so I
had to rework this area.
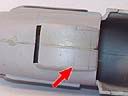
 then the internal
cavity was filled in with aluminium foil. then the internal
cavity was filled in with aluminium foil.
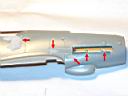
 Before gluing the wing
halves together, I added the necessary internal details, that included
fuel drain pipes, spent shell ejection chutes, some pipes for the main
gear bay and the roofs for water coolers. Before gluing the wing
halves together, I added the necessary internal details, that included
fuel drain pipes, spent shell ejection chutes, some pipes for the main
gear bay and the roofs for water coolers.
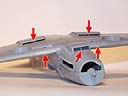 On the outside, I added
the actuating arms for cooler flaps, sanded wing's trailing edge to
scale width and filled-and-reschribed some mis-aligned panel lines. Fit
of the wings to the fuselage is not perfect. I decided to glue the wing
halves to the fuselage joint first . Then, the wing halves were glued
together. This resulted in a gap on the wings' leading edge, but it's
far easier to fill this gap then to fiddle with filling-and-sanding the
wing root. On the outside, I added
the actuating arms for cooler flaps, sanded wing's trailing edge to
scale width and filled-and-reschribed some mis-aligned panel lines. Fit
of the wings to the fuselage is not perfect. I decided to glue the wing
halves to the fuselage joint first . Then, the wing halves were glued
together. This resulted in a gap on the wings' leading edge, but it's
far easier to fill this gap then to fiddle with filling-and-sanding the
wing root.
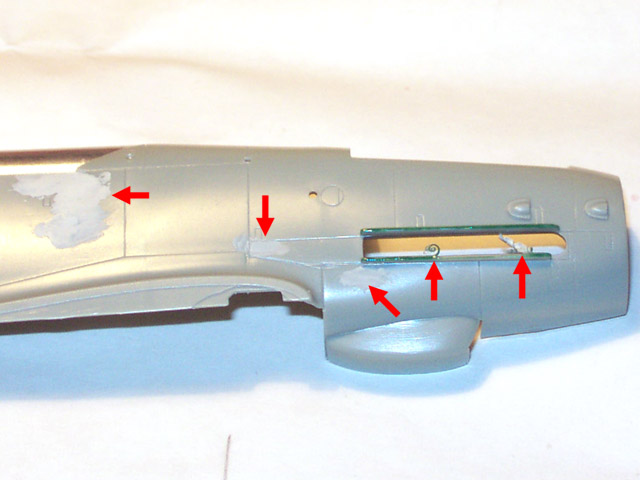
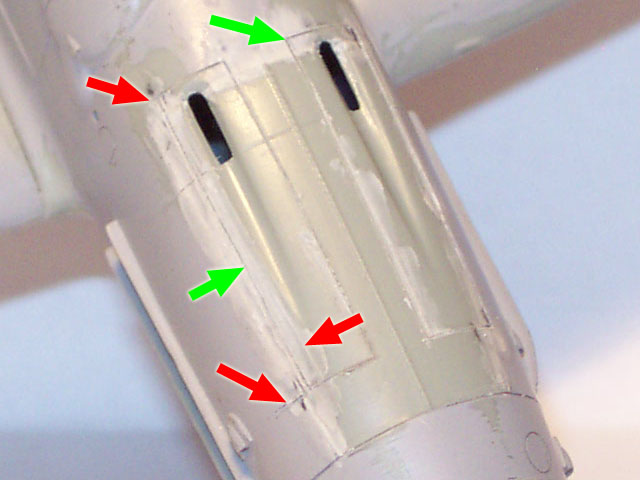
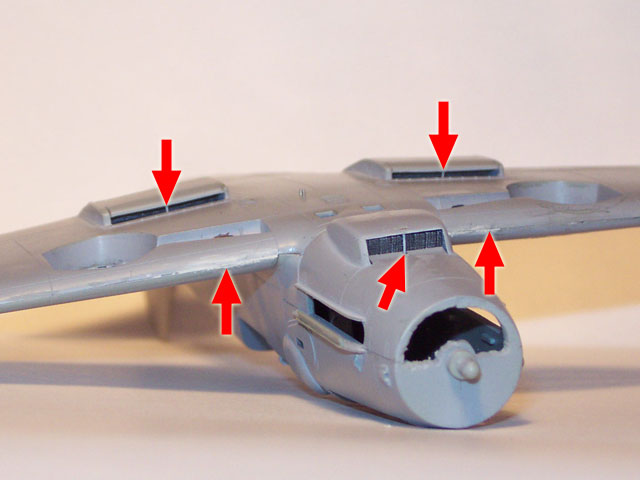
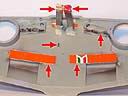
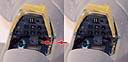
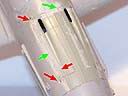 Opening up the area
around the gun muzzles and making panel lines around Mg131's. Green
arrows show the panel lines, the red ones show some of the wrong lines
that I accidentally schribed. Note that the upper hinge for the cowling
is not long enough, so I removed it and schribed in a new one before
painiting the kit. Opening up the area
around the gun muzzles and making panel lines around Mg131's. Green
arrows show the panel lines, the red ones show some of the wrong lines
that I accidentally schribed. Note that the upper hinge for the cowling
is not long enough, so I removed it and schribed in a new one before
painiting the kit.
Next came the main gear bay, that was missing almost all detail on
the original kit parts. Simple materials, such as aluminium foil and
copper wire was used for detailing. Holes were made inside the gear bay
to represent the original structure.
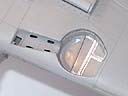
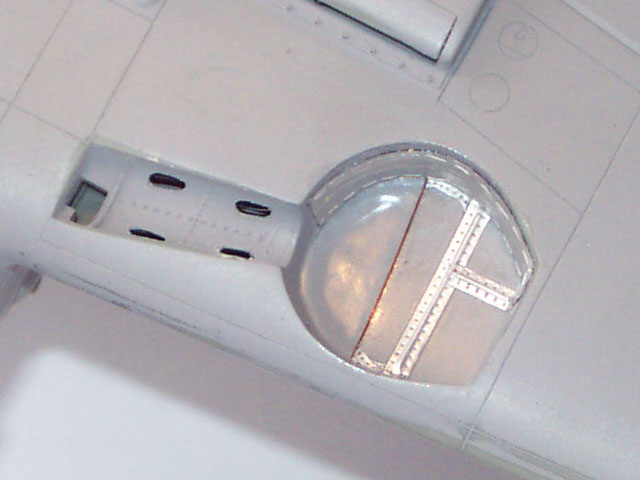
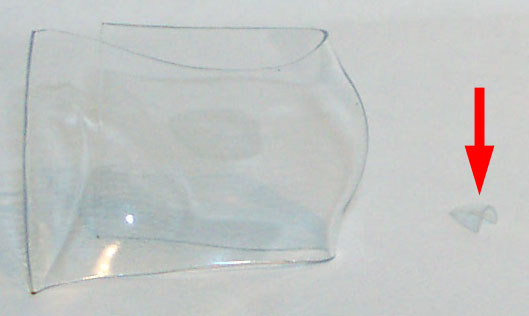
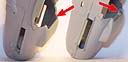
Academy's representation for the navigation lights ended up in a pair
of panel lines engraved into the surace of the wingtips. After removing
the excess plastic I rebuilt the internal detail from strips of
Evergreen styrene and clear foil was heat-formed to make the transparent
cover.
Some prominent panel lines (such as the one around the tail wheel
fork or some handholds, etc.) were missing on this kit, so I made custom
templates for scribing. These templates were cut out from a Gulash paste
tube. (Note: Gulash soup is a traditional Hungarian soup, it's one of my
favourites. You should really try it if you haven't tasted it before...
:-) )
One of the new additions to the G-6Y variant was the FuG16ZY antenna
mast. This was fabricated from flattened/stretched sprue bits and copper
wire.

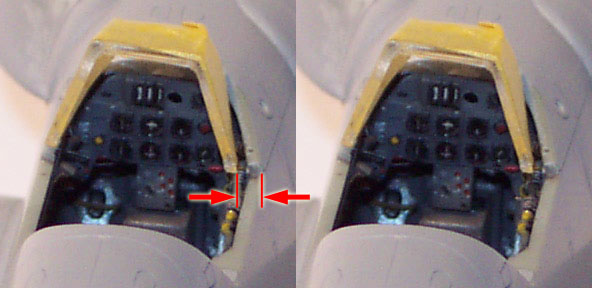
 One of the unpleasant
discoveries about this kit was when I noted that the windshield was so
much smaller than the fuselage, that it almost fell into the cockpit
tube. After some unsuccessful tries to stretch the canopy, I ended up
using Hasegawa's clear windshield and canopy that I got from my friend,
Ödön Horváth. One of the unpleasant
discoveries about this kit was when I noted that the windshield was so
much smaller than the fuselage, that it almost fell into the cockpit
tube. After some unsuccessful tries to stretch the canopy, I ended up
using Hasegawa's clear windshield and canopy that I got from my friend,
Ödön Horváth.
As you can see, no aftermarket sets have been used for detailing this
kit, except for Eduard seat harness. The sum of the number of home made
additions are listed in the following table:
| cockpit |
102 |
| main gear bays |
2x7 |
| lights |
3 |
| external surfaces |
45 |
After some layer of Gunze Mr. Surfacer 1000, sanding and polishing, I
added rivet detail based on the line drawings in Aero Detail booklet and
some "corrected" drawings found somewhere on the Net.
Part 2 of my article will show the different stages of painting, the
finished kit and a little introduction about me.
Messerschmitt Bf 109
Modelling Manuals 17 |
|
|
|
|
US Price: $17.95
UK Price: £12.99
Publisher:
Osprey Publishing
Publish Date:
January 25, 2002
Details: 64 pages; ISBN: 1841762652 |
|
|
Model, Images and Text Copyright ©
2005 by Peter Kormos
Page Created 05 April, 2005
Last Updated 05 April, 2005
Back to
HyperScale Main Page
|
 Home
| What's New |
Features |
Gallery |
Reviews |
Reference |
Forum |
Search
Home
| What's New |
Features |
Gallery |
Reviews |
Reference |
Forum |
Search