|
Classic
Airframes new 1/48 scale
Boulton Paul Defiant
by
Phil Hale
|
 |
|
Bolton Paul Defiant Mk.I |

Classic
Airframes' 1/48 scale Defiant Mk.I and II kits
are both available online from Squadron
For a detailed examination of the kit
contents, see
Steven "Modeldad" Eisenman's in-box review here on HyperScale.
I am back with another pair of beauties from Classic Airframes. Since
Modeldad has given a good review of the kit break down, I won’t waste
your time going over the ground again.
I will say that the surface of the plastic is very smooth and glossy
and this makes for a good base for painting. The clear parts are very
clear and can be polished to a high shine.
I like to have the clear parts as shiny as possible because this
makes a good contrast with the flat finish.
Now on to the build!
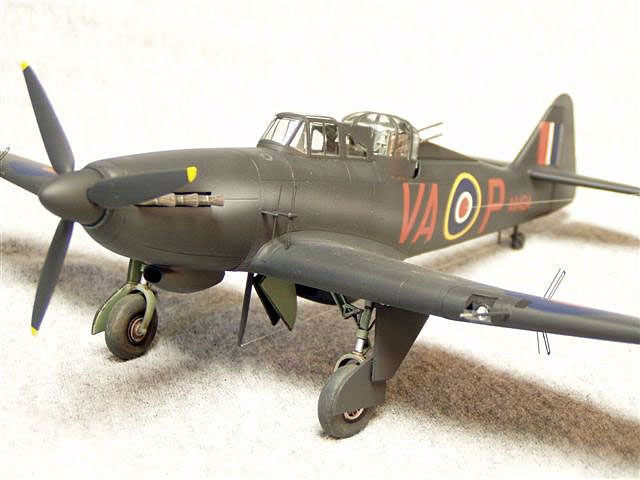
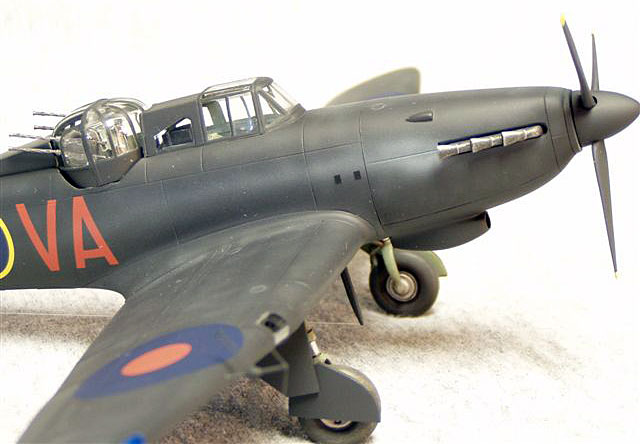
The fuselage is broken down into five major parts. The nose parts are
separate pieces to allow the modeler the option to either a Mk I or Mk
II. The chin scoop and the radiator are bigger on the Mk II. The Mk II
nose has the chin scoop molded as part of the nose where as the Mk I
scoop is a separate piece. The fit of both of these nose parts to the
rear fuselage is excellent requiring little to no filler. It is broken
on a natural panel line and if a little care is taken you will not have
to sand much at all. I had to sand a little on the right side but not
enough to lose any detail. I usually join the front and rear sections
before I glue the halves together. This kit was no exception. I would
rather fill the seam on the top or bottom instead of the side.
I painted the cockpit painted and got it ready to install. Clean up
of the cockpit took a little while has the pour stubs are large under
the cockpit area. Make sure that you cut or grind the stub completely as
this may present problems when attaching the wings to the fuselage.
There are large stubs on the wheel wells and must be completely cut
off. The top part of the wheel well will be thin but there is plenty of
room and will not harm the beautiful detail in the well.
I put the fuselage halves together and sanded them down before I
installed the cockpit and rear floors.
The fairing behind the turret is a separate piece and could be
positioned in the retracted position. This part fits well. You can slip
the cockpit in place from the underside through the wing opening. The
turret floor and the turret fairing floor can be put in after the
fuselage is together. The cockpit is a good tight fit and you can jockey
it in place then glue from the underside.
You need to install the wheel wells before gluing the wings together.
You’ll know very quickly if you have not taken enough of the pour stubs
off when you fit the upper wing surfaces to the one piece bottom
surface. If the wing parts fit well then you probably won’t have any
problems when mating the wings to the fuselage. When I mated the wings
to the fuselage, I found the underside surfaces fit very well, almost
perfect. I had to sand a little under the nose to wing area and none at
the rear portion. I did have a gap at the forward edge of the upper wing
to fuselage joint. There is a stiffener that runs the length of the
upper wing to fuselage joint. I sanded this area smooth. After sanding
was completed, I replaced this stiffener with vinyl tape. You get this
tape in large sheets at a shop that makes outdoor signs. It comes in
many colors and can be lightly sanded. I use it to replace lost panels.
It takes paint very well and can be masked over.
The rear stabilizers are butt joints but I used liquid cement and
allowed them to dry for several hours. Even a butt joint with liquid
cement makes a good strong bond. The rudder is a separate piece and
needs some attention. There are some depressions on both sides that will
require filling and sanding.
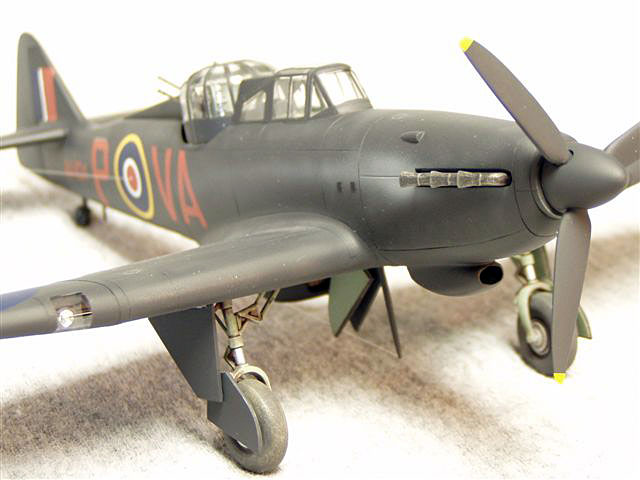
I had no trouble fitting the Mk I scoop on the nose. I did have a
little trouble with the radiators on both. There are raised areas on the
underside of the wing to mark the spot to attach the radiator. This is
fine for the Mk I but the Mk II radiator is longer and wider and does
not fit these marks. I used a little five minute epoxy to fair this in.
You just put the epoxy in the joint and wait a 30 seconds and then wipe
it off with a damp cotton swab (Q-tip). If you let it dry too long, you
can still wipe it off with a swab dipped in denatured alcohol. You might
try sanding these marks off and then attaching the radiator. I did not
as I did not want to lose any of the detail in this area.
 The
turret is in two pieces and care must be taken in gluing it together. I
used a piece of the vinyl tape to conceal the seam. The
turret is in two pieces and care must be taken in gluing it together. I
used a piece of the vinyl tape to conceal the seam.
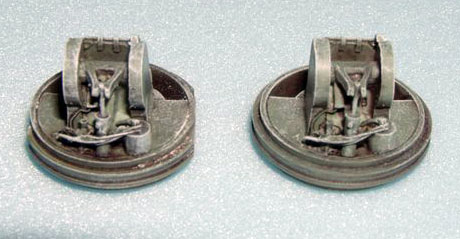
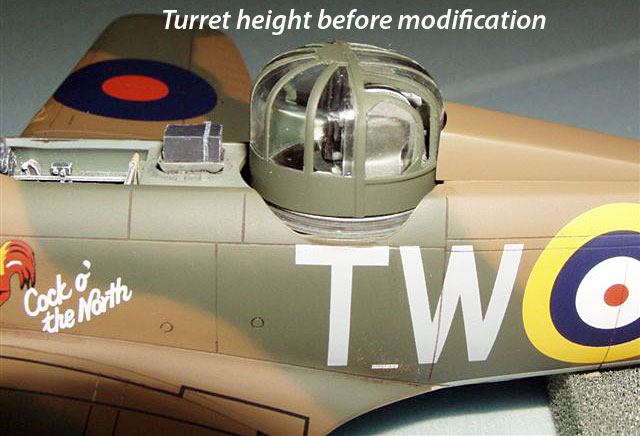
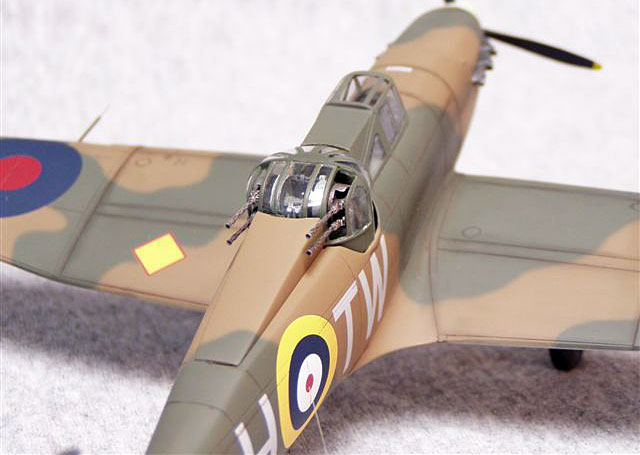
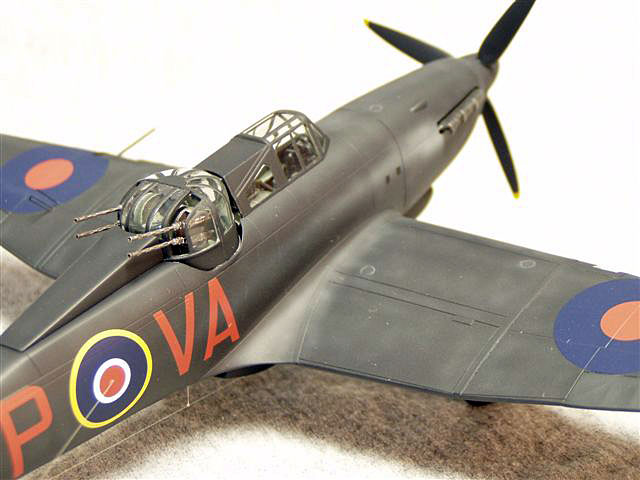
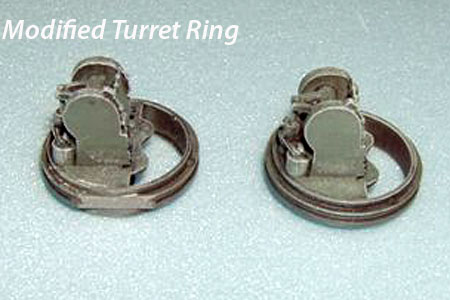
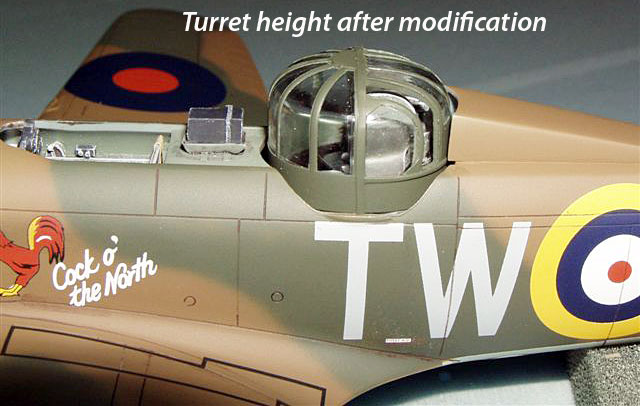
The turret parts fit very well but it sits a little high on the
fuselage. Since the turret is the focal point of this kit this may seem
to be a serious problem. Fear not, there is an easy fix. The interior of
the turret causes it to sit too high. I trimmed the sides of the resin
interior and I was able to slide the turret in place. I have include
photos to show where I trimmed.
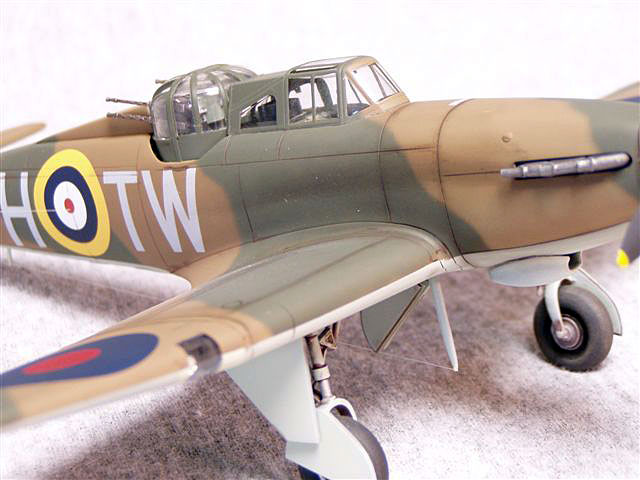
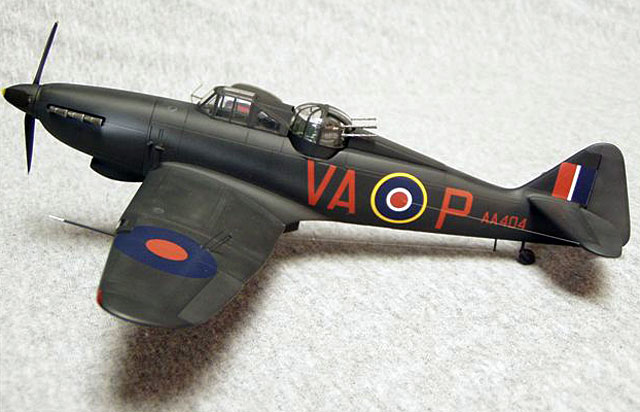
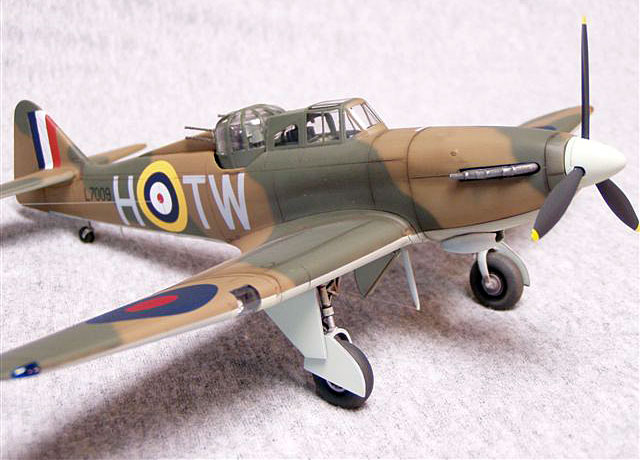
Is this deadly accurate? I don’t know because I have very little info
on this kit. I do know that it looks like a Defiant when completed.
Click the thumbnails below to view larger images:
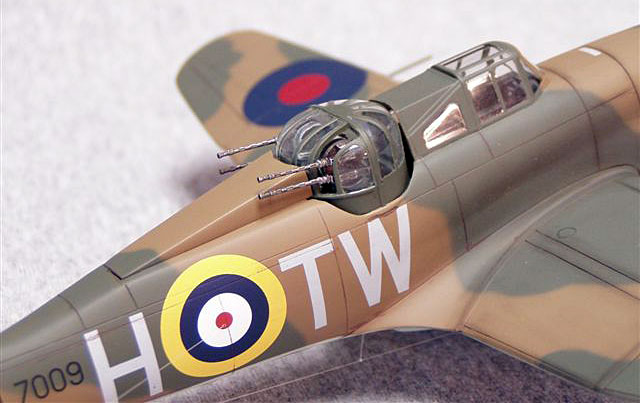
I do wish that the canopy was open to show the beautiful cockpit
detail but I’m sure that someone will release a nice vacuum formed
replacement.
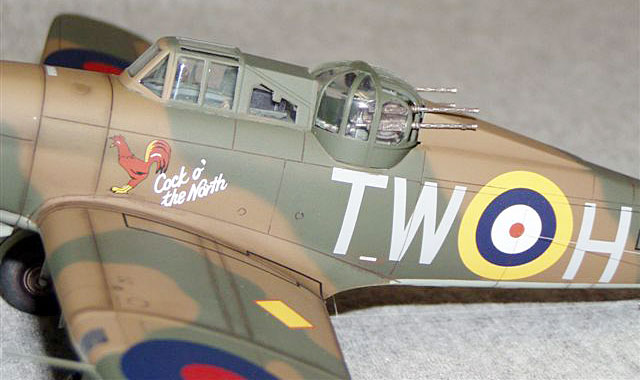
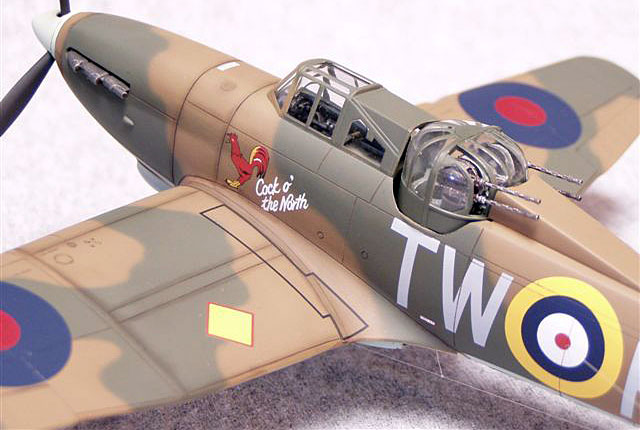
Painting and decaling presented no problems. You might want to check
your references as some Defiant Mk I’s had Duck Egg Green undersides
instead of Sky. According to Richard Caruana from SAMI, my Mk I had sky
undersides.
The decals are MicroScale and are very well done.
I had one problem of my own making that delayed this review. I use
Scotch Transparent tape to make the clear covers over the wing lights.
Normally, this causes no problems but this time I had little pieces of
trash that got inside the covers and I could not get them out. I had to
redo the covers on both models and this caused a several hour delay.
Overall this is an excellent kit and I would recommend it to a
modeler that has never built a limited run kit. It fits well and this is
plenty of detail.
I believe that this kit is one of the best limited run kits on the
market. Purists will find fault but NO kit is perfect. Granted there are
some that are close but one thing to remember. The guys that produce
these limited run kits usually don’t have the benefit of multi-million
dollar computer equipment. Plans can be off because of paper shrinkage.
The masters are hand made and may not be deadly accurate. They may be a
little too short or long and this shape may be slightly off but they are
kits. I mean, we don’t have to carve them out of pine ourselves. People
that want to nit-pick these kits need to offer their services to MPM,
Sword, Azur, and the like. I’m sure that they would appreciate and
welcome the help.
Thanks to
Classic Airframes for the samples
Click the thumbnails below to view larger images:
Model, Images and Text Copyright © 2004
by Phil Hale
Page Created 10 November, 2004
Last Updated
10 November, 2004
Back to
HyperScale Main Page
|
 Home
| What's New |
Features |
Gallery |
Reviews |
Reference |
Forum |
Search
Home
| What's New |
Features |
Gallery |
Reviews |
Reference |
Forum |
Search