|
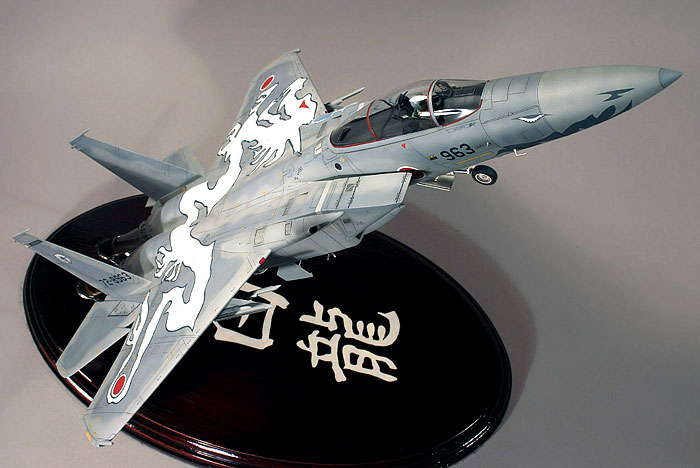
Hasegawa's 1/48 scale F-15J
Year Of The Dragon
Part One
by Aleksandar Šekularac
|
 |
|
F-15J |

HyperScale is proudly sponsored by Squadron.com
An F-15 model was quite improbable option on my “to
do” list just two years ago. My interest in modern western jet fighters
was long gone with my puberty, replaced by fancy for more arcane
subjects, and I wouldn’t think twice before dismissing such a
undertaking even as an idea. It all changed one innocent day, while I
was surfing through Internet, and found a review of “Two Bobs” decal
sheet for F-15J “The White Dragon”. I was impressed. This was the
best-looking air tattoo I have ever seen, and even if Canadians double
their air force and paint it all in memorial schemes, and tiger-meets,
they will have a hard time besting this one. So I ordered the decals, of
course.
Now I had markings for some kit I didn’t have, and subject that I didn’t
know much about. Yes, F-15 is a well known air-superiority fighter,
capable of spectacular take-offs on air-shows, outlived it’s
less-fortunate stable-mate, the “Tom Cat”, and will continue to serve
faithfully until new, overpriced, over-hyped technology gets its act
together, but what did I really know about this aircraft? Not much in
terms of details, so important in our world of scale modeling. Every
time when in situation like this, I reach for Squadron “Walk Around”
title. No surprise, there is one for F-15 Eagle… This, complemented by
the vast cyberspace of WWW was my prime reference for this job.
It was time to select the right kit in my favorite scale, which happens
to be 1/48. When we talk about F-15 there is a tyranny of choice, so I
did a quick Internet survey of all the available kits. Hasegawa seemed
to be a solid candidate, not without problems, but certainly
predictable. Instead of charging directly to one of the F-15J special
edition boxes, I cunningly selected the “hi-tech” F-15C kit, the one
with photo-etched fret, and supper-complex-turkey-feathers-plucked-out
exhausts. After all, the J and C type are very much the same aircraft,
and the markings were already taken care of.
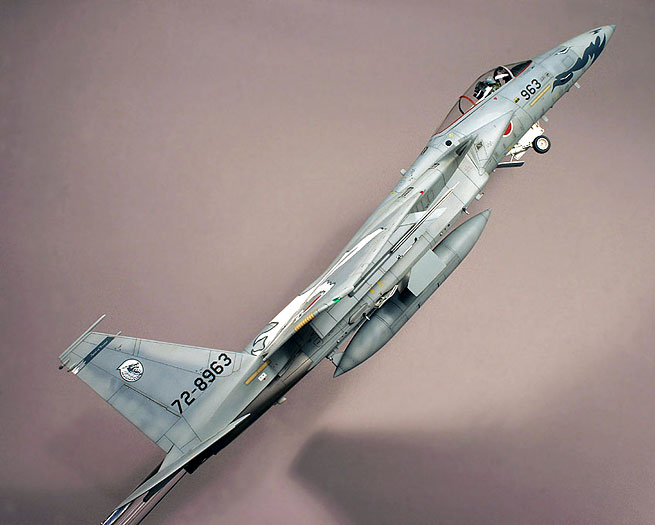
The F-15 has that rare feature, where the engines can overpower its
weight. This is a sure crowd pleaser at a public display, and it must
make any flight-jock feel more of a man. Kerosene is included in the
budget anyway. So, when I consider all this, it seams to me like a waste
of plastic to make another F-15 model waiting insipidly on the tarmac on
its three skinny legs, wrapped up in all those red ribbons, like some
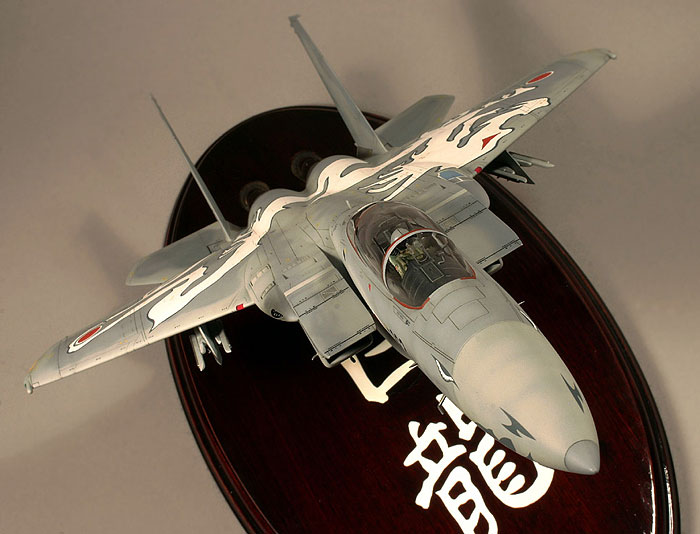
Xmas tree. Lets make it fly for a change! Better yet, lets make it do
one of those “Viking” take offs, as I understand they are called:
afterburner on, gear still retracting, elevators and air-intakes tilted
down, nose pointed upwards.
All right, good idea, how do we do it then?
Firstly, I thought about how to prop the aircraft in the air. Supporting
it through the burner-cans seemed as the most elegant way to do this.
Only some inside details of the engines are lost (turbine and
afterburner ring), and there are no offensive holes, or cuts to the
underbody. The model is detachable, and for all intents and purposes can
be detailed as any other “static” model.
I obtained two transparent acryl rods, and one rough oval wooden base
from Hobby Lobby. After some measuring, my power drill did its first
hobby assignment, making two parallel holes at about 45 degrees through
the wooden base. I left the acryl rods for later, as my instinct told me
there could be some fine adjusting to do when the model is close to
finish.
In my opinion, color of mahogany goes well with mythical Japanese
creatures such as dragons, so after sanding the base I proceeded with
two coats of wood varnish in this color. While this was slowly curing, I
went on-line once more to find correct Japanese symbols for “White
Dragon”. This took some time, but I’ve gotten it in the end. I printed
these characters in very large font, and mirrored, on the backside of
“frisket” paper, cut out the masks, and pasted them on now well-dried
base. White color was airbrushed through the mask. The base then
received two additional coats of clear gloss wood varnish, to seal
everything off.
Click
the thumbnails below to view larger images:
Much later, when the model was well underway, I
secured the acryl rods to the base using the slow setting epoxy glue.
After adding some black felt to the bottom, my base was finished.
Making the base before actual model is ready was sort of a commitment
for me. I now had to finish the project even if it took year and a half
to do it. And so it did…
Back to plastic, there were some serious modifications to be done to the
kit, in order to make this bird fly.
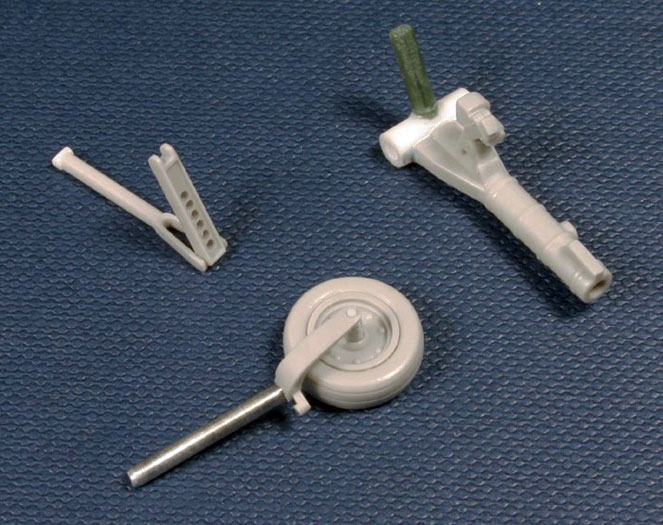
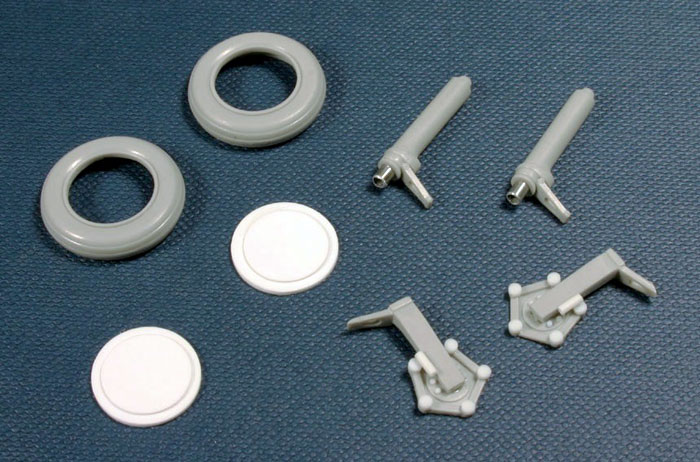
Landing Gear
I modified the gear legs so that they
can be depicted in moment of retraction. While I was at it, I decided to
put some more detail as well: oleos were cut out, and replaced with
pieces of metal tubing, wheel hubs were also cut out, and new brake
detail rebuilt for the main wheels. More details were also added to the
front undercarriage bay in form of wires and piping.
Click
the thumbnails below to view larger images:
After studying photos and some
thinking, I decided that the main gear legs should be already folded in
their bays, but with open doors, and the front leg still not completely
retracted, just before it sinks into the nose bay. I liked the dynamic
look of this configuration, and based on available photos, it did seem
that the front leg hydraulics are lagging a bit behind the main gear.
Air Intakes
The outside geometry of F-15 air
inlets changes in flight. By tilting downwards, front intake lip
provides for better compression of air, and improves stability of the
aircraft. In a steep climb this behavior is particularly obvious. Of
course, all kits of F-15 come with inlets fully open, with the upper
edge being straight, to represent the craft at rest. More work for my
hobby saw…
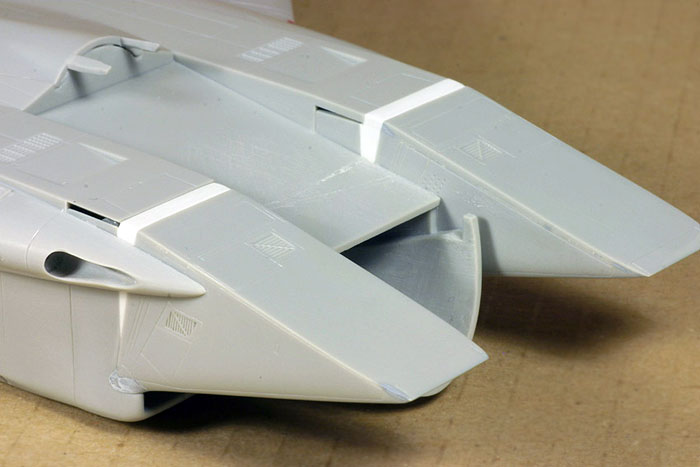
I identified the panel line dividing
pivoting front part of the intake from the main body, and cut the
plastic along this line. Now, there was no going back… New wedge of
plastic was added to each side of the intake, and a rectangular piece to
the top, and after many iterations of dry fitting, sanding and
adjusting, the original front piece was glued on top of that. After a
long drying time I smoothed out the whole mess.
The Mount
Next big modification happened inside
the main fuselage body. This being a rather large model, it needs to
have solid support for its weight. I was to use most of the main
fuselage space for hollow supporting cylinders leading to the exhaust
pipes, from the front compressor stages of the engines, all the way to
the tail. But, where to find such cylinders?
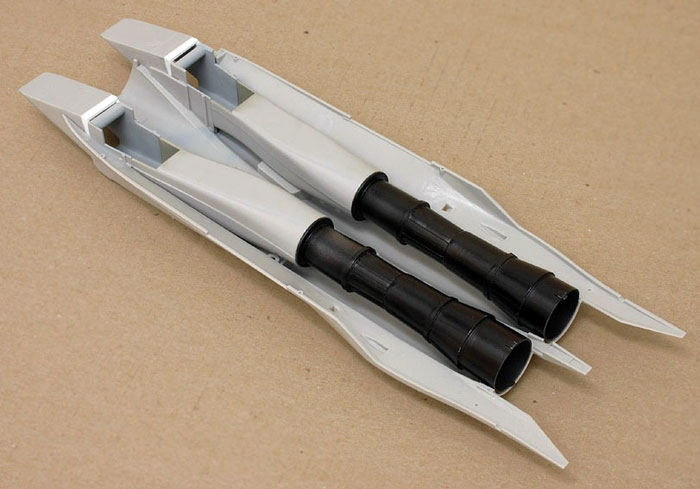
As much as I looked around the house
(and neighborhood) I couldn’t find suitable candidate for this job.
Finally I resorted to an awkward solution of gluing one onto another
spare exhaust pipes of other 1:48 kits. So in the end, my F-15 model
ended up with parts of MiG-29 and Su-27 buried inside…
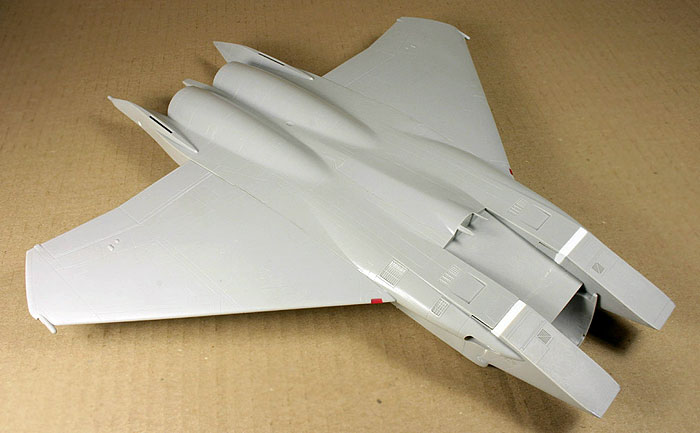
Flying Surfaces & Fuselage
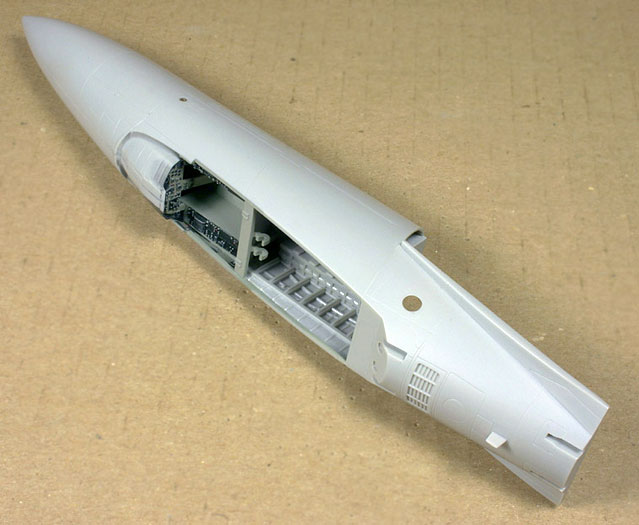
Hasegawa's F-15 kit has fuselage
divided in four major parts: the main body is made up of upper and lower
surfaces, while the nose with the cockpit compartment has a classic
left/right split. This part breakdown allowed me to finish the heavy
work upfront, as described, before tackling the cockpit.
Main wings attach to the fuselage body in an odd place, where they cross
several panel lines and should also blend into the upper body surface.
This continuity was somewhat difficult to achieve, and repeated sanding,
puttying, and finally re-scribing was crucial.
Situation with vertical tails was much the same. They look very well
integrated with tail booms on the real aircraft, so I reproduced this in
plastic (and putty). Horizontal tails were left alone at this point, and
only the pivot connection was removed, and replaced with longer
cylindrical piece of plastic.
Click
the thumbnails below to view larger images:
Cockpit
Wanting to represent this model in
flight, I knew that the canopy is going to be closed and pilot in his
place. There was not much point super detailing the “office”, since it
will be mostly obscured from the prying eyes. I added some details to
the ejection seat, pilot’s helmet, and the instrument-panel cover, which
are all very visible.

I also enhanced details of all the clutter that hangs from the arc of
the canopy frame in front of the pilot. Some of these bits were
scratch-built. Hasegawa’s Hi-tech edition also includes photo-etched
HUD, which, if done right, looks immensely better than the plastic part.
The only addition here was to drill a hole in the instrument panel
shroud, and insert a clear lens for the HUD. Painting the bottom of the
small clear bit transparent yellow and then silver, gives the lens a
nice reflection.
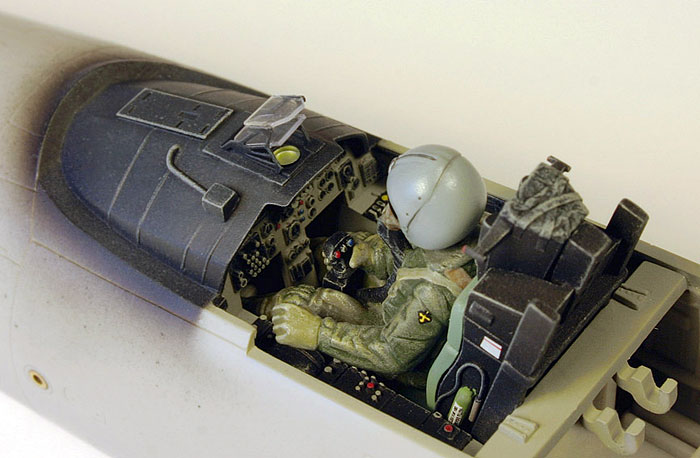
Apart from this, I just painted the
cockpit carefully, highlighted all the details by dry-brushing, and that
was it.
Nothing much happens here, just a lot
of time passes. You can imagine sitting in a dark theater listening to
annoying music, while you wait for the film reel to be changed.
What has actually happened is that I made another intercontinental jump,
from Asheville, North Carolina, home of Biltmore Estate, to Worms,
Germany, home of the Nibelungen; there was a period of about 10 months
where hobby was pushed aside by some more pressing issues.
After going through couple of these moves across the ocean, I can
ascertain that they are bad for hobby. The discontinuity is too great.
One feels completely severed from the routine, and finds it really hard
to start over. Some types of cactuses don’t like when they are
transplanted, and I believe I’m becoming one of them…
Continued in
Part Two
LaGG & Lavochkin Aces of
World War 2
Aircraft of the Aces 56 |
|
|
|
|
Author: George Mellinger
Illustrator: Jim Laurier
US Price: $19.95
UK Price: £12.99
Publisher:
Osprey Publishing
Publish Date:
November 21, 2003
Details: 96 pages; ISBN: 1841766097 |
|
|
Model, Images and Text Copyright © 2006
by Aleksandar Šekularac
Page Created 01 February, 2006
Last Updated
21 February, 2007
Back to
HyperScale Main Page |
 Home
| What's New |
Features |
Gallery |
Reviews |
Reference |
Forum |
Search
Home
| What's New |
Features |
Gallery |
Reviews |
Reference |
Forum |
Search