|
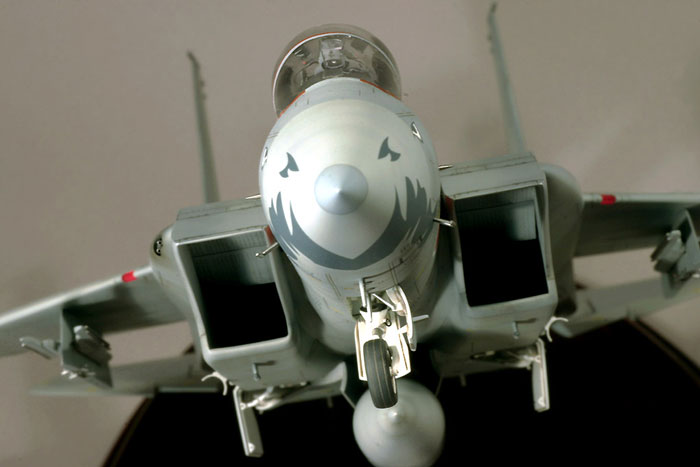
Hasegawa's 1/48 scale F-15J
Year Of The Dragon
Part Two
by Aleksandar Šekularac
|
 |
|
F-15J |

HyperScale is proudly sponsored by Squadron.com
Continued
from Part One
I was sitting in my new hobby room
trying to think what was I doing last. Opened couple of boxes that
looked promising, found few kits in various stages of construction… One
Blenheim Mk I in 1/48 scale looked particularly promising. I took it out
and played with subassemblies for a while. After a week I’ve put it back
in its box. It wasn’t it. Few more weeks passed.
After more half-hearted tries like this, I finally decided to focus,
finish my F-15, and not allow attention to meander until I do. This is
what worked for me in the past, and it didn’t fail me this time.
Carry On
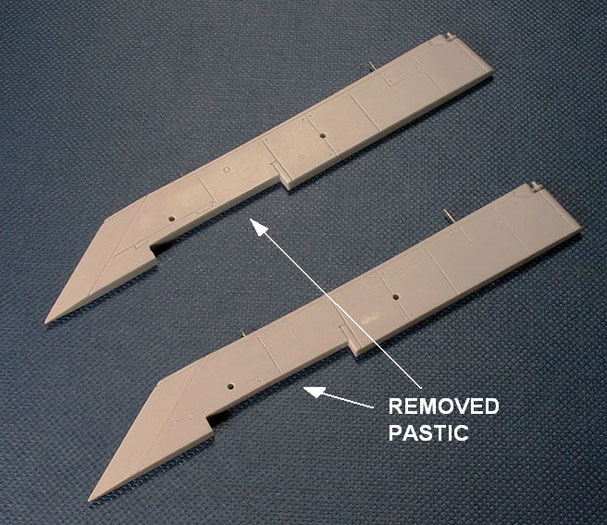
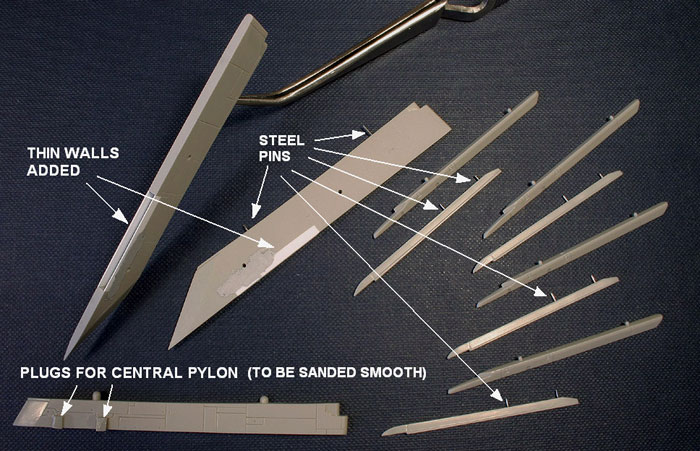
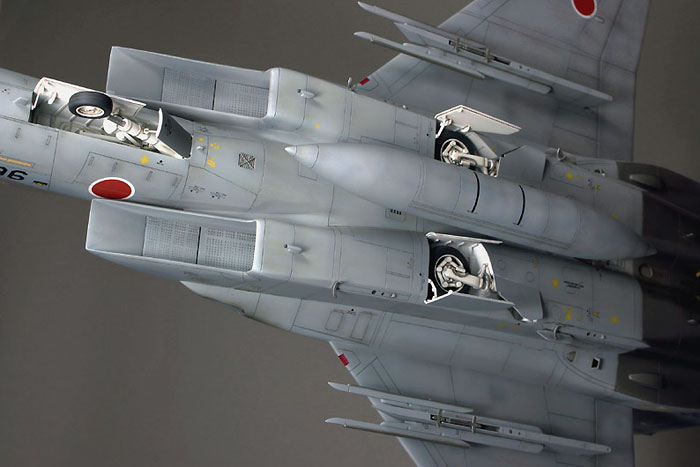
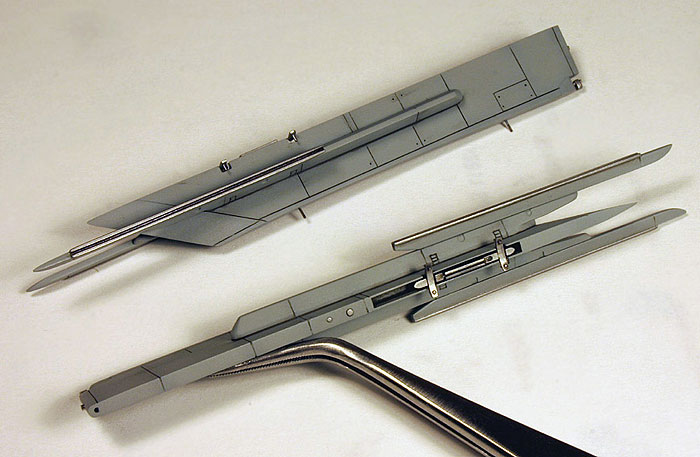
Much rework went into the two main
pylons under the wings. These are rudimentary in the kit, and no detail
is present at the main attachments, whereas on the real aircraft this is
a fairly busy place. I resorted to scratch building again. Cutting out
the block of plastic from the bottom of the pylon, where the whole
locking mechanism lies, and replacing this with thin plastic walls, left
the hollow box inside. Then I fashioned the separate mounting column,
with sway bars and detailed it to my taste. This was in the end inserted
in the pylon box, after painting and weathering.
Click
the thumbnails below to view larger images:
Some detail was added to the rear end
of the pylons as well. Metal locks that attach pylon to the wing
structure were scratch-built from pieces of plastic and metal wire, and
another small cylindrical outlet was added by drilling a hole and
inserting a short piece of syringe tubing, standing a bit proud of the
surface. Since I wanted clean model, without any under-wing payload and
only the central fuel tank attached, I detailed the sidewinder rails, as
they will be left exposed. I started by deleting the plastic tongue for
attaching the rocket, and then making a recess for the rail, by slowly
pushing the straight saw alongside the middle of the face. I finished it
off with some sand paper.
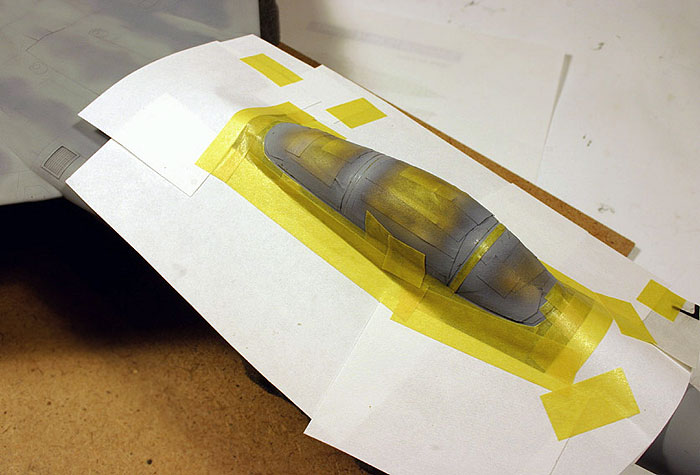
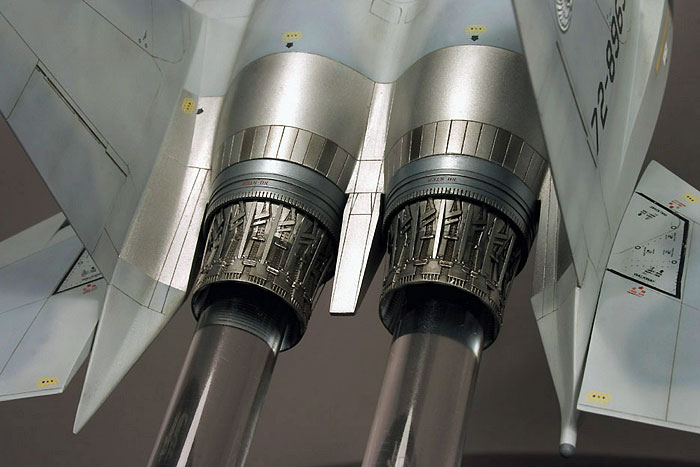
Big central fuel tank received
scratch-built sway bars at the attachment point, some rivet dental and
also a new rear pylon lock. When painted, assembled and weathered all
the effort shows up.
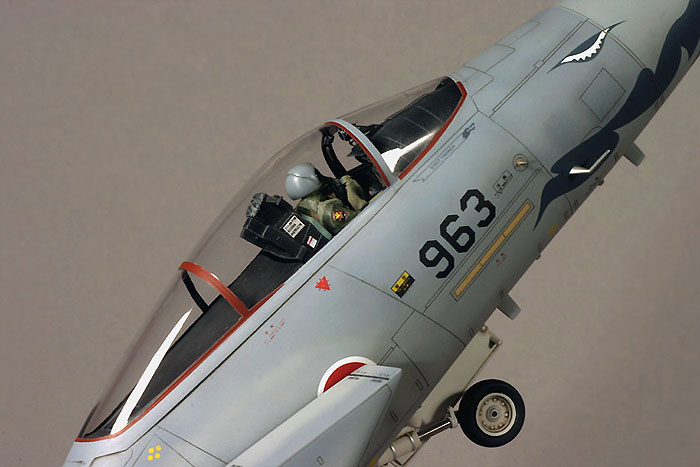
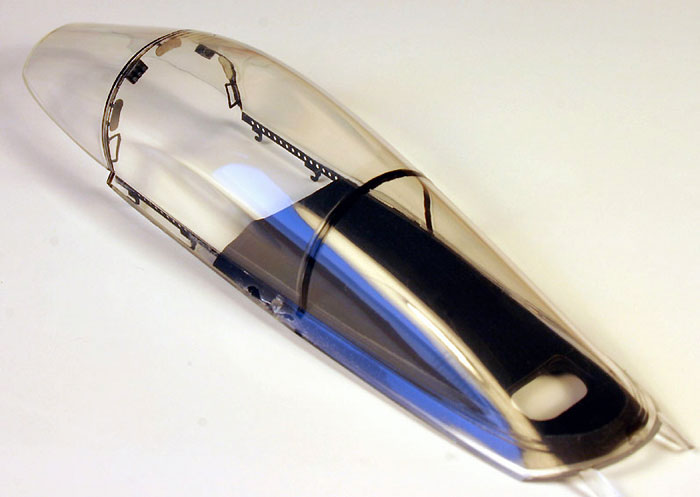
Canopy
This turned out to be a real test of
willpower. After sanding smooth the longitudinal seam of the clear
parts, I polishing them with Tamiya Polishing Compound, and added a coat
of Future. I like to apply it with a hand brush, rather then immersing
the whole part in a pool of Future. I find that the thin layer applied
with a brush dries more evenly. After canopy dried, all the small bits
where attached to the underside of the front frame and along the sides.
Using slow setting epoxy glue is a
good choice for attaching canopy, since one can remove any excess glue
with damp Q-tip, hours after application.
After 24 hours the bond was cured and I proceeded with work, only to
discover a lot of sanding dust that came from somewhere, and was now
stuck to the inner side of my crystal clear closed canopy. Watch the
temper, steady now! I had to carefully break off the canopy, without
actually cracking the transparent parts and try to minimize damage to
inside details. While I managed to save the canopy, there were now many
small pieces rattling inside the nose section. Pilot also decided to
eject in this emergency. By shaking the fuselage section under different
angles I managed to get all the pieces out. Clean, sand, polish,
repaint, re-glue…
After another 24 hours, for the epoxy to cure, I couldn’t believe when I
again discovered more dust under the canopy, plus some nice fingerprints
that I left with the second gluing! Much swearing in several tongues
followed.
I had to break open the canopy AGAIN. Clean, sand, polish, repaint…This
time around I wasn’t taking any chances, so I used my vacuum-cleaner to
suck out any remaining dirt from the cockpit cavity and the nose
section. Additionally, I washed everything in water. After repairing it
all, I carefully re-glued the canopy, this time wearing cotton gloves.
Another 24 hours passed and the work was finally finished. No dust, no
fingerprints, third time is indeed a charm…
With this build I tried several new
products and techniques, which in effect changed to a great degree the
way I finish a model. This was all done in an effort to improve control
and finesse in those critical steps when the subject takes its final
shape.
Things I Like & Things I Don’t
After reading some accolades about
Mr.Surfacer I decided to try it out myself and see if this primer really
makes a difference. Not so long ago I didn’t quite understand importance
of priming the model, and would most often skip this step altogether,
and immediately load the airbrush with the finishing paint. But, the
layer of primer gives 3 important benefits that I now fully appreciate:
-
Identifies all the imperfections
that still exist on the surface (giving one a chance to fix them)
-
Improves a lot adherence of any
subsequent layer of paint,
-
Allows for much thinner and finer
layers to be applied over it, as it provides opacity.
Mr.Surfacer is a Gunze Sangyo product,
and it comes in different grades. I have grade 500 (coarse) and 1000
(finer). The coarse grade sprays somewhat rough, but it dries quickly
and can be sanded to perfection. It can be also used very effectively as
liquid putty. The finer grade sprays smoother, and can be also further
improved by fine sanding and polishing.
In short, I became a believer.
Together with Tamiya masking tape this is probably the best hobby
product I ever tried.
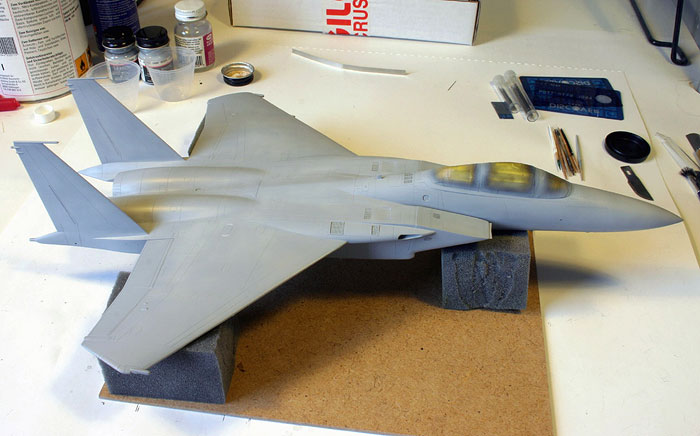
Painting
This was also the first model I
finished with my new Iwata Hi-Line airbrush. I must admit that it felt
like flying first class long distance after being used to “economy”. Old
Aztek airbrush served me well for last 5 years, but it started showing
me lately why plastic is meant for models, not for tools. A small “H”
link inside its double-action mechanism failed repeatedly, usually in
the middle of some big project. Then I had to send it back to Testor and
wait for the replacement body. While I find Aztek’s exchangeable nozzle
system to be really practical, the materials used for the mechanism are
simply not robust enough. Whenever the paint finds its way through the
piston sleeve, and inside the airbrush body, which is just a matter of
time, it will cause extra friction, and next time you try to pull back
the trigger this “H” link will brake. Testor does not recommend opening
airbrush body, as it’s supposed to be sealed (“snap-tight”), but it
isn’t really, and to prevent failure one has to clean the insides. The
whole hassle was finally too much for me, so I bought this chromed
marvel from Japan, and all I can say is: it’s worth the money…
Click
the thumbnails below to view larger images:
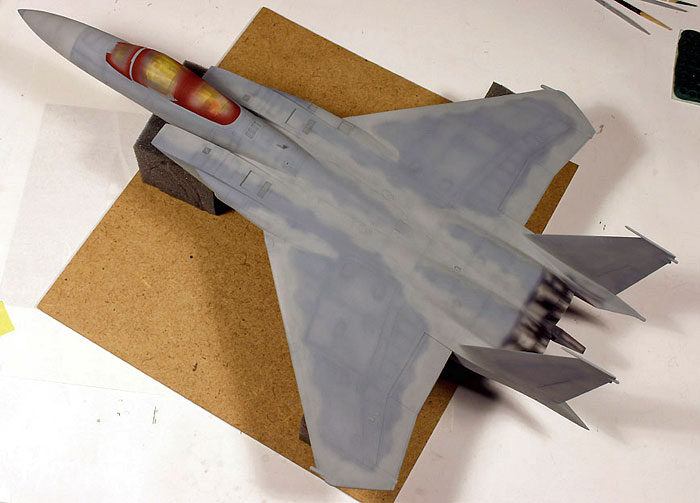
Lastly, I also changed the washing
technique for this model. My standard way would have been to use enamel,
or lacquer based finish, and then water-based pastes for washes. This is
a very safe method, as the painted layer is completely indifferent to
soapy water used for cleaning of the wash. However, I didn’t like
capillary characteristics of the water-based pastes, and also when they
dry it is sometimes hard to remove stains they leave behind.
This time I used a “standard” wash made of artist-oils diluted in
turpentine. Oils can be mixed very well, they flow excellently, they dry
slowly, and they can be cleaned with almost no additional turpentine,
using only cotton tuffs (a lot of them). The only requirement is that
the undersurface must be acrylic. For a gloss coat I used Future (acryl
based), and this worked very well. I plan to use this method from now
on.
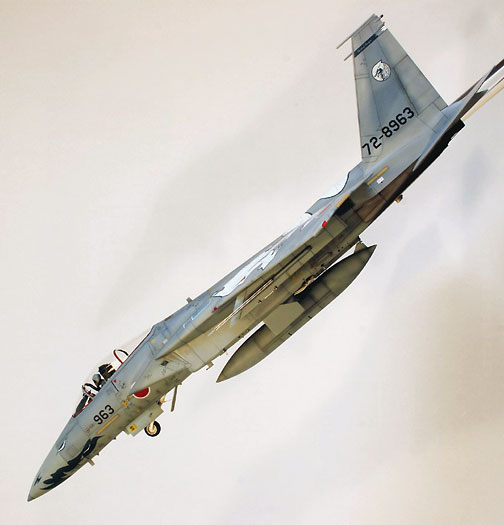
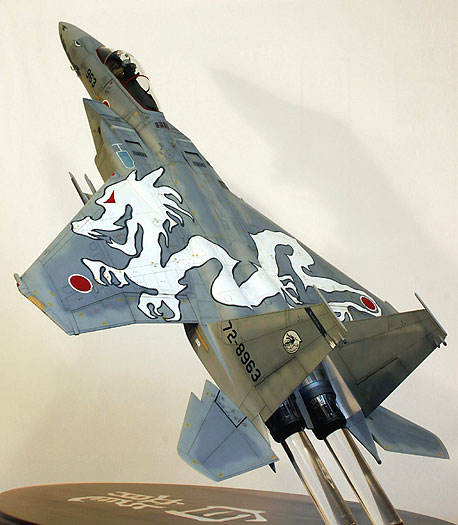
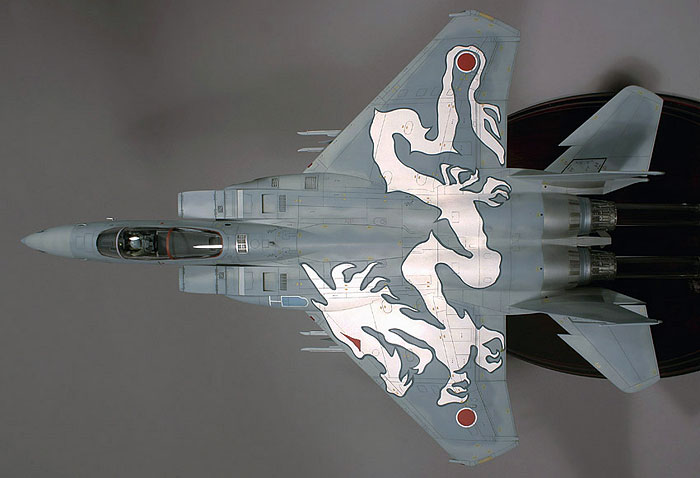
Decals
Decals were the starting point for
this project, and their application proved to be a deciding moment, and
major undertaking as well. Main motif, the huge white dragon spanning
the wings, is provided as three-piece decal. I have never before worked
with decal this big and so complex, and I hope I won’t have to do it
again. It is very difficult! I started by cutting out all three pieces
of the dragon and trimmed them closely. Then I was able to plan the
approach by “dry-fitting” it to the wing.
Despite reading earlier an opinion on the web that this dragon decal is
too large, I would suggest that the decal is correctly sized (at least
for Hasegawa kit), but fitting has to be done very carefully! When I
compare the model with images of the real aircraft from the web, dragon
motif looks identical in size and position.
I started with the tail of the dragon.
This decal includes starboard wing Hinomaru, which gives you one locator
point. The other locator was the tip of the forked tail that has to fit
as close as possible to the rear left corner of the starboard wing flap.
As soon as I had this piece in a more-or-less correct position I moved
on to the torso of the dragon, and after that to the head-piece. These
huge decals dry slowly, and by adding droplets of water one can apply
all three of them and have them still sliding on the surface. This is
essential for fine adjusting. Although the decals are very well
produced, their shear size makes them prone to tearing. Curvature of the
wing-fuselage joint and the engine bumps further complicate this
process. My decals tore in several places, but as long as they don’t
suffer some major damage they can be repaired.
Dragon was the first decal I applied to the model. I started one Friday
evening, and I was still working on it on Sunday (I did sleep in the
meantime if someone wonders), reapplying the softening solution, looking
for air bubbles and correcting all the tricky corners. There were
visible lines of different opacity where the two pieces joined together,
and some other places where decal was torn. These spots had to be
carefully and very lightly sanded, and then airbrushed, to blend
everything together. I also did some spot-repairs of the dragon’s
blue-gray border with a fine hand brush.
When this work was done I felt I crossed the Rubicon. There were still
uncountable number of small markings to be applied, but this just
required time, with no major obstacles.
In hindsight, much more elegant solution to this subject would be to
have masks for airbrushing white surface of the dragon, with only the
gray border and red eye provided as decals. This being said, I must give
praise to Two Bobs for a job well done. Subject selection, research, and
decal quality is excellent. Even the smallest stencils are authentic,
and shown in the right place.
This was a trailblazing journey for me
in more ways than one. The motivation came completely from a stunning
looks of this subject, and its availability in scale. To quote a line
from one film I like: “It is a funny feeling being under the wing of a
dragon. It’s warmer than you think”. Now I may decide to stay with the
theme, and build a Bae Hawk T1 with the red dragon from Wales in some
near future...
Photography
All the photography you see here is
done with my favorite Canon Digital Rebel SLR and following lenses:
-
Canon EFS 18-55 Zoom
-
Tamron f2.8, 90mm Macro
Click on the thumbnails
below to view larger images:
LaGG & Lavochkin Aces of
World War 2
Aircraft of the Aces 56 |
|
|
|
|
Author: George Mellinger
Illustrator: Jim Laurier
US Price: $19.95
UK Price: £12.99
Publisher:
Osprey Publishing
Publish Date:
November 21, 2003
Details: 96 pages; ISBN: 1841766097 |
|
|
Model, Images and Text Copyright © 2006
by Aleksandar Šekularac
Page Created 02 February, 2006
Last Updated
04 February, 2006
Back to
HyperScale Main Page |
 Home
| What's New |
Features |
Gallery |
Reviews |
Reference |
Forum |
Search
Home
| What's New |
Features |
Gallery |
Reviews |
Reference |
Forum |
Search