|
Tamiya's 1/48
scale
P-51C Mustang
Part Two - Painting and Completion
by
Tony Bell
|
 |
|
North American P-51C
Mustang |

Tamiya's
1/48 scale P-51B/C Mustang is available online from
Squadron.com
Part One of Tony's
article, covering construction and detailing, may
be seen by following this link.
Natural Metal Finish
NMF: three letters to strike terror into the heart
of even the most experienced modeller. And yet with the availability of
two particular products, getting a decent natural metal finish has never
been easier. These two products are of course Mr. Surfacer and Alclad
II.
The first step in achieving a good NMF is surface preparation. Because
metallic paints are very thin and very smooth, they tend to show all the
flaws; sanding and filing marks, scratches, filler, hairline cracks,
etc. This is where Mr. Surfacer is most useful. Thinned with lacquer
thinner and sprayed through the airbrush, this primer fills in most
minor surface defects. Spot applications will take care of bigger issues
such as scribing mishaps. Once dry, a good rub down with increasingly
fine grits of polishing cloths, finishing up with 3600 grit, brings the
surface to a smoothness that is acceptable for NMF. Note that it is not
necessary to polish the surface to a mirror like shine. In fact, doing
so reduces the adhesion of the paint, making for a more delicate finish.
The next step is the paint itself. Alclad II requires an acrylic primer,
but if Mr. Surfacer has been used for surface prep, then the primer can
be skipped (unless of course one is using the special shades which
require specific primer colours). The Alclad is best applied with a
siphon feed airbrush so that any pigment that settles to the bottom of
the airbrush jar can be re-suspended with a quick swirl. It is not so
easy to do this with a gravity feed due to the fact that the funnel
shape of the paint cup concentrates the settled pigment in a small
volume.
I sprayed at low pressure, applying light mist coats to avoid any build
up that would obscure the rivet detail. Putting it on in thin coats also
keeps the lacquer based Alclad from attacking any bare plastic that may
have been exposed as the primer was rubbed smooth.
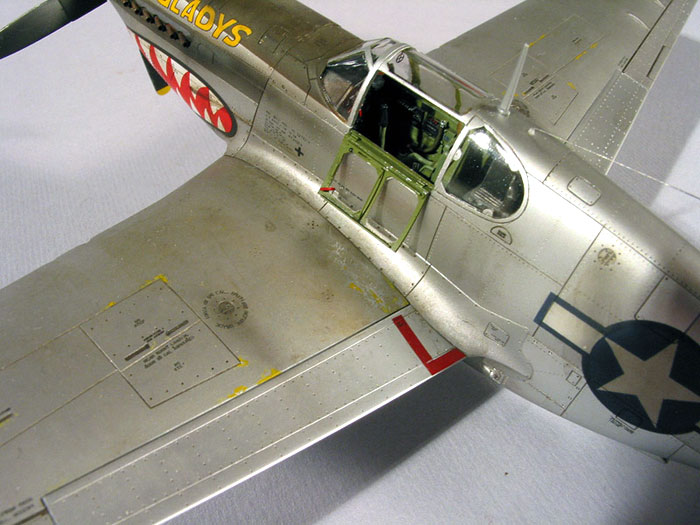
The primary shade was Duraluminum, with various panels masked off and
sprayed with Aluminum and White Aluminum. Unlike other metallic paints,
Alcald II is very durable and can be masked with low tack tape such as
Tamiya after it is dry to the touch. The anti-glare panel was masked and
sprayed using Tamiya Olive Drab lightened with Tamiya Buff. Four
different shades of OD were mixed up and sprayed heavily thinned (nine
parts rubbing alcohol to one part paint) in a patchy manner to break up
the monotony.
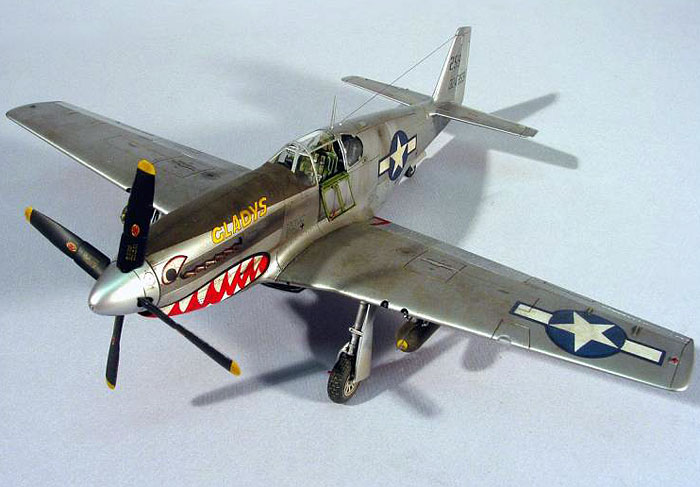
Stars & Bars
Because decal carrier film is hard to hide on
natural metal finishes, I elected to paint on the national insignia.
It’s not as daunting as it may seem at first. Digging through the stash,
I pulled out some old and thick, but properly sized and proportioned,
insignia decals which I applied to a piece of sheet styrene that had
been primed with Future. After the decals had dried, I stuck a piece of
low-tack frisket masking film over the decals and cut the masks using an
Olfa circle cutter, X-acto and ruler.

I cut rough outline masks from tracing paper sprayed with 3M Remount
adhesive (the same stuff on Post-It notes). These rough masks were about
1mm smaller than the final outline and were used to prevent paint build
up around the edges. I masked the outlines of the insignia, applied the
rough masks and airbrushed the white. The rough mask was removed and the
star and bars masks were carefully applied, taking care to align them
correctly. I then sprayed the faded Insignia Blue (Testors enamel, mixed
with white), removed the star mask and then applied a circular mask the
same diameter of the star. Finally I sprayed the darker Insignia Blue
around the outline of the insignia.
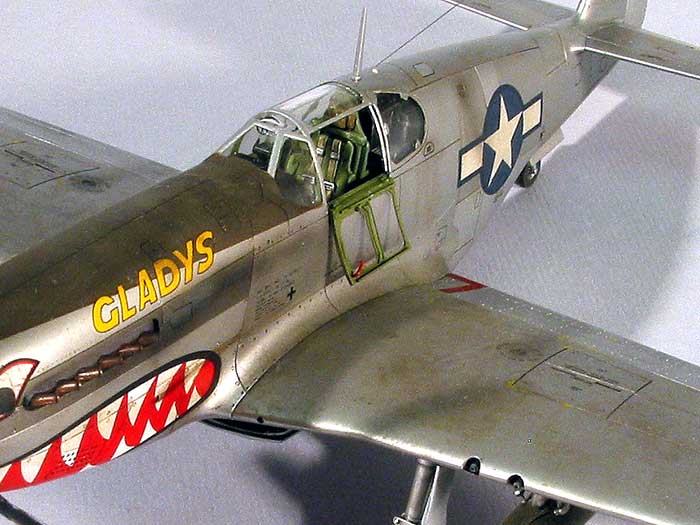
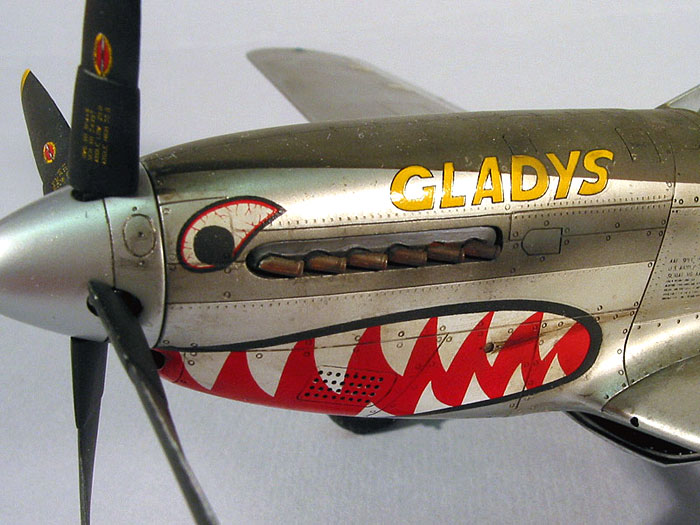
Other Markings
The markings specific to “Gladys” came from
Aeromaster’s sheet number 48-211, “Fighting Mustangs P-51B Part 1”.
Because the Alclad is already smooth enough and because I didn’t want to
add unnecessary layers of paint, I simply buffed the anti-glare panel
with an old tee shirt to shine it up a bit. The Aeromaster decals went
down without any problems, settling into the details with Microsol
setting solution and spot applications of Solvaset. The shark mouth
required a few judicious slices here and there to get it to conform to
the compound curves of the nose. Aeromaster provides some spare scraps
of red decal to fill in any little gaps that remain.
For the stencils I decided to try rub down dry transfers, a relatively
new product by a Japanese outfit called Hobbydecal. They are simply
terrific. The stencilling is extremely fine, with even the tiniest
lettering easily legible under magnification. Each stencil is cut from
the sheet and taped to the model in position. Hobbydecal supplies a
burnishing tool (which looks suspiciously like a crochet hook) which is
used to rub the stencil down and transfer it to the model. One thing to
be careful of is to make sure that the correct side is down, as some of
the markings are so small that it is hard to tell the correct
orientation. Rubbing the wrong side of a marking will wreck it, and
there are no spares on the sheet. And another hint: do the rub down
transfers before applying any water slide decals. The reason for this is
that the transfers need to be held in position with tape and the
presence of regular decals on the model limits the options for doing
this, making for some head scratching while you try to figure out how to
keep the stencil in position and yet avoid pulling up your nose art with
the tape.
To hide the decal carrier film I freehand airbrushed the individual
decals with Polly Scale satin heavily thinned with distilled water,
taking care to spray only the decal and a small portion of the
surrounding finish. Finally I went over the shark mouth with Polly Scale
flat in a similar fashion to dull it down a bit, and while I had the
airbrush loaded, I also sprayed the fabric covered rudder and elevators
to give them a look distinct from the metal airframe.
I masked the ailerons off (I hadn’t yet attached the flaps at this
point) and sprayed the wing with a 50/50 mix of Polly Scale flat and
satin to give it a more lacquered look.
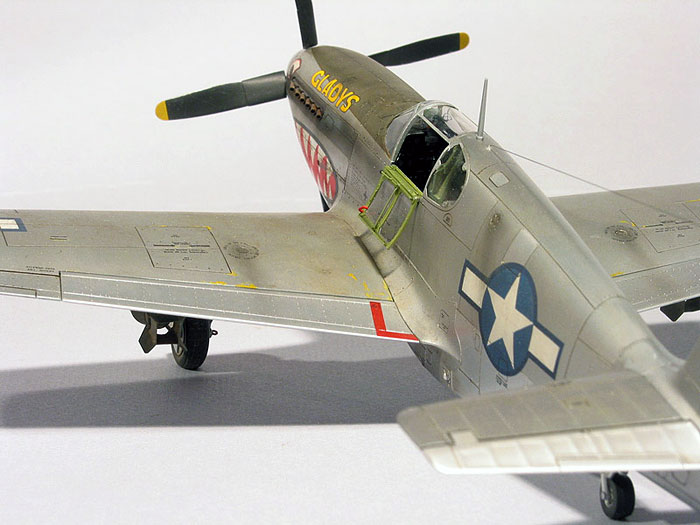
As I mentioned before, the spinner is from
Ultracast. At first I was doubtful of the value added, as I never
thought there was anything wrong with the kit spinner. However, looking
at the two side by side and comparing them to photographs of the real
thing, I have to admit that the kit spinner is a bit too fat looking.
Whereas the kit spinner features circular shaped blade openings, the
resin part features less incorrect oval shaped openings (they should
actually be kidney shaped).
The Ultracast prop blades feature more accurate
cuffs than the kit ones. The kit cuffs are distinctly flared at the base
whereas they should be straight. Again, this was something I hadn’t
noticed until I compared the kit parts to photographs of the real ones.
Unfortunately the rear sides of the resin blades were slightly flawed,
and due to their thinness and delicacy I opted instead to file and sand
the kit blade cuffs to the correct shape and thickness. This occupied
less time than anticipated, taking only about 20 minutes for all four.
After painting and decaling the blades, the mounting stubs were trimmed
to fit the resin spinner and the blades glued in place with five minute
epoxy, taking care to get them square and to set the pitch to a
consistent angle.
The vast majority of photographs of parked Merlin powered Mustangs
depict the flaps and inner gear doors in the fully down position. This
is due to the fact that the hydraulic system quickly bled off its
pressure after the engine was shut down, allowing the flaps and gear
doors to droop. Although not as common, there are still plenty of
photographs showing the flaps in the full up position along with the
gear doors being closed or almost closed. It was this latter
configuration that I decided to model, just for something different.
Besides which, to be strictly accurate if the flaps are to be modelled
lowered then the inboard and leading edge cut-outs on the kit flaps
would have to be filled in and surface detail restored. Either that or
they could have been replaced with Ultracast flaps.
The gear legs were detailed with little bitty discs of 0.010” styrene,
tie down rings made from fine copper wire wrapped around a small drill
bit and brake lines made from wire. The gear legs and the hubs of the
Ultracast wheels were airbrushed with Alclad II Duraluminum and treated
to a Future and ink mix to highlight the detail. The tires were brush
painted Aeromaster tire black and then dusted with MiG pigments. The
treads were blackened by smearing Smoke Black pigment on with my finger.
For a bit of visual interest I used a different tread pattern on each
side, as can be seen in some wartime photographs.
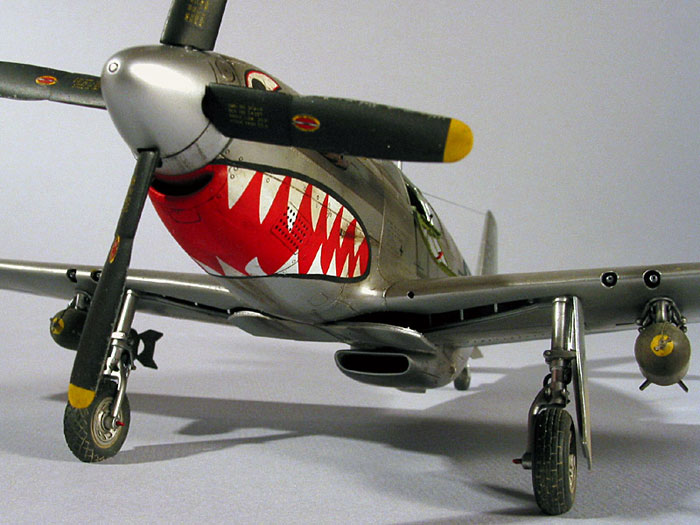
The 500lb AN-M65 General Purpose bombs came from the Verlinden set of
P-51 stores. The resin bombs feature photoetch fins which were a pain in
the butt to fold, assemble and square up. For strength I decided to
solder the fins together which allowed me to gently tweak them when
mating them to the resin body. The fuse safety wire was added from fine
copper wire and sway braces were added from stretched sprue and more
little bitty discs of 0.010” styrene. The bombs were painted OD with a
yellow disc on the nose, and stencil decals from the Tamiya P-47D
applied which were completely obscured by subsequent weathering (oh
well). To ensure a good solid join, the bombs were pinned to the pylons
with brass wire.
The wingtip formation and under-wing IFF lights were brush painted with
Gunze clear colours over silver, while the machinegun barrels were
replaced with nested steel tubing. They were painted with Humbrol
Metalcote steel because real steel didn’t look enough like, well, steel.
Weathering
To highlight the panel lines I applied a wash of
dark brownish grey mixed from burnt umber, black and white Liquitex
artist’s acrylics, thinned with distilled water and a good dollop of
dish detergent. The detergent is needed to reduce the paint’s ability to
adhere properly, allowing the excess wash to be wiped away with a clean,
damp paper towel.
To give the model a grubby look I used MiG Pigments. The aircraft of the
CBI theatre were very dusty and dirty, so I wasn’t to shy when it came
to dirtying up the model. A mixture Gulf War Sand, European Dust, Ashes
White and Smoke Black was dusted all over, concentrating on the gear
doors, wing roots, access panels and so forth. I poked and prodded at
the pigment with a broad, soft paint brush moistened with water to
achieve the final appearance. The bombs received extra attention with
the pigments, as the real things were often rolled around in the muck of
the bomb dump before being loaded onto the aircraft.
The exhaust stain was airbrushed on using Tamiya acrylics thinned 10:1 (thiner:paint)
with rubbing alcohol, and some oil streaks were added from black and
brown artists oil paints. Some light Yellow Zinc Chromate paint chipping
was added to the wing using Citadel paints and a fine brush.
The final touch was to add the radio mast and antenna wire. The wire was
“invisible” nylon thread, painted with Citadel “Gunbolt Metal” and
superglued into small holes drilled at either end. I tightened it up by
zapping it with a hair dryer set on high, being careful not to melt the
mast while I was at it.
The P-51B was one of the first of the new
generation of Wunderkits released by Tamiya back in the mid-1990’s. In
spite of the fact that it is now a decade old it still compares well to
any of today’s newer releases. Straight OOB it can be built up into a
great looking model, or if you suffer from terminal AMS (not that I’m
admitting to anything) there are plenty enough aftermarket details to
satisfy even the most hardcore resin and brass junkie.
Click
the thumbnails below to view larger images:
P-51 Mustang
From the RAF to the Mighty Eighth
Special Editions (Aviation) 1 |
|
|
|
|
Author: Michael O'Leary
US Price: $10.95
UK Price: £6.99
Publisher:
Osprey Publishing
Publish Date:
September 15, 1997
Details: 128 pages; ISBN: 1855327147 |
|
|
Model, Images and Text Copyright ©
2005 by Tony Bell
Page Created 09 May, 2005
Last Updated
09 May, 2005
Back to
HyperScale Main Page |
 Home
| What's New |
Features |
Gallery |
Reviews |
Reference |
Forum |
Search
Home
| What's New |
Features |
Gallery |
Reviews |
Reference |
Forum |
Search