|
Aeroclub's 1/72 scale Short 184
“Smoko break is over, there’s a
war on!”
by James Fahey
|
 |
|
Short 184 |

HyperScale is proudly supported by
Squadron
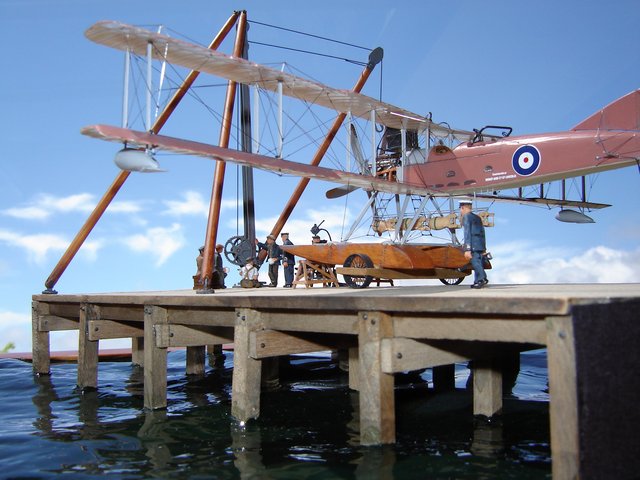
I enjoyed making Aeroclub’s Short 184 kit
so much (see
http://hsfeatures.com/features04/short184jf_1.htm ) that I decided
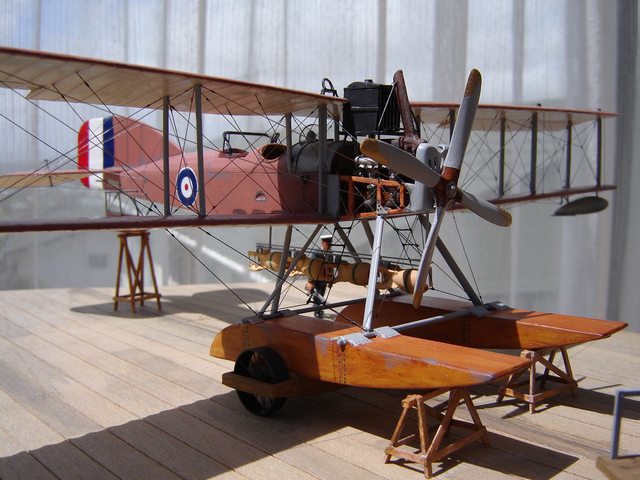
to do another one - a later version with bomb rack and Scarf MG
mounting, finished in PC12 (a naval colour described as like ‘milk
chocolate’).
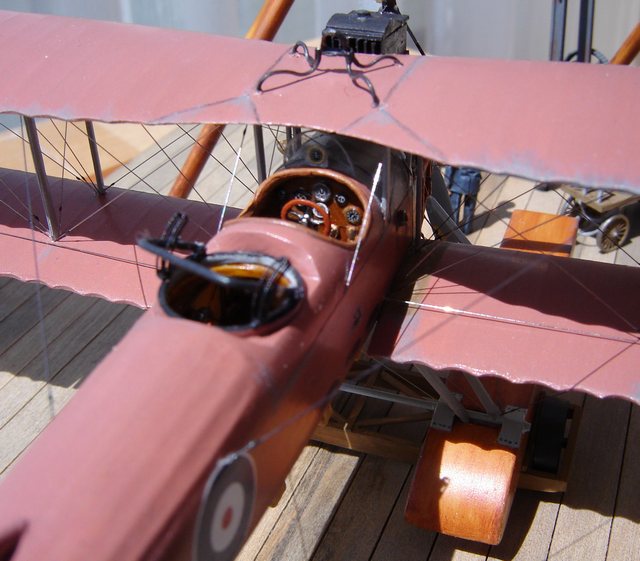
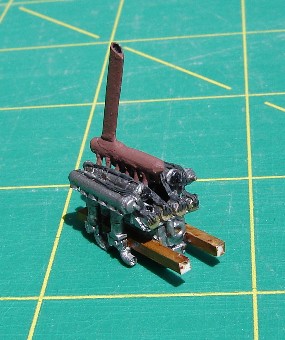
This time I decided to open up the engine
compartment and scratch build a Sunbeam Maori engine.
Engine Compartment
The wood framing in the nose is the
plastic left over after cutting away the rest of the nose. Note that the
longerons slope downwards from just in front of the centre section
struts down to about level with the prop. I painted the longerons a pale
sand colour (Humbrol), then when this was completely dry I painted over
with artists oils ‘burnt umber’ and then wiped most of it off with a
clean paint brush.
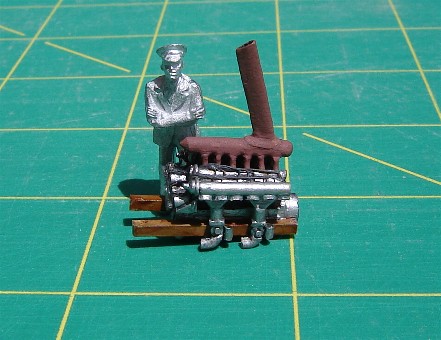
The engine is scratch built with brass rod, copper wire for the 24 spark
plug wires, plastic scrap etc. Reference pics for the engine a hard to
find but after doing a Google ‘image’ search I found this great website:
http://www.enginehistory.org/hendon_&_duxford.htm
The white metal radiator casting from Aeroclub has aged badly with
production so I scratchbuilt a new one from black card and styrene
sheet. You can now see through the radiator just like the real thing.
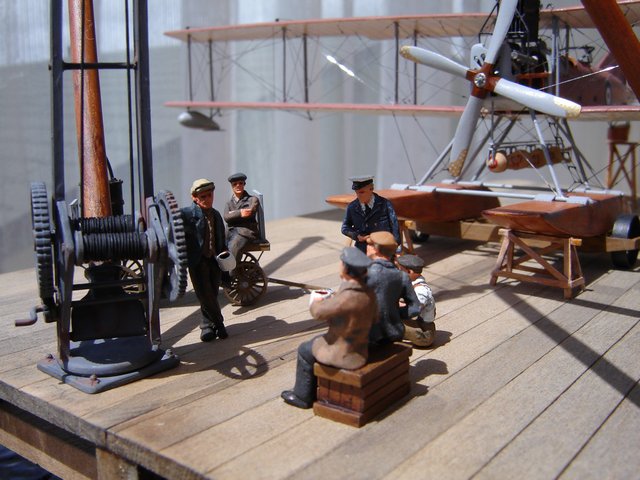
Crew figures
There is a range of white metal figures by
Monty’s Model Railways in the UK which are really great for Navy
officers. These figures are OO gauge which is about 20mm so they work OK
for 1/72 scale. Have a look here:
http://www.dartcastings.co.uk/
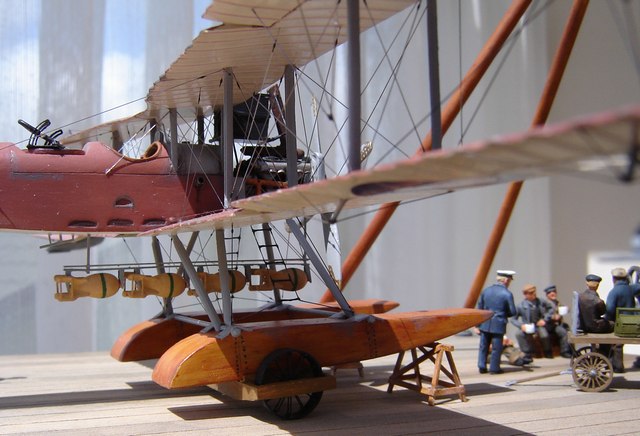
Bombs
The bomb rack is scratch built from brass
rod and strip. As far as I know the only 100 lb bombs available in 1/72
are the four included in the Airfix DH4 kit. They only bear a passing
resemblance to the real bombs but I thought it would be easier to modify
them rather than scratchbuild. The photo shows my four new bombs with
one of the originals from the kit.
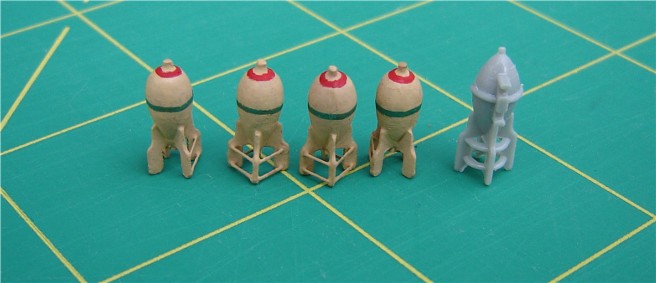
The changes I made include:
-
Round off the front of bombs as the
originals are too pointed. I fitted a new tip when this was done.
The result is not perfect, more like a cross between 100 lb and 112
lb bombs but I am happy with them.
-
Sand off the bomb mounting as it is
completely incorrect. Note the bombs should be mounted with the fins
in an X shape not a + shape.
-
Remove the circular bomb struts. I
replaced these with narrow strips of brass strip on three sides
only. The fourth side has no struts so as not to get in the way of
the bomb rack (it faces upwards).
-
Shortened the bomb fins.
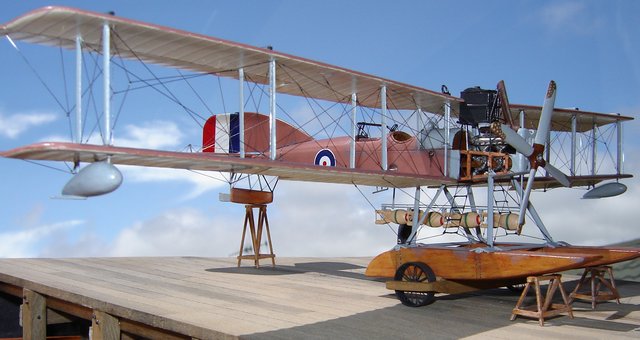
Wingtip floats
I wanted to use the more rounded wingtip
floats fitted to some later 184s. The alternative kit floats didn’t look
right to me – too cylindrical, so I glued a strip of styrene around the
floats then sanded it into the new shape.
Beaching Trolley
The trolley is made of plastic strip and
card. The kit’s white metal wheels aren’t right so I made new ones from
brass pipe and some 1/48 PE spokes from Fotocut (with every second spoke
cut away).
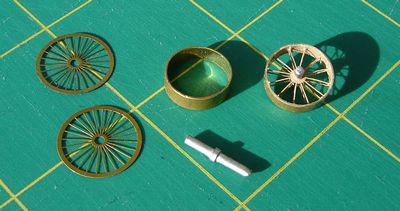
I used pictures from the Datafile as a
guide.
I used acrylics from the WWI range by Misterkit. The PC12 came up
lighter than I expected.
I laid decal stripes (salmon coloured
German rib tapes from Eagle Strike) along the underside wing ribs to
make them stand out like the Datafile photos.
Rigging
All the rigging and control wires are
0.005” stainless steel wire from Smallparts.com (product code is
GWX-0050-30 for anyone who gets lost in their website like I did).
The kit instructions don't accurately
capture the unusual rigging in the outer bays so I have played around in
Paint to show how they should look (second pic).
In addition I have shown the additional
flying wires that joined the wing half way between the bays, and the
wire ladder fitted to many later versions.
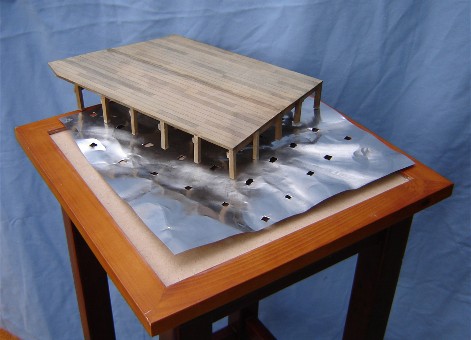
The Wharf & Crane
The wharf is scratch built from bass wood
with some bolts added from Grandt Line. The sea started out as tinfoil
from an oven liner cut to fit inside the photo frame base. Cutting each
square hole in the right spot for the wharf piles was a difficult job.
It was painted green and liberally covered with a clear acrylic stuff
called Mod Podge.

The crane is based on the photograph on the inside front cover of the
Datafile. While researching details I discovered it is of a type called
a "stiff leg derrick" and which rotates around the pivot point. It is
mostly scratch built, with some bits from a Wills kit.
I found the tool trolley from Grandt Line and the detail on it is
wonderful! Absolutely the finest detailing I have ever seen on a tiny
injection moulded kit. The drums, hand pump, funnel, tool box etc are
resin items from Attack’s WWII German tool set.
Thanks to John Adams at Aeroclub for producing such a great kit.
Click the thumbnails below to view larger images:
Model, Images and Text
Copyright © 2006 by
James Fahey
Page Created 21 December, 2005
Last Updated
21 February, 2007
Back to
HyperScale Main Page |
 Home
| What's New |
Features |
Gallery |
Reviews |
Reference |
Forum |
Search
Home
| What's New |
Features |
Gallery |
Reviews |
Reference |
Forum |
Search