|
1/48 scale
Aeroclub + ICM kitbash
Spitfire PR. Mk. XIX
by Ken Stanton
|
 |
|
Supermarine Spitfire
PR. Mk. XIX |

ICM's
1/48 scale Spitfire VIII
is available online from
Squadron.com
This must rate as my longest modelling project to date.
It really started in 1987 when Tore Martin at Falcon kindly sent me a
PR canopy after I had built his PRXI conversion. Unfortunately the
enthusiasm waned and I stuck to easier tasks. Enthusiasm was reawakened
in 1996 after I purchased an Airfix Seafire FR47 kit at RNAS Yeovilton
(stick with me, this will make sense later!).
I'm an unashamed lover of Spitfires. The design has a line about it
unmatched, in my opinion, by any other aircraft. Some things are
aesthetically beautiful because they are pleasant to look at and the
early Merlin Spitfire has a grace and neatness that belies its purpose.
It is curvaceous. Sometimes a less gracious but purposeful appearance
can be attractive too (still talking aeroplanes here, by the way) like
the F4 Phantom. In the Spitfire spectrum the F21 and the PRXIX fall into
the latter 'purposeful' category. The Griffon installation improves the
visual balance of the airframe but the clean lines of the unarmed PRXIX
reinforce Mitchell's vision demonstrated by K5054.
Meanwhile, back to Yeovilton. When I returned home from this visit I
searched on the web for FR47 information and found reference to
Aeroclub's F21 Conversion kit which uses the left over Seafire FR46
parts if the FR47 is built. Once purchased, I saw in the Aeroclub F21
fuselage the PRXIX that I had always wanted. So a second F21 conversion
kit was purchased.
I started off by taking the wing set from a Hobbycraft MkXIV. This has a
rather thick aerofoil section and I attacked it with some very coarse
emery cloth wrapped around a wooden block to get it to match the
fuselage wing root. I then began to scratch-build better ailerons and
add internal detail to the wheel wells. It was not going too badly, I
thought, until I saw Jim Kiker's PRXIX on HyperScale. Oh dear! Somehow,
with the Hobbycraft wings taped to the F21 fuselage, it didn't look
quite right when compared to Jim’s and I had yet to sort out the
undercarriage fixings, and the under wing radiators and the booster pump
housings and the under-fuselage camera ports and ……. and …. well, mine
just looked wrong. I thought it was time to stop and rethink. So I
thought for about 2 years! occasionally about the PRXIX.
Then along came my first stroke of fortune in the shape of an ICM Mk IX.
I bought three of these from Hannants and one of them had fairly
terminal sink marks in most major parts except for the wings. I offered
the ICM wings up to the F21 fuselage and yes! It all looked very good.
The Hobbycraft wings went into the bin.
The second stroke of fortune was finding the Airwaves PRXIX conversion
set at the Telford IPMS show in 2003. This gives you (in resin) the
Booster Pump and other blisters for under the wings, the under fuselage
camera installation, the beam approach aerial housing, the Cabin
Pressurisation System intake and a vac-formed canopy.
Now I was up and running! To complete the parts required I got the
Oblique Camera installation and the 4 spoke wheels from Cooper Details;
wingtips and the later style pilot's seat from Ultracast. I also managed
to obtain a set of Flying Colors' Swedish S31 decals from Rebel Hobby in
Stockholm. I had already got the Carpena ones but the Lion Insignia is
not 'handed' as on the S31 in the Swedish Museum.
I was ready to go.
Cockpit and Fuselage:
Do have a look at both Jim Kiker's PRXIX build here at HyperScale and
the Stockholm IPMS site for some 1st class info on the PRXIX / S31. I
modified the ICM compressed air bottles to make the oxygen cylinders and
made the pressure bulkhead with its unique 'Lobelle' canopy features. I
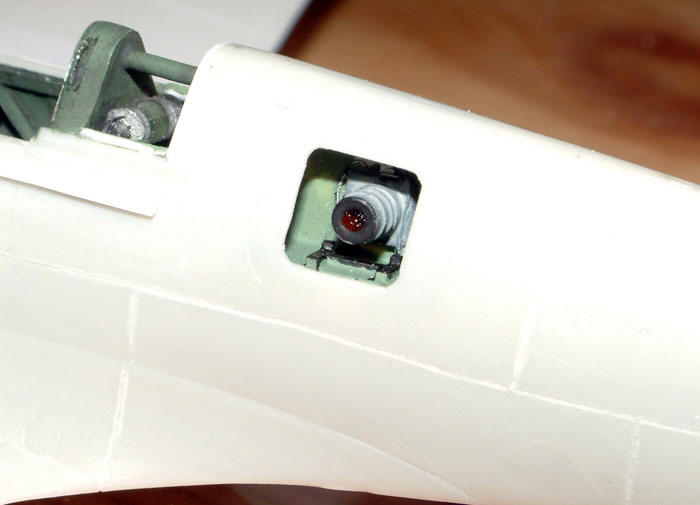
opened up both camera access doors in the fuselage and thinned the
fuselage down locally (the Aeroclub moulding is quite thick plastic) and
fitted Roy's resin camera parts. I painted the inside of the camera's
lens housing black and then filled it with clear varnish almost to its
end. When this was dry I added another layer of varnish with a little
gloss red added to simulate the anti-reflection coating.
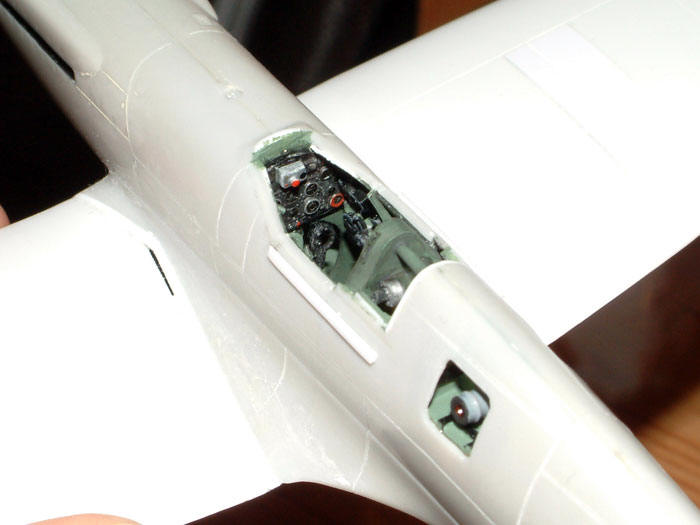
Then I moved onto the cockpit interior and used micro-strip to build up
the interior ribbing and a mixture of ICM and Aeroclub parts to complete
it. The horizontal join between the rear canopy glazing and the fuselage
on the PRXIX is 2 inches lower than Spitfires with the standard hood so
I removed a small amount of the fuselage side in this location. I added
the Camera Control box in lieu of the gun-sight and fitted the Ultracast
seat. The de-humidifier unit behind the seat was made from a chunk of
clear sprue and a paper clip. After removing a section of the lower
fuselage to accept the Airwaves Vertical Camera insert I closed up the
fuselage.
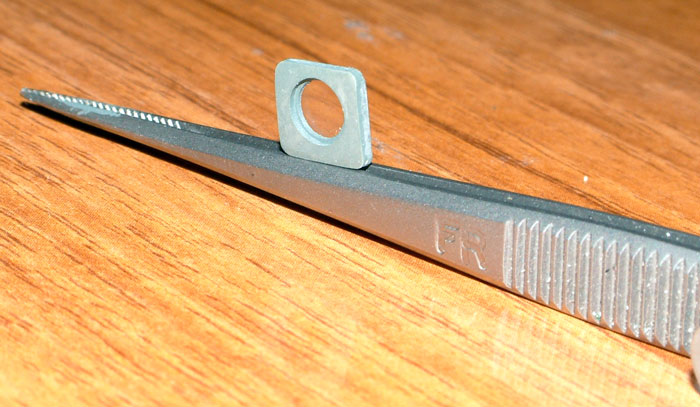
The panel lines on the Aeroclub fuselage were a little 'soft' so I
re-scribed them with a sewing needle in a pin-vice and sanded the
surface to sharpen them up a little. Once done I ran some liquid cement
along them with a brush to smooth out the finish in the groove and
lightly re-sanded. I added the external cockpit canopy rails and the
canopy stops from micro-strip and made the vent on the upper rear
fuselage from shaped styrene sheet.
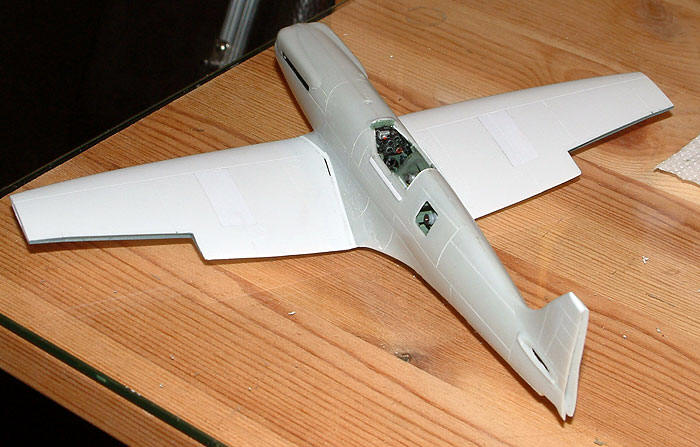
Wings:
The F21 uses the later laminar flow wing and the join at the root is
a different shape to that of the elliptical wing. I decided to shape the
fuselage to suit the wing form with a view to having parallel surfaces
that had a gap I could fill with micro-strip and then be correctly
shaped. I taped the wing set together and determined where to cut the
fuselage. I was aiming to create a gap of around 1.5 mm (60 thou) as I
had styrene sheets that I could laminate to this thickness and I could
adjust and wedge into the gap. It took a leap of faith to finally make
the cuts but after cleaning up with a file it wasn't far away from what
I had hoped for. Once this was done I set to work making blanking plates
for the gun access panels on the upper surfaces. These were supported on
four strips of styrene each around the inside of the openings. These
were positioned so that the blanking plate was slightly above the wing
surface. Plenty of liquid cement was used so that a thorough wet sand
would result in a flush surface. The upper and lower wing halves were
joined using liquid cement.
All non – PRXIX panel lines in the upper and lower surfaces were filled
with 'Super Glue' and flushed off. Additional panel lines were scribed
and the remaining ‘untouched’ kit ones 'scribed over' so that they had a
similar appearance. The lower section of fuselage aft of the flaps is
part of the Aeroclub 'Camera Port' insert so this was removed from the
wing moulding as was the carburettor air intake section which is not
correct for a PRXIX. Some dry fitting of the camera insert was carried
out and some small packing strips added to the inner leading edges to
align the wings to the wing roots and the wings were then attached to
the lower forward fuselage. With no support from the wing root the
dihedral was a little 'flat' but this was adjusted with the filler
strips required at the wing root join. Once the correct shim thickness
was determined they were glued into the gaps with liquid glue and then,
with the underside of wings on supports and a little weight on the
fuselage, the whole thing was left to harden.
The next job to tackle was the fuselage insert. This is designed for the
Academy Mk XIV. Have a read of Roy Sutherland's comments about this kit
on the Cooper Details web page. Suffice it to say that the curvature of
the lower edge of the insert is too convex to match up correctly with
the Aeroclub fuselage. However, this is the only option other than
scratch building this feature. A 'shelf' was added inside the rear of
the aperture I had cut in the fuselage to support the rear of the
insert. I 'fettled' the resin so that (1) it would line up with the
trailing edge of the wing and (2) the rear portion would drop in to a
point lower than finally required. I then placed a large quantity of 5
minute Araldite ® (epoxy resin) onto the inner surface of the fuselage
and sat the insert on it. After a couple of minutes the resin had
started to set but I was still able to gently press the insert down
until the forward edge of the insert lined up with the rear of the wing
and to ‘eyeball’ it so that the line of the wing and the insert were
continuous at that point. It was then left overnight to harden. The end
result meant that the rear portion was ‘inside’ the lower line of the
rear fuselage, but this was much easier to fill and shape than the front
part would have been and it could be achieved without working near the
camera ports. Milliput was used to fill the mismatch and lots of wet
sanding followed. A coat of super glue was applied to seal the surface
before a final sanding. At this point the wing root shims were sanded
down flush to the surface and any remaining gaps filled. Lost panel
lines were re-scribed. I still had the remains of the Hobbycraft Mk XIV
and tried the carburettor intake from that …. a perfect fit! All it
needed was a 'roof' made from thin styrene sheet.

After the Ultracast wing-tips had been attached and the ICM ailerons
fitted (PRXIXs have full width ailerons) the Aeroclub tail-planes were
glued in place. I had detached the Aeroclub rudder and refitted it with
a slight ‘turn’. The ICM undercarriage legs and doors plus Cooper
Details' 4 spoke wheels were fitted. Torque links were added from
micro-strip (the ICM ones are still in the study carpet somewhere!). The
propeller is the Aeroclub F21 part. The next job was to fix the
remaining Airwaves resin blisters, the cabin blower filter and the beam
approach aerial housing. There are two blisters on the upper wings plus
the wing tip fuel tank vents which I added. I drilled the upper fuselage
for a whip aerial (guitar string) and I was ready to paint. As a last
thought I added the Drop Tank 'hooks'
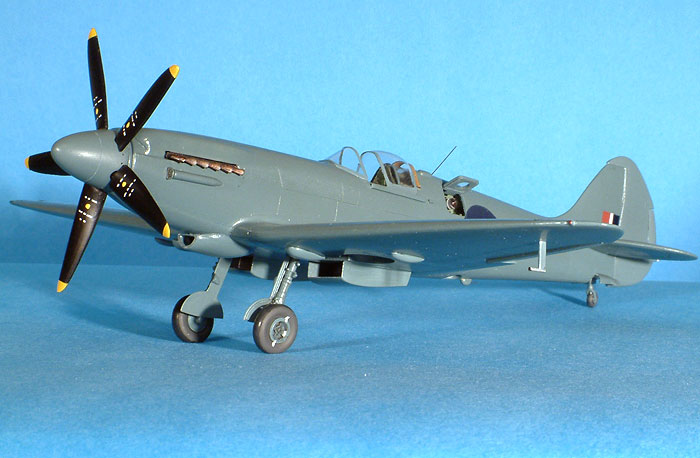
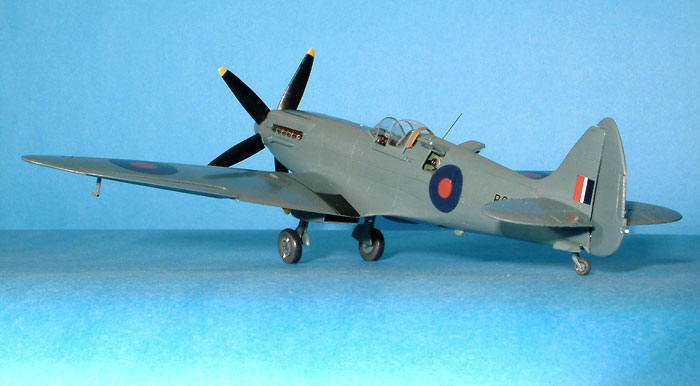
This was to be a Swedish S31. Colour scheme is overall PRU Blue (Humbrol
'Petrol Blue' which is now OOP) with a green spinner tip separated by a
white cheat line. I brush paint so this took a while to get three coats
on plus a coat of gloss varnish for the decals.
Decals and I just don't get on! I know it's probably me, but there you
are. I have 'bad decal' days and this was one of them. The first wing
walkway broke up on the backing sheet and the second one waited until I
got it on to the wing and then broke up. I decided to remove them and
paint them on. Good idea at the time, but I had to sand the decals off!
This was not a good omen and I did not want this to happen again when
the kit was half decaled, so I decided to change tack and complete the
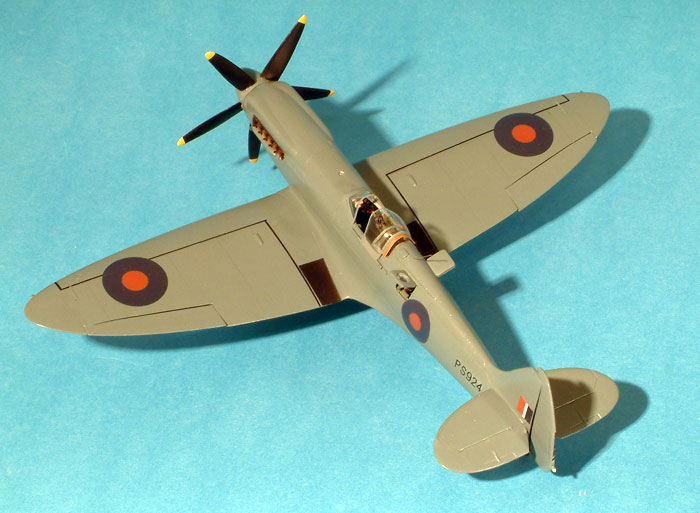
build as an RAF PRXIX from 541 Squadron. This PRXIX (PS924) is one of
the later batch of airframes that had the cabin pressurisation system.
It is depicted as one of 541 Squadron's machines as operated between
January 1944 and October 1946. The scheme shows it at the end of
hostilities before the roundels reverted to the red / white / blue
configuration.
541 Squadron was formed from B & F Flights of the Photographic
Reconnaissance Unit at Benson on 19 October 1942. The squadron reformed
at Benson on 1 November 1947, again in the PR role, equipped with
Spitfire XIXs, which were replaced by Meteor PR 10s in December 1950.
This meant I could paint the markings directly on the model and just use
decals for the serial number. The spinner was sanded back and given an
overall coat of PRU Blue. Once this was complete the plane was given a
coat of matt varnish.
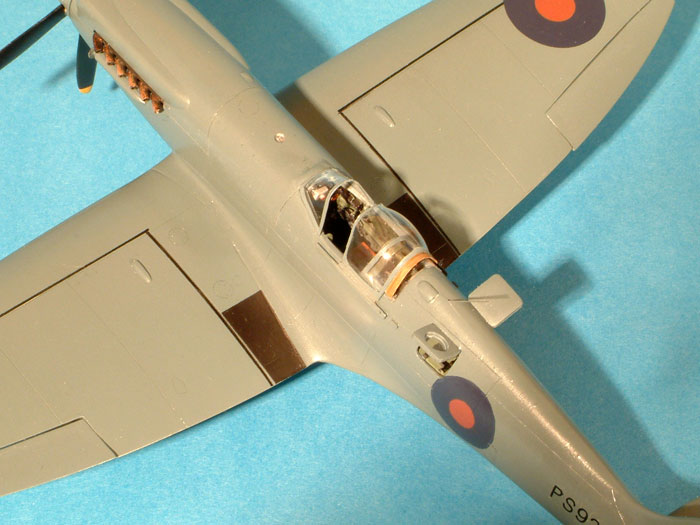
The camera access doors for the fuselage were made from laminates of
styrene sheet. The glass in the port side door is optically flat which
made for an easy construction. The starboard door has a leather pad to
rest on the camera back. The last items were the Aeroclub exhausts and
the whip aerial.
Overall, I was pleased with the end result. I've seen others in Plane
Talking asking about PRXIX conversions and I hope that this helps those
who wish to model one for themselves.
This combination (Aeroclub F21 Conversion and ICM wings) would probably
enable other Griffon powered marks not currently available in 1/48 scale
to be made as long as the correct combination of wing blisters and
aileron length is used.
Click
the thumbnails below to view larger images:
Model, Images and Text Copyright ©
2005 by Ken Stanton
Page Created 02 February, 2005
Last Updated
02 February, 2005
Back to
HyperScale Main Page |
 Home
| What's New |
Features |
Gallery |
Reviews |
Reference |
Forum |
Search
Home
| What's New |
Features |
Gallery |
Reviews |
Reference |
Forum |
Search