Continued from Part One
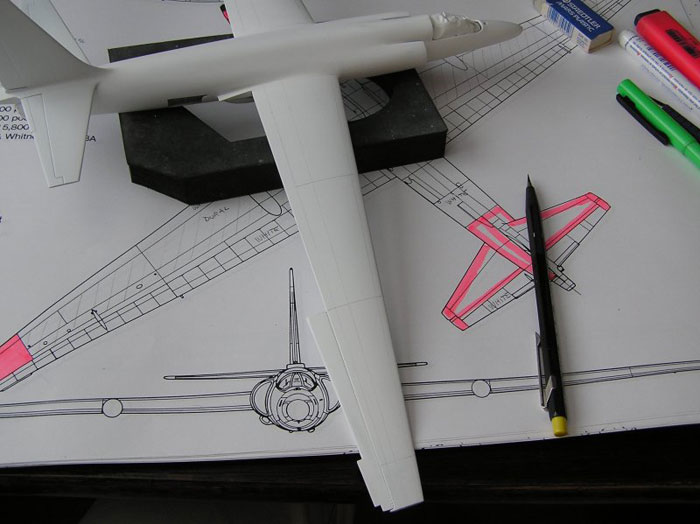
Wings
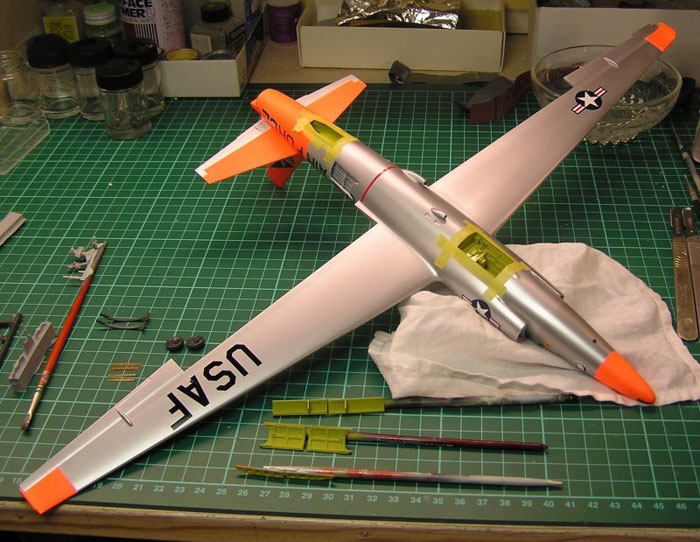
I decided to present the model with extended flaps since I have seen
several such photos, and the model needed something to break the large,
flat NMF surfaces. The flaps were cut out, the edges were trimmed and
the panel lines were sanded off.
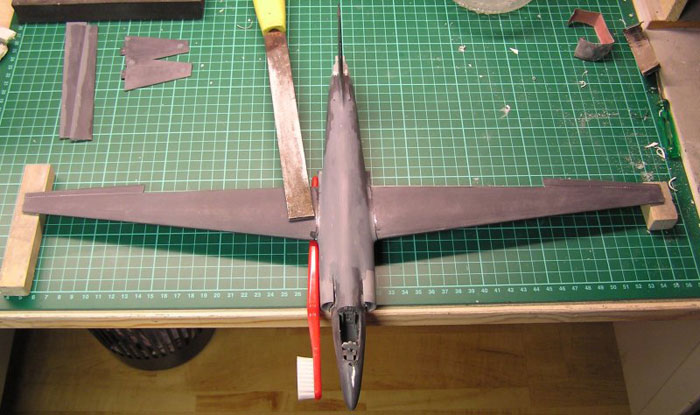
The wings and the flaps were all thinned down at the rear ends to give a
more realistic appearance. When assembling the wings care had to be
taken to get the “right look” on them. They should bend down slightly to
the Pogo wheels and outside them more prominently, to imitate a fully
tanked airplane. Where the flaps were cut out sprue and plastic card
were used to fill the gap and give the wings strength. All the edges
were trimmed and the wings could be assembled to the fuselage. They are
absolutely horizontal where they meet the fuselage; this was achieved
using a very temporary jig.
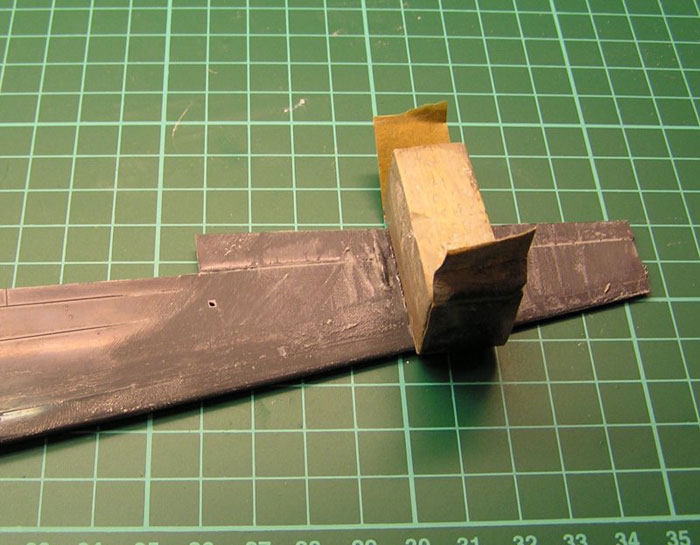
Finally the wing tip skids were glued to the wings and the small
right wing aileron trim tab which is missing in the kit was made from
plastic card. The left wing trim tab is integrated in the aileron.
Click the
thumbnails below to view full-sized images:
Tail plane
Now it was time to glue the fin halves together, much easier when the
wings were there. The raised panel lines on the fin were sanded off and
all the sanding work around all the exchanged parts were done. The
stabilators got the same treatment, and then new panel lines were
scribed. As these were to be painted dayglo I wanted “real” panel lines,
compared to the panel lines for the rest of the airplane, more of that
later. The stabilators were assembled to the model, in a “jig”.
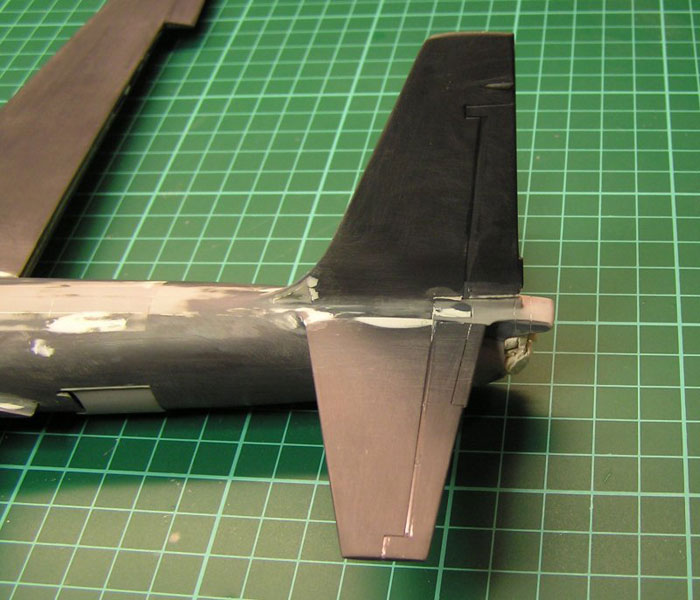
The final work with wet sanding paper and Milliput was done on the tail
plane, again for several hours. (Picture 17)
Windshield
Of course I should have bought the Squadron replacement windshield,
but the original looked good enough, and it’s always nice to use some
original parts on a highly modified model. The fit against the cockpit
sill was not good at all, so I tried a new method using Milliput where
the fit was worst and just squeezed the windshield in place. When the
Milliput had set I gently carved the excess Milliput off and trimmed
around the windshield, and finally the windshield was knocked off.
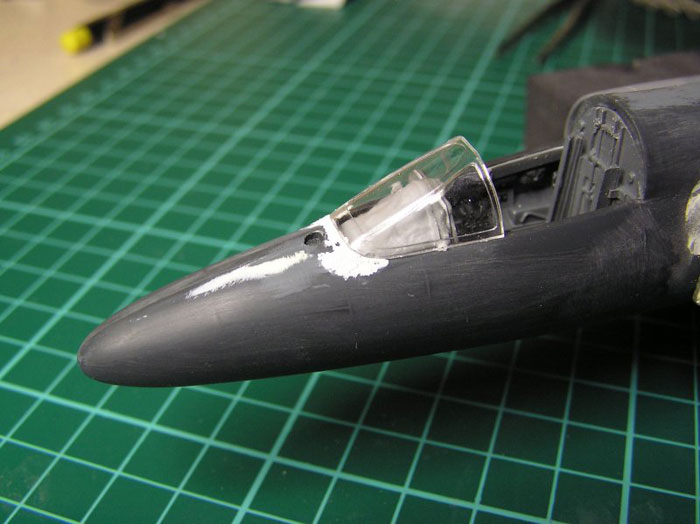
I continued sanding the putty and the result was very good.
Painting
The complete airframe was primed with Tamiya Primer in a spray can,
with a terribly strong smell. I don’t usually use a primer but this big
model with lots of Milliput and CA glue looked terrible. The primer was
easy to apply and after a very short drying time I began sanding with
fine grip wet paper. Even though I sprayed a lot of primer my sanding
demanded further primer layers before I had a smooth surface all over
the model. Of course I should have used the complete Mr Surfacer line of
products, but you know how it is…Now I have every product at home
awaiting the next NMF project.
I had scribed the panel lines on the tail plane already, and now I used
a sharp lead pencil and drew lines to be scribed on the rest of the
model. I used the plans in the Squadron in action book and photos for
references. I was very careful to make the lines barely visible as this
was to be a model of an exhibition airplane, and I never scribed through
the primer layers into the plastic.
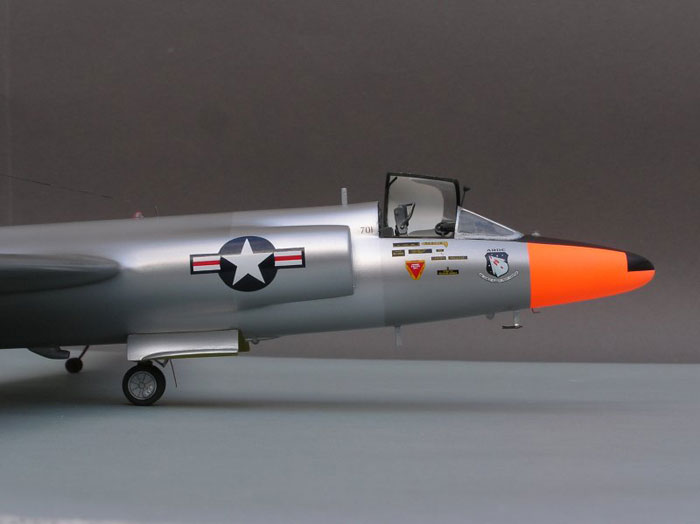
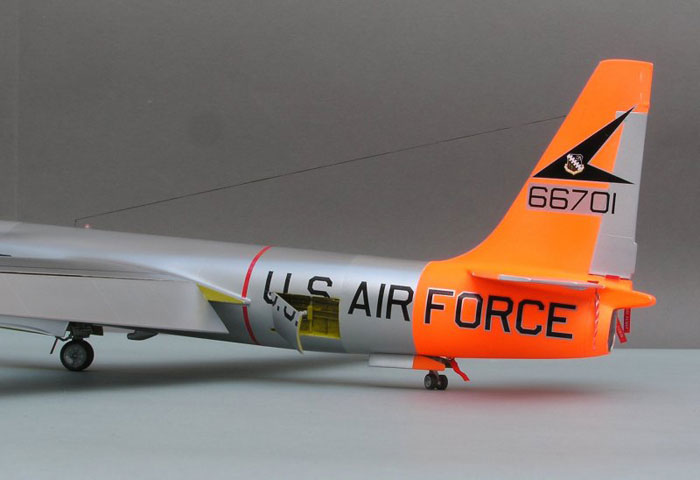
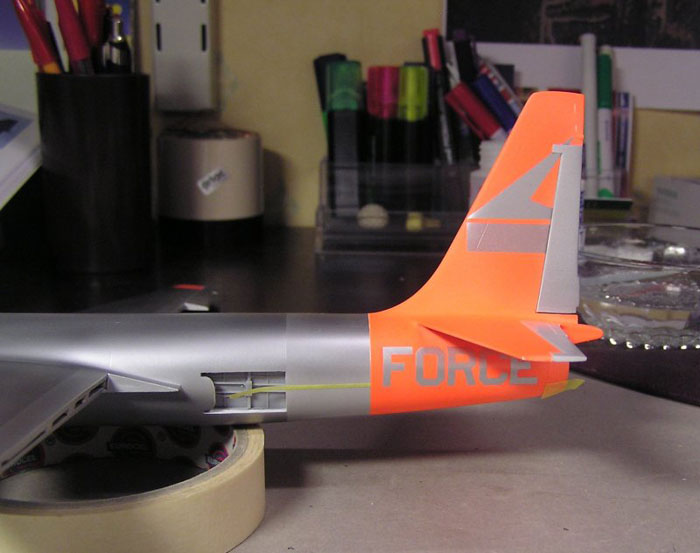
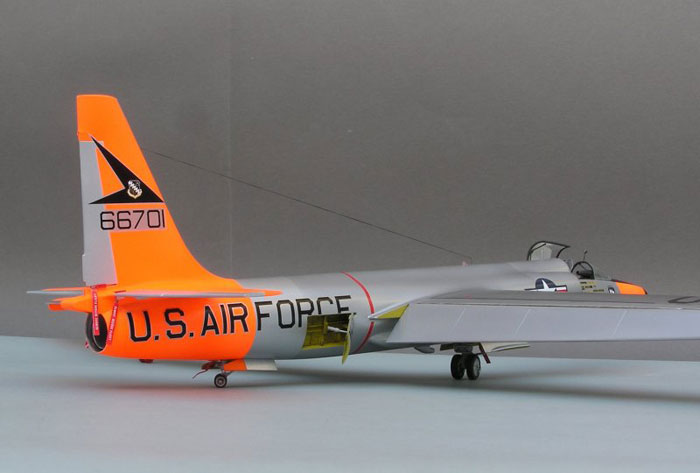
The rudder and elevators were painted Alclad II Aluminum on the white
primer, and looked fine.
I found an old Revell dayglo paint jar in my cupboard that matched
the Cutting Edge information for FS number. After careful masking the
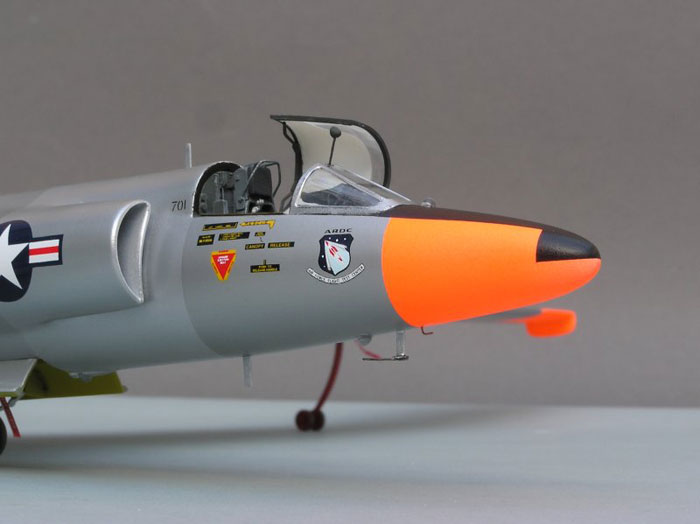
tail plane minus moving surfaces, wing tips and nose were air brushed
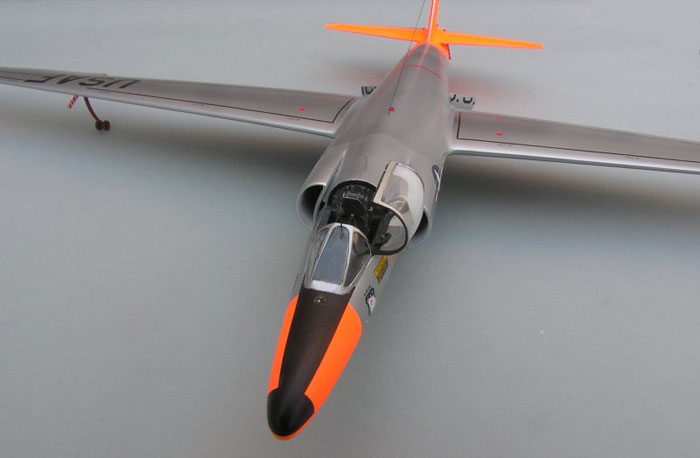
dayglo orange. It dried quickly and the Xtracolor black on the nose was
painted after further masking.
As all other surfaces would be painted NMF it was now convenient to
give the dayglo and black surfaces a coat of Future to prepare them for
the decals.
Alclad II
Now, “remasking”; all black and dayglo surfaces were masked and on
the white primer surfaces the masking was taken off.
I knew Alclad II Aluminum is recommended to be painted on their own gray
primer, but as I only had the black primer and I had already painted the
moving surfaces on the tail plane on the white primer and was happy with
what I saw, I was ready to try! Do I have to say this was my very first
experience with Alclad II.
I used my air brush and sprayed three thin coats of Aluminum but the
natural metal finish looked strange to me and I felt very uncomfortable
suddenly! After one more coat I was convinced; I would not go on until I
know what to do. Once again the model was put away for a week while I
was planning my next move.
I have been using SnJ to get nice NMF finishes earlier, and I had one
untouched bottle left and decided to give it a try. I gave the surface a
wet sanding treatment with 1200# paper, and inspected the panel lines;
yes, they were still visible.
The SnJ was shaken thoroughly and poured into the cup of my old
Paasche VL and I sprayed a thin mist on my U-2 and waited the
appropriate time until the next coat. This was repeated four times until
I realized that something was wrong with the paint! The surface felt
like a very coarse sand paper and did not cover enough to give anywhere
near a good NMF look.
My plan was to bring the model to Scale Modelworld in Telford and the
day for my departure was only one week away, and I was getting very
frustrated. The only NMF at home that maybe would give the result I
wanted was Alclad II and it apparently needed a gray undercoat to give
the right look. Back to wet paper sanding again, washing the model,
inspecting the panel lines; yes, still there, but not so prominent now.
I picked out an Xtracolor medium grey jar, in the state I was I
didn’t register which one, and gave my U-2 a light coat of paint, and
off to bed.
Usually, Xtracolor doesn’t dry in less than 24 hours for me, but this
time it was completely dry in the six hours I was asleep. Early next
morning I inspected the panel lines again and this time some of them
needed my attention. Very carefully I used my sharp scriber, but the
grey paint chipped off the SnJ, and I stopped immediately. No more
scribing, there were only a few panel lines that were faint and I could
live with it.
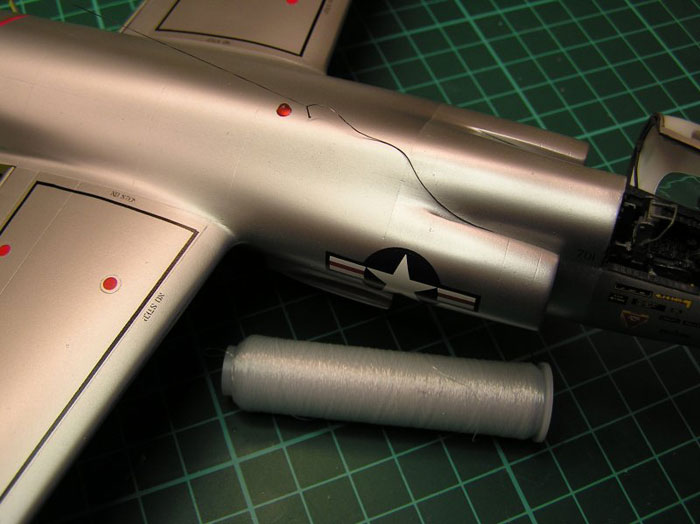
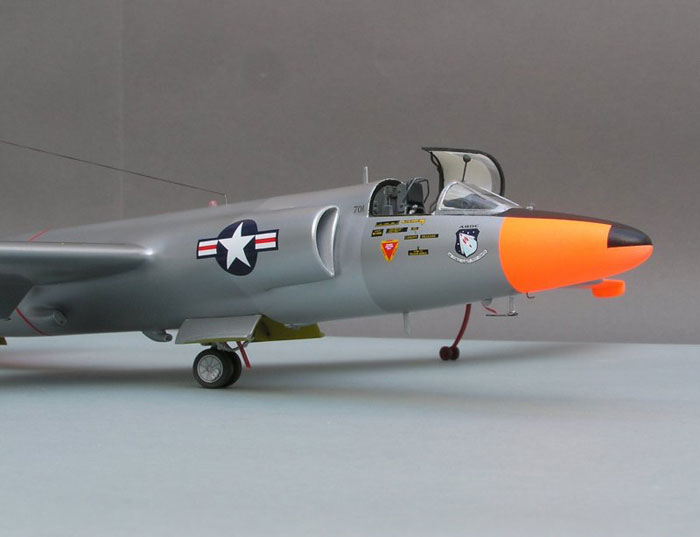
I painted several light coats of Alclad II Aluminum, White Aluminum
and Dark Aluminum and it was like a dream, and this time not a
nightmare!
Decals
I trimmed off the excess carrier film from some decals but as it was
almost impossible to see it when the decal was applied to the Alclad
surface I stopped trimming. The Cutting Edge decals worked fine with
Micro Set, and as I rubbed off the small amount of glue from the decals
Micro set was essential to fix the decals to the Alclad surface.
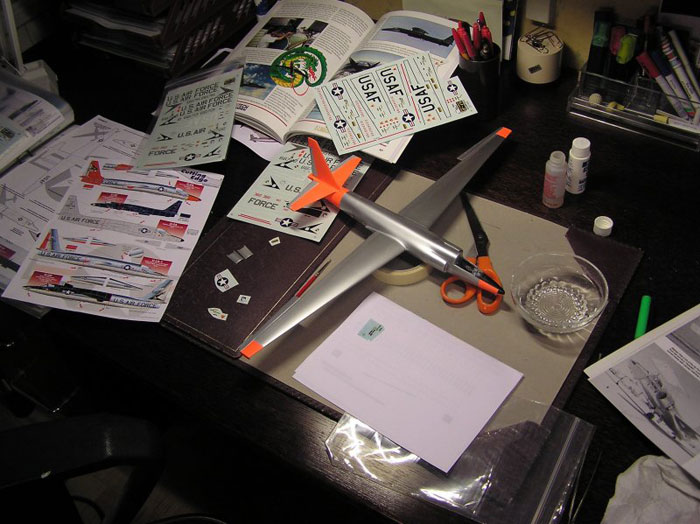
The decals were very good; shiny enough to match the Alclad II and make
them almost invisible. The decal work took three hours, one side of the
aircraft first and then the other. The position of the US Air Force
letters were carefully marked with tape before the backing NMF decals
over the dayglo part was applied as the lettering continues onto the air
brakes.
The Cutting Edge decals were easy to apply, the instructions have
useful information and I highly recommend them to U-2 fans.
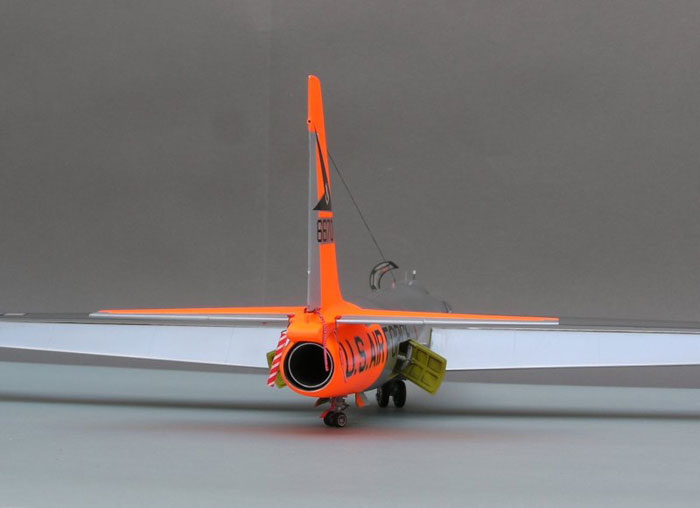
The main landing gear comes with the air brake resin set and with the
leg fully compressed the U-2 sits perfectly. The gear bay is amply
detailed; only needing tubes and cables for the super detailer. The rear
wheel well and gear assembly is less detailed but you don’t see much of
it unless you pick up the model. I painted all wheel wells and air brake
interiors zinc chromate yellow, but that’s only a guess as I’ve seen
both gray and black interiors. The air brake interiors were hand painted
as I didn’t dare masking with tape on the decals. I used the Xtracolor
matte paint which dried instantly and really helped me finish my model
in time.
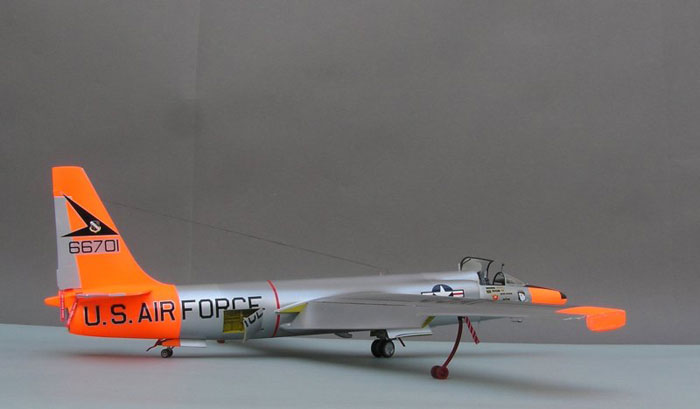
The landing gears and wheel hubs were painted light gray, the gear bay
door insides zinc chromate yellow and the entire pogo wheels (original
parts) bright red. The gears and wheels were assembled to the model and
voilá, all wheels touched the ground!
The eyes for the drift sight, original clear styrene parts, were
glued with Johnson Future after drilling the somewhat oval holes with a
2,2 mm drill.
The wind shield and canopy were masked with Tamiya tape on both inside
and outside and painted an Xtracolor dark gray and Humbrol Metalcote
Polished Aluminum, as I feared Alclad would dissolve the clear styrene.
I glued the wind shield with small droplets of Future which bonds well
enough and is invisible when dry.
The white sun shade in the canopy was painted after masking with Micro
Mask, with Tamiya acrylic, a paint that does not stick very well to the
clear surface and was easy to trim with a tooth pick.
The small resin fan and the hot air tube inside the canopy were
painted dark gray and glued with epoxy glue. I found some old Phantom II
photo etched cockpit sill parts which were glued to the canopy framing
and the canopy itself.
The canopy seems to open exactly at 90˚. Two small plastic rods were
glued to the cockpit sill and the canopy was glued to those with epoxy
glue. This rods are needed for strength only, as I hate gluing loose
canopies at exhibitions.
A small rear view mirror comes with the kit, it was modified using a
0,25 mm piano wire and glued in a 0,3 mm hole in the wind shield. For
the red navigation light a drift sight bulb was used, the drilled hole
was painted red in the bottom and the bulb glued with Future. For the
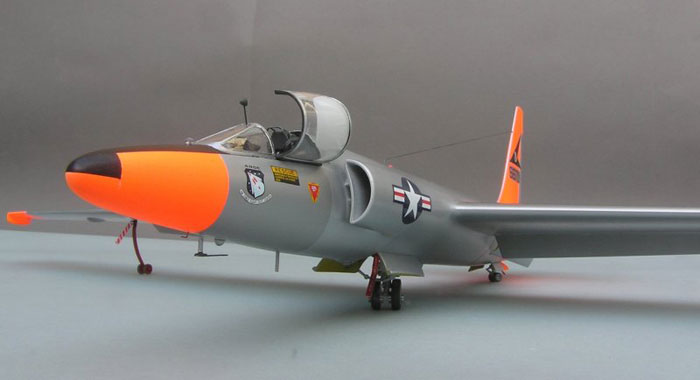
antenna wire elastic thread painted with a marker pen was used.
To add some more color to the model RBS-tags were attached to the pogo
wheels and the two landing gears and on the locks for the elevators and
the rudder.
Click the
thumbnails below to view full-sized images:
There is almost no weathering done as this particular aircraft was
also exhibited in air shows, and in the sixties it was wearing this NMF/dayglo
finish in the annual Edwards Air Base shows.
Building this converted U-2A has given me many interesting
experiences; all of them have not been pleasant!
I managed to get it ready for Telford last year and earned a silver
medal, but the comments that warmed my heart the most was given by Mr.
Chris Pocock of Aviation International News, author of “50 Years of the
U-2”, THE work on the Dragon Lady, he said……….let that be a secret
between him and me.
Click the
thumbnails below to view images full-sized.
Click the "Back" arrow on your browser to return to this page.
 Home
| What's New |
Features |
Gallery |
Reviews |
Reference |
Forum |
Search
Home
| What's New |
Features |
Gallery |
Reviews |
Reference |
Forum |
Search