|
1/72 scale Thunderjet
Prototype
Republic XP-84
by Bill Dye
|
 |
|
Republic XP-84 Thunderjet |

HyperScale is proudly supported by Squadron
I built the Heller F-84E/G and the ESCI F-84F (that one about 20 odd
years ago) and recently the Project ‘X’ Main
Track XF-84H Thunderscreech (see Hyperscale article). I was looking
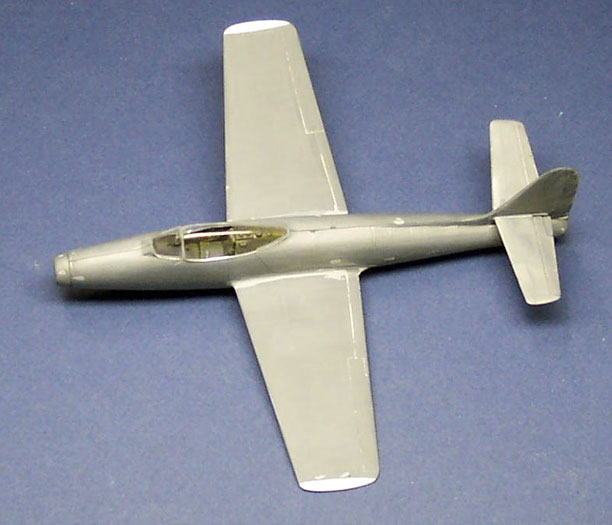
through a book I have on the Thunderjets and I saw the prototype. Clean,
simple, gray. I just had to do it. It will be go to the head of the line
of my growing Thunder family. I dug up my references, read up on the
Thunderjet and studied the differences between the E/G and the
prototype. I found out that the prototype, the XP-84, was a foot shorter
in length than the operational Thunderjets.
The photos I had provided all of the rest of the details that were
different, such as the pitot probe on the left wing, an antenna under
the fuselage behind the nose gear well, a clear canopy (not ribbed), far
fewer vents and things and of course no wing tip tanks.

The F-84 obviously grew out of the prototype and aside from some of the
changes mentioned above it went in to operation looking very much like
the prototype. I won’t bore you with a lot of statistics but suffice to
say that I was, first, surprised at how many of the straight winged
F-84s were built and, second, impressed with the amount of action they
saw in Korea.
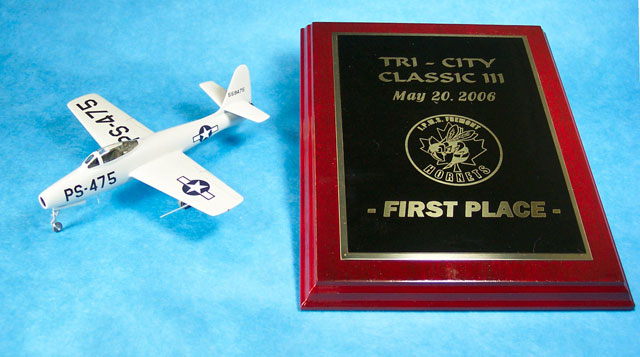
Feels good to see my family grow!
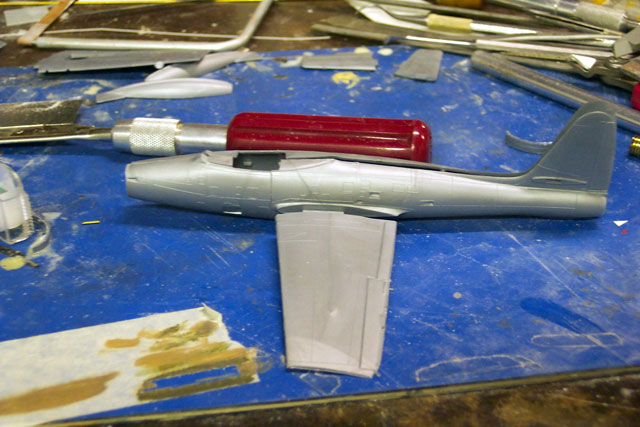
Modifications and Basic Assembly
I had a Heller kit, so I used it. This was to be a very simple, clean
looking airplane and Heller’s shape looked pretty good to me. Actually I
love Heller kits – the ones with the silver plastic. You can sand off
all of the raised panel lines and the line marks are still there for you
to re-scribe engraved panel lines. No measuring with micrometers to get
the left and right wings the same. Anyway, I thought it would be really
cool to put the finished model of the prototype next to the F-84E that I
already had built. This meant that the standard ‘E’ fuselage had to be
shortened one foot and the tip tanks removed. The removed area was just
in front of the wing leading edge. If you are doing this; pick up the
razor saw, take a deep breath and make the cut. Make – the – cut. What’s
the worst that could happen? What could go wrong? Do each fuselage half
and then re-glue so you still have two longitudinal fuselage halves. . .
. . Right?
Click the thumbnails below
to view larger images:
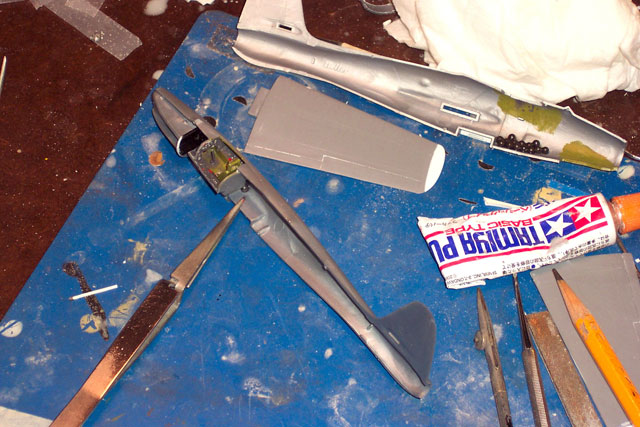
This also meant that the cockpit and canopy had to be shortened by
one foot too. All I did was slide the ‘tub’ under the instrument panel a
little more – of course I had to reshape the cockpit floor to the
changed contour. But, the canopy was another story. Not only did it have
to be shortened but I had to get rid of the ribs to yield a bubble type
canopy used on the prototype. So, I got out the razor saw (again) and
cut off the forward part of the canopy one foot – just do it! – and then
filed off the raised ribbing. The canopy was thick so I was able to
reshape the front to match the windscreen when closed. Hu-huu! I didn’t
have to vac a new canopy! I sanded it with 400 paper (wet), then 600,
1000, etc. up to Blue Magic polish and then dunked it into the Future
floor wax bottle, set on a paper towel and covered it with a small clean
cup to keep kitty hairs off of it.
Click the thumbnails below
to view larger images:
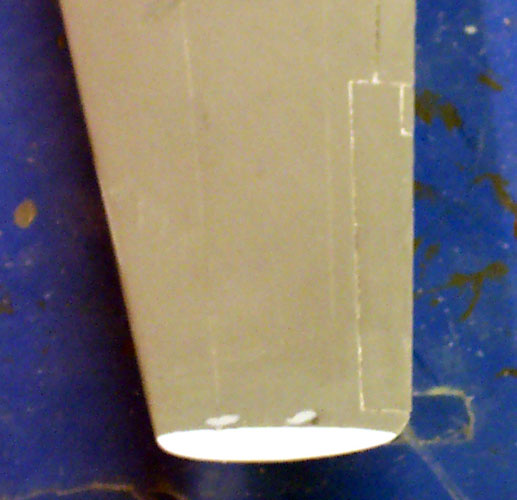
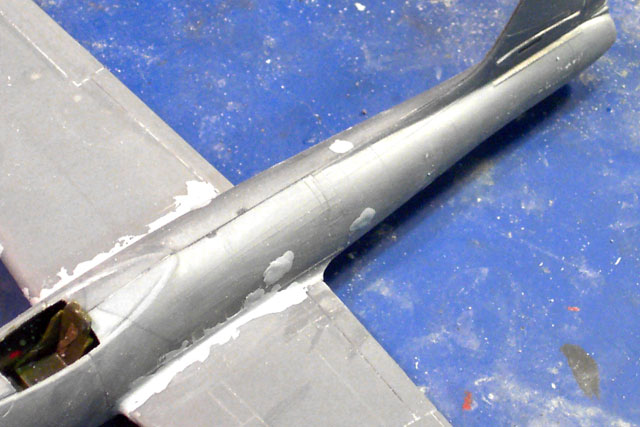
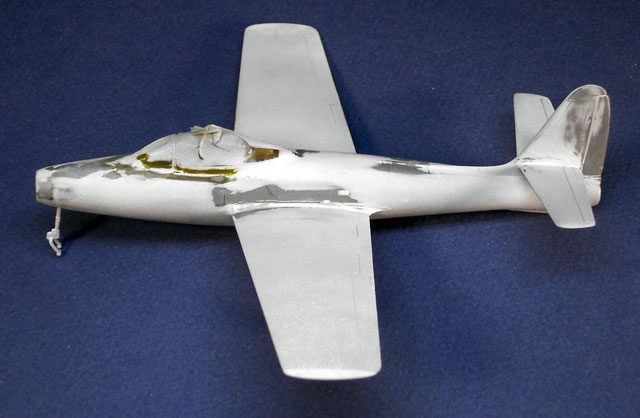
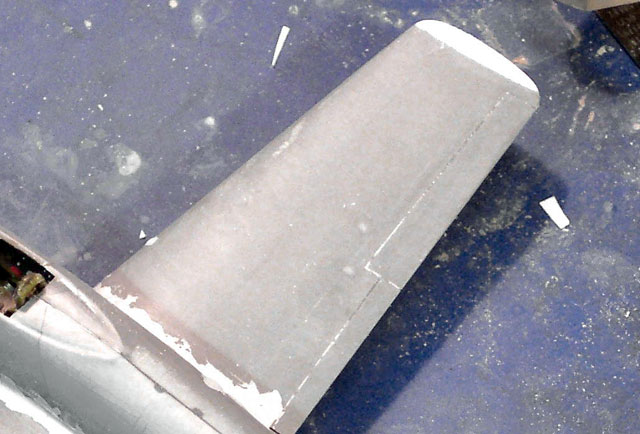
The wing tips were rebuilt with scrap plastic and then Tamiya putty
to fill in the gaps and then filing and sanding to the right shape.
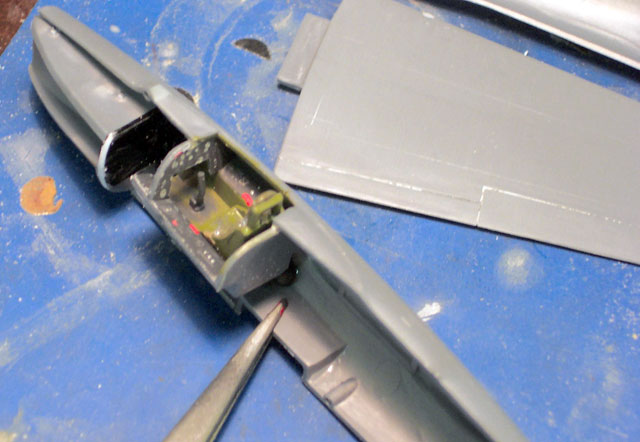
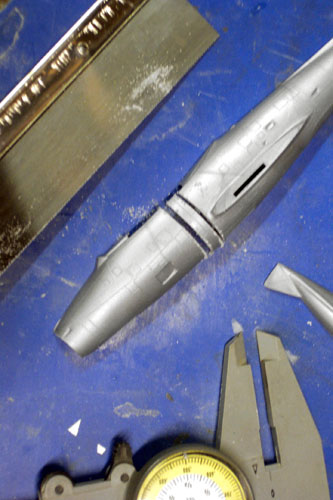
The machine gun ports, all of the vents on the fuselage and the blow
in doors had to be filled in. (All the photos showed no machine gun
ports on either the wings or the fuselage for the first prototype.) A
brass rod pitot probe was inserted into a hole drilled into the left
wing leading edge and another brass rod was inserted into the bottom
fuselage centerline behind the nose wheel door. That one was filed to
taper it and then filed to square its circular cross-section. These were
glued in for keeps after the model was completed.
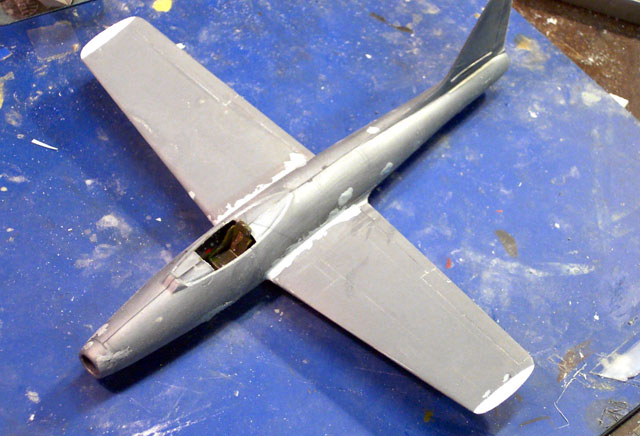
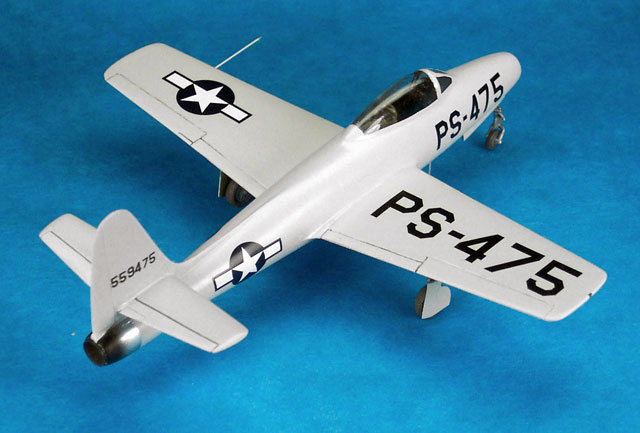
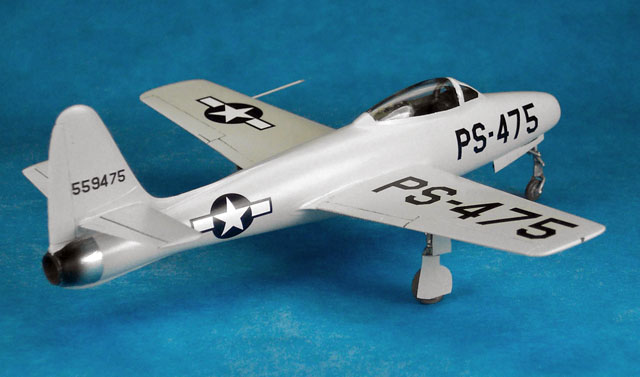
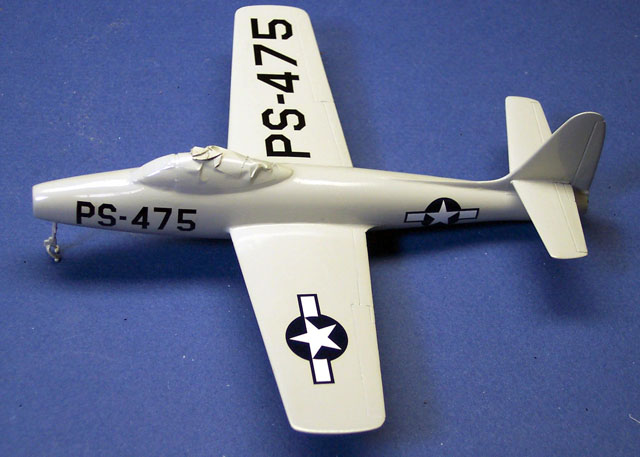
The airplane was painted with GUNZE acrylic light aircraft gray, then,
after a few days, over sprayed with gloss water soluble Varathane
thinned with pure water (NO ALCOHOL) about 30% (yes, Varathane). I
bought an Aero-Master Decal sheet for an F-84E/G Thunderjet for the nose
numbers but I had to convert an ‘F’ into a ‘P’ using the top part of a
‘3’ elsewhere on the decal sheet. I also bought a 1/48th decal sheet of
scale black 45degree letters and numbers for the very large buzz numbers
on the wings. The landing gear doors had to be scrutinized as to what
part of the ‘P’ and ‘S’ would be on each part of the gear doors. Not too
hard. The stars without bars came with the F-84E/G decal set and were
the correct size for the prototype. The serial numbers on the tail I
pieced together from the serial numbers on the various F-84 decals.
Click the thumbnails below
to view larger images:
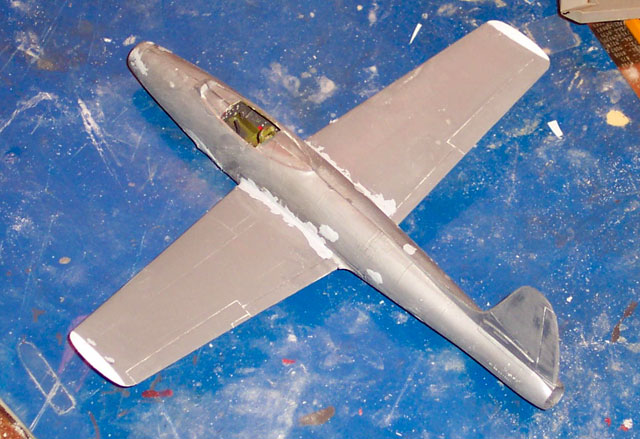
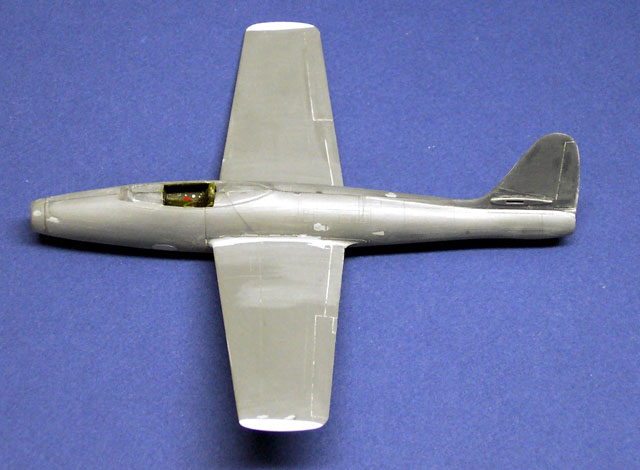
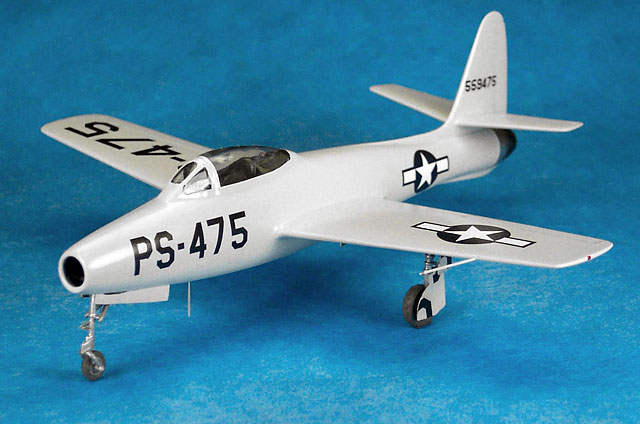
 I
just love the looks of the clean XP-84 prototype. After the decals dried
for a day or so, I oversprayed the model with Model Master Acrylic
clear. I mixed some gloss with a little flat to get a semi-gloss finish. I
just love the looks of the clean XP-84 prototype. After the decals dried
for a day or so, I oversprayed the model with Model Master Acrylic
clear. I mixed some gloss with a little flat to get a semi-gloss finish.
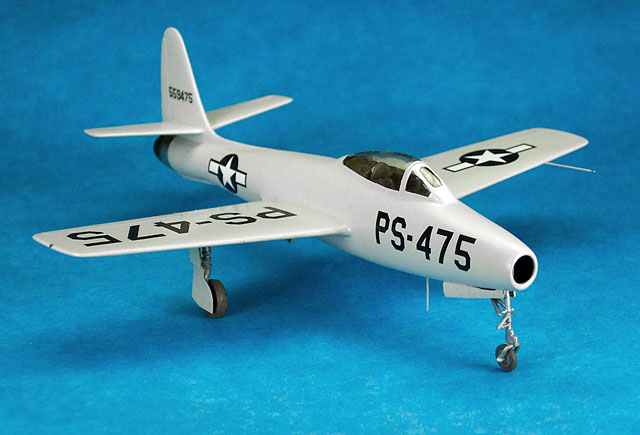
I put on the gears, doors, pulled off the canopy masking, put bare
Metal Foil on the exhaust and made the aft part of that look burnt with
Testor's Exhaust. I added the jet exhaust which was a piece of Aluminum
tube painted gloss black deep inside an grimy black near the exit plane
streaked with brown and light gray chalk powers from my railroad hobby
supplies.
The pitot probe and the antenna were installed and painted.
All done.
Bury me with sandpaper!
-
Pace, Steve; X-Fighters (USAF
Experimental and Prototype Fighters XP-59 to YF-23), 1991; pp 46-48
-
Kinzey, Bert, F-84 Thunderjet in
Detail, Detail in Scale Vol. 59, 1999
-
Davis, Larry and Menard, David, F-84
Thunderjet in Action, Aircraft Number 61, 1983
-
Westel, Freeman, ‘Rolling
Thunder’,Wings, October 1993, Vol. 23 No. 5, pp8-23
-
McLaren, David R., Republic F-84
Thunderjet, Sthunderstreak, & Thunderflash, A PhotoChronicle, 1998
Click the thumbnails below
to view larger images:
Model, Images and Text by Copyright ©
2006 by Bill Dye
Page Created 19 July, 2006
Last Updated
21 February, 2007
Back to
HyperScale Main Page |
 Home
| What's New |
Features |
Gallery |
Reviews |
Reference |
Forum |
Search
Home
| What's New |
Features |
Gallery |
Reviews |
Reference |
Forum |
Search