|
Ilyushin Il-2m Stormovik
by
Ian Robertson
|

|
|
Ilyushin Il-2 Stormovik |

HyperScale is proudly sponsored by Squadron.com
The single seat IL-2 Stormovik began production in
early 1941 and was an effective ground attack aircraft for the Russians
against Hitler's invading armies. However, a serious shortcoming of the
IL-2 was its complete lack of rear defense.
The need for a two seat variant with a rear gunner
was obvious; however, Stalin insisted that any modifications could not
interrupt production. The IL-2M was the first production series of a two
seat stormovik (note - some makeshift field conversions preceded the
IL-2M). For the IL-2M only minimal changes were made to the aircraft's
structure. The rear glazed canopy of the single-seat IL-2 was cut off to
make room for a rear gunner's compartment.
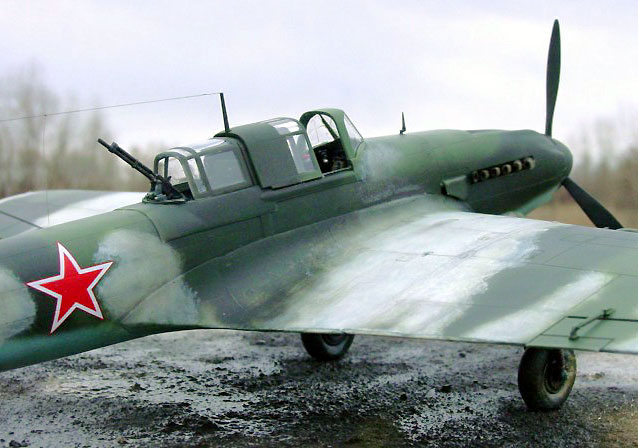
The gunner sat in cramped quarters on a padded
canvas seat suspended between the cockpit walls, with a rear-facing
machine gun installed on armor plate. Installation of the gunner's
position substantially increased the Stormovik's weight, primarily
behind the aircraft's center of gravity. Consequently, the handling
characteristics of the IL-2M were poor.
Performance improved greatly with the introduction
of the IL-2 Type 3, a two seat variant which had the outer wing panels
swept back 15 degrees to compensate for the rearward shift in center of
gravity.
Accurate Miniatures released both the single seat
IL-2 (including a version with skis) and the two seat IL-2 Type 3
(listed on the box as an IL-2m3) in 1/48 scale. I decided to build an
IL-2M using the fuselage from the two seat kit and the unswept wings
from the single seat kit.
Additional modifications included scribing panel
details on the rear fuselage (to match the single seater's fuselage),
using only two rocket rails beneath each wing, deleting the aileron
balance weights, installing a short antenna mast (the IL-2 Type 3's
antenna mast was taller), and using the large tail wheel supplied in the
two-seat kit.
Luckily, the Accurate Miniatures IL-2m3 kit
includes the proper early-style canopy glazing (Part 153) for the
IL-2M's rear gunner's position.
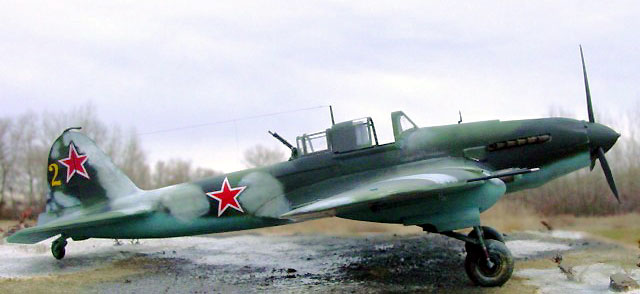
Apart from the conversion details, I repositioned the control surfaces
on the tail, and I added etched metal seatbelts from Eduard as well as a
brass ammunition belt from Reheat for the rear gun. The plastic edges
around the openings of the various intakes and scoops on the fuselage
were thinned out.
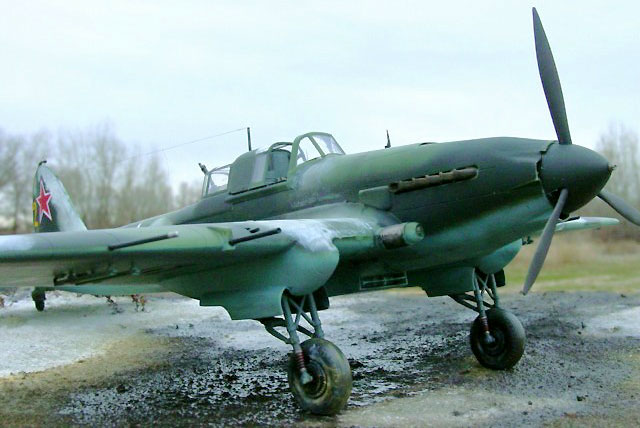
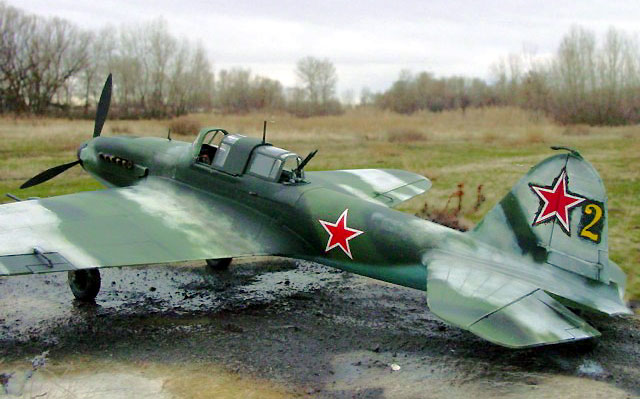
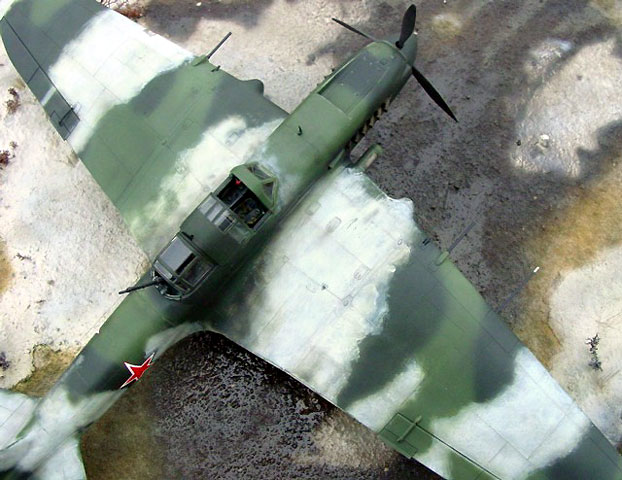
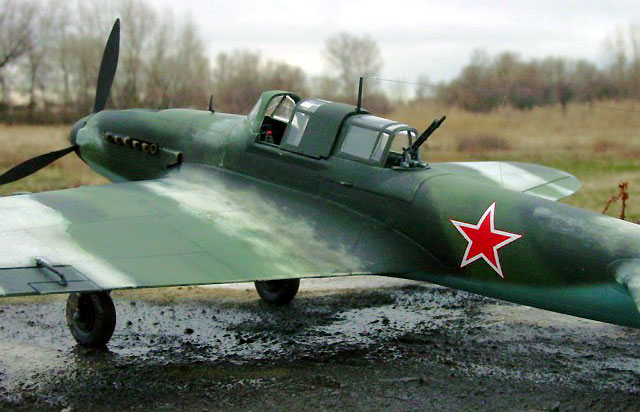
Winter Camouflage
 My model represents an aircraft from the Russian
front during the winter of 1943. The base camouflage is Testors Russian Armor Green and Polly Scale Black-Green over Polly Scale Russian
underside blue (faded slightly with RLM65 for scale effect). The
camouflage was sprayed freehand to create soft edges. Winter distemper
and weathering was applied using the technique I describe in a
companion
article on the Accurate Miniatures IL-2 single seat Stormovik My model represents an aircraft from the Russian
front during the winter of 1943. The base camouflage is Testors Russian Armor Green and Polly Scale Black-Green over Polly Scale Russian
underside blue (faded slightly with RLM65 for scale effect). The
camouflage was sprayed freehand to create soft edges. Winter distemper
and weathering was applied using the technique I describe in a
companion
article on the Accurate Miniatures IL-2 single seat Stormovik
Decals
The model was sprayed with Future floor wax prior
to the addition of decals. I opted to apply the decals after adding the
winter camouflage even though in reality distemper would have been
applied around the aircraft's markings. Small amounts of green paint
were hand-brushed around the stars on the fuselage and tail to give the
appearance of distemper that had been applied in the field. A dull coat
made from a 50:50 mixture of Polly Scale clear flat and clear satin was
applied as a final step.
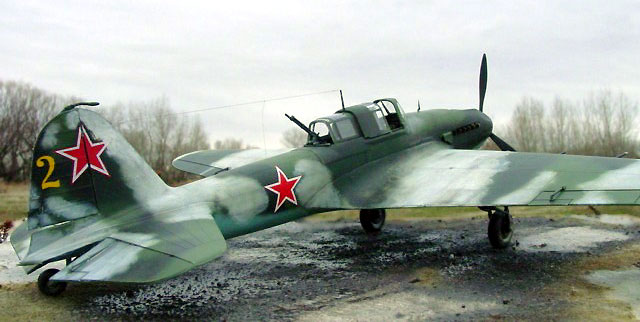
A wooden cutting board was used as the base for the
diorama.
Celluclay, a papier mâché product available in
craft stores, was used to make the basic ground cover. Celluclay powder
was mixed into a paste with water and white glue and then spread thinly
over the cutting board. The cutting board had previously been treated
with clear lacquer to prevent warping while the celluclay dried.
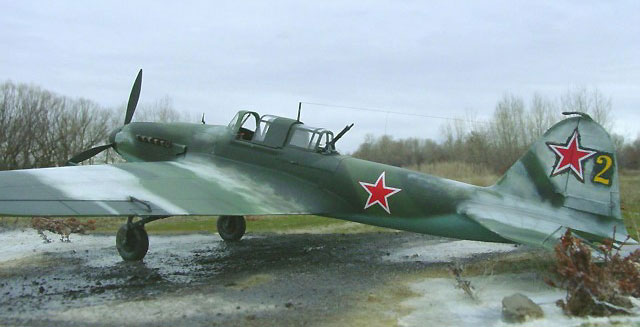
While the celluclay was wet I added fine sand and
dull green static grass to simulate areas of dirt and grass. Some
patches of celluclay were left bare to simulate areas of snow. Areas of
grass, mud and snow were painted appropriately once the celluclay had
dried thoroughly. Clear gloss epoxy resin was poured onto the areas that
I wanted to appear wet. The taller vegetation is represented by various
dried mosses.
All images were taken outdoors on an overcast day
(for mood) with a SONY digital camera set at its highest picture
resolution (2048 x 1536 pixels).
Other camera settings were as follows:
-
200 ISO film speed (yes,
it's an option on my digital camera)
-
100-150th/sec shutter
speed
-
F-stop 8.0, and fixed
focus distance of either 20 or 30 cm.
Images were cleaned up using Adobe Photoshop 6.0
for the Macintosh. Specifically, the interface between the base and
background were merged using the software's "blur" tool, and edges in
some photographs were sharpened using the "sharpen edges" tool.
Sharpening images in such a way helps to restore some of the clarity
lost during image compression.
Click on the thumbnails
below to view larger images:
Model, Images and Text Copyright ©
2003 by Ian Robertson
Page Created 03 March, 2003
Last Updated 17 March, 2004
Back to HyperScale
Main Page
|
 Home |
What's New |
Features |
Gallery |
Reviews |
Reference |
Forum |
Search
Home |
What's New |
Features |
Gallery |
Reviews |
Reference |
Forum |
Search